
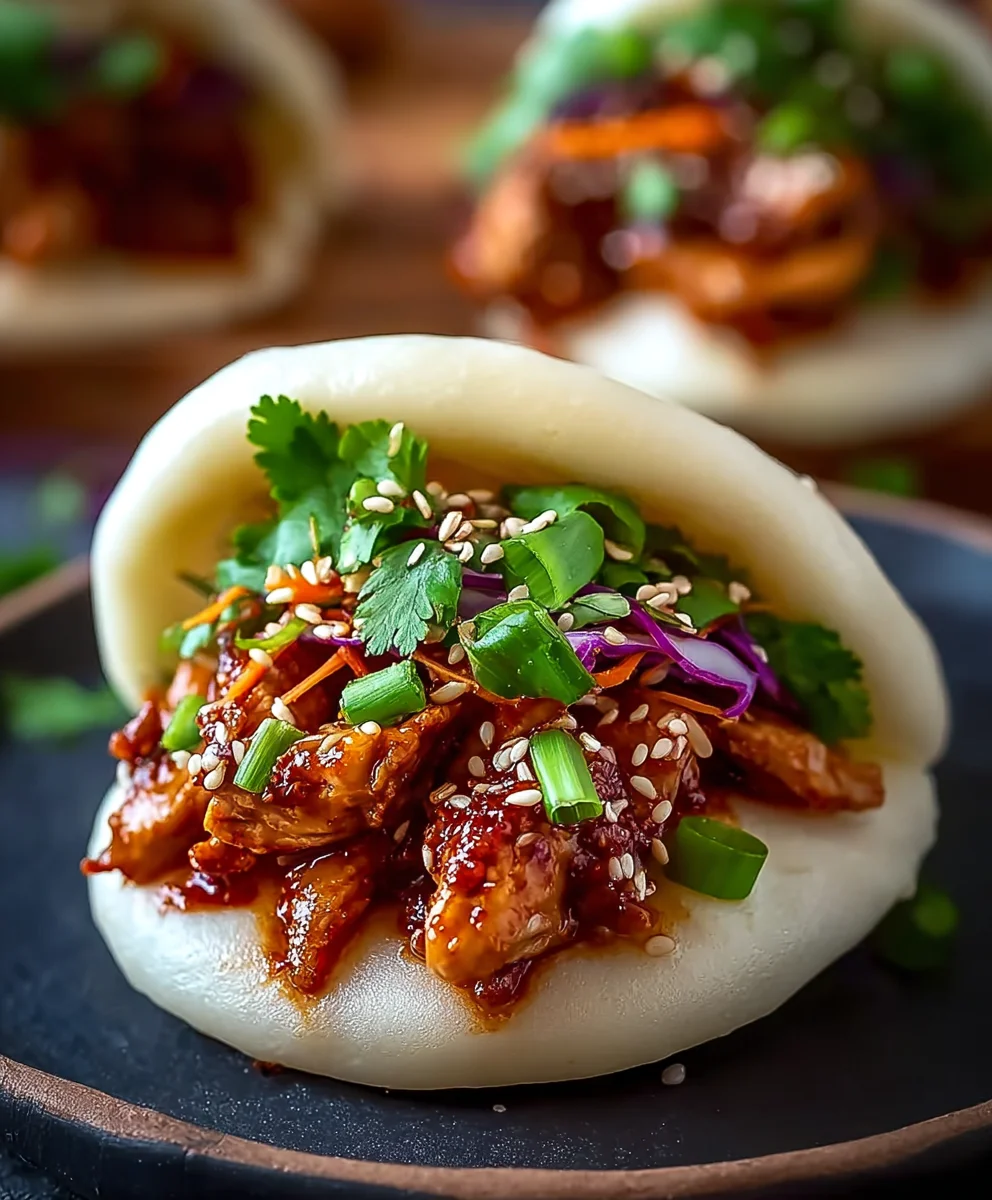
Korean Chicken Bao – just the name itself conjures up images of culinary delight! Have you ever experienced that perfect harmony of a cloud-like, steamy bao bun cradling the most incredibly flavorful, tender chicken? It’s a truly unforgettable sensation that bridges continents and flavors. While bao buns have a rich history originating in ancient China, evolving over centuries into the beloved street food and restaurant staple we know today, this particular iteration takes a vibrant detour into the bold and zesty world of Korean cuisine, a testament to culinary innovation.
I find immense joy in sharing recipes that offer such a unique blend of tradition and modern innovation. People utterly adore this dish for its captivating contrasts: the pillowy softness of the steamed bun perfectly complementing the irresistible crunch and subsequent tenderness of the Korean-style chicken. Drenched in a sticky, sweet, savory, and subtly spicy glaze, each bite of this Korean Chicken Bao is an explosion of umami. It’s an ideal choice for a sophisticated appetizer, a delightful lunch, or even a fun, interactive dinner that’s guaranteed to impress. Get ready to embark on a culinary adventure that will tantalize your taste buds!

Ingredients:
-
For the Bao Buns (Steamed Buns):
- 3 cups (about 360g) All-Purpose Flour: The foundation of our soft and fluffy bao.
- 2 teaspoons Instant Dry Yeast: Our magic leavening agent for that perfect rise.
- 1/4 cup Granulated Sugar: Adds a touch of sweetness and helps activate the yeast.
- 1 cup + 2 tablespoons Warm Water (105-115°F / 40-46°C): Crucial for activating the yeast without killing it.
- 2 tablespoons Vegetable Oil (plus extra for brushing): For a tender crumb and to prevent sticking.
- 1 teaspoon Baking Powder: An extra boost for ultimate fluffiness.
- 1/2 teaspoon Salt: To balance the flavors.
- Small squares of parchment paper: Essential for steaming without sticking.
-
For the Korean Fried Chicken:
- 1.5 lbs Boneless, Skinless Chicken Thighs: Thighs stay juicy and flavorful even after frying. Cut into 1.5-inch pieces.
- 1 tablespoon Soy Sauce: Adds umami to the marinade.
- 1 teaspoon Fresh Ginger, grated: For a zesty kick in the marinade.
- 1 teaspoon Fresh Garlic, minced: Aromatic goodness for the marinade.
- 1/2 teaspoon Black Pepper: Classic seasoning.
-
For the Crispy Batter:
- 1 cup All-Purpose Flour: Base of our crispy coating.
- 1/2 cup Corn Starch: The secret to extra crispiness.
- 1 Large Egg: Binds the batter.
- 1/2 cup Cold Water (or more as needed): Helps create a light, airy batter.
- 1 teaspoon Baking Powder: Enhances the crisp texture.
- 1/2 teaspoon Salt: For seasoning the batter.
- 6-8 cups Frying Oil (canola, vegetable, or peanut oil): Enough for deep frying.
-
For the Korean Gochujang Sauce:
- 1/4 cup Gochujang (Korean Chili Paste): The star of our Korean flavor profile, delivering a spicy, savory, and slightly sweet punch.
- 2 tablespoons Soy Sauce: For depth and saltiness.
- 2 tablespoons Rice Vinegar: Adds a bright, tangy note.
- 2 tablespoons Honey or Maple Syrup: For sweetness and glaze.
- 1 tablespoon Brown Sugar: Contributes to the caramelized sweetness.
- 1 tablespoon Fresh Garlic, minced: Essential aromatic.
- 1 teaspoon Fresh Ginger, grated: Brings a warm, zesty undertone.
- 1 teaspoon Sesame Oil: For that nutty, distinctive Korean aroma.
- 1/4 cup Water: To adjust consistency.
- 1 teaspoon Cornstarch slurry (1 tsp cornstarch mixed with 1 tbsp water): To thicken the sauce to a perfect coating consistency.
-
For the Quick Pickled Daikon and Carrots:
- 1 cup Daikon Radish, julienned: Crisp and refreshing.
- 1/2 cup Carrot, julienned: Adds color and a hint of sweetness.
- 1/2 cup Rice Vinegar: The pickling base.
- 2 tablespoons Granulated Sugar: Balances the tartness.
- 1/2 cup Water: Dilutes the brine.
- 1/2 teaspoon Salt: Enhances flavor and aids pickling.
-
For Garnish:
- Toasted Sesame Seeds: For visual appeal and a nutty crunch.
- Fresh Cilantro, chopped: A burst of freshness.
- Thinly Sliced Green Onions: For a mild oniony bite and vibrant color.
- Sriracha Mayo (optional): For an extra creamy and spicy kick.
Preparing the Bao Buns (Steamed Buns)
- Activate the Yeast: In a large mixing bowl, I like to combine my warm water (make sure it’s not too hot, or it will kill the yeast!), sugar, and instant dry yeast. Give it a gentle stir and let it sit for about 5-10 minutes. You’ll know it’s alive and happy when it gets bubbly and foamy on the surface. This is a crucial step for light and airy bao!
- Combine Dry Ingredients: In a separate bowl, I whisk together the all-purpose flour, baking powder, and salt. The baking powder here is a little trick to give the bao an extra lift and a super soft texture, making it perfect for holding our delicious Korean Chicken Bao filling.
- Mix Wet and Dry: Once my yeast mixture is activated, I slowly add the dry ingredients to the wet mixture, stirring with a wooden spoon or a spatula until a shaggy dough forms. Then, I drizzle in the two tablespoons of vegetable oil. The oil helps create a more tender dough.
- Knead the Dough: Turn the dough out onto a lightly floured surface. Now comes the kneading! Knead for about 8-10 minutes until the dough is smooth, elastic, and no longer sticky. It should spring back slowly when you gently poke it. This development of gluten is what gives the bao its characteristic chew.
- First Proof: Lightly oil a clean bowl. Place the dough in the bowl, turning it once to coat with oil. Cover the bowl tightly with plastic wrap or a damp kitchen towel. Let it rise in a warm place for about 1 to 1.5 hours, or until it has doubled in size. Patience is a virtue here; don’t rush the proofing!
- Divide and Shape: Once the dough has doubled, gently punch it down to release the air. Turn it out onto a lightly floured surface and knead it briefly for about a minute. Roll the dough into a log, then divide it into 12-14 equal pieces (about 40-45g each). For each piece, I like to flatten it into a small circle, then use a rolling pin to roll it into an oval shape, about 4-5 inches long and 2-3 inches wide. Brush one side of the oval with a tiny bit of vegetable oil, then fold it in half. This creates the classic pocket for our Korean Chicken Bao. Place each folded bao on a small square of parchment paper. The parchment prevents them from sticking to the steamer basket.
- Second Proof: Arrange the shaped bao buns in your steamer basket, making sure to leave enough space between them for expansion. Cover the steamer basket with a lid or a clean towel and let them proof again for another 30-45 minutes, or until they look visibly puffy and light. This second proof is essential for super fluffy bao.
- Steam the Bao: Bring water to a boil in a pot or wok fitted with a steamer. Once the water is boiling, place the steamer basket with the proofed bao buns over the boiling water. Steam for 8-10 minutes. Do not open the lid during steaming, or the bao might collapse! Once steamed, immediately remove them from the steamer and set them aside. They will be incredibly soft and slightly sticky, just perfect for our filling!
Preparing the Quick Pickled Daikon and Carrots
This quick pickle adds a wonderful bright, tangy crunch that perfectly cuts through the richness of the Korean fried chicken. It’s a simple yet effective component of our Korean Chicken Bao.
- Prepare Vegetables: First, I thinly julienne my daikon radish and carrots. You want them to be delicate strips, easy to eat in a bao. A mandoline slicer can make quick work of this, or a sharp knife and some patience will do the trick. Place the julienned vegetables in a heatproof bowl.
- Make Pickling Liquid: In a small saucepan, combine the rice vinegar, granulated sugar, water, and salt. Heat the mixture over medium heat, stirring until the sugar and salt have fully dissolved. You don’t need to bring it to a rolling boil, just warm enough to dissolve the solids.
- Combine and Chill: Pour the hot pickling liquid over the julienned daikon and carrots. Make sure all the vegetables are submerged. Let it cool to room temperature, then cover the bowl and refrigerate for at least 30 minutes, or even better, a few hours. This allows the flavors to meld beautifully. Drain before serving.
Making the Korean Fried Chicken
The star of our Korean Chicken Bao is undoubtedly the crispy, saucy Korean fried chicken. Achieving that signature crunch takes a little technique, but it’s absolutely worth it!
Marinating the Chicken
- Cut Chicken: I start by patting my boneless, skinless chicken thighs very dry with paper towels. This is important for crispiness later. Then, I cut them into bite-sized pieces, roughly 1.5 inches. Smaller pieces cook faster and are easier to fit into the bao buns.
- Marinate: In a medium bowl, combine the cut chicken pieces with soy sauce, grated fresh ginger, minced fresh garlic, and black pepper. Toss everything together until the chicken is well coated. Cover the bowl and let it marinate in the refrigerator for at least 30 minutes, or up to 2 hours. This brief marination infuses the chicken with a wonderful base flavor.
Preparing the Korean Fried Chicken Batter
- Mix Dry Ingredients: In a large bowl, whisk together the all-purpose flour, corn starch, baking powder, and salt. The corn starch is our secret weapon here for extra crispiness that lasts!
- Add Wet Ingredients: In a separate smaller bowl, whisk the egg with the cold water. Gradually pour the wet mixture into the dry ingredients, whisking until you have a smooth batter. It should be the consistency of a thin pancake batter—not too thick, not too thin. If it’s too thick, add a tiny bit more cold water, a tablespoon at a time, until it reaches the right consistency. A thin batter coats the chicken lightly, allowing it to get incredibly crispy.
- Coat Chicken: Drain any excess marinade from the chicken pieces. Add the marinated chicken directly into the batter bowl. Toss thoroughly, making sure each piece is completely coated. Let the chicken sit in the batter for about 5-10 minutes while you get your frying oil ready.
The Double-Frying Process
This is the key to truly crispy Korean Fried Chicken for our Korean Chicken Bao. We’ll be frying the chicken twice.
- First Fry (Cooking the Chicken): Pour frying oil into a large, heavy-bottomed pot or Dutch oven, ensuring it’s at least 3-4 inches deep. Heat the oil to 350°F (175°C). Use a cooking thermometer to monitor the temperature; it’s essential for perfect frying. Once the oil is hot, carefully add the battered chicken pieces in batches, making sure not to overcrowd the pot. Overcrowding will lower the oil temperature and lead to soggy chicken. Fry for about 4-5 minutes per batch, until the chicken is cooked through and lightly golden. The internal temperature should reach 165°F (74°C). Remove the chicken with a slotted spoon or spider and place it on a wire rack set over a baking sheet to drain.
- Rest the Chicken: Allow all the first-fried chicken pieces to rest for at least 10 minutes (or even up to 30 minutes) on the wire rack. This resting period allows the moisture to redistribute within the chicken and helps develop that ultimate crispy texture during the second fry.
- Second Fry (Crisping the Chicken): While the chicken is resting, increase the oil temperature to 375°F (190°C). This higher temperature is crucial for achieving that irresistible crisp exterior. Carefully return the rested chicken pieces to the hot oil, again in batches if necessary. Fry for another 2-3 minutes, or until the chicken is deep golden brown and exceptionally crispy. You’ll hear a distinct change in the sound – it will be much crisper.
- Drain: Remove the perfectly crispy chicken from the oil and place it back on the wire rack to drain any excess oil. This double-frying technique is what makes Korean fried chicken so unique and perfect for our Korean Chicken Bao!
Crafting the Korean Gochujang Sauce
This sweet, spicy, and savory gochujang sauce is what elevates our Korean Chicken Bao to an unforgettable culinary experience.
- Sauté Aromatics: In a medium saucepan or deep skillet, heat the sesame oil over medium heat. Add the minced garlic and grated ginger and sauté for about 30 seconds to 1 minute, until fragrant. Be careful not to burn the garlic!
- Add Sauce Ingredients: Add the gochujang, soy sauce, rice vinegar, honey (or maple syrup), brown sugar, and water to the saucepan. Stir everything together until it’s well combined and the sugars have dissolved. Bring the sauce to a gentle simmer.
- Thicken the Sauce: Once simmering, give your cornstarch slurry a quick whisk to ensure it’s fully mixed, then slowly pour it into the simmering sauce while stirring continuously. Continue to simmer and stir for 1-2 minutes until the sauce thickens to a glossy, syrupy consistency that will beautifully coat our Korean fried chicken. Remove from heat.
- Coat Chicken: In a large mixing bowl, add the hot Korean fried chicken. Pour the warm gochujang sauce over the chicken. Toss gently but quickly to ensure every piece of that glorious Korean fried chicken is evenly coated in the sticky, flavorful sauce. Do this step right before assembling your Korean Chicken Bao to maintain maximum crispness.
Assembling Your Delicious Korean Chicken Bao
Now for the best part – bringing all these wonderful components together to create your ultimate Korean Chicken Bao!
- Open the Bao Bun: Gently open a warm, steamed bao bun. It should naturally have a pocket due to the folding and steaming process. If it’s a bit stuck, you can carefully use your fingers to open it wider.
- Layer with Chicken: Take 2-3 pieces of the freshly sauced Korean fried chicken and nestle them into the soft bao bun. Make sure there’s enough chicken to get a good bite but not so much that the bao can’t hold it. This is the heart of your Korean Chicken Bao!
- Add Pickled Vegetables: Top the chicken with a generous spoonful of the drained quick pickled daikon and carrots. The tangy crunch provides a fantastic contrast to the rich, spicy chicken.
- Garnish: Sprinkle generously with toasted sesame seeds, chopped fresh cilantro, and thinly sliced green onions. If you like an extra layer of creamy heat, drizzle a little sriracha mayo over the top. These garnishes not only add flavor but also make your Korean Chicken Bao visually appealing.
- Serve Immediately: Serve your Korean Chicken Bao immediately while the bao buns are warm and soft, and the chicken is still delightfully crispy beneath its sticky sauce. Enjoy the incredible explosion of flavors and textures in every bite! This dish is a true crowd-pleaser and a fantastic way to enjoy the vibrant tastes of Korea.
Conclusion:
As we wrap up our culinary adventure, I truly hope you’re feeling as excited as I am about this incredible recipe. What makes these delightful morsels truly stand out is the masterful blend of vibrant, authentic Korean flavors with the irresistible comfort of a perfectly steamed bao bun. Imagine biting into a cloud-like, soft bao, instantly met with the tender, juicy chicken, marinated to perfection, boasting that signature sweet, savory, and subtly spicy kick that Korean cuisine is renowned for. It’s not just a meal; it’s an experience, a harmonious fusion that dances on your palate and leaves you craving more. I promise, once you experience the explosion of taste and texture, you’ll understand why I can’t stop raving about it. This isn’t just another dinner idea; it’s a showstopper, a conversation starter, and an absolute treat for your taste buds.
I find that the beauty of this dish lies not only in its sensational flavor but also in its versatility. While the Korean Chicken Bao is utterly fantastic all on its own, a little accompaniment can elevate your dining experience even further. Consider serving these alongside a crisp, refreshing cucumber salad, perhaps with a touch of sesame oil and rice vinegar, to cut through the richness. A small bowl of homemade quick kimchi or pickled daikon radish would also provide a wonderful tangy counterpoint, adding an extra layer of authentic Korean flair. For a heartier meal, you could even pair them with a light, clear broth soup, or for those who appreciate a multi-textured feast, some perfectly steamed edamame. Don’t be afraid to experiment with your side dishes; think about what textures and flavors would complement the tender chicken and soft bao.
Elevate Your Korean Chicken Bao Experience with Creative Twists!
But wait, the fun doesn’t stop there! One of my favorite things about cooking is the endless possibility of customization, and this recipe is incredibly forgiving and open to your personal touch. Feeling adventurous? Try adding a sprinkle of toasted sesame seeds or a generous dollop of sriracha mayo for an extra creamy, spicy kick right before serving. A scattering of fresh cilantro or thinly sliced green onions not only adds a beautiful pop of color but also a burst of herbaceous freshness that brightens every bite. For those who love a bit of crunch, a sprinkle of crushed roasted peanuts or crispy fried shallots would be an absolutely delightful addition, introducing a whole new textural dimension. You could even play with the heat level by adjusting the gochujang or gochugaru in the marinade, making it milder for sensitive palates or dialing up the spice for the chili enthusiasts among us. For a non-chicken variation, imagine succulent slices of gochujang-marinated pork belly, or even a robust, savory mushroom and tofu mix for a vegetarian option, all tucked into those fluffy bao buns. The core technique remains the same, allowing you to innovate with confidence.
So, what are you waiting for? This is your invitation, your gentle nudge, to step into the kitchen and unleash your inner chef. Don’t let this recipe remain just words on a screen. Take the leap, gather your ingredients, and embark on this delicious journey to create your very own batch of these irresistible Korean Chicken Bao. I can assure you, the effort is well worth the reward. The moment you take that first bite, you’ll know exactly what I mean. I am incredibly eager to hear about your culinary adventures, so please, once you’ve made them, don’t be shy! Share your experiences, your successes, and even your creative variations in the comments section below. Did you find a new favorite topping? Did you pair it with an unexpected side dish that blew your mind? Your insights and tips are invaluable to me and to our wonderful community of home cooks. Let’s celebrate the joy of cooking and the sheer deliciousness of this fantastic dish together!
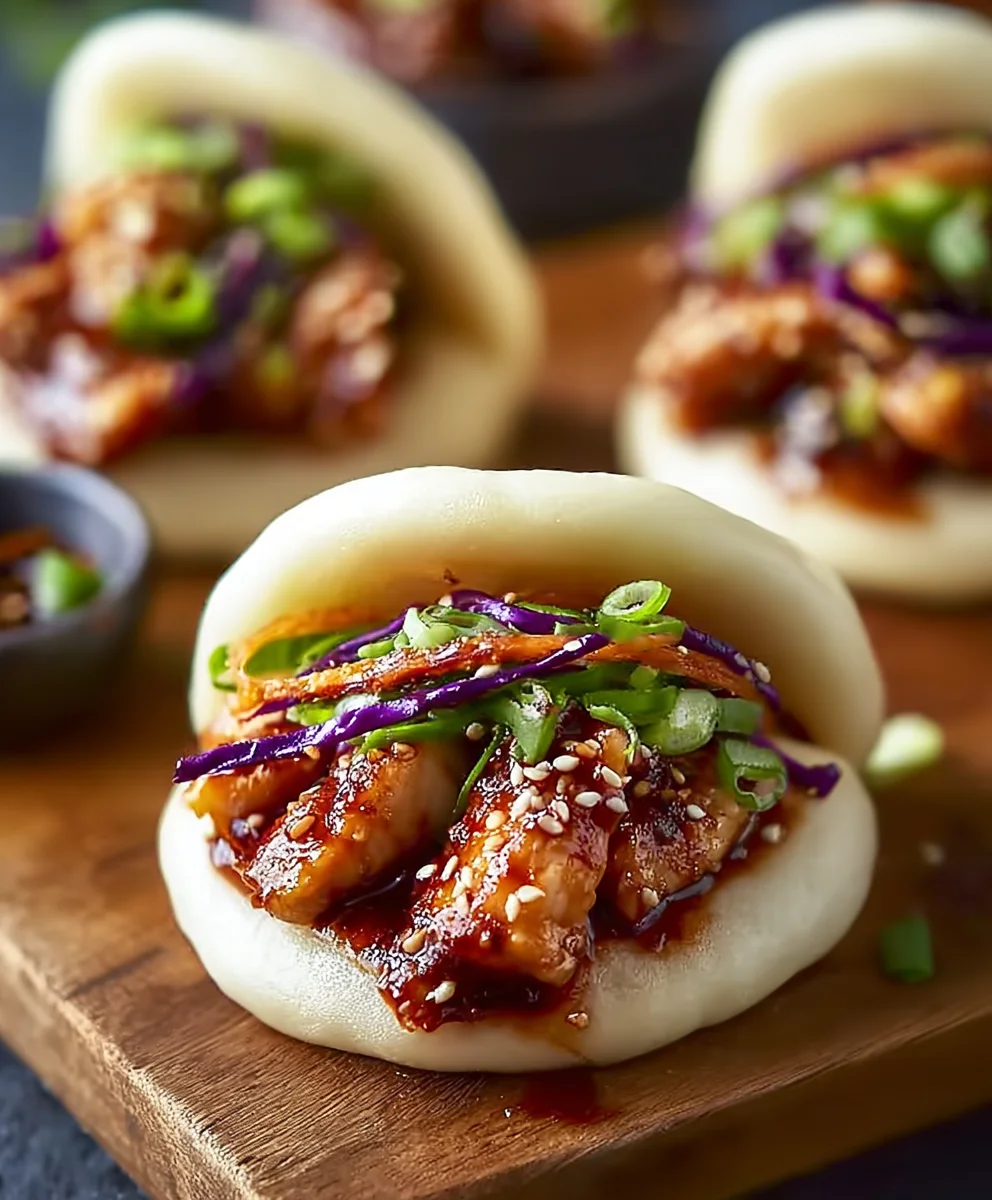
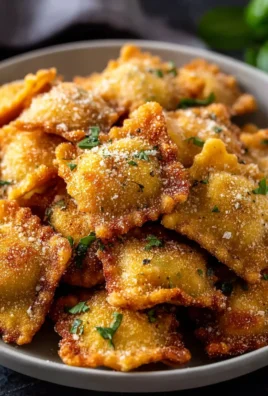
Korean Chicken Bao
Experience the perfect harmony of a cloud-like, steamy bao bun cradling incredibly flavorful, tender Korean-style chicken. This dish combines traditional bao with the bold and zesty world of Korean cuisine, featuring crispy chicken drenched in a sticky, sweet, savory, and subtly spicy gochujang glaze, complemented by tangy quick-pickled vegetables.
Ingredients
-
3 cups (360g) All-Purpose Flour
-
2 teaspoons Instant Dry Yeast
-
1/4 cup Granulated Sugar
-
1 cup + 2 tablespoons Warm Water (105-115°F / 40-46°C)
-
2 tablespoons Vegetable Oil (plus extra for brushing)
-
1 teaspoon Baking Powder
-
1/2 teaspoon Salt
-
Small squares of parchment paper
-
1.5 lbs Boneless, Skinless Chicken Thighs, cut into 1.5-inch pieces
-
1 tablespoon Soy Sauce
-
1 teaspoon Fresh Ginger, grated
-
1 teaspoon Fresh Garlic, minced
-
1/2 teaspoon Black Pepper
-
1 cup All-Purpose Flour (for batter)
-
1/2 cup Corn Starch (for batter)
-
1 Large Egg
-
1/2 cup Cold Water (or more as needed)
-
1 teaspoon Baking Powder (for batter)
-
1/2 teaspoon Salt (for batter)
-
6-8 cups Frying Oil (canola, vegetable, or peanut oil)
-
1/4 cup Gochujang (Korean Chili Paste)
-
2 tablespoons Soy Sauce (for sauce)
-
2 tablespoons Rice Vinegar
-
2 tablespoons Honey or Maple Syrup
-
1 tablespoon Brown Sugar
-
1 tablespoon Fresh Garlic, minced (for sauce)
-
1 teaspoon Fresh Ginger, grated (for sauce)
-
1 teaspoon Sesame Oil
-
1/4 cup Water (for sauce)
-
1 teaspoon Cornstarch slurry (1 tsp cornstarch mixed with 1 tbsp water)
-
1 cup Daikon Radish, julienned
-
1/2 cup Carrot, julienned
-
1/2 cup Rice Vinegar (for pickling)
-
2 tablespoons Granulated Sugar (for pickling)
-
1/2 cup Water (for pickling)
-
1/2 teaspoon Salt (for pickling)
-
Toasted Sesame Seeds (for garnish)
-
Fresh Cilantro, chopped (for garnish)
-
Thinly Sliced Green Onions (for garnish)
-
Sriracha Mayo (optional)
Instructions
-
Step 1
In a large bowl, combine warm water, sugar, and instant dry yeast. Stir gently and let sit 5-10 minutes until foamy. -
Step 2
In a separate bowl, whisk together 3 cups all-purpose flour, baking powder, and 1/2 tsp salt. Add dry ingredients to the activated yeast mixture, then drizzle in 2 tbsp vegetable oil. Stir until a shaggy dough forms. -
Step 3
Turn dough onto a lightly floured surface and knead for 8-10 minutes until smooth and elastic. Lightly oil a clean bowl, place dough in it, and cover. Let rise in a warm place for 1-1.5 hours, or until doubled in size. -
Step 4
Gently punch down dough. Roll into a log and divide into 12-14 equal pieces. Flatten each piece into a circle, then roll into a 4-5 inch long, 2-3 inch wide oval. Brush one side with a tiny bit of vegetable oil, then fold in half. Place each folded bao on a small square of parchment paper. -
Step 5
Arrange shaped bao in a steamer, leaving space. Cover and let proof for 30-45 minutes until puffy. Bring water to a boil in a pot with a steamer. Steam bao for 8-10 minutes (do not open lid). Remove immediately. -
Step 6
Julienne daikon and carrots. In a saucepan, combine 1/2 cup rice vinegar, 2 tbsp sugar, 1/2 cup water, and 1/2 tsp salt. Heat until sugar and salt dissolve. Pour hot pickling liquid over vegetables in a heatproof bowl. Let cool, then refrigerate for at least 30 minutes. Drain before serving. -
Step 7
Pat chicken thighs dry and cut into 1.5-inch pieces. In a bowl, combine chicken with 1 tbsp soy sauce, grated ginger, minced garlic, and black pepper. Toss to coat. Marinate in the refrigerator for 30 minutes to 2 hours. -
Step 8
In a large bowl, whisk together 1 cup all-purpose flour, corn starch, 1 tsp baking powder, and 1/2 tsp salt. In a separate bowl, whisk egg with cold water. Gradually add wet mixture to dry ingredients, whisking until smooth (thin pancake batter consistency). Add marinated chicken to batter and toss to coat completely. Let sit 5-10 minutes. -
Step 9
Heat frying oil to 350°F (175°C) in a large pot. Fry battered chicken in batches for 4-5 minutes until cooked through and lightly golden. Remove to a wire rack to drain and rest for at least 10 minutes. -
Step 10
Increase oil temperature to 375°F (190°C). Return rested chicken to hot oil in batches. Fry for another 2-3 minutes until deep golden brown and exceptionally crispy. Drain on a wire rack. -
Step 11
In a medium saucepan, heat sesame oil over medium heat. Sauté minced garlic and grated ginger for 30 seconds to 1 minute until fragrant. Add gochujang, 2 tbsp soy sauce, rice vinegar, honey/maple syrup, brown sugar, and 1/4 cup water. Stir and bring to a gentle simmer. -
Step 12
Whisk cornstarch slurry and slowly pour into simmering sauce, stirring continuously for 1-2 minutes until thickened and glossy. Remove from heat. In a large bowl, add hot fried chicken and pour warm gochujang sauce over it. Toss gently but quickly to coat every piece evenly. -
Step 13
Gently open a warm, steamed bao bun. Nestle 2-3 pieces of sauced Korean fried chicken into the bun. Top with a generous spoonful of drained quick pickled daikon and carrots. Garnish with toasted sesame seeds, chopped fresh cilantro, and thinly sliced green onions. Optionally drizzle with sriracha mayo. Serve immediately.
Important Information
Nutrition Facts (Per Serving)
It is important to consider this information as approximate and not to use it as definitive health advice.
Allergy Information
Please check ingredients for potential allergens and consult a health professional if in doubt.
Leave a Comment