
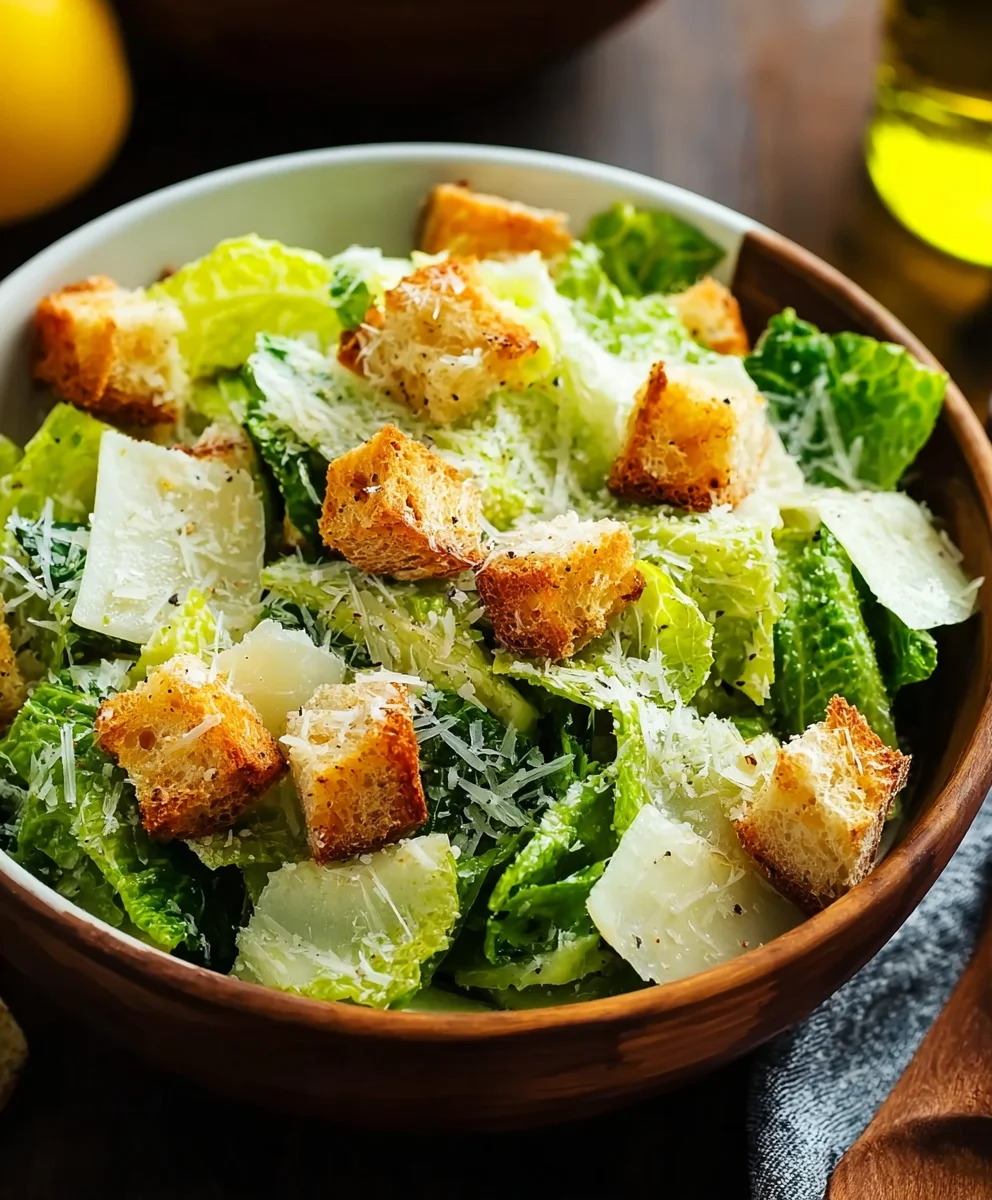
Classic Caesar Salad Croutons are, without a doubt, the quintessential element that transforms a good Caesar salad into an unforgettable culinary experience. We all understand that a Caesar salad simply isn’t complete without those perfectly toasted, golden morsels, each delivering a satisfying crunch and a burst of savory flavor. It’s the delightful textural contrast, the garlicky aroma, and the robust taste that elevate crisp romaine and creamy dressing to legendary status.
The history of the Caesar salad itself, born in Tijuana, Mexico, by Caesar Cardini, intrinsically links these delightful bread cubes to its very essence. From its inception, the crouton was not an afterthought but a fundamental component, designed to complement and enhance every forkful. This rich heritage underscores their importance, making them far more than just toasted bread; they are a tradition.
Why We Love the Perfect Crouton
People adore these specific croutons for their unparalleled ability to add character and depth to a dish. Their golden-brown exterior, achieved through careful toasting, yields an irresistible crispness, while the interior remains just tender enough to avoid being overly dry. Infused with garlic and herbs, they are savory flavor bombs, providing that addictive, comforting taste and a truly spectacular texture. My recipe ensures you’ll create Classic Caesar Salad Croutons that achieve this ideal balance every single time, bringing an authentic, gourmet touch directly to your home kitchen.

Ingredients:
-
For the Classic Caesar Salad Dressing:
- 2 cloves garlic, peeled and roughly chopped (I like to use fresh garlic for the most vibrant flavor!)
- 1 teaspoon Dijon mustard (a good quality one makes all the difference!)
- 2 anchovy fillets, packed in oil, drained and finely minced (don’t skip these, they add incredible umami without making the dressing taste “fishy” – trust me!)
- 1 large egg yolk, pasteurized if you’re concerned about raw egg (this is what gives our dressing its rich, creamy body)
- 1/2 cup extra virgin olive oil, a good quality one is essential here for flavor
- 2 tablespoons freshly squeezed lemon juice (fresh is non-negotiable for that bright tang!)
- 1 teaspoon Worcestershire sauce (another secret weapon for depth)
- 1/4 cup finely grated Parmesan cheese, plus extra for serving (Parmigiano-Reggiano, please!)
- Freshly ground black pepper, to taste
- Salt, to taste (remember anchovies are salty, so add judiciously)
-
For the Classic Caesar Salad Croutons:
- 4 cups day-old crusty bread, such as sourdough or a rustic Italian loaf, cut into 1-inch cubes (day-old bread is crucial because it absorbs the oil better and crisps up more effectively)
- 1/4 cup extra virgin olive oil (or more, if your bread is very dry)
- 2 cloves garlic, minced very finely or grated (for maximum garlic flavor infusion)
- 1/2 teaspoon dried oregano (optional, but it adds a lovely herbaceous note)
- 1/4 teaspoon sea salt, or to taste
- 1/8 teaspoon freshly ground black pepper, or to taste
-
For the Salad Assembly:
- 2 large heads Romaine lettuce, outer leaves removed, washed, thoroughly dried, and torn or chopped into bite-sized pieces (crisp, dry lettuce is paramount for a good Caesar!)
- 1/2 cup freshly shaved or grated Parmesan cheese, for garnish (use a vegetable peeler to get beautiful broad shavings)
- Freshly ground black pepper, for serving
Instructions:
Phase 1: Crafting Your Classic Caesar Salad Croutons
- Prepare Your Bread: The foundation of exceptional Classic Caesar Salad Croutons begins with the right bread. I always opt for a day-old crusty loaf like sourdough or a good rustic Italian bread. Its slightly stale nature means it will absorb the olive oil beautifully and bake up to an incredibly crisp texture without becoming soggy. Using a sharp serrated knife, carefully cut your bread into uniform 1-inch cubes. Uniformity is key here because it ensures that every crouton bakes evenly, resulting in a consistent crunch in every bite. If your cubes are wildly different sizes, some will burn while others remain soft. Lay the bread cubes out on a large baking sheet; you might need two to avoid overcrowding, as proper air circulation is vital for crispness.
- Infuse the Garlic Oil: In a small bowl, combine the 1/4 cup of extra virgin olive oil with the finely minced garlic, dried oregano (if using), sea salt, and freshly ground black pepper. Give it a good stir to combine all those wonderful aromatics. This isn’t just plain olive oil; it’s a flavorful infusion that will penetrate every single crouton, ensuring a deep, savory taste. I often let this mixture sit for a few minutes while my oven preheats, just to give the garlic a little extra time to release its essence into the oil.
- Coat the Bread Evenly: Drizzle the infused olive oil mixture over your prepared bread cubes. Now, this next step is crucial for perfect Classic Caesar Salad Croutons: get in there with your hands! Gently, but thoroughly, toss and massage the oil into the bread cubes. You want every single surface of every single cube to be lightly coated with that fragrant oil. Don’t be shy; if some bread pieces look dry, add another tablespoon or two of olive oil. The goal isn’t to soak them, but to ensure an even, thin film that will crisp up beautifully in the oven. The better coated they are, the more golden and crunchy your croutons will be.
- First Bake for Dryness: Preheat your oven to a moderate 350°F (175°C). Once your bread cubes are perfectly coated and spread out in a single layer on your baking sheet(s), place them into the preheated oven. Bake for 10-15 minutes, or until the croutons are just starting to turn light golden brown around the edges and feel dry to the touch. This initial bake is about drawing out moisture and beginning the crisping process. Keep a close eye on them, as oven temperatures can vary, and you don’t want them to burn.
- Second Bake for Golden Perfection: After the initial bake, remove the baking sheet(s) from the oven. Using a spatula, gently toss the croutons to flip them over and ensure even browning. You’ll notice they’ve already started to firm up. Return them to the oven and continue baking for another 10-15 minutes, or until they are deeply golden brown and wonderfully crisp all the way through. This is where your Classic Caesar Salad Croutons truly develop their signature crunch and color. Listen for a dry, hollow sound when you tap them; that’s a good indicator of doneness. When you break one open, it should be firm and brittle, not soft in the center. If they are not entirely crisp, continue baking for a few more minutes, checking frequently.
- Cool and Store: Once your Classic Caesar Salad Croutons are perfectly golden and crisp, remove them from the oven. Let them cool completely on the baking sheet. As they cool, they will become even crispier. This cooling period is essential – putting warm croutons into a salad will make your lettuce wilt! Once fully cooled, they can be stored in an airtight container at room temperature for up to 3-4 days. While they are best enjoyed fresh, having a batch on hand makes whipping up a Caesar salad a breeze.
Phase 2: Whisking Up the Perfect Caesar Dressing
- Prepare the Garlic and Anchovy Paste: Begin by making a smooth paste from your garlic. On a cutting board, sprinkle the chopped garlic with a pinch of salt. Using the flat side of your knife, press down and drag the garlic repeatedly, essentially mashing it into a fine paste. The salt helps abrade the garlic, making this process easier and ensuring a smooth texture in your dressing. Transfer the garlic paste to a medium-sized bowl. Add the minced anchovy fillets to the bowl. Using the back of a spoon or a fork, mash the anchovies together with the garlic until you have a fairly uniform paste. This combination is the pungent, savory heart of our dressing.
- Combine Base Ingredients: To the garlic and anchovy paste, add the Dijon mustard and the pasteurized egg yolk. Whisk these ingredients vigorously until they are well combined and the mixture is smooth and slightly pale. The egg yolk and mustard act as emulsifiers, which means they help bind the oil and other liquid ingredients together, creating that wonderfully thick and stable dressing texture we all love.
- Slowly Emulsify with Olive Oil: Now for the magic: emulsification! While continuously whisking the egg yolk mixture, very slowly drizzle in the extra virgin olive oil, literally drop by drop at first. As the dressing starts to thicken and emulsify, you can gradually increase the speed of your pour to a thin, steady stream. It’s crucial not to add the oil too quickly, or your dressing will “break” and separate, becoming oily and thin. Continue whisking until all the olive oil has been incorporated and the dressing is thick, creamy, and looks like a rich mayonnaise.
- Introduce Brightness and Depth: Once your dressing base is beautifully emulsified, whisk in the fresh lemon juice and Worcestershire sauce. The lemon provides essential acidity to cut through the richness, while the Worcestershire sauce adds another layer of complex, savory flavor. Taste at this point – you’ll notice how these additions brighten the entire profile.
- Fold in the Parmesan: Finally, fold in the 1/4 cup of finely grated Parmesan cheese. This not only adds a salty, nutty flavor but also further thickens the dressing and gives it a lovely texture. Stir until it’s evenly distributed.
- Season and Adjust: Give the dressing a final taste. This is your chance to make it perfect for your palate. Add more salt if needed (remembering the anchovies and Parmesan already contribute saltiness), and plenty of freshly ground black pepper. If you prefer it tangier, a little more lemon juice. If you like it richer, a tiny splash more olive oil, carefully whisked in. Once seasoned to your liking, cover the dressing and refrigerate it for at least 30 minutes to allow the flavors to meld. This dressing can be made a day in advance and stored in an airtight container in the refrigerator.
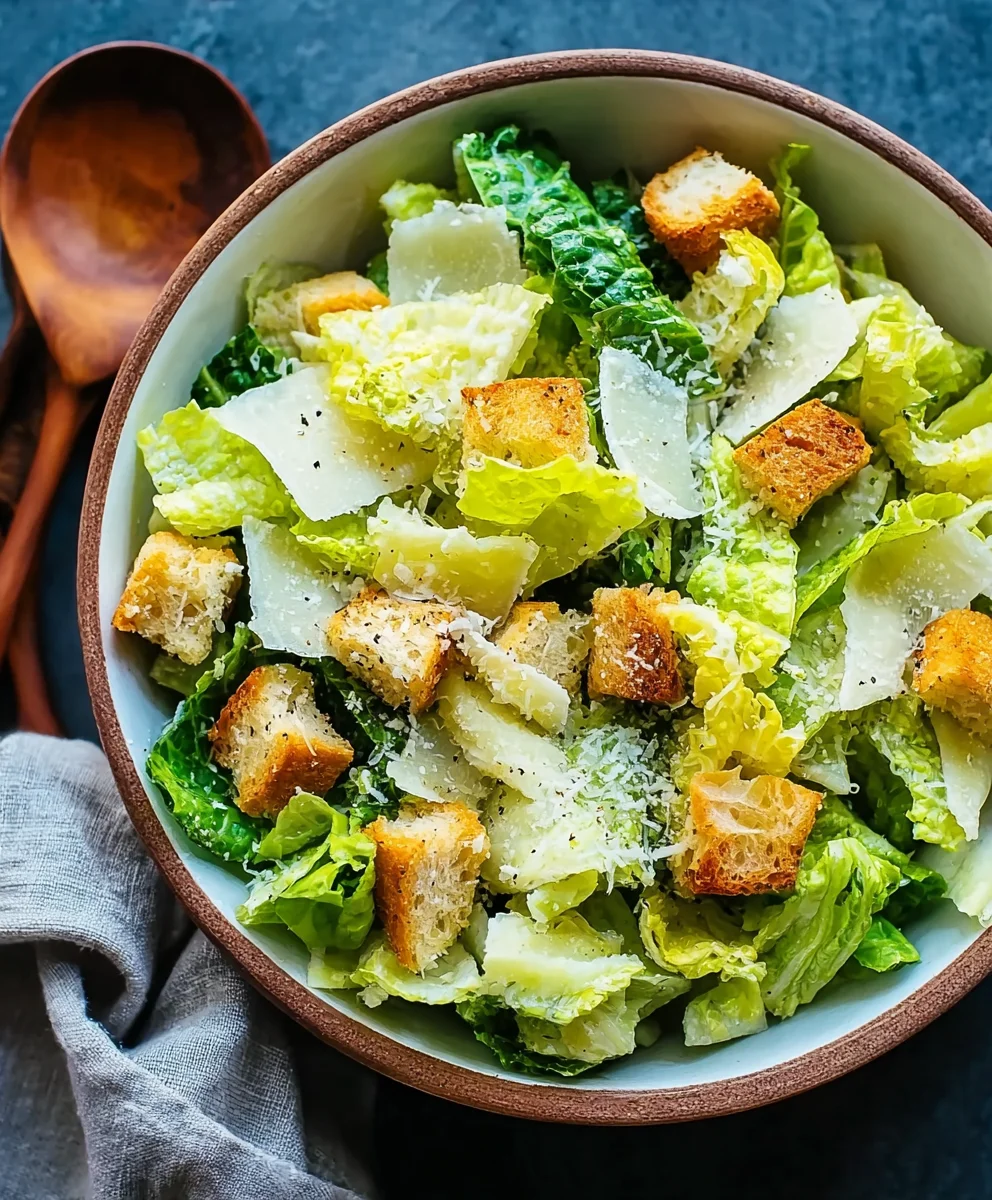
Phase 3: Assembling Your Magnificent Classic Caesar Salad
- Prepare the Romaine: Take your thoroughly washed and dried Romaine lettuce. It’s incredibly important that the lettuce is as dry as possible; any residual water will dilute your dressing and prevent it from clinging properly to the leaves. Tear or chop the lettuce into bite-sized pieces and place them into a very large mixing bowl. You want ample space for tossing.
- Dress the Lettuce: Retrieve your chilled Caesar dressing. Give it a good stir, as it may have thickened further in the fridge. Add about half to two-thirds of the dressing to the Romaine lettuce in the bowl. Now, using clean hands or large salad tongs, gently but thoroughly toss the lettuce. Your goal is to lightly coat every single leaf with the dressing without bruising the lettuce. Add more dressing, a tablespoon at a time, until the lettuce is perfectly coated to your liking. It should be glistening, but not swimming in dressing.
- Incorporate Parmesan: Sprinkle a generous portion of the freshly shaved or grated Parmesan cheese (from the “For the Salad Assembly” list) over the dressed lettuce. Gently toss again to distribute the cheese throughout the salad. The sharp, nutty flavor of the Parmesan is quintessential to a Classic Caesar Salad.
- Add the Star: Your Homemade Classic Caesar Salad Croutons: This is the moment your hard work in Phase 1 truly shines! Just before serving, add your perfectly crisp, golden-brown Classic Caesar Salad Croutons to the bowl. It’s crucial to add them at the very last minute to prevent them from becoming soggy. Their incredible crunch provides a delightful textural contrast to the crisp lettuce and creamy dressing.
- Final Toss and Serve: Give the salad one final, gentle toss to incorporate the croutons without crushing them. Transfer the salad to individual serving plates or a large serving bowl. Garnish with additional freshly shaved Parmesan cheese and a generous grinding of fresh black pepper. Serve your magnificent Classic Caesar Salad immediately and prepare for rave reviews! The combination of crisp lettuce, tangy-creamy dressing, and incredibly crunchy homemade Classic Caesar Salad Croutons is simply unbeatable. Enjoy the fruits of your labor!
Conclusion:
There’s a certain magic that happens when you take simple, fresh ingredients and transform them into something truly extraordinary. That’s precisely what I believe we’ve achieved with this recipe. It’s not just another meal; it’s an experience, a moment of culinary triumph that will elevate your dining table from everyday to exceptional. I understand that sometimes, the thought of making something from scratch, especially a dish often relegated to store-bought convenience, can feel daunting. But I promise you, the minimal effort required for this recipe yields disproportionately spectacular results. You’ll find yourself wondering why you ever settled for less, as the vibrant flavors and perfect textures dance on your palate.
What makes this recipe an absolute must-try, in my humble opinion, is its unparalleled ability to deliver on taste and quality. We’re talking about freshness you simply cannot replicate from a package, a depth of flavor that only comes from thoughtfully combined ingredients, and a texture that is nothing short of sublime. Each element works in harmony, creating a symphony of taste that is both comforting and exhilarating. Imagine that initial crispness, followed by a burst of savory goodness, leaving you craving just one more bite. This isn’t just a meal; it’s a testament to the fact that the best food often comes from your own kitchen, crafted with care and a little bit of love.
Unleash the Versatility: Beyond the Expected
While the undisputed champion and primary muse for many of us will undoubtedly be the tantalizing, golden brown perfection of homemade Classic Caesar Salad Croutons – a game-changer for any Caesar salad, transforming it into a truly unforgettable dish – this recipe’s components offer so much more than just a starring role in your next Roman-inspired feast. The robust flavors and incredible textures you’ve just mastered can be the secret weapon in your culinary arsenal, ready to elevate a multitude of dishes. Think expansively; think creatively!
Consider incorporating them into your weekly rotation in unexpected ways. Imagine a hearty, warm lentil soup, made infinitely better with a scattering of these savory crumbles right before serving, adding a delightful crunch and a whisper of garlicky goodness. Or perhaps a vibrant summer gazpacho, where the contrasting texture provides a beautiful counterpoint to the cool, smooth soup. They also make an incredible topping for baked pasta dishes, lending a crispy, flavorful crust that far surpasses breadcrumbs. For a quick and sophisticated appetizer, spoon some fresh bruschetta topping onto individual pieces and serve alongside a charcuterie board. You could even crush them slightly and use them as a textural element in a creative stuffing for poultry or vegetables, or as a crunchy layer in a layered dip for your next gathering.
Creative Twists and Adaptations to Make it Your Own
Part of the joy of cooking is making a recipe your own, and this one is wonderfully adaptable. Don’t hesitate to experiment! For an herbal twist, try adding finely chopped fresh rosemary or thyme to your oil mixture before tossing, which will infuse a delightful aromatic note. A pinch of smoked paprika can introduce a subtle smoky depth, while a dash of red pepper flakes will give it a gentle kick. If you’re looking to elevate the cheesy factor beyond the traditional, consider grating in some Pecorino Romano or even a sharp Asiago along with or instead of Parmesan. For those seeking a dairy-free option, a sprinkle of nutritional yeast can provide a surprisingly cheesy umami flavor. And remember, the type of bread you choose will dramatically impact the final result – while a rustic sourdough offers a wonderful tang, a classic French baguette provides a lighter, airier crunch. Feel free to play with the baking time too; a minute or two extra can result in an even deeper golden hue and an almost aggressively crisp texture, perfect for those who love an extra-hard crunch.
Your Kitchen, Your Masterpiece!
I truly hope this recipe has inspired you to step into your kitchen with confidence and creativity. There’s immense satisfaction to be found in crafting something delicious from scratch, and I believe this recipe is a perfect testament to that. It’s a small investment of your time and effort that promises a magnificent return in flavor and enjoyment. Don’t let the simplicity fool you; the impact is profound. Make this recipe your own, adapt it to your preferences, and most importantly, savor every single bite.
Once you’ve experienced the unparalleled deliciousness of this creation, I would absolutely love to hear about it! Your culinary adventures are a source of great inspiration for me and our entire community. Please, don’t be shy – share your thoughts in the comments below. Did you try a unique variation? Did it become an instant family favorite? We’d be thrilled to see your photos and read about your experiences. Let’s celebrate the joy of homemade food together. Happy cooking!
Classic Caesar Salad Croutons
Elevate your Caesar salad with these irresistible homemade croutons. Perfectly golden-brown, crispy, and infused with savory garlic and herbs, they deliver an authentic crunch and flavor that’s simply unbeatable.
Ingredients
-
4 cups day-old crusty bread (sourdough or rustic Italian), cut into 1-inch cubes
-
1/4 cup extra virgin olive oil (or more, if bread is very dry)
-
2 cloves garlic, minced very finely or grated
-
1/2 teaspoon dried oregano (optional)
-
1/4 teaspoon sea salt
-
1/8 teaspoon freshly ground black pepper
Instructions
-
Step 1
Cut 4 cups of day-old crusty bread into uniform 1-inch cubes. Spread the cubes in a single layer on a large baking sheet(s) to prevent overcrowding. -
Step 2
In a small bowl, combine 1/4 cup extra virgin olive oil, 2 finely minced garlic cloves, 1/2 teaspoon dried oregano (optional), 1/4 teaspoon sea salt, and 1/8 teaspoon freshly ground black pepper. Stir well to combine. -
Step 3
Drizzle the infused olive oil mixture over the bread cubes. Toss with your hands to gently but thoroughly coat every surface of each bread cube. Add an additional tablespoon or two of olive oil if some pieces appear dry. -
Step 4
Preheat your oven to 350°F (175°C). Place the baking sheet(s) into the preheated oven and bake for 10-15 minutes, or until the croutons begin to turn light golden brown around the edges and feel dry. -
Step 5
Remove the baking sheet(s) from the oven. Using a spatula, gently toss the croutons to flip them. Return to the oven and continue baking for another 10-15 minutes, or until they are deeply golden brown and wonderfully crisp throughout. They should feel firm and brittle when broken. -
Step 6
Once perfectly golden and crisp, remove the croutons from the oven. Let them cool completely on the baking sheet; they will become even crispier as they cool. Store cooled croutons in an airtight container at room temperature for up to 3-4 days.
Important Information
Nutrition Facts (Per Serving)
It is important to consider this information as approximate and not to use it as definitive health advice.
Allergy Information
Please check ingredients for potential allergens and consult a health professional if in doubt.


Leave a Comment