
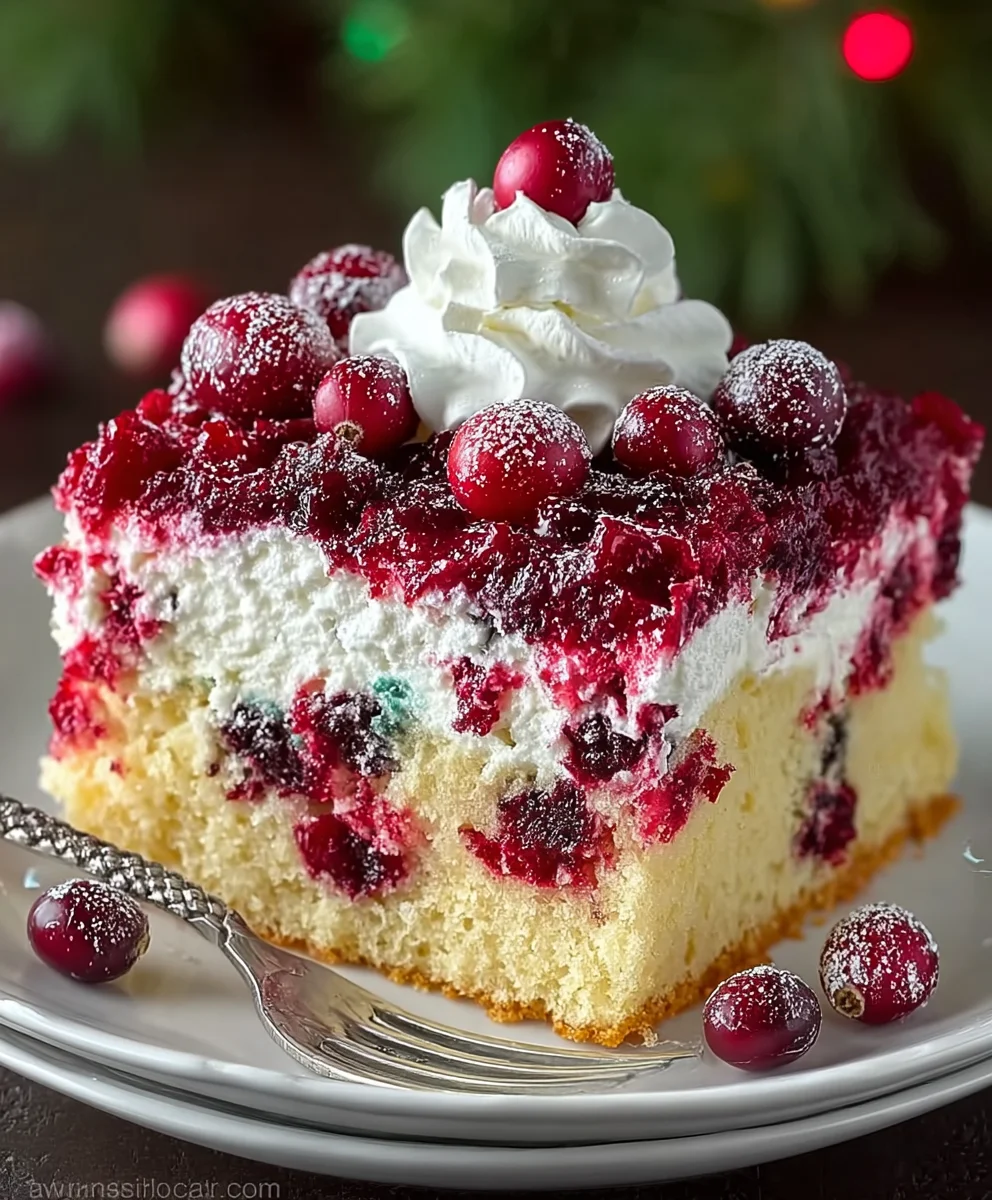
Christmas Cranberry Poke Cake is the quintessential dessert that promises to be the dazzling centerpiece of your holiday table, captivating both the eye and the palate. I am absolutely thrilled to share this recipe with you, as it embodies everything wonderful about festive baking: vibrant flavors, delightful textures, and an undeniable sense of occasion. Imagine a gorgeously moist cake, artfully “poked” to absorb a luscious, tangy cranberry infusion, then crowned with a light, creamy topping. This isn’t just any cake; it’s a celebration of seasonal cheer in every single bite.
The beauty of the poke cake lies in its ingenious design, ensuring every forkful is bursting with moisture and flavor – a technique that has charmed bakers for decades due to its incredible results. While poke cakes themselves boast a history rooted in American kitchens for their convenience and delightful moistness, the addition of cranberries elevates this particular version into a timeless holiday tradition. Cranberries, with their iconic tartness and vivid color, are synonymous with festive feasting, and their inclusion here transforms a simple cake into a true seasonal showstopper.
Why This Christmas Cranberry Poke Cake Becomes a Holiday Favorite
People adore this particular Christmas Cranberry Poke Cake for numerous compelling reasons. Firstly, the harmonious balance of sweet cake with the bright, zesty cranberries is simply irresistible, cutting through the richness of holiday meals perfectly. Secondly, the ‘poke’ method guarantees an extraordinarily tender and moist crumb, ensuring the cake remains incredibly soft and enjoyable. Furthermore, its ability to be prepared ahead of time makes it a godsend for busy hosts, allowing you to focus on other festive preparations. This delightful creation truly offers a taste of holiday magic, making it a beloved addition to any Christmas spread.

Ingredients:
- For the Vanilla Cake Base:
- 2 ½ cups (300g) all-purpose flour, spooned and leveled, plus extra for dusting the pan. I always make sure my flour is precisely measured for the best texture.
- 2 teaspoons baking powder. This is our leavening agent, ensuring a light and airy crumb.
- ½ teaspoon salt. A little bit of salt enhances all the other flavors, bringing balance to the sweetness.
- 1 cup (226g) unsalted butter, softened to room temperature. This is crucial for creaming properly and incorporating air.
- 2 cups (400g) granulated sugar. For sweetness and moisture.
- 4 large eggs, at room temperature. Room temperature eggs emulsify better with the butter and sugar.
- 1 tablespoon pure vanilla extract. Use good quality vanilla; it makes a big difference in the final taste of our Christmas Cranberry Poke Cake.
- 1 ¼ cups (300ml) whole milk, at room temperature. Again, room temperature helps with emulsification.
- For the Bright Cranberry Syrup Filling:
- 1 (12-ounce) bag (340g) fresh or frozen cranberries. The star of our poke cake! No need to thaw if using frozen.
- ¾ cup (150g) granulated sugar. To sweeten the tart cranberries.
- ½ cup (120ml) water. To help the cranberries break down and form a syrup.
- 1 teaspoon orange zest. This adds a beautiful aromatic lift that pairs wonderfully with cranberries. Make sure to only zest the orange part, not the bitter white pith.
- Pinch of ground cinnamon or a tiny grating of fresh nutmeg (optional, but highly recommended for that festive touch).
- For the Velvety Cream Cheese Whipped Topping:
- 8 ounces (226g) cream cheese, softened to room temperature. Full-fat cream cheese works best for richness and stability.
- ½ cup (113g) unsalted butter, softened to room temperature. Adds a luxurious texture and flavor to our frosting.
- 1 cup (120g) confectioners’ sugar (powdered sugar), sifted. Sifting prevents lumps and ensures a smooth frosting.
- 1 teaspoon pure vanilla extract. Enhances the creamy flavor.
- 1 ½ cups (360ml) heavy cream (cold). Make sure it’s very cold for the best whipping results.
- For the Festive Garnishes:
- Fresh cranberries. A few scattered on top look absolutely stunning and add a pop of color.
- Sprigs of fresh rosemary or mint. These give a beautiful “holiday” look, reminiscent of evergreen.
- Optional: A dusting of confectioners’ sugar. For a snowy effect.
Preparing the Fluffy Vanilla Cake Base
-
Preheat and Prepare Your Pan:
Before you even think about mixing ingredients, let’s get our oven ready. Preheat your oven to 350°F (175°C). This ensures a consistent baking temperature from the moment your cake goes in. Grease and flour a 9×13-inch baking pan. I like to use baking spray with flour to make this process super quick and effective, ensuring my cake releases cleanly. Alternatively, you can grease it well with butter or shortening, then dust it evenly with a tablespoon or two of all-purpose flour, tapping out any excess. This step is critical for a beautiful, intact cake.
-
Combine Dry Ingredients:
In a medium bowl, whisk together the 2 ½ cups of all-purpose flour, 2 teaspoons of baking powder, and ½ teaspoon of salt. Give it a good whisk for about 30 seconds to ensure everything is evenly distributed. This aeration also helps to make the flour lighter, which contributes to a tender cake. Set this bowl aside for a moment.
-
Cream Butter and Sugar:
In the bowl of a stand mixer fitted with the paddle attachment, or using a large bowl with an electric hand mixer, combine the 1 cup of softened unsalted butter and 2 cups of granulated sugar. Beat on medium speed for about 3-5 minutes, until the mixture is light in color and fluffy in texture. This creaming process is vital because it incorporates air into the batter, which is what gives your cake its light and airy structure. Scrape down the sides of the bowl occasionally to ensure everything is well combined.
-
Incorporate Eggs and Vanilla:
Add the 4 large room temperature eggs one at a time, beating well after each addition. Make sure each egg is fully incorporated into the butter-sugar mixture before adding the next. This prevents the mixture from curdling and creates a smooth emulsion. After all eggs are in, stir in the 1 tablespoon of pure vanilla extract. Beat for another minute or so until the mixture looks creamy and cohesive.
-
Alternate Dry and Wet Ingredients:
Now we’re going to slowly add the dry ingredients and the milk, alternating between the two. Begin by adding about one-third of the dry ingredient mixture to the wet ingredients, mixing on low speed until just combined. Be careful not to overmix! Then, pour in half of the 1 ¼ cups of room temperature milk, mixing until just combined. Repeat with another third of the dry ingredients, followed by the remaining milk, and finally, the last third of the dry ingredients. Mix on the lowest speed possible, stopping just as the last streaks of flour disappear. Overmixing develops gluten, which can lead to a tough, dense cake – the opposite of what we want for our delicate Christmas Cranberry Poke Cake. A truly light and tender cake relies on gentle mixing at this stage.
-
Bake the Cake:
Pour the cake batter evenly into your prepared 9×13-inch baking pan. Smooth the top with a spatula. Place the pan in the preheated oven and bake for 30-35 minutes, or until a wooden skewer or toothpick inserted into the center comes out clean. The cake should be golden brown and spring back lightly when touched. Keep an eye on it, as oven temperatures can vary.
-
Cool the Cake:
Once baked, remove the cake from the oven and let it cool in the pan on a wire rack for at least 20-30 minutes. This initial cooling allows the cake to firm up slightly. Then, if you prefer, you can invert it onto the wire rack to cool completely. However, for a poke cake, it’s perfectly fine to let it cool completely in the pan, as we’ll be poking holes directly into it. Ensure the cake is completely cool before proceeding, as a warm cake will absorb the syrup differently and could melt your frosting later.
Crafting the Bright Cranberry Syrup Filling for Your Christmas Cranberry Poke Cake
-
Combine Cranberry Syrup Ingredients:
While your cake is cooling, let’s get started on the vibrant cranberry syrup that will infuse our cake with its festive flavor. In a medium saucepan, combine the 1 (12-ounce) bag of fresh or frozen cranberries, ¾ cup of granulated sugar, and ½ cup of water. If you’re using them, add the 1 teaspoon of orange zest and a pinch of ground cinnamon or freshly grated nutmeg now. These additions will really elevate the aroma and taste.
-
Simmer and Soften:
Bring the mixture to a gentle boil over medium heat, stirring occasionally to dissolve the sugar. Once boiling, reduce the heat to low and let it simmer for about 8-10 minutes. During this time, the cranberries will begin to burst and soften, releasing their juices and creating a beautiful, ruby-red syrup. You’ll hear little popping sounds, which means they are doing their job! Continue to stir gently, breaking down any larger cranberry pieces with the back of your spoon.
-
Strain for a Smooth Syrup:
Remove the saucepan from the heat. For a truly smooth “poke” experience, I highly recommend straining the cranberry mixture. Place a fine-mesh sieve over a heatproof bowl and pour the cranberry mixture into it. Use the back of a spoon or a spatula to press down on the cranberry solids, extracting as much of that delicious, colorful syrup as possible. Discard the solids, or save them for another use (like mixing into yogurt or oatmeal!). You should be left with a gorgeously clear, thick syrup.
-
Cool the Syrup:
Allow the cranberry syrup to cool completely to room temperature. You can even pop it into the refrigerator for about 30 minutes to speed up the cooling process, as a cool syrup will be better absorbed by the cake without making it soggy. This vibrant syrup is the heart of our Christmas Cranberry Poke Cake!
Assembling Your Delightful Christmas Cranberry Poke Cake
-
Poke the Cake:
Once your vanilla cake is completely cool, grab a wooden spoon, the handle of a spatula, or even a large fork. Begin to poke holes all over the surface of the cake. I aim for holes about ½ to ¾ inch in diameter, spaced about an inch apart. You want to make sure the holes go almost all the way down to the bottom of the cake, but not through it. Be generous with your poking! The more holes, the more channels for that incredible cranberry syrup to seep into every nook and cranny of the cake, ensuring every bite is moist and bursting with flavor.
-
Pour the Cranberry Syrup:
Carefully and slowly pour the cooled cranberry syrup evenly over the entire poked cake. Take your time, allowing the syrup to naturally seep into all the holes and saturate the cake. You’ll see the beautiful red liquid disappear into the cake, transforming it. You might need to gently spread it around with a spoon to ensure even coverage. Don’t worry if it looks like a lot; the cake will absorb it beautifully, leaving you with an incredibly moist and flavorful cake.
-
Chill for Infusion:
Cover the pan loosely with plastic wrap and transfer the cake to the refrigerator. Allow it to chill for at least 2 hours, or ideally, overnight. This chilling period is crucial because it gives the cake ample time to fully absorb the cranberry syrup, become wonderfully moist, and allows the flavors to meld together. This step is what makes a poke cake truly special and ensures our Christmas Cranberry Poke Cake lives up to its name.
Whipping Up the Velvety Cream Cheese Topping
-
Beat Cream Cheese and Butter:
In the bowl of a stand mixer with the paddle attachment, or using an electric hand mixer, combine the 8 ounces of softened cream cheese and ½ cup of softened unsalted butter. Beat on medium speed for about 2-3 minutes, until the mixture is completely smooth and creamy, with no lumps of cream cheese visible. Scrape down the sides of the bowl as needed to ensure even mixing. The cream cheese and butter must be truly soft for a lump-free, silky frosting.
-
Add Sugar and Vanilla:
Reduce the mixer speed to low and gradually add the 1 cup of sifted confectioners’ sugar. Once all the sugar is incorporated, increase the speed to medium-high and beat for another 1-2 minutes until the mixture is light and fluffy. Stir in the 1 teaspoon of pure vanilla extract and beat for another 30 seconds to combine.
-
Whip in Heavy Cream:
In a separate, very clean and cold bowl (ideally, you can chill the bowl and whisk attachment in the freezer for 10-15 minutes beforehand), pour the 1 ½ cups of very cold heavy cream. Using an electric mixer (stand or hand mixer with the whisk attachment), beat the heavy cream on medium-high speed until stiff peaks form. This will take about 3-5 minutes, depending on your mixer. You want the whipped cream to be stable enough to hold its shape.
-
Fold Together:
Gently fold the whipped cream into the cream cheese mixture in two additions. Use a spatula and a light hand, folding until just combined. Be careful not to deflate the whipped cream; the goal is to maintain that airy texture. This combination creates a light, tangy, and incredibly delicious topping that perfectly complements the rich cake and tart cranberry syrup of our Christmas Cranberry Poke Cake.
Decorating and Serving Your Festive Christmas Cranberry Poke Cake
-
Frost the Cake:
Once the poke cake has been thoroughly chilled and the cranberry syrup has had time to fully absorb, remove it from the refrigerator. Evenly spread the luscious cream cheese whipped topping over the entire surface of the cake using an offset spatula or the back of a spoon. You can create beautiful swirls or a smooth, elegant finish – whatever your heart desires!
-
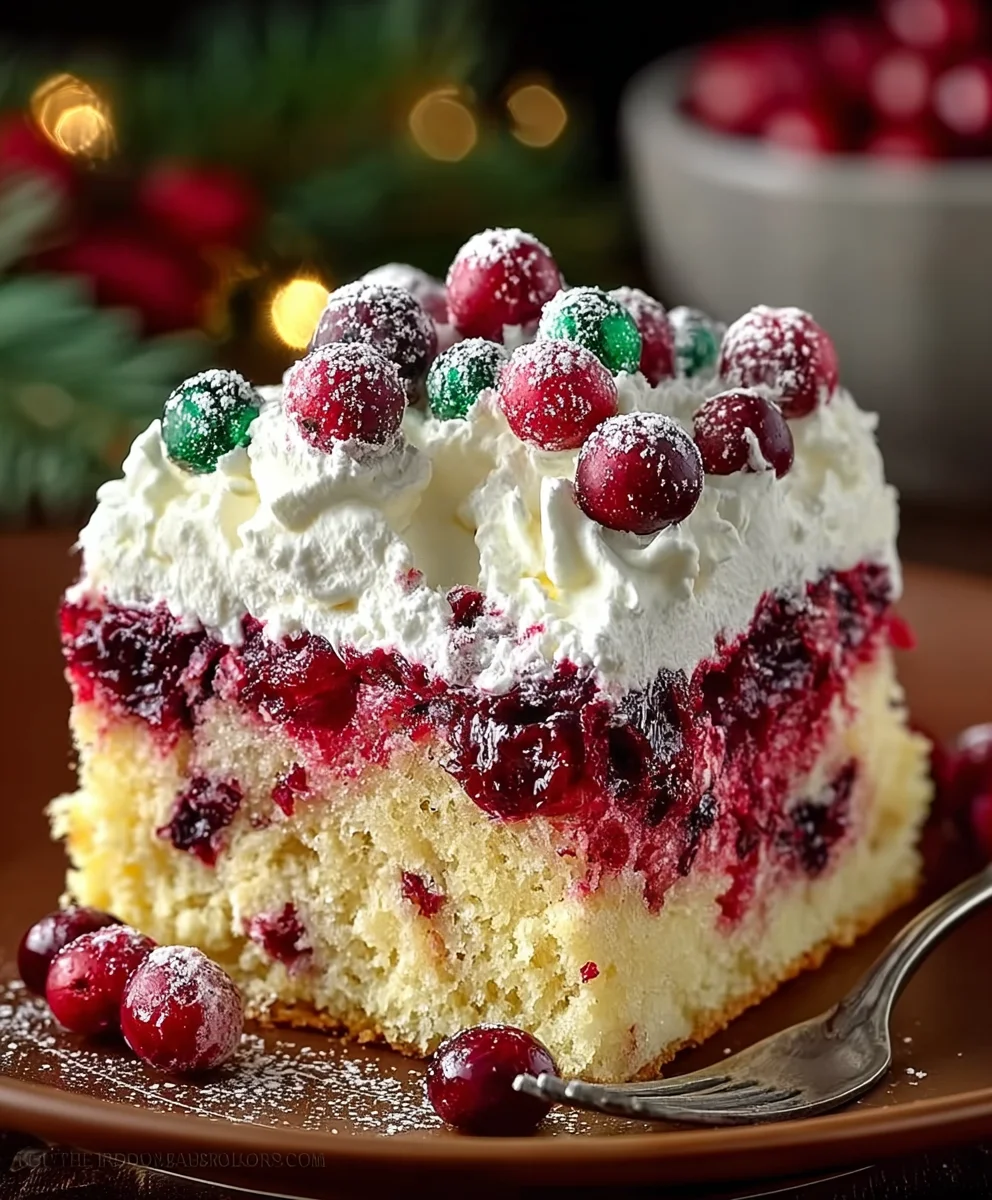
Garnish for Visual Appeal:
This is where your cake truly comes alive and gets its festive “Christmas Cranberry Poke Cake” look! Arrange a few fresh cranberries artistically on top of the frosting. For an extra touch of holiday elegance, tuck in small sprigs of fresh rosemary or mint among the cranberries. The green against the red and white creates a stunning visual contrast. If you want a “snowy” effect, you can lightly dust the cake with a sprinkle of confectioners’ sugar just before serving.
-
Chill Again (Optional, but Recommended):
For best results and to allow the frosting to set slightly, I recommend chilling the decorated cake in the refrigerator for at least another 30 minutes before slicing and serving. This makes for cleaner slices and ensures the frosting is perfectly firm.
-
Slice and Serve:
When you’re ready to serve, use a sharp knife (running it under hot water and wiping it clean between slices can help with clean cuts) to cut the Christmas Cranberry Poke Cake into generous squares. You’ll see the beautiful red streaks of cranberry syrup running through the moist vanilla cake – a delightful surprise with every bite. Serve chilled, and watch your guests marvel at this festive and flavorful dessert!
-
Storage:
Leftover Christmas Cranberry Poke Cake should be stored in an airtight container in the refrigerator for up to 3-4 days. The flavors actually deepen over time, so you might find it even more delicious the next day! This cake is perfect for holiday gatherings, potlucks, or a special family treat.
Conclusion:
Well, my friends, we’ve journeyed through the steps of creating what I truly believe will become a cherished staple in your holiday baking repertoire. This isn’t just another dessert; it’s a celebration in itself, a perfect marriage of simplicity and show-stopping elegance that is surprisingly easy to achieve. I’m talking about a dessert that delivers on every front: a wonderfully moist cake base, infused with the bright, tart essence of cranberries, all brought together by a sweet, vibrant glaze that truly sings of the season. The very first time I brought this to a gathering, I was met with oohs and aahs, and requests for the recipe before the last slice had even disappeared. It has that magical ability to instantly brighten any table, turning an ordinary moment into something truly special. The texture is divine – soft, tender, and incredibly moist thanks to the ingenious ‘poke’ method, which allows the cranberry sauce to seep into every crevice, ensuring a burst of flavor with each and every bite.
Then, you have the gorgeous visual appeal; that delightful crimson swirl against the tender cake creates an irresistible invitation. It’s the kind of dessert that looks like it took hours of painstaking effort, yet, as you now know, is wonderfully straightforward. This recipe is your secret weapon for impressing guests, delighting your family, and bringing genuine warmth to your festive gatherings without the stress. It’s comforting, it’s vibrant, and it undeniably captures the spirit of joy and generosity that defines the holiday season. The balance between the sweet and the tart, the tender cake and the fruity pockets, is just exquisite. It’s a guaranteed crowd-pleaser, a dessert that manages to feel both traditional and excitingly new all at once. And trust me, once you taste it, you’ll understand exactly what I mean when I say it’s utterly irresistible.
Now, let’s talk about making this already magnificent dessert even more uniquely yours. While the cake is absolutely phenomenal on its own, served at room temperature or slightly chilled, there are so many delightful ways to present and adapt it. For a truly luxurious touch, I often find myself serving a generous slice with a dollop of freshly whipped cream, perhaps lightly sweetened with a hint of vanilla extract. The creamy coolness provides a beautiful contrast to the cake’s vibrant flavors and tender texture. Alternatively, a scoop of premium vanilla bean ice cream melting gently beside it creates an utterly decadent experience that is simply divine, especially if you’re looking to add another layer of richness. A light dusting of powdered sugar just before serving adds a touch of simple elegance and enhances its festive appeal. If you’re feeling a bit more adventurous, consider garnishing your slices with a few candied cranberries or even a fresh sprig of mint for a pop of color and a whisper of freshness.
But the fun doesn’t stop there! This recipe is incredibly versatile and lends itself beautifully to creative adaptations. If you’re looking to switch things up, consider varying the cake base itself. While I adore a classic white or yellow cake mix for its subtle sweetness that lets the cranberries shine, an almond-flavored cake mix could introduce a lovely nutty nuance, or even a spiced cake mix for an extra layer of warmth. For the cranberry poke filling, don’t feel limited to just cranberries. Imagine a luscious raspberry sauce or a rich cherry compote nestled within the cake for a different fruity twist. Even a spiced apple cider reduction, thickened slightly, could offer a wonderfully autumnal variation. And for the topping? Instead of the simple glaze, you could whip up a cream cheese frosting for a richer, tangier finish, or even a light lemon glaze to amplify the brightness. This adaptability means you can make this cake your signature dessert for more than just the holidays; think blueberries for summer gatherings, or a pumpkin puree filling for a unique autumn treat. The beauty of this recipe lies in its forgiving nature and its openness to your personal culinary flair. Don’t be afraid to experiment; that’s where some of the most wonderful kitchen discoveries are made!
So, I implore you, dear reader, don’t just read this recipe; make it! Take the leap and immerse yourself in the joyful process of baking this incredible dessert. I promise you, the aroma filling your kitchen as it bakes, the anticipation as you pour that glorious cranberry sauce into the poked holes, and the sheer delight on the faces of those who taste it, will be reward enough. This Christmas Cranberry Poke Cake is more than just a recipe; it’s an experience waiting to unfold in your home. It’s about creating those heartwarming holiday memories, sharing something truly delicious with your loved ones, and perhaps even starting a new tradition. Baking should be a source of joy, a creative outlet, and a way to connect, and I truly believe this cake embodies all of that.
Once you’ve had the pleasure of preparing and sharing this festive delight, I would absolutely love to hear about your experience. Did you stick to the recipe, or did you venture into some of the variations I suggested? Perhaps you came up with a brilliant twist of your own! Please, share your stories, your triumphs, and even your funny kitchen anecdotes. What did your family and friends think? Did it become an instant hit? Your feedback and shared moments are what truly bring these recipes to life for our wider community of home bakers. Take a photo, write a comment, or simply tell me your favorite part about making or eating this cake. Let’s build a tapestry of shared holiday joy around this wonderful creation. I am genuinely excited for you to discover the magic of this poke cake, and I can’t wait to hear all about your delicious journey. Happy baking, and may your holiday season be filled with sweet moments and even sweeter treats!
Christmas Cranberry Poke Cake
A gorgeously moist vanilla cake, artfully ‘poked’ to absorb a luscious, tangy cranberry infusion, then crowned with a light, creamy whipped topping. This festive dessert embodies vibrant flavors and delightful textures, making it a perfect celebration of seasonal cheer.
Ingredients
-
2 ½ cups all-purpose flour
-
2 tsp baking powder
-
½ tsp salt
-
1 cup (226g) unsalted butter, softened
-
2 cups (400g) granulated sugar
-
4 large eggs, room temperature
-
1 tbsp pure vanilla extract
-
1 ¼ cups (300ml) whole milk, room temperature
-
1 (12-ounce) can cranberry sauce
-
¾ cup granulated sugar (for syrup)
-
½ cup water
-
1 cup heavy cream, cold
-
1-2 tbsp granulated sugar (for whipping cream)
-
1 tsp pure vanilla extract (for whipping cream)
-
Fresh cranberries for garnish
-
Fresh rosemary or mint sprigs for garnish
-
Optional: Confectioners’ sugar for dusting
Instructions
-
Step 1
Preheat oven to 350°F (175°C). Grease and flour a 9×13-inch baking pan. In a medium bowl, whisk 2 ½ cups flour, 2 tsp baking powder, and ½ tsp salt. In a stand mixer, cream 1 cup softened butter and 2 cups granulated sugar until light and fluffy. Add 4 room temperature eggs one at a time, beating well after each. Stir in 1 tbsp vanilla extract. Gradually alternate adding the dry mixture and 1 ¼ cups milk to the wet ingredients, starting and ending with dry, mixing on low speed until just combined. Do not overmix. -
Step 2
Pour batter into the prepared pan. Bake for 30-35 minutes, or until a toothpick inserted into the center comes out clean. Remove from oven and cool completely in the pan on a wire rack. -
Step 3
In a medium saucepan, combine 1 can cranberry sauce, ¾ cup granulated sugar, and ½ cup water. Heat over medium heat, stirring, until well blended. Remove from heat and cool completely to room temperature. -
Step 4
Once cake is completely cool, poke holes all over the surface using a wooden spoon handle (approx. ½-¾ inch diameter, 1 inch apart, almost to the bottom). Slowly pour the cooled cranberry syrup evenly over the poked cake, allowing it to seep into all the holes. Cover and chill in the refrigerator for at least 2 hours, or ideally overnight, for full absorption. -
Step 5
In a very clean, cold bowl, whip 1 cup very cold heavy cream with 1-2 tbsp granulated sugar and 1 tsp vanilla extract on medium-high speed until stiff peaks form (3-5 minutes). -
Step 6
Once the cake is thoroughly chilled, evenly spread the whipped topping over the entire surface. Arrange fresh cranberries and small sprigs of fresh rosemary or mint on top for garnish. Optionally, dust lightly with confectioners’ sugar. Chill the decorated cake for at least another 30 minutes before slicing and serving. Store leftover cake in an airtight container in the refrigerator for up to 3-4 days.
Important Information
Nutrition Facts (Per Serving)
It is important to consider this information as approximate and not to use it as definitive health advice.
Allergy Information
Please check ingredients for potential allergens and consult a health professional if in doubt.


Leave a Comment