
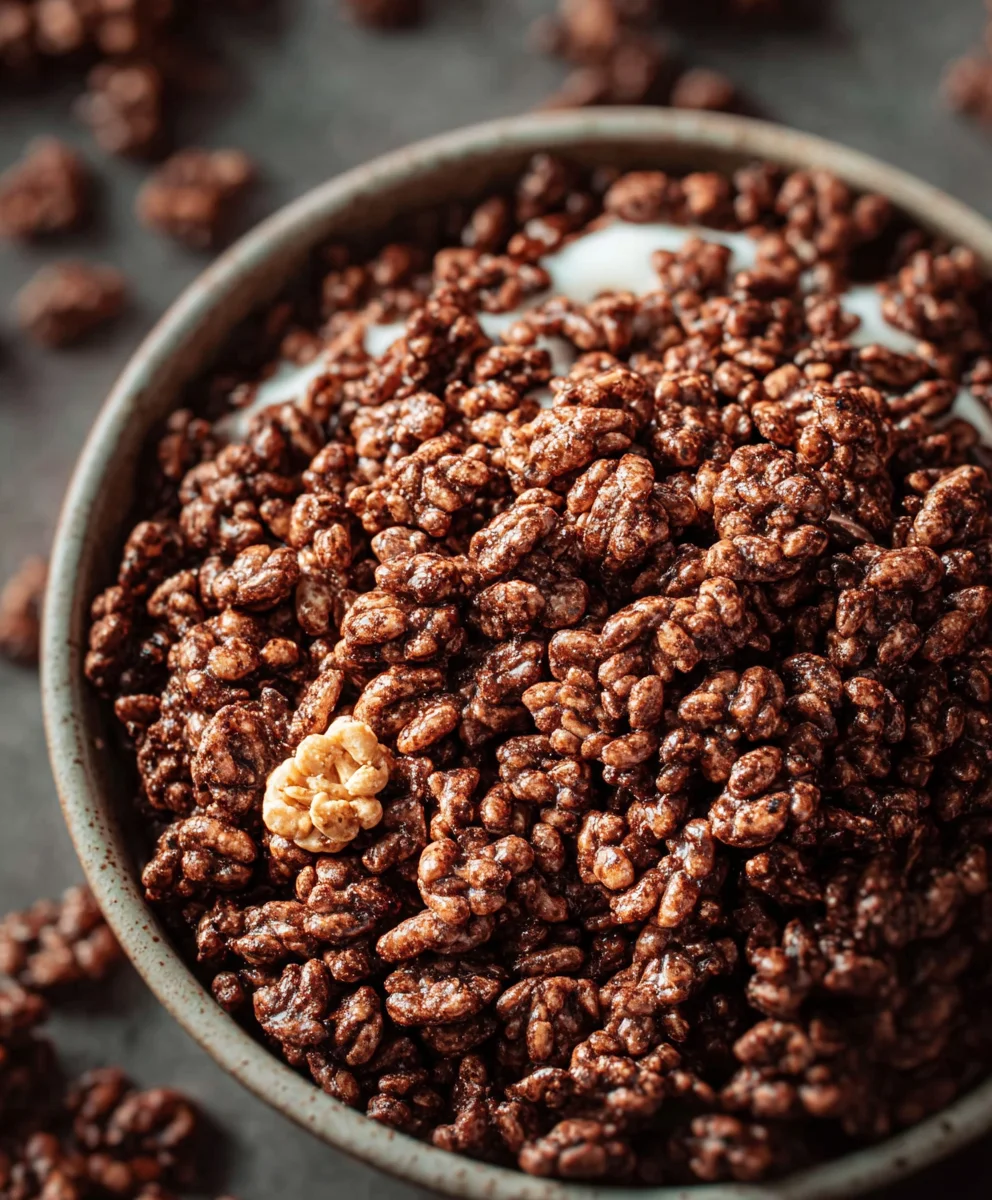
Healthy Crispy Chocolate Puffed Rice Cereal – does that sound like an impossible dream? For anyone who cherishes the nostalgic comfort of a bowl of chocolatey goodness but strives for mindful eating, I’m thrilled to share a recipe that truly delivers on both fronts. We all know the universal appeal of chocolate, especially when it’s paired with that satisfying crunch, and for generations, puffed rice has served as the perfect vehicle for such delights. From simple breakfast grains to an indulgent treat, the evolution of cereals has always sought to combine taste with convenience.
My culinary journey often revolves around transforming beloved classics into healthier versions without sacrificing flavor or texture. This isn’t just about making a ‘better for you’ option; it’s about crafting something genuinely delicious. This recipe taps into that childhood joy of a chocolate-flavored cereal, elevating it with wholesome ingredients and a superior, enduring crispness that conventional store-bought options can rarely match. You’ll discover a wonderful blend of rich cocoa, subtle sweetness, and that unmistakable snap in every bite.
Whether you’re looking for a quick, energizing breakfast, a guilt-free afternoon snack, or even a crunchy topping for your yogurt or ice cream, this homemade Healthy Crispy Chocolate Puffed Rice Cereal is incredibly versatile and utterly addictive. It’s a testament to the fact that healthy eating doesn’t mean compromising on deliciousness or the simple pleasures of life. Get ready to embark on a delightful culinary adventure that will make your mornings brighter and your snack times much more satisfying!

Ingredients:
- 6 cups (approximately 150g) puffed rice cereal (make sure it’s plain, unsweetened, and ideally made from whole grain brown rice for the best “Healthy Crispy Chocolate Puffed Rice Cereal” experience)
- 1/2 cup (120ml) pure maple syrup (or agave nectar/date syrup for a different healthy sweetener option)
- 1/4 cup (60ml) unsweetened cocoa powder (high quality for rich chocolate flavor)
- 1/4 cup (60ml) creamy nut butter (almond butter, cashew butter, or even sunflower seed butter for a nut-free option; ensure it’s natural with no added sugars or oils)
- 2 tablespoons (30ml) melted coconut oil (virgin or refined, depending on your preference for coconut flavor intensity)
- 1 teaspoon pure vanilla extract
- 1/4 teaspoon fine sea salt (crucial for enhancing the chocolate flavor)
- Optional add-ins:
- 1/4 cup chopped nuts (almonds, pecans, walnuts)
- 1/4 cup seeds (chia seeds, flax seeds, hemp seeds for extra nutrition)
- 2 tablespoons dark chocolate chips (dairy-free if preferred, at least 70% cocoa for a healthier option, added after baking)
- 1/4 teaspoon ground cinnamon (for a subtle warm spice note)
Gathering Your Tools and Preparing for Perfection
- Preheat your oven and prepare your baking sheet: Begin by preheating your oven to a gentle 250°F (120°C). This low temperature is absolutely key to achieving a truly “Healthy Crispy Chocolate Puffed Rice Cereal” without burning the delicate puffed rice or the chocolate coating. While the oven preheats, line a large rimmed baking sheet (approximately 13×18 inches or a similar size) with parchment paper. Using parchment paper is a non-negotiable step here; it prevents sticking and makes cleanup incredibly easy, ensuring your crispy cereal doesn’t adhere stubbornly to the pan. If you don’t have parchment paper, you can lightly grease the pan, but parchment is highly recommended for best results.
- Measure your dry ingredients: In a medium-sized mixing bowl, combine your unsweetened cocoa powder and fine sea salt. If you’re using the optional ground cinnamon, add it to this bowl as well. Give these dry ingredients a quick whisk with a fork or a small whisk to ensure they are thoroughly combined and there are no lumps of cocoa powder. This initial mixing prevents pockets of unmixed cocoa in your final chocolate binding mixture and ensures a consistent flavor throughout your “Healthy Crispy Chocolate Puffed Rice Cereal.”
- Measure your wet ingredients: In a separate, larger heat-safe mixing bowl (you’ll be adding the puffed rice to this one later), measure out your pure maple syrup, creamy nut butter, melted coconut oil, and pure vanilla extract. Ensure your coconut oil is fully melted but not boiling hot; it should be a pourable liquid. If your nut butter is very firm, you might want to gently warm it for 10-15 seconds in the microwave to make it more pliable and easier to mix into the other ingredients. This step ensures that all the wet components can emulsify smoothly, creating a uniform and irresistible chocolate binder.
Crafting the Rich Chocolate Binding Mixture
- Combine the wet ingredients gently: Pour the pre-measured wet ingredients (maple syrup, nut butter, melted coconut oil, vanilla extract) into the large mixing bowl. Using a spatula or a sturdy whisk, stir these ingredients together until they are completely smooth and homogenous. Take your time with this step, especially if your nut butter was a bit stiff; you want a uniform consistency with no streaks of individual ingredients. This forms the foundational sweetness and richness for our “Healthy Crispy Chocolate Puffed Rice Cereal.”
- Whisk in the dry ingredients for the chocolate paste: Now, add the previously combined cocoa powder and salt mixture to the wet ingredients in the large bowl. Continue whisking or stirring vigorously until all the dry ingredients are fully incorporated into the wet mixture. What you’re aiming for here is a thick, glossy, and intensely chocolatey paste. There should be no visible dry cocoa powder remaining. If the mixture seems too thick, resist the urge to add any liquid. It needs to be a robust binder to coat every piece of puffed rice effectively.
- Ensure a smooth and luxurious consistency: Once all ingredients are combined, take a moment to admire the rich, dark chocolate paste you’ve created. It should have a consistency akin to a thick brownie batter or a soft fudge. This is the magical glue that will transform simple puffed rice into an extraordinary “Healthy Crispy Chocolate Puffed Rice Cereal.” A perfectly smooth binding mixture is crucial for even coating, which in turn leads to uniform crispiness in the final product. Scrape down the sides of the bowl to ensure every last bit of this deliciousness is ready for the next step.
Transforming Puffed Rice into Healthy Crispy Chocolate Goodness
- Introduce the puffed rice to the bowl: Carefully add the entire 6 cups of puffed rice cereal to the bowl containing your luscious chocolate binding mixture. It will look like a very large volume compared to the chocolate, but trust the process! If you are including any optional chopped nuts or seeds (like chia, flax, or hemp seeds), now is the time to add them to the bowl with the puffed rice. This ensures they get coated along with the cereal, integrating perfectly into your “Healthy Crispy Chocolate Puffed Rice Cereal.”
- The delicate coating process: This is arguably the most crucial step for achieving that uniform, irresistible chocolate coating. Using a large spatula, a wooden spoon, or even your clean hands (which can sometimes be the most effective method for gentle but thorough mixing), begin to fold and stir the puffed rice into the chocolate mixture. The goal is to coat every single piece of puffed rice cereal evenly without crushing it. Puffed rice is quite delicate, so be gentle yet persistent. Continue to fold and toss until you no longer see any plain white puffed rice, and each piece is beautifully enrobed in the rich chocolate mixture. This can take a few minutes, so be patient. Even coating is the secret to maximum flavor and crunch in your “Healthy Crispy Chocolate Puffed Rice Cereal.”
- Spreading evenly on the baking sheet: Once all the puffed rice is uniformly coated in chocolate, transfer the entire mixture onto your prepared baking sheet lined with parchment paper. Use your spatula to spread the coated cereal out into a single, even layer. It’s important that the layer isn’t too thick, as this could hinder even drying and crisping. Aim for a relatively thin layer, ensuring that as much surface area as possible is exposed to the gentle oven heat. If your baking sheet isn’t large enough to accommodate a single, thin layer, consider using two smaller baking sheets. This optimal spread is vital for allowing each piece of “Healthy Crispy Chocolate Puffed Rice Cereal” to achieve its full potential crispiness.
The Gentle Baking Process for Ultimate Crispiness
- The initial bake for setting the chocolate: Carefully place the baking sheet into your preheated 250°F (120°C) oven. Allow the “Healthy Crispy Chocolate Puffed Rice Cereal” to bake for an initial 15 minutes. During this time, the low heat will gently start to dry out the chocolate coating, helping it to adhere more firmly to the puffed rice and beginning the crisping process. You won’t see much change in color, but the mixture will begin to feel slightly less sticky. This initial period is essential for setting the binding mixture.
- The crucial stirring phase for even crispiness: After the first 15 minutes, remove the baking sheet from the oven. Using your spatula or a wooden spoon, gently stir and toss the cereal mixture. Break up any larger clumps that may have formed and redistribute the cereal evenly across the baking sheet. This stirring step is incredibly important as it ensures that all sides of the puffed rice pieces are exposed to the heat, promoting uniform drying and crisping. Without this stir, you might end up with some soggy spots and some perfectly crispy ones. Return the baking sheet to the oven for another 15 minutes.
- Final bake and aroma check: Remove the baking sheet from the oven again after the second 15-minute interval. Give the cereal another gentle stir, once more breaking up any clusters and spreading it evenly. Return it to the oven for a final 10-15 minutes. The total baking time will be between 40-45 minutes. You’ll know your “Healthy Crispy Chocolate Puffed Rice Cereal” is done when it smells wonderfully toasty and chocolatey, and when the clusters feel dry and crisp to the touch (be careful, as they will be hot!). The goal is to achieve a beautiful crisp texture, not a burnt one, so keep a close eye on it during these final minutes. The cereal will continue to crisp up significantly as it cools.
Cooling, Breaking Apart, and Storing Your Delicious Healthy Crispy Chocolate Puffed Rice Cereal
- Cooling on the pan for ultimate crispness: Once your “Healthy Crispy Chocolate Puffed Rice Cereal” has finished baking and smells absolutely divine, remove the baking sheet from the oven. Do not skip the cooling process on the pan! It is paramount for achieving that signature, satisfying crunch. Allow the cereal to cool completely, undisturbed, on the baking sheet for at least 30 minutes to an hour, or even longer, until it reaches room temperature. As it cools, the chocolate coating will harden further, and the puffed rice will become incredibly crispy. If you added optional dark chocolate chips, now is the time to sprinkle them over the warm cereal and let them melt slightly, then gently spread or stir them in as the mixture cools.
- Breaking into delightful clusters: Once your “Healthy Crispy Chocolate Puffed Rice Cereal” is completely cool and firm, it will likely have formed into large sheets or chunks on the parchment paper. Now comes the fun part! Gently lift the parchment paper from the baking sheet and transfer it to a clean surface. Use your hands to break the cereal into smaller, bite-sized clusters or individual pieces, according to your preference. Some people love big, chunky clusters, while others prefer a more uniform, loose cereal. The beauty of homemade cereal is that you get to decide! This also helps aerate the cereal, ensuring every piece is ready for enjoyment.
- Proper storage for lasting freshness: To maintain the crispness and flavor of your “Healthy Crispy Chocolate Puffed Rice Cereal,” proper storage is essential. Transfer the completely cooled and broken-apart cereal into an airtight container. A glass jar with a tight-fitting lid or a sealed plastic container works perfectly. Store the container at room temperature in a cool, dry place, away from direct sunlight or humidity. When stored correctly, your homemade chocolate puffed rice cereal should remain wonderfully crispy and fresh for up to 1-2 weeks. Avoid refrigerating it, as the moisture in the fridge can soften the cereal and compromise its crunchy texture. Keeping it airtight is the single most important factor for long-term crispiness.
Enhancing Your Healthy Crispy Chocolate Puffed Rice Cereal: Optional Add-ins and Serving Suggestions
- Suggested additions during mixing for personalized flavor: While the basic “Healthy Crispy Chocolate Puffed Rice Cereal” is absolutely delicious on its own, you can elevate its flavor and nutritional profile with a few optional additions. As mentioned earlier, during Step 7 when you add the puffed rice, you can also stir in 1/4 cup of chopped nuts (like almonds, pecans, or walnuts) for extra protein and healthy fats, or 1/4 cup of various seeds (such as chia seeds, flax seeds, or hemp seeds) for a boost of omega-3s and fiber. A hint of ground cinnamon (1/4 teaspoon added with the cocoa powder in Step 2) can also introduce a warm, comforting note that complements the chocolate beautifully. These small tweaks can transform your cereal into an even more nutrient-dense and flavorful experience.
- Toppings for serving: Once your “Healthy Crispy Chocolate Puffed Rice Cereal” is ready to enjoy, consider a few simple toppings to enhance your breakfast or snack. A sprinkle of fresh berries (strawberries, blueberries, raspberries) adds a lovely tart contrast and a burst of antioxidants. A dollop of Greek yogurt or a splash of your favorite plant-based milk (almond, oat, soy) can turn it into a satisfying bowl of cereal. For an extra treat, a drizzle of extra maple syrup or a tiny sprinkle of flaky sea salt (if you like a sweet and salty combination) can take it over the top.
-
Creative ways to enjoy your cereal: Your “Healthy Crispy Chocolate Puffed Rice Cereal” isn’t just for breakfast! It’s incredibly versatile.
- As a simple snack: Grab a handful straight from the container for a quick energy boost.
- Yogurt parfait: Layer it with yogurt and fruit for a delicious and balanced parfait.
- Smoothie bowl topping: Sprinkle it over your morning smoothie bowl for added crunch and chocolatey goodness.
- Ice cream topping: It makes an unexpected yet delightful crunch on a scoop of vanilla or chocolate ice cream.
- Energy bars: You can gently press it into a pan with a bit more melted nut butter and maple syrup to form quick, no-bake energy bars.
- Portable treat: Pack it in a small bag for a convenient and satisfying snack on the go.
The possibilities are truly endless for incorporating this delightful and wholesome “Healthy Crispy Chocolate Puffed Rice Cereal” into your daily routine. Enjoy experimenting and finding your favorite ways to savor this homemade goodness!
Conclusion:
My journey to perfect this recipe has been incredibly rewarding, and I truly believe you’ll feel the same satisfaction once you try it. What makes this recipe an absolute game-changer in your kitchen, you ask? Well, it’s the magical combination of incredible flavor, satisfying texture, and surprising simplicity. We’re talking about a treat that requires minimal effort but delivers maximum impact, making it ideal for busy mornings or those sudden afternoon cravings. Forget about highly processed options laden with artificial ingredients; this is a pure, unadulterated delight that you can feel genuinely good about. Every single bite offers that delightful crunch, followed by a rich, comforting chocolate flavor that isn’t overly sweet, striking the perfect balance. It’s a testament to the fact that wholesome ingredients can create truly extraordinary results, transforming everyday puffed rice into something truly special. This isn’t just another breakfast idea; it’s a versatile foundation for so many wonderful culinary adventures, providing sustained energy without the dreaded sugar crash that often accompanies commercial cereals. It’s also incredibly adaptable to various dietary needs and preferences, proving that healthy eating absolutely does not mean sacrificing an ounce of taste or enjoyment. I’ve poured a lot of love into perfecting the crispiness and the deep, satisfying chocolatey depth, ensuring that it stands out from anything you might find on store shelves, offering a homemade quality that’s simply unmatched. It’s a truly guilt-free indulgence that your taste buds, and your body, will undoubtedly thank you for. This recipe embodies everything I believe in: deliciousness, health, and ease, all wrapped up in one fantastic, incredibly satisfying package.
Now, once you’ve made your batch of this incredible treat, the fun truly begins with how you choose to enjoy it! While it’s absolutely divine straight from the bowl with your favorite milk – whether dairy, almond, oat, or soy – don’t limit yourself there. Imagine sprinkling a generous handful over a creamy Greek yogurt with fresh berries and a drizzle of honey for an elevated breakfast parfait that’s both beautiful and nourishing. It also makes an exceptional topping for vibrant smoothie bowls, adding that much-needed textural contrast that takes your breakfast from good to gourmet. For a delightful and energizing afternoon snack, consider mixing it into a homemade trail mix alongside some roasted nuts, seeds, and perhaps a few dried cranberries or cherries for an extra burst of flavor and a natural energy boost that will carry you through any slump. And for those who love to get creative in the kitchen, consider incorporating it into a no-bake dessert! Think of it as a wonderfully crunchy base for a quick chocolate tart, or even gently folded into softened vanilla bean ice cream for an extra layer of decadence and delightful texture that will surprise and please your palate.
Unleash Your Inner Chef with These Variations:
Want to play with the flavor profile even further? A tiny pinch of flaky sea salt added to the chocolate mixture can truly elevate the chocolate notes, making them even more complex and intriguing. Or, for a hint of warmth and exotic spice, try a tiny dash of ground cinnamon or even a whisper of chili powder if you’re feeling particularly adventurous and enjoy a subtle kick. You could also experiment with different puffed grains – puffed quinoa or puffed millet could offer intriguing texture changes and additional nutritional benefits. For added nutrition and flavor, stir in some toasted shredded coconut, finely chopped dried apricots, or a handful of roasted chopped almonds or pecans right before the mixture sets. The possibilities are truly endless, and I wholeheartedly encourage you to make this recipe your own by exploring different combinations and personalizing it to your unique taste!
I genuinely hope that my enthusiasm for this recipe has shone through, and that you’re now feeling incredibly inspired and excited to give it a try in your own kitchen. I promise you, the reward of a fresh, homemade batch is well worth the minimal effort required. Preparing this Healthy Crispy Chocolate Puffed Rice Cereal is not just about making a meal or a snack; it’s about creating moments of delicious joy for yourself and your loved ones. It’s about rediscovering the pure pleasure of simple, wholesome ingredients and the satisfaction of knowing exactly what goes into your food. So, please, go ahead and gather your ingredients, follow the straightforward steps, and experience the magic for yourself. And once you do, I would absolutely love to hear about your experience! Did you stick to the original recipe, or did you venture into new variations and creative twists? Share your thoughts, your successes, and even your brilliant new ideas. Your feedback, tips, and photos truly make my day and inspire others in our wonderful community. Let’s spread the joy of delicious, healthy eating together, one perfectly crispy bite at a time!
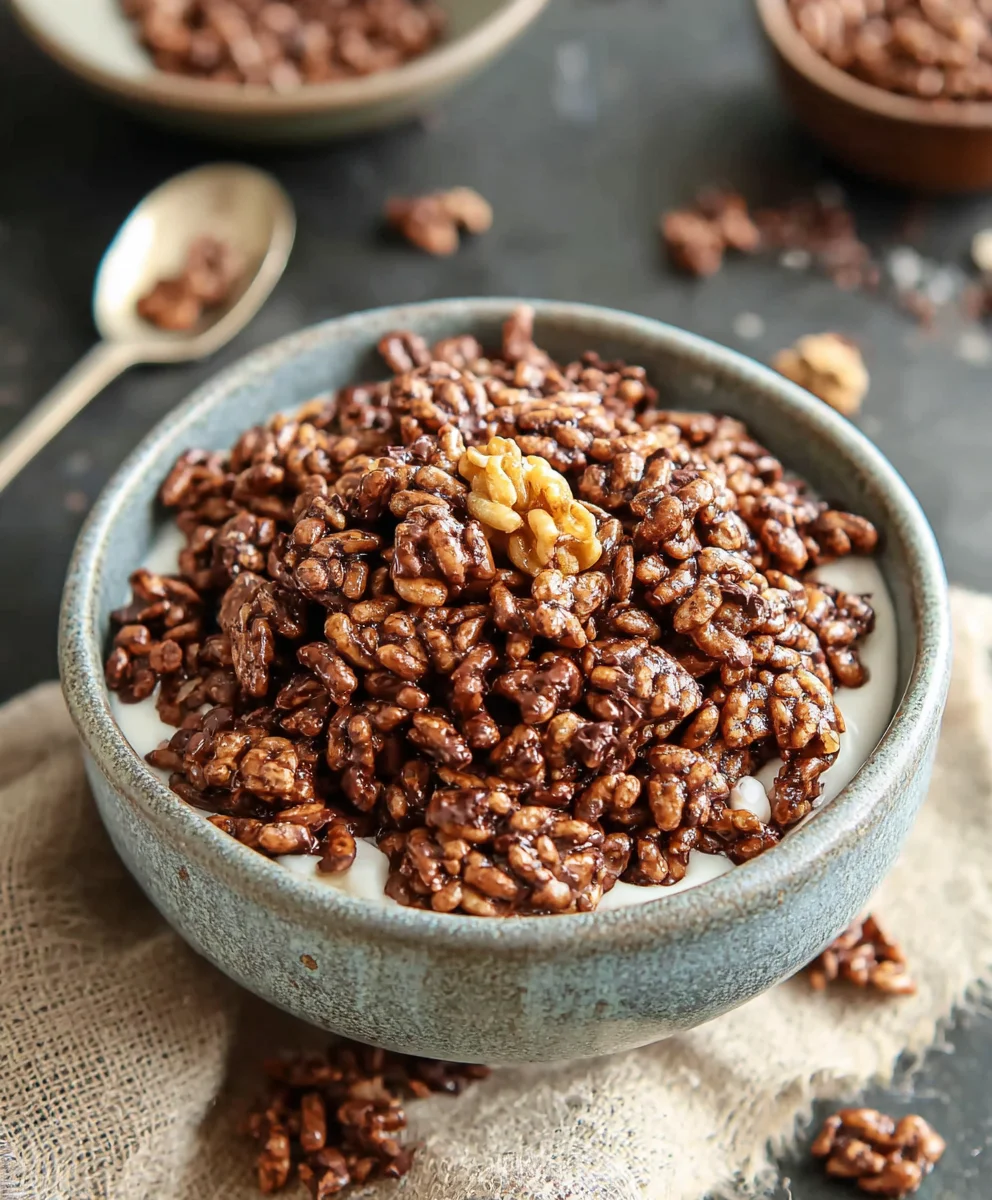
Healthy Crispy Chocolate Puffed Rice Cereal Treat
A wholesome and irresistibly delicious homemade chocolate puffed rice cereal. This recipe transforms a classic comfort food into a healthier version with superior crispness and rich flavor, perfect for breakfast, snacks, or dessert toppings.
Ingredients
-
6 cups (150g) puffed rice cereal (unsweetened, whole grain recommended)
-
1/2 cup (120ml) pure maple syrup
-
1/4 cup (60ml) unsweetened cocoa powder
-
1/4 cup (60ml) creamy nut butter (e.g., almond, cashew, sunflower seed)
-
2 tablespoons (30ml) melted coconut oil
-
1 teaspoon pure vanilla extract
-
1/4 teaspoon fine sea salt
-
Optional: 1/4 cup chopped nuts (e.g., almonds, pecans, walnuts)
-
Optional: 1/4 cup seeds (e.g., chia, flax, hemp)
-
Optional: 2 tablespoons dark chocolate chips (70%+ cocoa, for after baking)
-
Optional: 1/4 teaspoon ground cinnamon
Instructions
-
Step 1
Preheat oven to 250°F (120°C). Line a large baking sheet (13×18 inches) with parchment paper. -
Step 2
In a medium bowl, whisk cocoa powder, sea salt, and optional cinnamon until combined. -
Step 3
In a separate large, heat-safe bowl, combine maple syrup, nut butter, melted coconut oil, and vanilla extract. Stir until completely smooth. -
Step 4
Add the dry cocoa mixture to the wet ingredients. Whisk vigorously until a thick, glossy, chocolate paste forms with no dry cocoa powder remaining. -
Step 5
Gently add 6 cups of puffed rice cereal and any optional nuts/seeds to the chocolate paste. Fold and stir carefully until every piece of puffed rice is evenly coated without crushing it. -
Step 6
Transfer the coated cereal to the prepared baking sheet. Spread it into a single, even, thin layer to ensure uniform crisping. -
Step 7
Bake for an initial 15 minutes. Remove from oven, gently stir and toss the cereal, breaking up any clumps, and redistribute evenly. Return to oven for another 15 minutes. -
Step 8
Remove again, stir, and bake for a final 10-15 minutes (total baking time will be 40-45 minutes). The cereal should smell wonderfully toasty and feel dry and crisp to the touch. -
Step 9
Remove the baking sheet from the oven and allow the cereal to cool completely, undisturbed, on the pan for at least 30-60 minutes. If using optional dark chocolate chips, sprinkle them over the warm cereal to melt, then gently stir in as it cools. -
Step 10
Once completely cool and firm, break the cereal into smaller, bite-sized clusters or individual pieces according to your preference. -
Step 11
Store the completely cooled and broken-apart cereal in an airtight container at room temperature in a cool, dry place for up to 1-2 weeks to maintain crispness. Avoid refrigeration. -
Step 12
Enjoy your homemade cereal as a quick breakfast with milk, a guilt-free afternoon snack, or as a crunchy topping for yogurt, smoothie bowls, or ice cream.
Important Information
Nutrition Facts (Per Serving)
It is important to consider this information as approximate and not to use it as definitive health advice.
Allergy Information
Please check ingredients for potential allergens and consult a health professional if in doubt.


Leave a Comment