
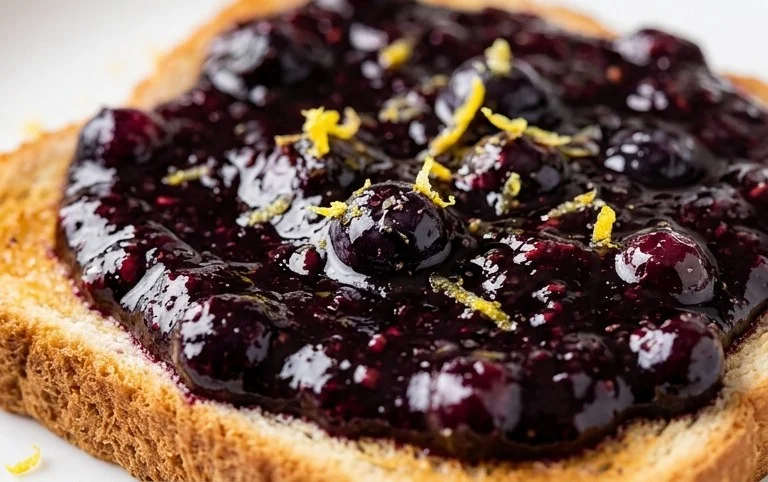
Easy Blueberry Lemon Jam is the vibrant burst of sunshine your pantry has been craving. There’s something inherently magical about transforming simple, fresh ingredients into a jewel-toned spread that tastes like summer captured in a jar. We all love jam, right? It’s that comforting, familiar sweetness that elevates toast, yogurt, or even a simple scoop of ice cream to a whole new level. But this isn’t just any jam; this Easy Blueberry Lemon Jam is special because it strikes that perfect balance. The plump sweetness of blueberries dances beautifully with the bright, zesty tang of lemon, creating a flavor profile that’s both refreshing and deeply satisfying. It’s incredibly simple to make, meaning even if you’re a begin extractner in the kitchen, you can whip up a batch of this glorious Easy Blueberry Lemon Jam with confidence. Get ready to impress yourself and everyone you share it with!

Easy Blueberry Lemon Jam
There’s something truly special about homemade jam. The vibrant color, the burst of fresh fruit flavor, the satisfying spread on toast or a scone – it’s a little jar of sunshine. And the best part? It doesn’t have to be complicated! This Easy Blueberry Lemon Jam is a testament to that. It requires just a few simple ingredients and a bit of patience, and the result is a beautifully balanced sweet and tart jam that will have you reaching for your toast knife again and again. The tartness of the lemon perfectly complements the sweet burst of blueberries, creating a flavor profile that’s both refreshing and comforting. It’s the perfect way to capture the essence of summer, even if you’re making it during the off-season.
This recipe is incredibly forgiving, making it ideal for begin extractners or anyone looking for a quick and rewarding kitchen project. We’re skipping the pectin for this recipe, allowing the natural pectin in the blueberries and the reduction process to work its magic. This results in a jam with a slightly looser set, which I personally love as it’s wonderfully spreadable and doesn’t have that overly firm, jelly-like texture some jams can have. Plus, the addition of maple syrup adds a subtle, nuanced sweetness that plays beautifully with the other flavors.
Let’s get started on this delightful creation. Gather your ingredients, put on your favorite apron, and prepare for a little kitchen magic!
Ingredients:
Cooking Instructions
Phase 1: Preparing the Fruit and Flavor Base
The first step to creating our delicious jam is to ensure our blueberries are ready to go. You’ll need 4 cups of fresh blueberries. Give them a good rinse under cool water to remove any dust or debris. As you’re washing them, take a moment to gently pick off any stray stems. While a few tiny bits might not be noticeable, removing the larger stems will ensure a smoother jam texture. For the lemon, you’ll want to zest it before juicing. This is because the zest contains the fragrant oils that contribute so much to the bright, citrusy aroma and flavor. Use a microplane or a fine grater to get just the yellow part of the peel, avoiding the bitter white pith underneath. Once zested, cut the lemon in half and squeeze out the juice. You’ll need the juice from one small lemon.
Phase 2: Simmering and Softening
Once your blueberries are washed and your lemon is zested and juiced, it’s time to bring everything together. In a medium to large heavy-bottomed saucepan, combine the prepared blueberries, the lemon zest, and the lemon juice. Add the 2 tablespoons of maple syrup. Why a heavy-bottomed saucepan? This is crucial for preventing scorching. A thicker base distributes heat more evenly, reducing the risk of your jam burning on the bottom. Now, place the saucepan over medium heat. Stir everything gently to combine. You’ll want to bring the mixture to a gentle simmer. As it heats up, you’ll notice the blueberries starting to soften and release their juices. This is exactly what we want! Keep stirring occasionally to ensure nothing sticks to the bottom.
Phase 3: Breaking Down the Berries and Thickening the Jam
This is where the magic truly happens. Once the mixture is simmering, reduce the heat to low. This low and slow approach is key to developing the rich flavor and allowing the jam to thicken naturally. Now, you have a couple of options for how you want your jam to be textured. If you prefer a smoother jam, you can use a potato masher or the back of a sturdy spoon to gently mash some of the blueberries as they cook. Don’t feel the need to mash them all; a mix of whole and lightly mashed berries is often the most appealing. Continue to simmer the jam, stirring frequently. You’ll notice the liquid starting to reduce and the mixture begin extractning to thicken. This process can take anywhere from 20 to 40 minutes, depending on the moisture content of your blueberries and the heat of your stove. The jam is ready when it has thickened enough to coat the back of a spoon. You can also test for doneness by placing a small plate in the freezer before you start cooking. After about 20 minutes of simmering, place a tiny dollop of jam onto the chilled plate. Let it sit for a minute, then gently push it with your finger. If the surface wrinkles slightly, your jam is ready. If it still looks very liquid, continue simmering and testing every 5-10 minutes.
Phase 4: Achieving the Perfect Consistency
As the jam continues to cook, you’ll notice a significant change in its consistency. The vibrant blue liquid will start to transform into a thicker, more syrupy consistency. This thickening happens as the natural pectin in the blueberries, along with the sugars from the fruit and maple syrup, combine and gel. Resist the urge to crank up the heat to speed things along; high heat can lead to scorching and a burnt flavor, which we definitely want to avoid. Maintaining a gentle simmer allows the flavors to meld beautifully and the jam to thicken gradually and evenly. Keep stirring frequently during this final stage. You’ll see the jam start to cling to the spoon more readily. The ‘wrinkle test’ described earlier is the most reliable way to determine if your jam has reached its desired consistency. Remember that the jam will thicken further as it cools, so it’s better to err on the side of slightly less thick when it’s hot.
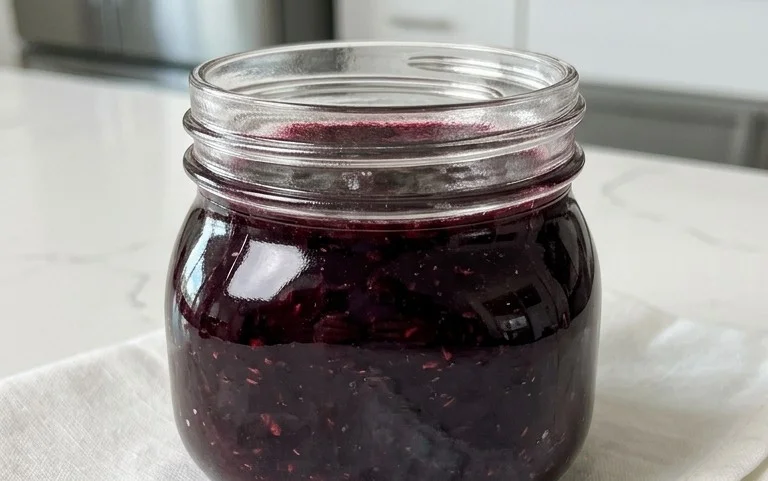
Phase 5: Cooling and Storing
Once your jam has reached the desired consistency, remove the saucepan from the heat. Carefully ladle the hot jam into clean jars or a heatproof container. Leave a small amount of headspace at the top of each jar. Allow the jam to cool completely at room temperature. As it cools, you’ll see it thicken further and take on that beautiful, glossy jam appearance. Once completely cool, cover the jars tightly. This jam can be stored in the refrigerator for up to two weeks. For longer storage, you can certainly explore proper canning methods, but for everyday enjoyment, refrigeration is perfectly adequate. Enjoy this delightful homemade treat on toast, scones, yogurt, or even as a glaze for your favorite baked goods!
Conclusion:
There you have it! A simple, delightful recipe for Easy Blueberry Lemon Jam that is truly a game-changer for any kitchen. This jam is fantastic because it perfectly balances the sweet burst of ripe blueberries with the bright, zesty kick of fresh lemon. It’s incredibly forgiving, making it perfect for begin extractners, and the process is so rewarding. Imagin extracte slathering this vibrant preserve on warm toast, dolloping it onto a fluffy scone, or swirling it into your morning yogurt! The possibilities are endless.
Don’t be afraid to get creative with this recipe! You can experiment by adding a pinch of lavender for a floral twist, a touch of gin extractger for warmth, or even swap out some of the blueberries for raspberries or blackberries. I truly encourage you to give this Easy Blueberry Lemon Jam a try. It’s a wonderful way to capture the essence of summer and enjoy delicious homemade goodness year-round.
Frequently Asked Questions:
Q: How long will this jam last?
A: When stored properly in sterilized jars in a cool, dark place, your Easy Blueberry Lemon Jam should stay fresh for up to a year. Once opened, refrigerate it and it’s best enjoyed within a few weeks.
Q: Can I use frozen blueberries for this recipe?
A: Absolutely! Frozen blueberries work wonderfully in this jam. You might notice it takes a little longer for them to break down, but the flavor and texture will be just as delicious. Just ensure they are fully thawed before you start.
Q: What if my jam doesn’t thicken?
A: If your jam is too thin after cooking, don’t worry! You can usually thicken it by bringin extractg it back to a rolling boil for a few more minutes. Alternatively, you can dissolve a teaspoon of pectin in a tablespoon of lemon juice and stir it in, then boil for another minute.
Easy Blueberry Lemon Jam
A simple and delicious homemade jam featuring sweet blueberries and bright lemon.
Ingredients
-
4 cups blueberries, washed and any stems picked off
-
zest from one small lemon
-
juice from one small lemon
-
2 tbsp maple syrup
-
1/2 cup granulated sugar
-
1 tbsp pectin
Instructions
-
Step 1
Combine blueberries, lemon zest, lemon juice, and maple syrup in a large saucepan. -
Step 2
Stir in the granulated sugar and pectin. -
Step 3
Bring the mixture to a rolling boil over high heat, stirring constantly. -
Step 4
Boil for 1 minute, stirring continuously. -
Step 5
Remove from heat. Skim off any foam. -
Step 6
Ladle the hot jam into clean jars, leaving 1/4 inch headspace. Seal and process if desired, or store in the refrigerator.
Important Information
Nutrition Facts (Per Serving)
It is important to consider this information as approximate and not to use it as definitive health advice.
Allergy Information
Please check ingredients for potential allergens and consult a health professional if in doubt.


Leave a Comment