
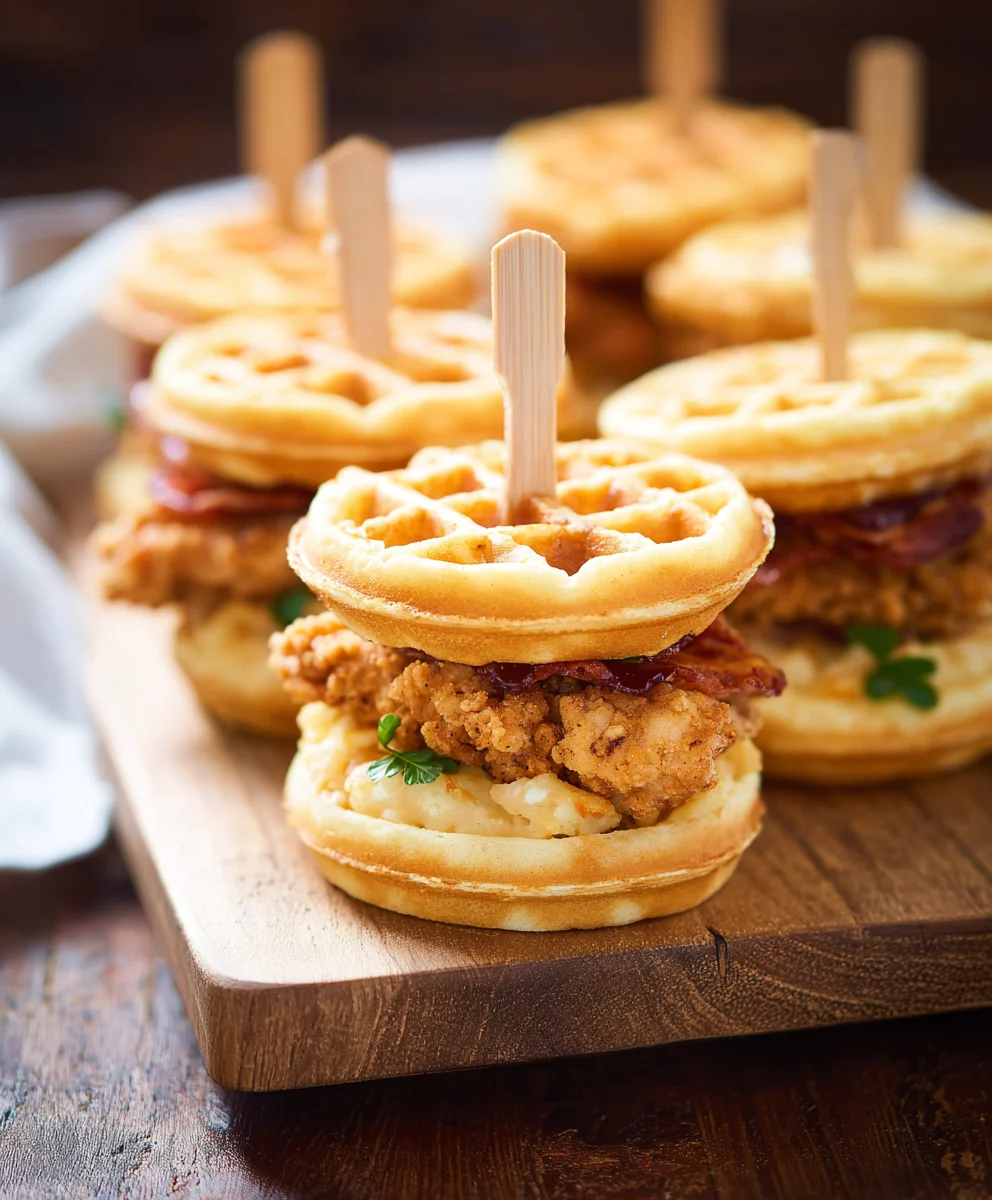
Game Day Eats Chicken Waffle Sliders are the ultimate touchdown in any culinary competition, a guaranteed crowd-pleaser that brings smiles and satisfied sighs to every gathering. Forget the same old chips and dip; these mini masterpieces are a symphony of sweet and savory, a playful yet sophisticated twist on classic comfort food that transforms ordinary moments into extraordinary celebrations. What is it about this delightful combination that captures our hearts and taste buds? Perhaps it’s the irresistible contrast of the fluffy, slightly sweet waffle embracing tender, crispy fried chicken, all brought together with a drizzle of something magical. These aren’t just appetizers; they’re edible works of art, perfectly portioned for easy snacking while you cheer on your favorite team or simply enjoy good company. Get ready to elevate your game with these unforgettable Game Day Eats Chicken Waffle Sliders.

Ingredients:
- 1 pound boneless, skinless chicken thighs
- 1 cup all-purpose flour
- 1 teaspoon smoked paprika
- 1/2 teaspoon garlic powder
- 1/2 teaspoon onion powder
- 1/4 teaspoon cayenne pepper (optional, for a little heat)
- Salt, to taste
- Black pepper, to taste
- 2 large eggs
- 1 tablespoon milk
- Vegetable oil, for frying
- 12 mini waffles (store-bought or homemade)
- 1/4 cup maple syrup, plus more for drizzling
- 2 tablespoons Dijon mustard
- 1/4 cup mayonnaise
- 1 tablespoon chopped fresh chives, for garnish
Preparing the Chicken for Frying
Step 1: Marinate and Prepare the Chicken
The first step to creating these incredible Game Day Eats Chicken Waffle Sliders is to get our chicken ready. We want it to be tender and flavorful before it even hits the fryer. Begin extract by trimming any excess fat from your boneless, skinless chicken thighs. Then, cut each thigh into bite-sized pieces, roughly 1 to 1.5 inches square. This size is perfect for sliders, ensuring a good bite without being overwhelming. Place these chicken pieces in a medium bowl. In a separate small bowl, whisk together the two large eggs with the tablespoon of milk. This egg wash will help our seasoned flour adhere beautifully to the chicken, creating a wonderfully crispy coating. Pour this egg wash over the chicken pieces and toss to coat them evenly. Let the chicken sit in the egg wash for about 10-15 minutes at room temperature. This brief soak allows the chicken to absorb some moisture, contributing to a juicier end product.
Coating and Frying the Chicken
Step 2: Create the Crispy Coating
Now for the magic that makes our chicken irresistibly crunchy! In a shallow dish or a large resealable plastic bag, combine the 1 cup of all-purpose flour with the smoked paprika, garlic powder, onion powder, and cayenne pepper (if you’re using it for a touch of heat). Don’t forget to season generously with salt and black pepper at this stage. Whisk or shake the bag to thoroughly combine all the dry ingredients. This ensures that every piece of chicken gets a uniform and flavorful coating. Working in batches to avoid overcrowding the dish, take a piece of chicken from the egg wash, letting any excess drip off. Dredge it thoroughly in the seasoned flour mixture, pressing gently to ensure the flour sticks well. Make sure each piece is completely coated. You can even double-dip for an extra-crispy crust: dip the floured chicken back into the egg wash, then dredge it in the flour mixture again. Place the coated chicken pieces on a wire rack set over a baking sheet to allow them to rest for a few minutes. This resting period helps the coating adhere better and prevents it from falling off during frying.
Step 3: Fry the Chicken to Golden Perfection
It’s time to bring the heat and get that chicken crispy! Pour enough vegetable oil into a large, heavy-bottomed skillet or Dutch oven to reach a depth of about 1 to 1.5 inches. Heat the oil over medium-high heat until it reaches approximately 350°F (175°C). You can test the oil by dropping a tiny bit of the flour mixture into it; it should sizzle immediately. Carefully, using tongs or a spider strainer, add the coated chicken pieces to the hot oil in batches. Do not overcrowd the pan, as this will lower the oil temperature and result in soggy chicken. Fry the chicken for about 4-6 minutes per batch, turning occasionally, until it’s golden brown, cooked through, and has a wonderfully crispy exterior. The internal temperature of the chicken should reach 165°F (74°C). Once cooked, remove the chicken from the oil and place it on a clean wire rack set over a baking sheet to drain any excess oil. This step is crucial for maintaining crispiness. Sprinkle a little extra salt over the hot chicken immediately after frying for maximum flavor.
Assembling the Sliders
Step 4: Prepare the Maple-Dijon Glaze and Waffles
While the chicken is draining and cooling slightly, let’s get our other components ready. In a small bowl, whisk together the 1/4 cup of maple syrup with the 2 tablespoons of Dijon mustard. This creates a sweet and tangy glaze that perfectly complements the savory fried chicken and sweet waffles. This glaze is incredibly simple but packed with flavor, offering a delightful balance. Next, if you’re using frozen mini waffles, toast them according to package directions until they are warm and lightly crisp. If you’re making them from scratch, ensure they are cooled enough to handle. You’ll want to slice each mini waffle in half horizontally to create a top and bottom for your sliders. Aim for a clean cut so they sit well together. This will give you 24 waffle halves to work with, perfect for our sliders.
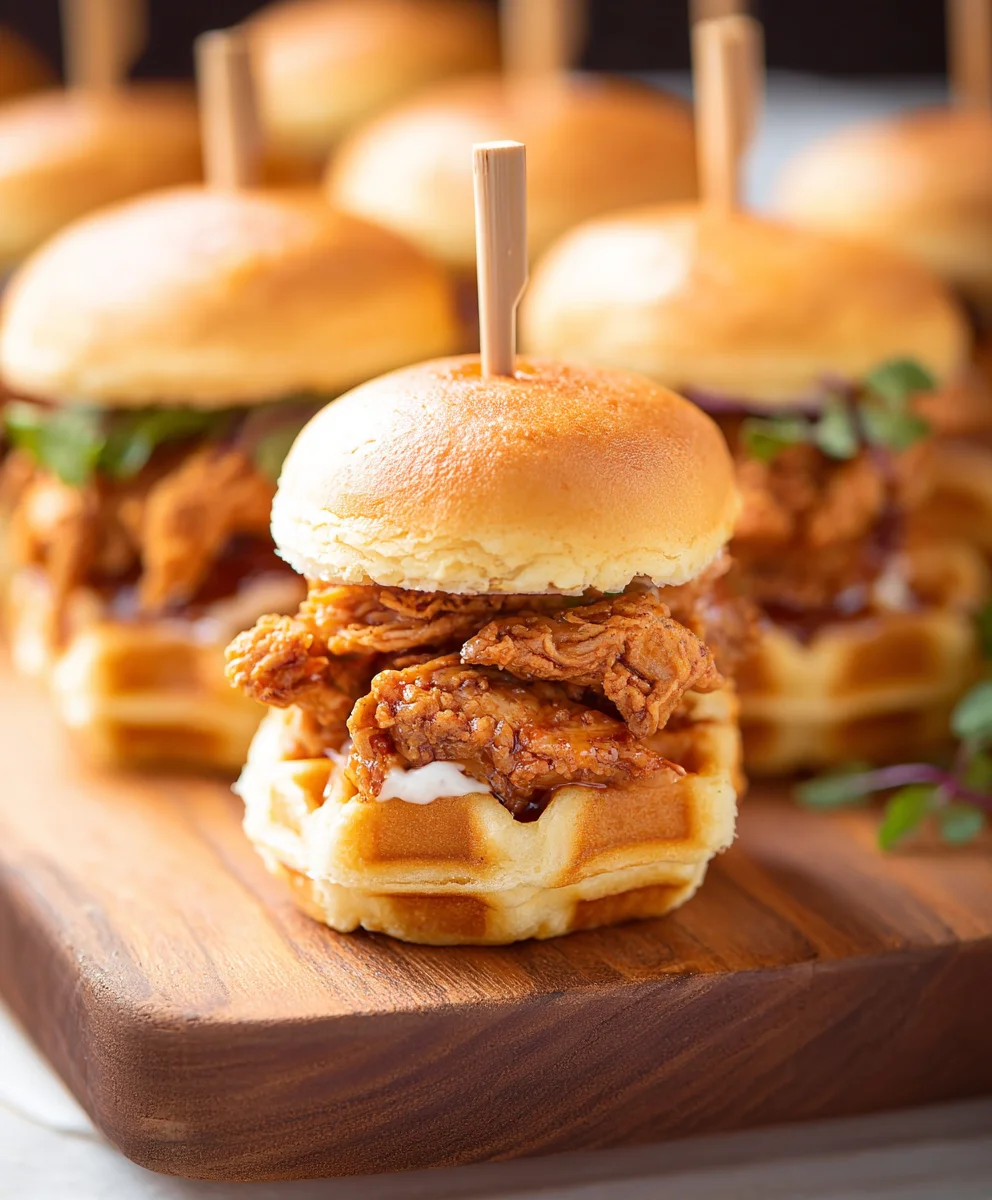
Step 5: Assemble Your Game Day Eats Chicken Waffle Sliders
The final frontigin extract bringing it all together! Take your toasted waffle halves and arrange them on a platter. Spread a thin layer of mayonnaise on the bottom half of each waffle. This adds a creamy element and a touch of richness that bridges the flavors beautifully. Place a piece or two of your crispy fried chicken on top of the mayonnaise. Don’t be shy; load them up for a satisfying bite. Drizzle a generous amount of the maple-Dijon glaze over the chicken. This is where that sweet and savory magic happens. Finally, place the top half of the waffle onto each slider. For an extra touch of elegance and freshness, sprinkle a little chopped fresh chives over the top of each slider. You can also add a tiny extra drizzle of maple syrup for those who love a bit more sweetness. Serve these Game Day Eats Chicken Waffle Sliders immediately while they are still warm and delightfully crispy for the ultimate game day experience.
Conclusion:
And there you have it – your ultimate guide to creating irresistible Game Day Eats Chicken Waffle Sliders! We’ve walked through each step, from preparing the crispy chicken to assembling these flavor-packed delights. These sliders are more than just a game day snack; they’re a crowd-pleaser perfect for any gathering, from casual get-togethers to more formal parties. The sweet and savory combination is guaranteed to be a hit, leaving everyone asking for seconds. Don’t be afraid to get creative and make these sliders your own!
When it comes to serving, these Game Day Eats Chicken Waffle Sliders are fantastic on their own, but they also pair wonderfully with a side of coleslaw, sweet potato fries, or a fresh green salad for a more complete meal. For variations, consider adding a drizzle of sriracha mayo for a spicy kick, a sprinkle of chives for added freshness, or even a thin slice of sharp cheddar cheese melted over the chicken. The possibilities are endless, and the joy of sharing these homemade treats is even greater. So go ahead, gather your ingredients, and get ready to score some culinary touchdowns with your Game Day Eats Chicken Waffle Sliders!
Frequently Asked Questions:
Q1: Can I make the chicken waffle sliders ahead of time?
While it’s best to serve the chicken waffle sliders fresh for optimal crispiness, you can prepare some components in advance. The fried chicken can be cooked and kept warm in a low oven (around 200°F or 93°C) for up to an hour. The waffle batter can be made and refrigerated for a few hours. However, it’s recommended to assemble the sliders just before serving to prevent the waffles from becoming soggy.
Q2: What kind of chicken is best for these sliders?
Boneless, skinless chicken thighs are generally preferred for these sliders because they remain incredibly juicy and tender, even after frying. They also tend to be more forgiving if overcooked slightly. However, you can certainly use chicken breast if you prefer, just be mindful of the cooking time to avoid drying it out.
Q3: How can I make these chicken waffle sliders spicier?
There are several ways to add some heat! You can incorporate cayenne pepper or chili powder into your chicken dredge. For a sauce variation, try a spicy honey butter glaze by adding hot sauce or sriracha to melted butter and honey. A drizzle of chipotle aioli or a spicy ranch dressing on top would also do the trick!
Game Day Chicken Waffle Sliders
Easy and delicious chicken waffle sliders perfect for game day.
Ingredients
-
1 pound boneless, skinless chicken thighs
-
1 cup all-purpose flour
-
1 teaspoon smoked paprika
-
1/2 teaspoon garlic powder
-
1/2 teaspoon onion powder
-
1/4 teaspoon cayenne pepper
-
Salt, to taste
-
Black pepper, to taste
-
2 large eggs
-
1 tablespoon milk
-
Vegetable oil, for frying
-
12 mini waffles
-
1/4 cup maple syrup
-
2 tablespoons Dijon mustard
-
1/4 cup mayonnaise
-
1 tablespoon chopped fresh chives
Instructions
-
Step 1
Trim excess fat from chicken thighs and cut into bite-sized pieces. Whisk eggs and milk in a separate bowl, then pour over chicken and toss to coat. Let sit for 10-15 minutes. -
Step 2
In a shallow dish, combine flour, smoked paprika, garlic powder, onion powder, cayenne pepper (if using), salt, and black pepper. Dredge chicken pieces in the seasoned flour, pressing to coat. Double-dip for extra crispiness if desired. Let rest on a wire rack. -
Step 3
Heat vegetable oil in a skillet to 350°F (175°C). Fry chicken in batches for 4-6 minutes, until golden brown and cooked through. Drain on a wire rack and sprinkle with salt. -
Step 4
Whisk together maple syrup and Dijon mustard to create the glaze. Toast mini waffles and slice each in half horizontally. -
Step 5
Spread mayonnaise on the bottom waffle halves. Top with fried chicken, drizzle with maple-Dijon glaze, and place the top waffle half. Garnish with chives.
Important Information
Nutrition Facts (Per Serving)
It is important to consider this information as approximate and not to use it as definitive health advice.
Allergy Information
Please check ingredients for potential allergens and consult a health professional if in doubt.

Leave a Comment