
Deviled Eggs are more than just a simple appetizer; they are a timeless classic that brings a smile to every face at gatherings. I’ve always found something incredibly comforting about the creamy, savory filling nestled perfectly within a firm egg white. This beloved dish boasts a fascinating history, tracing its origins back to ancient Rome, where seasoned boiled eggs were a popular starter. The term “deviled” itself began to appear in print in the 18th century, referring to highly seasoned or spicy food, perfectly capturing the zesty kick we often associate with this delightful treat today.
People absolutely adore Deviled Eggs for their irresistible taste and surprisingly simple preparation. Whether it’s the smooth, rich yolk mixture or the perfect balance of tang and creaminess, these iconic bites disappear from platters faster than anything else.
They are truly a testament to how humble ingredients can create something extraordinary.
I am so excited to share my go-to recipe for the ultimate batch, guaranteed to be a hit at your next potluck or family meal.

Ingredients:
- 12 Large Eggs: For the very best Deviled Eggs, I always opt for large eggs. Freshness can sometimes make peeling a bit trickier, but the flavor is unparalleled. If you have access to farm-fresh eggs, they’ll make your Deviled Eggs truly sing!
- ½ cup Mayonnaise: I find that a good quality, full-fat mayonnaise is absolutely essential for the creamy, luscious texture we all crave in Deviled Eggs. My personal preference leans towards brands that are rich and slightly tangy, as they provide a perfect foundation for the other flavors to build upon. If you’re feeling adventurous, you could even try making your own homemade mayonnaise for an extra special touch – it truly elevates the final dish!
- 1 tablespoon Dijon Mustard: Dijon mustard adds a sophisticated, tangy, and slightly spicy kick that I adore in my Deviled Eggs. It provides a depth of flavor that yellow mustard simply can’t match. However, if you prefer a classic, milder taste, feel free to substitute with good old yellow mustard. Some folks even love a touch of stone-ground mustard for a bit of texture!
- 1 teaspoon White Vinegar or Apple Cider Vinegar: This might seem like a small amount, but it makes a significant difference. A touch of vinegar brightens the entire filling, cutting through the richness of the mayonnaise and adding a subtle tang that really makes the flavors pop. It’s my secret ingredient for truly outstanding Deviled Eggs.
- ¼ teaspoon Salt: I always recommend starting with a small amount of salt, like fine sea salt or kosher salt, and then adjusting to taste. The right amount of salt is crucial for enhancing all the other ingredients in your Deviled Eggs.
- ⅛ teaspoon Black Pepper: Freshly ground black pepper is non-negotiable for me. The aroma and subtle bite it adds are far superior to pre-ground pepper. It provides a gentle warmth that complements the creamy filling beautifully.
-
Optional Garnishes: This is where you can truly make your Deviled Eggs your own!
- Smoked Paprika: A classic dusting of smoked paprika adds a lovely color and a subtle smoky undertone.
- Fresh Chives or Dill: Finely chopped fresh herbs bring a wonderful freshness and visual appeal.
- Crumbled Cooked Bacon: For a decadent, savory crunch.
- Hot Sauce: A few drops for those who like a little heat in their Deviled Eggs.
- Capers: For a briny, tangy burst of flavor.
- Relish: Sweet or dill relish, finely minced, can add a classic twist to your Deviled Eggs.
Preparing the Hard-Boiled Eggs: The Foundation of Perfect Deviled Eggs
The success of your Deviled Eggs hinges almost entirely on perfectly cooked and easily peelable hard-boiled eggs. Trust me, I’ve had my share of frustrating peeling experiences! My preferred method ensures consistent results every time, giving you beautiful, smooth egg whites for your filling.
- Gently Place Eggs in a Pot: First, I carefully place my 12 large eggs in a single layer at the bottom of a large saucepan or pot. It’s important to make sure they aren’t crowded, as this can lead to uneven cooking. I like to use a pot large enough so that when covered with water, there’s about an inch of space above the eggs.
- Cover with Cold Water: Next, I fill the pot with cold tap water, ensuring the eggs are submerged by at least an inch. Starting with cold water is key, as it allows the eggs to heat up gradually, preventing them from cracking due to sudden temperature changes. This gradual heating also helps to ensure a tender, rather than rubbery, egg white.
- Bring to a Rolling Boil: I then place the pot on my stovetop over high heat and bring the water to a rapid, rolling boil. As soon as I see those big, enthusiastic bubbles, I know we’re on the right track.
- Remove from Heat and Cover: The moment the water reaches a full boil, I immediately remove the pot from the heat. This step is crucial for achieving that perfect creamy yolk without any green ring (a sign of overcooking!). I cover the pot tightly with a lid – this traps the heat and allows the residual warmth to continue cooking the eggs gently.
- Let Sit for 12 Minutes: Now, I set a timer for precisely 12 minutes. For large eggs, I’ve found that 12 minutes yields a perfectly set yolk and tender white, ideal for Deviled Eggs. If you’re using extra-large eggs, you might add an extra minute, or if using medium eggs, reduce by a minute. Consistency is key here! During this time, I try not to peek, letting the magic happen undisturbed.
- Prepare an Ice Bath: While the eggs are “cooking” in the hot water, I prepare a large bowl filled with ice water. This ice bath is perhaps the most critical step for easy peeling. It halts the cooking process immediately and causes the egg whites to contract, separating them from the shell membrane. This is what helps prevent those frustrating bits of egg white from sticking to the shell when you peel them for your Deviled Eggs.
- Transfer Eggs to Ice Bath: As soon as the 12-minute timer goes off, I carefully transfer the eggs from the hot water bath directly into the ice bath using a slotted spoon. It’s important to move them quickly to stop the cooking process promptly. I let them sit in the ice bath for at least 10-15 minutes, or until they are completely cooled. Do not skip this cooling step! It’s the secret to those beautifully smooth eggs you need for stunning Deviled Eggs.
- Peel the Eggs: Once the eggs are fully chilled, I gently crack each egg on a hard surface, like my countertop, and then roll it between my palms to further loosen the shell. I usually start peeling under cold running water, as this helps to wash away any small shell fragments and makes the process even smoother. I peel them carefully to ensure the egg whites remain intact and pristine – remember, these will be the vessels for our delicious Deviled Egg filling!
- Rinse and Dry: After peeling, I give each egg a quick rinse to remove any stray shell pieces and then pat them dry with a paper towel. Set these beautiful, naked eggs aside, ready for their transformation into delightful Deviled Eggs.
Crafting the Creamy Deviled Egg Filling: Flavor and Texture
This is where the magic truly begins – transforming simple yolks into an irresistibly creamy and flavorful filling. The balance of ingredients here is crucial for the quintessential Deviled Egg taste.
- Halve the Eggs: I carefully slice each peeled hard-boiled egg in half lengthwise, from top to bottom. I try to make a clean cut right down the middle to ensure two even halves. This not only looks aesthetically pleasing but also creates the perfect cavity for our generous filling.
- Scoop Out the Yolks: Using a small spoon, I gently scoop out all the vibrant yellow yolks from the egg white halves. I place them into a medium-sized mixing bowl. I make sure to scrape the whites clean without tearing them, as these will be our attractive “boats” for the Deviled Egg mixture. I line up the empty egg white halves on a platter or a clean cutting board, ready for filling.
- Mash the Yolks: With a fork, I thoroughly mash the egg yolks until they are completely smooth and crumble-free. I take my time with this step, ensuring there are no lumps. A smooth yolk base is essential for a wonderfully creamy Deviled Egg filling. If you prefer a slightly rustic texture, you can leave a few tiny bits, but for classic Deviled Eggs, smooth is the way to go.
- Add the Wet Ingredients: Now, it’s time to introduce the stars of the filling! I add the ½ cup of mayonnaise, 1 tablespoon of Dijon mustard, and 1 teaspoon of white or apple cider vinegar to the mashed yolks. I always make sure to get all the measurement just right, as each ingredient plays a critical role in the final flavor profile of our Deviled Eggs.
- Season the Filling: Next, I sprinkle in ¼ teaspoon of salt and ⅛ teaspoon of freshly ground black pepper. These are starting points, remember.
- Mix Thoroughly: Using the same fork or a rubber spatula, I mix all the ingredients together until they are completely combined and the mixture is smooth and creamy. I really get in there, making sure the mayonnaise, mustard, and vinegar are evenly distributed throughout the mashed yolks. I look for a consistency that is spreadable but not too runny, and firm enough to hold its shape when piped or spooned. If it seems a little too stiff, I might add another half-teaspoon of mayonnaise; if it’s too loose, a tiny pinch more salt can sometimes help, or if you have some, a touch of a very finely grated hard cheese like Parmesan can thicken it slightly while adding flavor.
- Taste and Adjust: This is arguably the most important step for truly customized Deviled Eggs! I always take a small taste of the filling. Does it need more salt? A little more pepper for a kick? Perhaps a tiny extra dab of mustard for more tang, or another splash of vinegar to brighten it up? I adjust the seasonings incrementally until the flavor is absolutely perfect for my palate. Everyone’s taste buds are different, and this is your chance to make these Deviled Eggs uniquely yours! A well-seasoned filling is the hallmark of truly exceptional Deviled Eggs.
Assembling and Garnishing Your Deviled Eggs: The Final Flourish
With our beautiful egg whites and perfectly seasoned filling, it’s time to bring our Deviled Eggs to life! This phase focuses on presentation and adding those final touches that make them irresistible.
-
Choose Your Filling Method: You have a couple of options here, depending on how fancy you want your Deviled Eggs to look.
- Spoon Method (Classic and Easy): For a rustic and straightforward approach, I simply use a small spoon to carefully mound the creamy Deviled Egg filling back into the hollows of each egg white half. I try to create a nice, generous dome. This method is quick, easy, and always delicious.
- Piping Bag Method (Elegant Presentation): For a more elegant and professional look, I transfer the filling into a piping bag fitted with a star tip (or any decorative tip you prefer). Then, I pipe the filling beautifully into each egg white cavity, creating lovely swirls or rosettes. This method instantly elevates the visual appeal of your Deviled Eggs, making them perfect for parties or special gatherings. If you don’t have a piping bag, a sturdy Ziploc bag with one corner snipped off works wonderfully as a makeshift piping tool!
I usually recommend piping when serving Deviled Eggs for guests, as it really makes them look special.
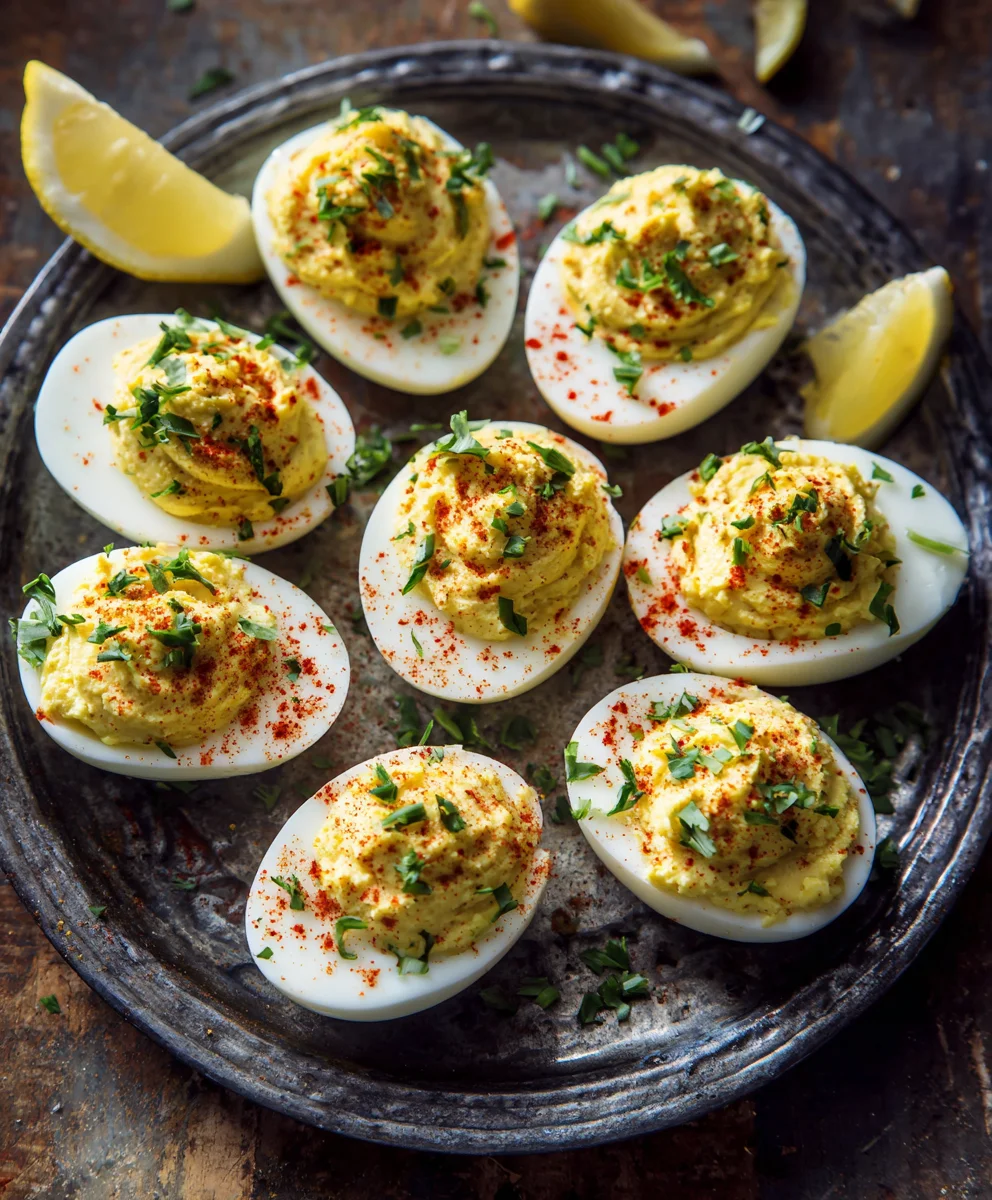
- Arrange on a Platter: As I fill them, I carefully arrange the finished Deviled Eggs on a serving platter. I like to use a platter that’s just the right size, so they look abundant and inviting without being overcrowded. A decorative serving platter or even a dedicated Deviled Egg plate can make all the difference in presentation.
-
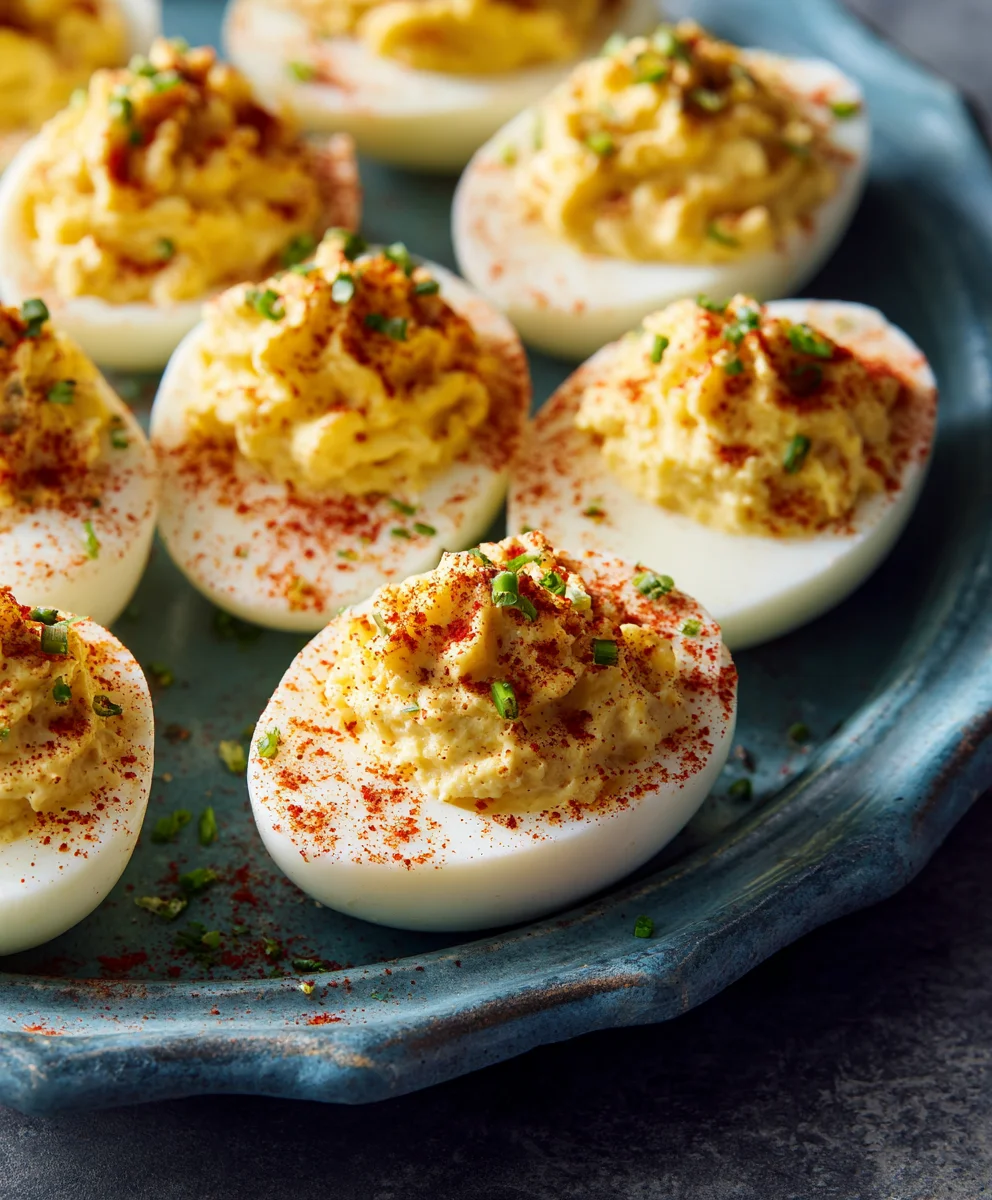
Garnish Your Deviled Eggs: Now for the fun part – the garnishes! This is where you can add that final touch of flavor and visual appeal. My absolute go-to is a light dusting of smoked paprika over each filled egg. It adds a beautiful warm color and a subtle smoky note that complements the creamy filling perfectly.
- Paprika: As mentioned, smoked paprika is a classic and my top recommendation. A gentle sprinkle is all you need.
- Fresh Herbs: For a burst of freshness, I love to finely chop some fresh chives, dill, or even parsley and sprinkle a tiny pinch over each Deviled Egg. The green contrast against the yellow filling and white egg is simply stunning.
- Bacon Bits: If you’re feeling indulgent, a sprinkle of crispy, crumbled bacon bits adds an incredible savory crunch that takes your Deviled Eggs to the next level.
- Other Creative Garnishes: Don’t be afraid to experiment! A tiny sliver of a cornichon, a small caper, a very thin ring of pickled jalapeño, or even a microgreen can add both flavor and visual interest.
Remember, the garnish is the crown jewel of your Deviled Eggs!
- Chill Before Serving: Once all your Deviled Eggs are filled and garnished, I highly recommend covering the platter loosely with plastic wrap and chilling them in the refrigerator for at least 30 minutes, or up to 2 hours. This chilling time allows the flavors to meld beautifully and ensures the filling is firm and refreshing. Deviled Eggs are always best when served chilled.
Tips for Success and Variations for Your Deviled Eggs: Elevating the Classic
To ensure your Deviled Eggs are always a crowd-pleaser and to inspire you to explore new flavors, here are some of my best tips and creative variations.
- Make-Ahead Magic: Deviled Eggs are fantastic for parties and meal prep because you can do much of the work in advance. I often boil and peel the eggs a day or two before. I store the peeled whole eggs in an airtight container in the fridge. For the filling, you can mix it completely a day ahead and store it in an airtight container or a piping bag (with the tip snipped just before use) in the refrigerator. I then assemble and garnish the Deviled Eggs just a few hours before serving to ensure ultimate freshness and presentation. This significantly reduces stress on the day of your event!
- Storage: Leftover Deviled Eggs, if there are any (which is rare in my house!), should be stored in an airtight container in the refrigerator for up to 2-3 days. While they are still delicious, I find that Deviled Eggs are truly at their peak on the day they are made. The egg whites can sometimes dry out slightly, or the filling can lose a bit of its vibrant texture after a couple of days.
-
Troubleshooting Common Issues:
- Dry Filling: If your filling seems too stiff or dry, don’t despair! I simply mix in another teaspoon or two of mayonnaise until it reaches the desired creamy consistency. A tiny splash of milk or even a bit of pickle juice can also work wonders, adding moisture and a touch more tang.
- Runny Filling: If your filling is too loose, it likely has too much liquid. You can try adding a bit more mashed egg yolk (if you have extra) or a very small amount of finely grated hard cheese, like Parmesan, which will absorb some moisture and add flavor. A tiny sprinkle of unflavored breadcrumbs, mixed in thoroughly, can also help absorb excess liquid without significantly altering the taste, though I prefer to stick to additional yolk or cheese.
- Green Ring Around the Yolk: This happens when eggs are overcooked. While it doesn’t affect the safety or flavor, it’s not ideal visually. My 12-minute method with the ice bath should prevent this. If you do see a slight green ring, don’t worry, once mashed with the other ingredients, it won’t be noticeable in your Deviled Eggs filling.
-
Creative Variations for Your Deviled Eggs:
The beauty of Deviled Eggs lies in their versatility. Once you’ve mastered the classic recipe, the possibilities for customization are endless!
- Spicy Deviled Eggs: Add a dash of your favorite hot sauce (like Tabasco or Sriracha) to the filling. Finely minced jalapeño or a pinch of cayenne pepper also works wonderfully for those who crave a bit of heat. A sprinkle of chili powder on top instead of paprika can also amp up the flavor.
- Smoky Deviled Eggs: Beyond smoked paprika, consider adding a tiny pinch of liquid smoke to the filling (use sparingly, as it’s potent!). Crumbled crispy bacon or a very finely minced piece of smoked ham also contributes a delightful smoky depth to your Deviled Eggs.
- Herby Deviled Eggs: Incorporate finely chopped fresh herbs directly into the filling. Dill, chives, parsley, tarragon, or even a tiny bit of fresh thyme can add a beautiful aromatic dimension. This is particularly lovely for spring gatherings.
- Pesto Deviled Eggs: Mix a teaspoon or two of your favorite basil pesto into the filling for a vibrant, herbaceous, and garlicky twist. Top with a pine nut for extra flair.
- Curry Deviled Eggs: A surprising but delicious variation! Add ½ to 1 teaspoon of curry powder to the filling. A tiny bit of mango chutney can also be a fantastic addition, offering a sweet and savory element.
- Pickle Deviled Eggs: For those who love a briny kick, finely mince a gherkin or a dill pickle and mix it into the filling. A teaspoon of pickle juice can also be used instead of vinegar for an even more pronounced pickle flavor.
- Avocado Deviled Eggs: For a creamier, healthier alternative, mash in a quarter of a ripe avocado with the yolks. This will give your Deviled Eggs a lovely green hue and an extra smooth texture. Ensure to serve these quickly, as avocado can brown.
-
The Importance of Quality Ingredients:
While Deviled Eggs seem simple, the quality of each ingredient truly shines through. Using fresh eggs, a rich mayonnaise, and a flavorful mustard will make a noticeable difference in the final taste of your Deviled Eggs. Don’t skimp on these foundational elements!
-
Serving Temperature:
Always serve your Deviled Eggs chilled. The cool, creamy filling is incredibly refreshing, especially on a warm day or as a palate cleanser before a main meal. They are an absolute classic for picnics, potlucks, and any celebration!
Conclusion:
Well, friends, we’ve reached the grand finale, and I truly hope you’re feeling as excited as I am about getting into the kitchen to whip up these absolute gems. If there’s one appetizer that consistently steals the show, that disappears from the platter faster than you can say ‘more, please,’ it’s undeniably the perfect batch of Deviled Eggs. And I genuinely believe that the recipe we’ve just explored is the one you’ll come back to again and again. What makes it a must-try, you ask? It’s the impeccable balance of flavors – that delightful tang from the vinegar and mustard, the rich creaminess from the mayonnaise, and that secret touch of seasoning that elevates it beyond the ordinary. The texture is key, isn’t it? We’ve achieved a filling that’s incredibly smooth, almost velvety, without being runny, nestled perfectly within those firm, beautifully cooked egg white halves. It’s not just a dish; it’s a testament to simple ingredients coming together to create something truly spectacular. Think about the joy of presenting a platter of these at your next gathering – the vibrant color, the inviting aroma, the sheer delight on people’s faces as they reach for their first one. This recipe isn’t complicated, but it yields results that taste like they took hours of meticulous work. It’s a classic, yes, but with a refined edge that makes every single bite a moment to savor. Seriously, once you master this version, you’ll understand why it’s poised to become your signature appetizer.
Now, while these Deviled Eggs are utterly perfect just as they are, one of the things I love most about them is their incredible versatility. They’re a blank canvas, ready for your creative touches! For presentation, a simple sprinkle of smoked paprika not only adds a beautiful pop of color but also a subtle, earthy undertone that complements the richness of the yolk filling. Finely chopped fresh chives or dill can bring a lovely herbaceous freshness, and if you’re feeling a bit fancy, a small sprig of fresh parsley can make each egg look like a miniature work of art.
But let’s talk about variations, because this is where the fun really begins!
Elevate Your Deviled Eggs with These Ideas:
- Smoky Bacon Twist: For those who adore a savory crunch, crumble some crispy bacon bits over the top. The smoky, salty notes are an absolute dream paired with the creamy filling.
- Spicy Kick: If you like a little heat, a dash of your favorite hot sauce or a pinch of cayenne pepper mixed into the filling can transform them into fiery delights. A tiny slice of jalapeño on top also looks fantastic.
- Herbaceous Heights: Experiment with different fresh herbs! Beyond chives and dill, consider finely chopped tarragon for an anise-like note, or even a hint of cilantro if you’re going for a more Latin-inspired flavor profile.
- Mediterranean Flair: Stir in a tiny bit of finely chopped sun-dried tomatoes and a pinch of dried oregano for a taste of the Mediterranean. A small olive slice as a garnish would be perfect.
- Seafood Sensation: For an elegant touch, a small piece of smoked salmon or a tiny shrimp placed artfully on top transforms them into a gourmet treat, perfect for a sophisticated brunch or cocktail party.
- Curry Craze: A pinch of mild curry powder in the yolk mixture offers a wonderfully exotic and unexpected flavor, perfect for adventurous palates.
These magnificent bites are ideal for just about any occasion. They’re the quintessential picnic food, easily transportable and always a hit. They shine brightly at holiday gatherings – think Easter brunch, Thanksgiving appetizers, or even a festive Christmas potluck. For a casual summer BBQ, they’re light, refreshing, and always disappear first. And if you’re hosting a sophisticated dinner party, a beautifully arranged platter of these eggs makes for an elegant starter that sets a wonderful tone for the meal to come.
So, there you have it, my comprehensive guide to creating the most incredible Deviled Eggs. I’ve shared all my tips and tricks, and now it’s your turn! I truly encourage you to roll up your sleeves, gather your ingredients, and give this recipe a try. You’ll be amazed at how simple it is to achieve such extraordinary results.
And once you’ve made them, please, please share your experience with me! I absolutely love hearing from you. Did you try one of the suggested variations, or did you come up with your own brilliant twist? What was your favorite part of the process, and more importantly, how quickly did they vanish from your table? Take a photo, tag me if you’re sharing on social media, or simply drop a comment below the article. Your feedback and creative ideas are what make this community so vibrant and inspiring. Let’s make these Deviled Eggs a staple in kitchens everywhere, celebrated for their simplicity, flavor, and universal appeal. I can’t wait to see your amazing creations!
Classic Deviled Eggs: Easy & Delicious Party Appetizer
Deviled Eggs are a timeless classic, loved for their creamy, savory filling and surprisingly simple preparation. Tracing origins back to ancient Rome, these zesty bites are a guaranteed hit at any gathering. This recipe ensures a delicious batch for your next party or family meal.
Ingredients
-
12 large eggs
-
4-5 cups water (for boiling eggs)
-
1/2 cup mayonnaise
-
1 tablespoon Dijon mustard
-
1 teaspoon white vinegar or apple cider vinegar
-
1/4 teaspoon salt
-
1/8 teaspoon black pepper
-
Optional garnishes: smoked paprika, fresh chives or dill, crumbled cooked beef, hot sauce, capers, relish
Instructions
-
Step 1
Place 12 large eggs in a pot and add about 4-5 cups water to cover them, along with a pinch of salt. Bring water to a rolling boil over high heat, then immediately remove from heat, cover tightly, and let sit for precisely 12 minutes. -
Step 2
Immediately transfer eggs to a large ice bath for 10-15 minutes to cool completely. Gently crack and peel eggs under cold running water, then rinse and pat dry. -
Step 3
Halve each peeled egg lengthwise. Carefully scoop out all yolks into a medium mixing bowl, ensuring egg white halves remain intact. Arrange empty egg white halves on a serving platter. -
Step 4
Mash the scooped yolks until completely smooth. Add ½ cup mayonnaise, 1 tablespoon Dijon mustard, 1 teaspoon white or apple cider vinegar, ¼ teaspoon salt, and ⅛ teaspoon black pepper to the mashed yolks. -
Step 5
Mix all filling ingredients thoroughly until smooth and creamy. Taste the filling and adjust seasonings (more salt, pepper, mustard, or vinegar) to your preference. -
Step 6
Spoon the creamy filling generously back into the hollows of each egg white half, creating a nice dome. For an elegant presentation, transfer filling to a piping bag with a star tip and pipe into the egg whites. -
Step 7
Garnish your Deviled Eggs with a light dusting of smoked paprika, finely chopped fresh herbs (like chives or dill), crumbled cooked beef, or other preferred toppings. Cover loosely and chill in the refrigerator for at least 30 minutes (up to 2 hours) before serving for best flavor and texture.
Important Information
Nutrition Facts (Per Serving)
It is important to consider this information as approximate and not to use it as definitive health advice.
Allergy Information
Please check ingredients for potential allergens and consult a health professional if in doubt.


Leave a Comment