
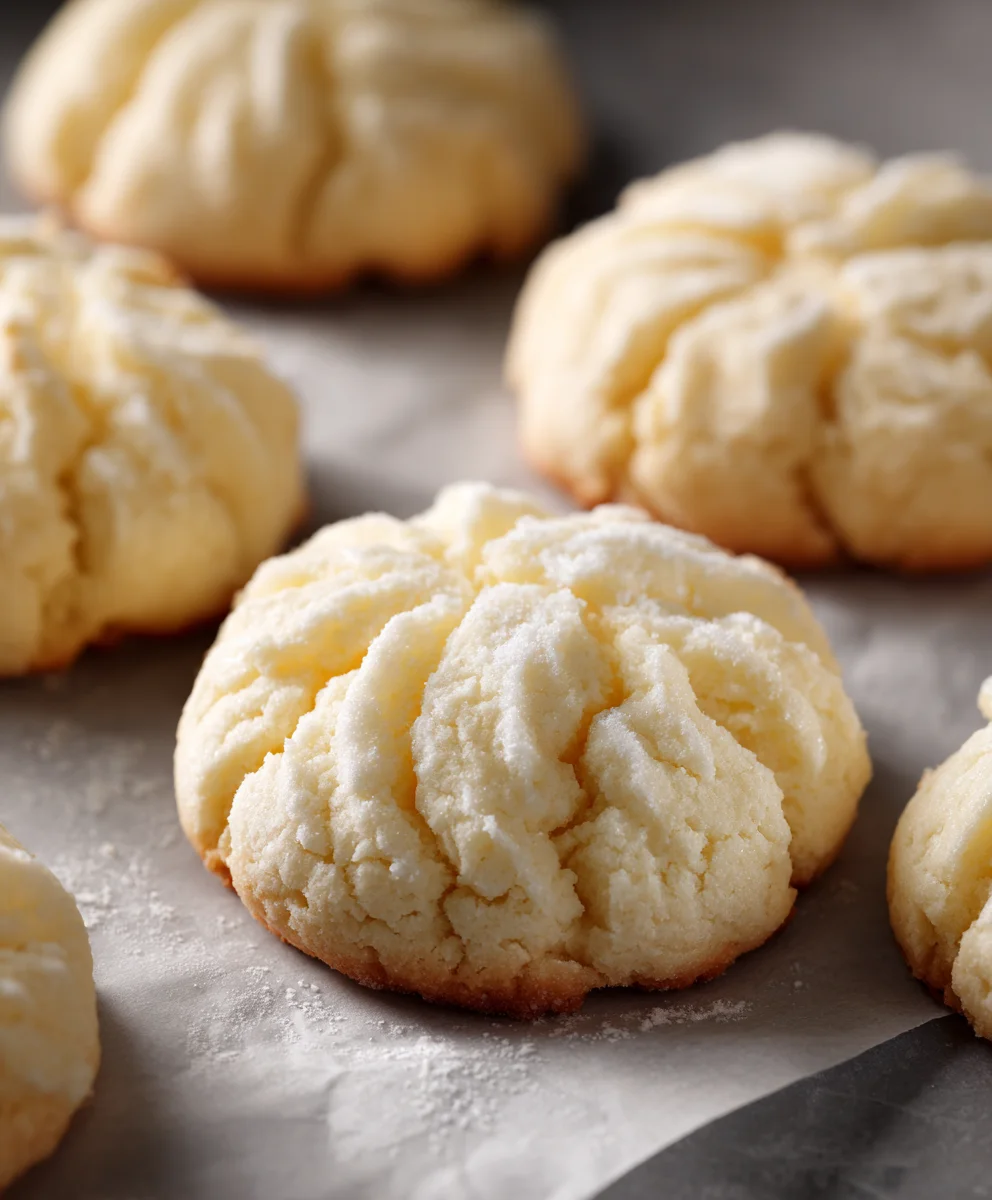
Whipped Shortbread. Ah, the very name conjures images of delicate, buttery perfection that simply dissolves on your tongue. I am absolutely delighted to share with you a recipe that promises to elevate your baking repertoire from delicious to truly unforgettable. This isn’t just any cookie; it’s a tender, melt-in-your-mouth delight that has gracefully adorned holiday tables and comforting tea times for generations.
Hailing from the rich culinary traditions of Scotland, classic shortbread has always been cherished for its profound, simple taste and luxurious texture. The ‘whipped’ iteration of this beloved classic takes it to new heights, incorporating air into the butter and sugar mixture to create an unbelievably light, yet rich, texture that truly melts away the moment it touches your palate. It’s this unparalleled melt-in-your-mouth sensation that sets whipped shortbread apart and makes it so incredibly addictive.
Why People Adore Whipped Shortbread
People adore this treat not only for its ethereal texture and rich, pure buttery flavour but also for its surprisingly straightforward preparation. With just a handful of pantry staples and a little patience, you can create a confection that feels incredibly luxurious and utterly irresistible. Whether you are seeking the perfect addition to a festive cookie platter, a thoughtful homemade gift, or simply a comforting indulgence to pair with your afternoon coffee, this recipe for whipped shortbread is sure to become a cherished favourite in your household. I promise, once you experience that incredible melt-away sensation, there’s truly no turning back.

Ingredients:
- 1 pound (4 sticks) unsalted butter, softened to room temperature. This is crucial for the perfect whipped texture, so don’t rush it!
- 1 cup powdered sugar (also known as confectioners’ sugar), plus extra for dusting, if desired.
- 1 teaspoon pure vanilla extract.
- 3 ½ cups all-purpose flour.
- ½ cup cornstarch. This secret ingredient is what gives whipped shortbread its distinctively tender, melt-in-your-mouth quality.
- Pinch of salt (about ¼ teaspoon).
- Optional: Maraschino cherries, sprinkles, or festive sugar for decoration.
Getting Started: Preparing Your Workspace and Ingredients
- Preheat your oven and prepare your baking sheets. I always like to get this out of the way first. Preheat your oven to a gentle 325°F (160°C). This lower temperature is key for shortbread; it allows the cookies to bake slowly and evenly without browning too much, preserving that pale, delicate appearance we love. Line several large baking sheets with parchment paper. Trust me, parchment paper is your best friend here – it prevents sticking and makes cleanup a breeze!
- Ensure your butter and powdered sugar are truly at room temperature. This might sound like a minor detail, but for Whipped Shortbread, it’s absolutely vital. If your butter is too cold, it won’t cream properly, and you’ll end up with a dense, crumbly dough rather than a light, airy one. If it’s too warm (borderline melted), it won’t hold air. I usually leave my butter out on the counter for at least an hour or two before I plan to bake. It should be soft enough that your finger can make a slight indentation without much effort, but not greasy or shiny. Take your powdered sugar out too, just to ensure it’s not cold from a pantry shelf.
The Heart of Whipped Shortbread: Creaming the Butter and Sugar
- Begin to cream your softened butter. In the bowl of a stand mixer fitted with the paddle attachment, or with a large bowl and a handheld electric mixer, place your softened butter. Beat the butter on medium-high speed for about 3-5 minutes, scraping down the sides of the bowl occasionally. You want to see it transform from a dense, yellow block into a pale, fluffy, and almost white mass. This process incorporates air, which is fundamental to the light texture of Whipped Shortbread. Don’t skimp on this step! The longer you beat it at this stage, the lighter your cookies will be.
-
Gradually add the powdered sugar and continue whipping extensively. Once your butter is beautifully light and airy, reduce the mixer speed to low and gradually add the powdered sugar, about ½ cup at a time. This prevents a “sugar cloud” from forming in your kitchen! Once all the sugar is incorporated, increase the speed back to medium-high and continue beating for another 5-7 minutes. This is where the “whipped” in Whipped Shortbread truly comes into play. The mixture will become incredibly light, almost ethereal, and very pale in color, significantly increasing in volume. It should look like a rich, fluffy frosting.
Tip for Success: Scrape the Bowl Thoroughly!
Throughout this creaming process, make sure to stop the mixer and scrape down the sides and bottom of the bowl frequently to ensure everything is evenly incorporated. Any butter or sugar clinging to the bottom won’t get properly aerated.
- Stir in the pure vanilla extract. Once your butter and sugar mixture is perfectly whipped, add the vanilla extract. Beat on low speed until it’s just combined. The vanilla adds that warm, comforting aroma and flavor that pairs so wonderfully with the simple richness of shortbread.
Bringing it All Together: Incorporating Dry Ingredients
- Sift together your flour, cornstarch, and pinch of salt. In a separate medium bowl, combine the all-purpose flour, cornstarch, and salt. Sifting these dry ingredients together isn’t just about removing lumps; it also helps to aerate them, ensuring they are evenly distributed throughout the dough. The cornstarch, as I mentioned, is a game-changer here. It reduces the gluten development in the flour, resulting in a much more tender, delicate crumb that literally melts in your mouth. This is a hallmark of truly exceptional Whipped Shortbread.
- Gently add the dry mixture to the wet mixture. Reduce your mixer speed to the lowest setting. Gradually add the dry ingredient mixture to the whipped butter and sugar, about ½ cup at a time, mixing only until just combined after each addition. It’s absolutely crucial not to overmix at this stage. Overmixing will develop the gluten in the flour, leading to tough, chewy cookies instead of the delicate, crisp-yet-tender shortbread we’re aiming for. Stop mixing as soon as you see no more streaks of dry flour. The dough will be thick, somewhat stiff, but still quite pliable and soft, almost like a very thick frosting. It should be cohesive but not sticky.
Shaping Your Masterpiece: Creating Uniform Whipped Shortbread Cookies
-
Shape your whipped shortbread dough. Now for the fun part! There are a few ways to shape Whipped Shortbread, and your choice often depends on the desired aesthetic.
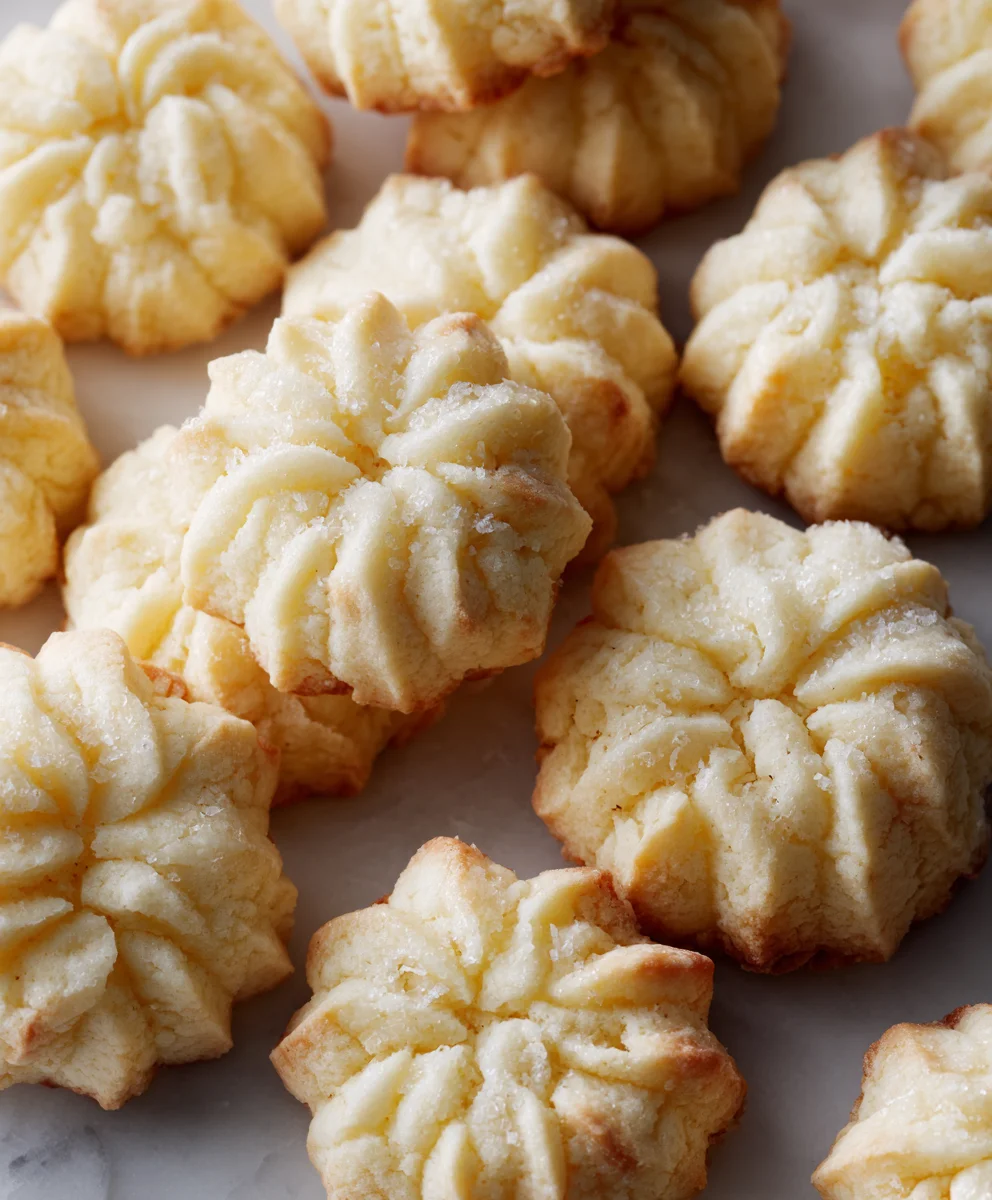
- Piping: This is my favorite method for that classic, elegant look. Transfer the dough to a large piping bag fitted with a large star tip (like an Ateco 827 or Wilton 1M). Pipe small rosettes, S-shapes, or even simple rounds onto your prepared baking sheets, leaving about 1 inch between each cookie. The dough might feel a bit stiff at first, but the warmth of your hands will help soften it slightly, making it easier to pipe. Aim for consistent size and shape for even baking.
- Rolling and Slicing: If you prefer a more traditional shortbread look or don’t have a piping bag, you can gently press the dough into an even log shape, about 1 ½ to 2 inches in diameter, on a piece of parchment paper. Chill the log in the refrigerator for at least 30 minutes (or up to a few days). Once firm, slice the log into ¼-inch thick rounds with a sharp knife and arrange them on your baking sheets.
- Pressing: For a more rustic approach, you can lightly flour your hands and roll the dough into small balls (about 1 tablespoon each). Place them on the baking sheet and gently flatten each ball with the tines of a fork, creating a crosshatch pattern.
- Add optional garnishes for visual appeal and flavor. If you’re feeling festive, this is the time to add a little something extra. I love pressing a small piece of a maraschino cherry (pat it dry first to prevent excess moisture) into the center of each piped rosette. You could also sprinkle them with colorful nonpareils or a coarse sparkling sugar for a beautiful crunch and glitter. These little touches really elevate the Whipped Shortbread from simple to spectacular.
- Arrange on baking sheets. Ensure your shaped cookies are evenly spaced on the parchment-lined baking sheets. Overcrowding can lead to uneven baking.
Baking to Golden Perfection: The Gentle Art of Shortbread Baking
- Bake your shortbread in the preheated oven. Place your baking sheets into the 325°F (160°C) oven. The baking time will vary depending on the size and thickness of your cookies, as well as your individual oven, but typically it will be around 15-20 minutes.
- Watch for the subtle signs of doneness. Whipped Shortbread is meant to be pale, so don’t expect a deep golden brown color. Instead, look for the edges to be just barely kissed with a very light golden hue. The centers should appear firm and set, no longer wet or shiny. If you gently touch the top of a cookie, it should feel firm. Overbaking will make them dry and hard, losing that signature melt-in-your-mouth texture. I always recommend rotating your baking sheets halfway through the baking time for even results, especially if your oven has hot spots.
- Cool the shortbread properly. Once baked, remove the baking sheets from the oven. This is another important step! Let the cookies cool on the baking sheets for about 5-10 minutes. They are quite delicate when warm, and this resting period allows them to firm up slightly. After this initial cooling, carefully transfer the cookies to a wire rack to cool completely. They will become even crisper as they cool. Resisting the urge to sneak one immediately is the hardest part, but they really do taste best when fully cooled.
The Final Flourish: Decorating and Storing Your Delicious Creation
- Consider an optional dusting of powdered sugar. Once your Whipped Shortbread cookies are completely cool, you can dust them with a light coating of additional powdered sugar using a fine-mesh sieve. This adds another layer of sweetness and a beautiful, snowy finish, making them even more irresistible.
- Store your delightful shortbread correctly. These cookies are wonderful keepers! Store your cooled Whipped Shortbread in an airtight container at room temperature for up to 2 weeks. I find that their flavor actually deepens and improves slightly after a day or two. If you want to make them ahead for a special occasion, they also freeze beautifully. Layer them in an airtight freezer-safe container, separated by parchment paper, for up to 3 months. When you’re ready to enjoy them, simply let them thaw at room temperature. This makes them perfect for holiday baking or gifting! Enjoy every tender, buttery bite!
Conclusion:
And there you have it, my friends! We’ve journeyed together through the delightful process of creating what I genuinely believe to be one of the most irresistible and profoundly satisfying cookies you will ever bake. This isn’t just another shortbread recipe; it’s an experience, a little bite of heaven that encapsulates simplicity, elegance, and pure, unadulterated buttery joy. I’m talking about a cookie that consistently earns rave reviews, disappears from platters faster than you can say “more please,” and leaves a lasting impression on everyone lucky enough to taste it.
Why This Recipe is an Absolute Must-Try:
It all comes down to that magical, ethereal texture. Unlike traditional shortbreads that can sometimes be dense or crumbly, our version achieves an unparalleled melt-in-your-mouth tenderness, a direct result of the meticulous whipping process that incorporates air and creates a supremely delicate crumb. The rich, golden butter flavor is front and center, complemented by just a hint of vanilla, making it a sophisticated treat that requires very few ingredients but delivers immense flavor impact. It’s incredibly forgiving, perfect for both novice bakers looking for an impressive win and seasoned pros who appreciate a classic done right. Imagine the satisfying sigh of contentment from friends and family as they experience the delicate crunch giving way to that sublime, creamy texture. This recipe isn’t just about baking; it’s about crafting moments of pure culinary bliss, making it an essential addition to any home baker’s collection of cherished recipes.
Now, while these delightful cookies are absolutely perfect on their own, perhaps with a steaming cup of tea or a robust coffee for a moment of quiet indulgence, their versatility knows no bounds. For an elegant dessert presentation, try serving them alongside a scoop of vanilla bean ice cream, allowing the cookies’ buttery notes to melt deliciously into the cold creaminess. They also make an exquisite addition to any holiday cookie platter, their pale, pristine appearance offering a beautiful contrast to more colorful confections. Think of them as the ideal accompaniment to a cozy afternoon gathering, a charming offering for a potluck, or even a sophisticated edible gift that truly speaks volumes about your thoughtfulness.
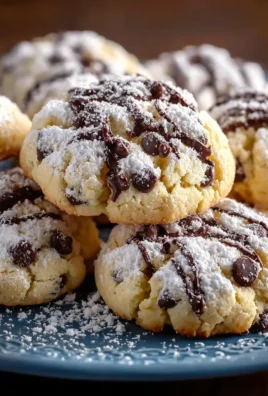
But let’s talk about taking things up a notch with some exciting variations! If you’re feeling adventurous, consider incorporating a different extract into the dough; a touch of almond extract can add a beautiful nutty depth, or a hint of lemon or orange zest can introduce a bright, zesty lift that perfectly cuts through the richness. For the chocolate lovers among us, gently fold in some mini chocolate chips before chilling and baking – the pockets of melted chocolate will be an absolute dream. During the festive season, a dash of peppermint extract or a sprinkling of crushed candy canes on top before baking transforms them into delightful holiday treats. You could also get creative with presentation: once cooled, try dipping half of each cookie into melted dark chocolate and allowing it to set, or dust them generously with powdered sugar for a classic, elegant finish. For a visually stunning effect, try using a pastry bag fitted with a star tip to pipe the dough into beautiful rosettes or finger shapes before baking. The possibilities are truly endless, allowing you to personalize this already fantastic recipe to suit any occasion or preference.
I cannot stress enough how much I encourage you to set aside some time this week to whip up a batch of this extraordinary Whipped Shortbread. Seriously, you won’t regret it! The joy of watching these simple ingredients transform into something so utterly exquisite is incredibly rewarding. Once you’ve experienced the magic of this recipe, I would absolutely love to hear about it. Please, share your baking journey with me! Did you try any of the variations? What did your family and friends think? Did you find a new favorite way to serve them? Your insights, comments, and especially your photos, bring so much joy to our community of bakers. Don’t be shy; let’s celebrate our shared love for delicious, homemade treats together. Happy baking, and I can’t wait to see your wonderful creations!
Whipped Shortbread Recipe: Light, Buttery & Melt-in-Your-Mouth!
Every time I make these whipped shortbread cookies my kitchen fills with the most amazing buttery aroma. They’re my go to recipe when I want something simple yet completely irresistible. With just four ingredients they transform into the lightest fluffiest cookies that literally melt in your mouth. It’s pure magic how something so simple becomes so special.
Ingredients
-
1 lb (4 sticks) unsalted butter, softened
-
1 cup powdered sugar, plus extra for dusting
-
1 tsp pure vanilla extract
-
3 ½ cups all-purpose flour
-
½ cup cornstarch
-
¼ tsp salt
-
Optional: Maraschino cherries, sprinkles, or decorative sugar
Instructions
-
Step 1
Preheat oven to 325°F (160°C) and line baking sheets with parchment paper. Ensure butter is softened to room temperature. -
Step 2
In a stand mixer with the paddle attachment, beat softened butter on medium-high speed for 3-5 minutes until pale and fluffy. Gradually add 1 cup powdered sugar, then beat on medium-high for 5-7 minutes until very light and airy. Scrape the bowl frequently. -
Step 3
Beat in 1 tsp pure vanilla extract until just combined. -
Step 4
In a separate bowl, sift together 3 ½ cups all-purpose flour, ½ cup cornstarch, and ¼ tsp salt. -
Step 5
With the mixer on the lowest setting, gradually add the dry ingredients to the butter mixture, mixing only until just combined. Do not overmix; the dough will be thick but pliable. -
Step 6
Shape cookies: Either pipe dough using a large star tip onto prepared baking sheets; or roll dough into a 1 ½ to 2-inch log, chill for at least 30 minutes, then slice ¼-inch thick; or roll into 1 tbsp balls and flatten with a fork. Add optional garnishes like maraschino cherries or sprinkles. -
Step 7
Bake for 15-20 minutes, or until edges are barely light golden and centers are set. Rotate baking sheets halfway through for even baking. -
Step 8
Cool cookies on baking sheets for 5-10 minutes, then carefully transfer to a wire rack to cool completely. -
Step 9
Optionally, dust with extra powdered sugar once completely cool. Store in an airtight container at room temperature for up to 2 weeks, or freeze for up to 3 months.
Important Information
Nutrition Facts (Per Serving)
It is important to consider this information as approximate and not to use it as definitive health advice.
Allergy Information
Please check ingredients for potential allergens and consult a health professional if in doubt.

Leave a Comment