
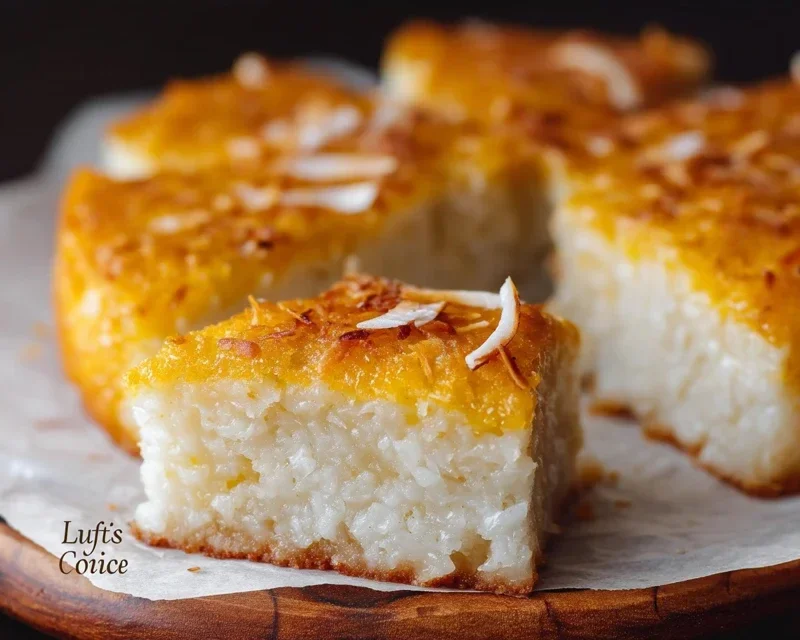
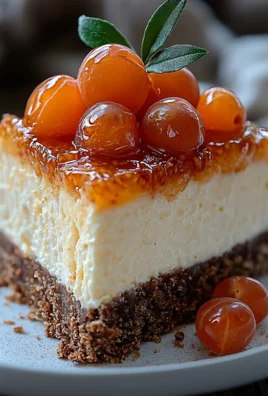
Sticky coconut cake is a dessert that conjures up images of tropical paradises and pure indulgence. There’s something utterly captivating about its rich, moist crum extractb, kissed with the sweet, nutty essence of coconut. This isn’t just any cake; it’s a sensory experience. Imagin extracte a golden-baked marvel, its surface glistening with a luscious, caramelized topping, promising a symphony of textures and flavors with every bite. It’s the kind of treat that transports you, melting away your worries and leaving you with a satisfied sigh. What makes this sticky coconut cake truly special is the harmonious marriage of tender cake and a deeply flavored, slightly chewy topping. It’s a comforting hug in cake form, perfect for sharing with loved ones or savoring all to yourself.

Sticky Coconut Cake
Get ready to indulge in a truly irresistible treat! This Sticky Coconut Cake is a symphony of tropical flavors and delightful textures. Imagin extracte a moist, tender crum extractb infused with the rich, creamy essence of coconut, all brought together by a wonderfully sticky, caramelized top. It’s the kind of cake that transports you to a sunny paradise with every bite. Perfect for afternoon tea, a special dessert, or whenever you crave a taste of the tropics, this recipe is surprisingly straightforward and delivers spectacular results. We’re using some fantastic ingredients to make this happen, ensuring a depth of flavor and a comforting, chewy texture that’s simply addictive.
Ingredients:
Cooking Instructions
This Sticky Coconut Cake is a delightful journey from simple ingredients to a show-stopping dessert. We’ll break it down into manageable steps to ensure you achieve that perfect, glorious finish.
Phase 1: Preparing the Coconut Base
The foundation of our cake lies in creating a luscious, coconut-infused mixture. This step is where the magic truly begin extracts, allowing the flavors to meld and develop.
1. In a medium saucepan, combine the 2¼ cups of full-fat canned coconut milk with 1 cup of the granulated sugar (we’ll use the remaining ¼ cup later). Add the 3 cups of shredded sweetened coconut to this mixture. Stir everything together until well combined. Place the saucepan over medium heat.
2. Gently heat the coconut milk and sugar mixture, stirring continuously. We’re not looking to boil it, but rather to warm it through and dissolve the sugar completely. As it heats, the shredded coconut will start to soften and absorb some of the liquid. Continue to stir for about 5-7 minutes. You want the sugar to be fully dissolved and the mixture to be warm and fragrant, but not actively bubbling. This gentle warming allows the coconut to release its oils and flavors into the milk, creating a richer base for our cake.
Phase 2: Incorporating the Dry Ingredients and Eggs
Now, we’ll bring in the flour and eggs to form the cake batter. The glutinous rice flour is key here, as it will provide that wonderfully chewy and sticky texture we’re aiming for.
3. Once the coconut mixture has been heated and stirred for the specified time, remove the saucepan from the heat. Let it cool slightly for about 5 minutes so it’s not piping hot. In a separate bowl, whisk together the 1½ cups of glutinous rice flour with the 2 egg yolks until they form a thick paste. Gradually add this glutinous rice flour and egg yolk mixture to the slightly cooled coconut mixture in the saucepan. Stir vigorously to ensure there are no lumps and that the flour is completely incorporated. It will thicken considerably at this stage.
4. Next, we’ll add the flavor enhancers. Stir in the 1 teaspoon of vanilla extract. Then, in a clean, dry bowl, whisk the 2 egg whites until they are frothy. Gradually add the remaining ¼ cup of granulated sugar to the egg whites, continuing to whisk until stiff peaks form. This is your meringue. Gently fold this stiffly beaten egg white mixture into the coconut and flour batter. Be careful not to overmix; you want to incorporate the egg whites to lighten the batter without deflating them too much. The batter will be thick and sticky, which is exactly what we want.
Phase 3: Baking to Golden Perfection
The final stage is baking, where our sticky coconut mixture transforms into a beautiful, golden-brown cake with that signature caramelized top.
5. Preheat your oven to 350°F (175°C). Prepare an 8×8 inch baking pan by greasing it well with butter or oil, or lining it with parchment paper for easy removal. Pour the thick, sticky batter into the prepared baking pan, spreading it evenly.
6. Place the pan in the preheated oven and bake for approximately 35-45 minutes, or until the top is a deep golden brown and a toothpick inserted into the center comes out mostly clean (a few moist crum extractbs are okay due to the sticky nature of the cake). During the last 10-15 minutes of baking, you’ll notice the sugar on top starting to caramelize, forming that irresistible sticky layer. Keep an eye on it to prevent burning. The aroma that fills your kitchen will be absolutely heavenly!
Once baked, allow the cake to cool in the pan on a wire rack for at least 15-20 minutes before attempting to cut and serve. This cooling period is crucial for the cake to set properly and for the sticky topping to achieve its perfect texture. You can enjoy this cake warm or at room temperature. It’s absolutely divine on its own, but a scoop of vanilla ice cream or a dollop of whipped cream takes it to another level of pure bliss! Enjoy this delightful taste of the tropics!
Conclusion:
I hope you’ve enjoyed exploring this wonderfully decadent Sticky Coconut Cake recipe! This cake truly is a triumph of simple ingredients coming together to create something truly special. The combination of moist coconut cake with a rich, gooey caramel-like topping is simply irresistible, making it perfect for any occasion, from a casual afternoon tea to a celebratory dessert. Its unique texture and tropical flavor profile make it stand out from the usual cake offerings, and the ease of preparation means you can whip up this delight without a fuss. I encourage you all to give this Sticky Coconut Cake a try – I’m confident it will become a new favorite!
For serving, this cake is heavenly on its own, allowing its flavors to shine. However, a dollop of freshly whipped cream or a scoop of vanilla bean ice cream complements the sweetness beautifully. For variations, consider adding a hint of lime zest to the batter for a brighter, more tropical note, or a sprinkle of toasted slivered almonds on top of the sticky topping once it’s cooled for an extra crunch. Don’t be afraid to experiment and make it your own!
Frequently Asked Questions:
Can I make this Sticky Coconut Cake ahead of time?
Absolutely! This cake actually benefits from being made a day in advance. The flavors meld beautifully, and the sticky topping will firm up just enough to slice cleanly. Store it at room temperature, loosely covered, to maintain its moistness.
What kind of coconut milk should I use?
For the best flavor and texture, I recommend using full-fat canned coconut milk. This will provide the richest coconut flavor and ensure your cake is wonderfully moist. Light coconut milk can be used in a pinch, but the cake might be slightly less rich.
My sticky topping isn’t setting. What did I do wrong?
Sometimes, the topping needs a little extra time to set. Ensure you’ve let it cool sufficiently. If it still seems too liquid, you can gently place the cake in the refrigerator for 30-60 minutes to help it firm up. Avoid over-boiling the topping mixture, as this can sometimes lead to it being too hard once cooled.
Sticky Coconut Cake
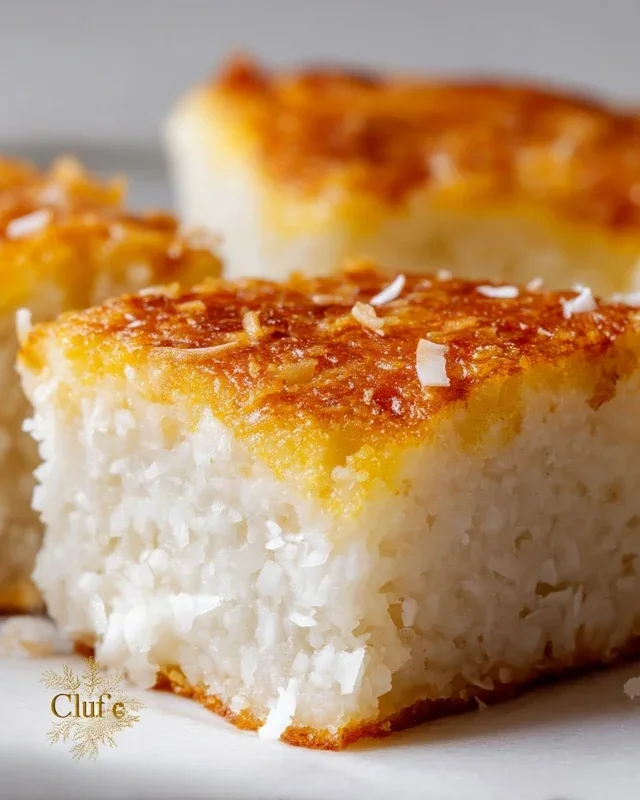
A moist and fragrant sticky coconut cake, perfect for dessert or a sweet snack. This recipe uses glutinous rice flour for a delightful chewy texture.
Ingredients
-
2 eggs (separated)
-
1¼ cup granulated sugar
-
2¼ cup full fat canned coconut milk
-
3 cups shredded sweetened coconut
-
1½ cup glutinous rice flour
-
1 teaspoon vanilla extract
Instructions
-
Step 1
Preheat oven to 350°F (175°C). Grease and flour a 9×13 inch baking pan. -
Step 2
In a large bowl, whisk together the egg yolks, 1 cup of the granulated sugar, coconut milk, and vanilla extract until well combined. -
Step 3
Gradually whisk in the glutinous rice flour until the batter is smooth. Stir in 2 cups of the shredded coconut. -
Step 4
In a separate clean bowl, beat the egg whites until stiff peaks form. Gradually beat in the remaining ¼ cup of granulated sugar until glossy. -
Step 5
Gently fold the whipped egg whites into the coconut mixture until just combined, being careful not to overmix. -
Step 6
Pour the batter into the prepared baking pan and sprinkle the remaining 1 cup of shredded coconut evenly over the top. -
Step 7
Bake for 35-40 minutes, or until a toothpick inserted into the center comes out clean and the top is golden brown. -
Step 8
Let the cake cool in the pan for at least 15 minutes before cutting and serving.
Important Information
Nutrition Facts (Per Serving)
It is important to consider this information as approximate and not to use it as definitive health advice.
Allergy Information
Please check ingredients for potential allergens and consult a health professional if in doubt.

Leave a Comment