
Dark Chocolate and Sea Salt Nut Bars are more than just a treat; they are an experience for your taste buds. If you’re like me, you crave that perfect balance of sweet and salty, that satisfying crunch, and that rich, decadent flavor that only dark chocolate can deliver. That’s precisely what these glorious bars offer. They are the ultimate pick-me-up, a sophisticated yet wonderfully simple snack that feels utterly indulgent. What makes these Dark Chocolate and Sea Salt Nut Bars truly special is their effortless elegance. You can whip them up for a spontaneous craving, a thoughtful homemade gift, or to impress guests without breaking a sweat. The interplay between the intensely satisfying dark chocolate and the subtle, sparkling crystals of sea salt is simply divine. They are a testament to how a few, carefully chosen ingredients can create something truly unforgettable. Get ready to fall in love with these addictive bars!

Ingredients:
Get ready to whip up a batch of irresistible Dark Chocolate and Sea Salt Nut Bars! These bars are the perfect blend of crunchy, chewy, sweet, and salty, making them an ideal snack for any time of day. Whether you need a pick-me-up, a post-workout treat, or a delightful addition to your dessert table, these homemade bars are sure to impress. The beauty of this recipe lies in its simplicity and the satisfying textures that come from the combination of nuts, puffed rice, and luscious dark chocolate. Plus, you can customize the nuts to your heart’s content, making them uniquely yours. Let’s get started!
Preparing the Base
The foundation of our delicious nut bars is a medley of crunchy, unsalted nuts and light, airy puffed rice. For our go-to blend, we love the combination of creamy cashews, classic peanuts, and slightly sweet almonds. However, feel free to experiment! Walnuts, pecans, or even pistachios would be fantastic additions. The key is to ensure your nuts are unsalted, as we’ll be adding salt later to control the flavor profile precisely. If your nuts aren’t already roasted, a quick toasting in a dry pan over medium heat for 5-7 minutes until fragrant can really enhance their flavor and texture, adding another layer of deliciousness to your bars. Make sure they cool completely before proceeding.
Combining and Binding
Now it’s time to bring everything together! In a large bowl, combine your chosen nuts (we’re using our 3/4 cup cashews, 3/4 cup peanuts, and 1 cup almonds) and the 1/2 cup of puffed rice. This mixture will provide the essential crunch and texture to our bars. Next, we need to create the binding agent that will hold all these wonderful ingredients together. In a small saucepan over low heat, gently warm the 1/4 cup of brown rice syrup. Brown rice syrup is excellent here because it’s not overly sweet and provides a lovely chewy texture. Stir in the 1 1/2 teaspoon of vanilla extract and the 1/2 teaspoon of sea salt. Whisk these together until well combined and the syrup is warm and pourable.
Forming the Bars
Once the brown rice syrup mixture is warm, pour it evenly over the nut and puffed rice mixture in the large bowl. Using a sturdy spatula or wooden spoon, stir everything together thoroughly. You want to ensure every piece of nut and puffed rice is coated in the sticky, sweet syrup. This step requires a bit of elbow grease, but it’s crucial for making sure your bars hold their shape. Once everything is well combined, you can transfer this mixture into a prepared baking dish. We recommend lining an 8×8 inch baking dish with parchment paper, leaving some overhang on the sides to make lifting the bars out easier. Press the mixture firmly and evenly into the prepared dish. Use the back of your spatula or your hands (lightly greased to prevent sticking) to compress the mixture as much as possible. The more compact you make it, the firmer and less crum extractbly your bars will be.
Chilling and Setting
After pressing the mixture into the dish, it’s time to let it set. Place the baking dish in the refrigerator for at least 1 hour. This chilling period is essential for allowing the brown rice syrup to firm up and bind the ingredients effectively, creating a solid base for our chocolate topping. You can even leave it in the fridge for longer, up to a few hours, if that fits your schedule better. Patience here will be rewarded with well-formed, easy-to-cut bars.
The Chocolatey Finnon-alcoholic ale
While the base is chilling, prepare the decadent dark chocolate topping. In a heatproof bowl set over a saucepan of simmering water (or in the microwave in 30-second intervals, stirring in between), combine the 1 cup of dark chocolate chips and the 2 teaspoons of coconut oil. The coconut oil helps to create a smoother, glossier chocolate coating that is easier to spread and sets beautifully. Stir the chocolate and coconut oil until they are completely melted and smooth. Once the nut base has chilled and is firm, remove it from the refrigerator. Pour the melted dark chocolate evenly over the chilled nut mixture. Use a spatula to spread the chocolate smoothly all the way to the edges. If you’re using the optional flaky sea salt, sprinkle it generously over the melted chocolate while it’s still wet. The contrast of the dark chocolate and the little bursts of salty crunch from the flaky salt is truly divine!
Cutting and Enjoying
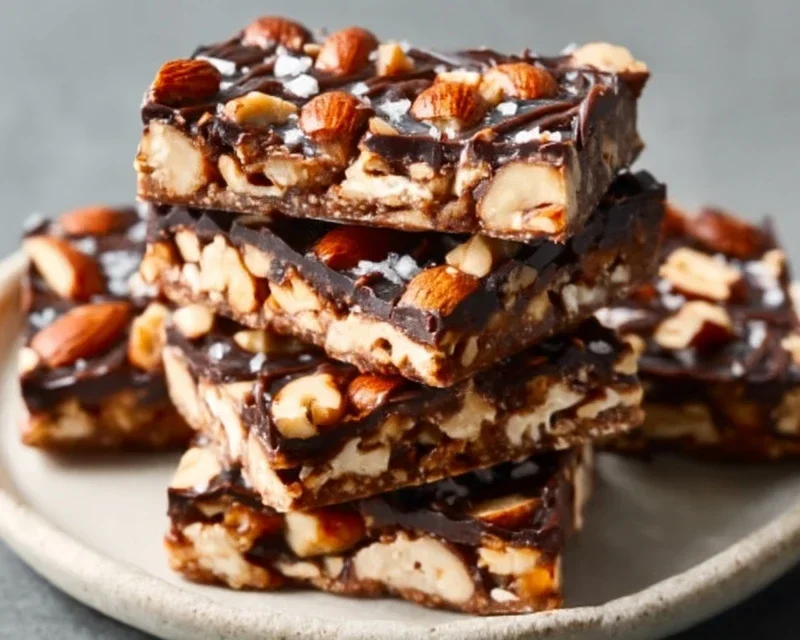
Return the dish to the refrigerator for another 30-60 minutes, or until the chocolate is completely set. Once the chocolate has hardened, use the parchment paper overhang to lift the entire slab out of the baking dish. Place it on a cutting board and, using a sharp knife, cut it into your desired bar shapes. You can make them thin and snackable, or thicker and more substantial. Store your finished Dark Chocolate and Sea Salt Nut Bars in an airtight container in the refrigerator. They will keep well for up to a week, though I doubt they’ll last that long! Enjoy the delightful crunch, chewy texture, and the perfect balance of sweet and salty in every bite.
Conclusion:
There you have it – the perfect recipe for delicious Dark Chocolate and Sea Salt Nut Bars! These bars are a true winner because they strike that incredible balance between rich, decadent dark chocolate and the satisfying crunch of nuts, all elevated by a hint of sparkling sea salt. They’re incredibly versatile, making them a fantastic snack for busy mornings, an afternoon pick-me-up, or even a healthier dessert option. I’ve found they disappear incredibly fast, so you might want to double the batch!
These bars are wonderful on their own, but consider crum extractbling them over yogurt or ice cream for an extra layer of texture and flavor. They also make a thoughtful homemade gift for friends and family. Don’t be afraid to experiment with different nuts – almonds, walnuts, or pecans all work beautifully. You could also add a sprinkle of chili flakes for a spicy kick, or a swirl of caramel for added indulgence. I truly encourage you to give these Dark Chocolate and Sea Salt Nut Bars a try; you won’t regret it!
Frequently Asked Questions:
How should I store these nut bars?
Store your Dark Chocolate and Sea Salt Nut Bars in an airtight container at room temperature for up to a week, or in the refrigerator for up to two weeks. They can also be frozen for longer storage – simply wrap them individually in parchment paper before placing them in a freezer-safe bag or container.
Can I make these bars vegan?
Absolutely! To make these bars vegan, simply ensure you are using vegan dark chocolate chips and substitute the honey or maple syrup with a plant-based sweetener like agave nectar or date syrup. The rest of the ingredients are naturally vegan-friendly.
What if I don’t have sea salt?
While sea salt provides that delightful contrast, you can use regular table salt in a pinch. Start with a smaller amount, as table salt is more concentrated, and adjust to your taste. However, the unique texture and subtle flavor of sea salt truly enhance the overall experience of these bars.
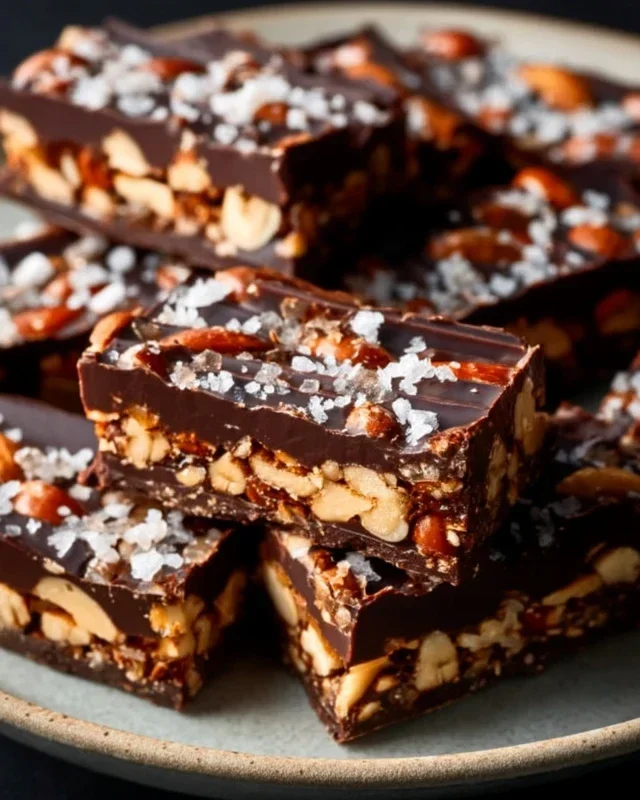
Dark Chocolate and Sea Salt Nut Bars
Chewy and satisfying nut bars packed with your favorite nuts, puffed rice, and drizzled with dark chocolate and sea salt.
Ingredients
-
2 1/2 cups unsalted nuts of choice (3/4 cup cashews, 3/4 cup peanuts, 1 cup almonds)
-
1/2 cup puffed rice
-
1/4 cup brown rice syrup
-
1 1/2 teaspoon vanilla extract
-
1/2 teaspoon sea salt
-
1 cup dark chocolate chips
-
2 teaspoons coconut oil
-
Flaky salt for topping (optional)
Instructions
-
Step 1
Line an 8×8 inch baking pan with parchment paper. -
Step 2
In a large bowl, combine the nuts and puffed rice. If using whole nuts, roughly chop them. -
Step 3
In a small saucepan, gently warm the brown rice syrup, vanilla extract, and 1/2 teaspoon sea salt over low heat until just combined. Do not boil. -
Step 4
Pour the warm syrup mixture over the nut and puffed rice mixture and stir until everything is evenly coated. -
Step 5
Press the mixture firmly into the prepared baking pan. Ensure it’s packed tightly. -
Step 6
In a microwave-safe bowl, combine dark chocolate chips and coconut oil. Microwave in 30-second intervals, stirring between each, until smooth and melted. -
Step 7
Drizzle the melted chocolate over the top of the bars. If desired, sprinkle with flaky salt. -
Step 8
Refrigerate for at least 30 minutes, or until the chocolate is set. -
Step 9
Cut into bars and serve.
Important Information
Nutrition Facts (Per Serving)
It is important to consider this information as approximate and not to use it as definitive health advice.
Allergy Information
Please check ingredients for potential allergens and consult a health professional if in doubt.



Leave a Comment