

Ramen eggs, or Ajitama as they’re lovingly known in Japan, are more than just a topping; they’re a revelation. That perfectly jammy yolk, cradled in a delicately seasoned, chewy white, is pure culinary magic. Why do we go so gaga for these marinated marvels? It’s the ultimate umami bomb, a burst of savory, slightly sweet, and deeply satisfying flavor that elevates any bowl of ramen from good to utterly unforgettable. But what truly makes these ramen eggs special is the transformation. Simple eggs, through a thoughtful marinade, become something extraordinary, absorbing layers of deliciousness that leave you craving more. They’re a testament to how a little bit of care and the right ingredients can create something truly spectacular, a small but mighty addition that makes all the difference.
The Secret to Perfect Ramen Eggs
Let’s unlock the secrets together!

Perfect Ramen Eggs (Ajitama) for Your Noodle Bowls
There’s something truly magical about the jammy, savory-sweet ramen egg, also known as Ajitama, that elevates a humble bowl of ramen from delicious to divine. These marinated soft-boiled eggs are a staple in ramen shops for a reason – they offer a burst of umami, a satisfying texture, and a beautiful visual appeal. Making them at home is surprisingly simple, and once you’ve mastered this technique, you’ll find yourself adding them to more than just ramen. Imagin extracte them on avocado toast, in a poke bowl, or even just as a protein-packed snack. The key to a great Ajitama is the perfect soft-boiled egg and a flavorful marinade that soaks in just right. Let’s get started on creating these little gems.
Ingredients:
*Note on eggs: For the best results and easiest peeling, I recommend using eggs that are about a week old. Fresher eggs tend to be more difficult to peel after boiling. You can gently pierce the wider end of the egg with a pin before boiling to help with peeling, though it’s not strictly necessary if your eggs are not super fresh.
Preparing the Perfect Soft-Boiled Eggs
The foundation of any good Ajitama is a perfectly cooked soft-boiled egg with a beautifully jammy yolk and a firm, but not rubbery, white. Getting this right is crucial.
1. Boiling the Eggs: In a medium saucepan, gently place the eggs in a single layer. Cover them with cold water by about an inch. If you’re using vinegar, add a splash (about a tablespoon) to the water; this helps prevent cracking and can make peeling easier if an egg does happen to crack. Bring the water to a rolling boil over medium-high heat. Once the water reaches a full boil, immediately reduce the heat to a gentle simmer. Set a timer for exactly 6 minutes and 30 seconds for a perfectly jammy yolk. If you prefer a slightly firmer yolk, you can add an extra minute. If you like your yolk even softer, aim for 5 minutes and 30 seconds. It might take a little experimenting to find your personal preference, but this 6.5-minute mark is a fantastic starting point.
2. Shocking and Peeling: As soon as the timer goes off, immediately transfer the eggs from the simmering water into an ice bath. This ice bath is crucial for stopping the cooking process instantly, preventing the yolk from overcooking. Let the eggs sit in the ice bath for at least 10-15 minutes, or until they are completely cool to the touch. Once cooled, it’s time to peel. Gently tap each egg on a hard surface to crack the shell all over. Start peeling from the wider end of the egg, where the air pocket is usually located. If you find peeling difficult, you can try peeling them under cool running water; this often helps loosen the shell. Be patient and gentle to avoid damagin extractg the delicate egg white.
Crafting the Flavorful Marinade
While the eggs are cooling, it’s time to whip up the delicious marinade that will transform these simple boiled eggs into Ajitama. The balance of salty, sweet, and umami is key here.
3. Mixing the Marinade: In a small saucepan, combine the soy sauce, water, non-non-non-alcoholic alternativeic non-alcoholic mirin, and granulated sugar. Stir over medium heat, just until the sugar has completely dissolved. You don’t need to bring this mixture to a boil; gentle warming is sufficient to help the flavors meld. Once the sugar is dissolved, remove the saucepan from the heat and let the marinade cool down. It’s important that the marinade is not hot when you add the eggs, as hot liquid can continue to cook the eggs and make the whites tough. Aim for a lukewarm or room temperature marinade.
Marinating for Maximum Flavor
This is where the magic happens. The eggs will absorb the savory, sweet, and slightly complex flavors of the marinade.
4. Marinating the Eggs: Once the eggs are peeled and the marinade has cooled, it’s time to combine them. You can place the peeled eggs directly into a resealable plastic bag or a shallow airtight container. Pour the cooled marinade over the eggs, ensuring they are fully submerged. If using a plastic bag, gently press out as much air as possible before sealing it. If using a container, make sure the eggs are covered by the liquid. For the best flavor, I like to refrigerate them for at least 4 hours, but ideally overnight. The longer they marinate, the deeper the flavor will be. You can even marinate them for up to 2-3 days, though the yolks might start to firm up slightly more the longer they are submerged.
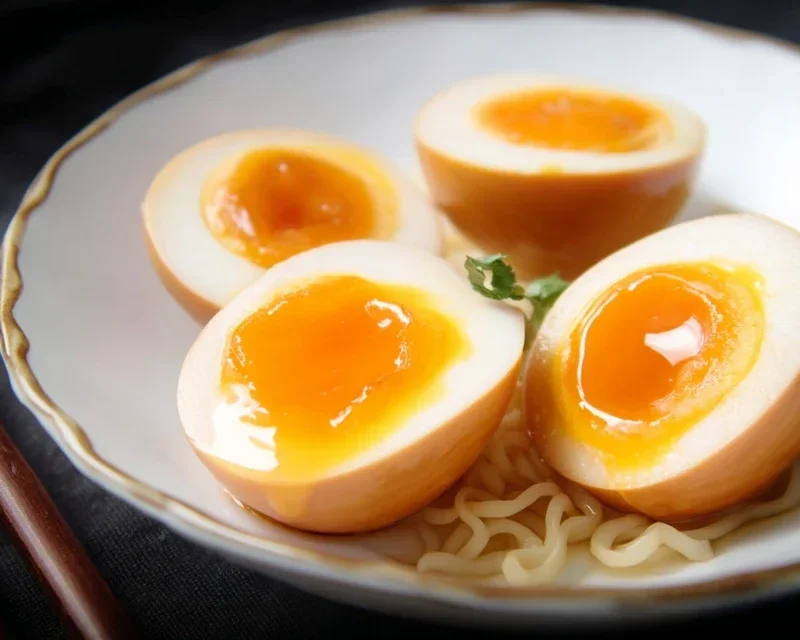
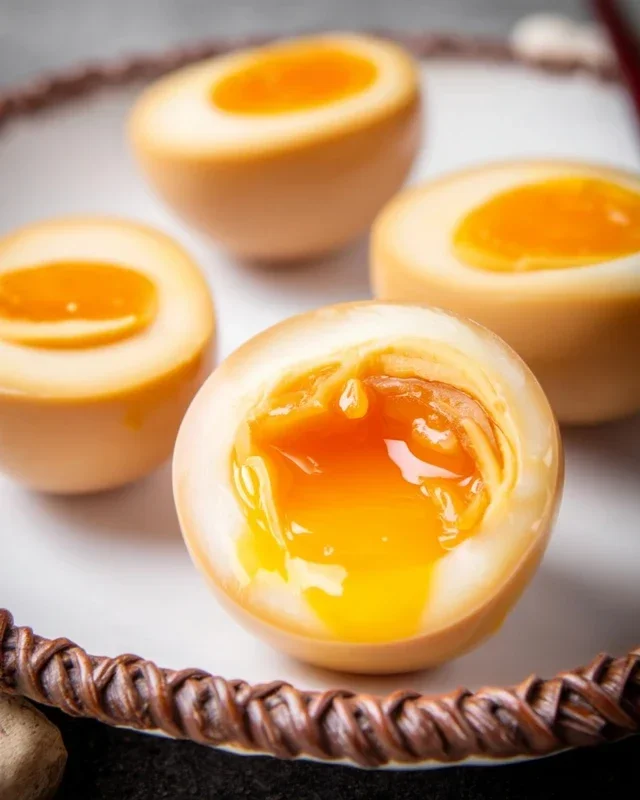
5. Serving Your Ajitama: After the marinating period, carefully remove the Ajitama from the marinade. You can reserve the leftover marinade to use as a dressing for salads or as a dipping sauce, though it’s best to use it within a few days. To serve, simply slice the eggs in half lengthwise with a sharp knife. You’ll be greeted by the beautiful, vibrant orange yolk and the slightly darker, flavor-infused egg white. Place them cut-side up on your ramen bowls, and prepare for an explosion of flavor. They are also delicious served on their own, or as a fantastic addition to any meal where a little extra savory goodness is desired. Enjoy your homemade Ajitama!
Conclusion:
And there you have it! Crafting perfect Ramen Eggs, or Ajitama, is surprisingly straightforward, and the results are truly spectacular. This recipe is fantastic because it elevates a simple boiled egg into something deeply flavorful and wonderfully satisfying. The rich, savory marinade infuses the whites and creates that iconic, luscious jammy yolk that’s the hallmark of a great ramen bowl. Whether you’re a seasoned ramen chef or just looking to add a gourmet touch to your meals, this is an essential skill to have in your culinary arsenal.
These delightful eggs are incredibly versatile. Of course, they are the star of any bowl of ramen, but don’t stop there! Try them sliced on top of fried rice, tucked into a banh mi sandwich, or even enjoyed on their own as a protein-packed snack. For variations, feel free to play with your marinade. Add a splash of non-alcoholic mirin for sweetness, a pinch of chili flakes for a kick, or even a star anise for a subtle licorice note. The possibilities are truly endless.
I truly encourage you to give this Ramen Egg recipe a try. It’s a simple investment of time that yields incredibly rewarding results. You’ll be amazed at how such a humble ingredient can become so complex and delicious.
Frequently Asked Questions:
How long do Ramen Eggs last in the refrigerator?
Once marinated, your Ramen Eggs can be stored in an airtight container in the refrigerator for up to 5 days. The flavor actually deepens over time, so they’re great to make ahead!
Can I use different soy sauce for the marinade?
Absolutely! While Japanese soy sauce is traditional and offers a wonderful umami depth, you can experiment with others. Light soy sauce will result in a less intense color and flavor, while tamari can be a good gluten-free alternative. Just be mindful of the saltiness.
What if I don’t have non-alcoholic sake?
No worries if you don’t have non-alcoholic sake! You can substitute it with dry sherry vinegar or even a dry white grape juice. If you prefer to avoid non-alcoholic alternative altogether, simply increase the amount of non-alcoholic mirin slightly or add a touch more water to the marinade.
Ramen Eggs (Ajitama)
Perfectly soft-boiled eggs marinated in a savory, slightly sweet soy sauce mixture, ideal for topping ramen or as a snack.
Ingredients
-
6 large eggs
-
½ cup soy sauce (light sodium)
-
¼ cup water
-
¼ cup non-alcoholic mirin
-
2 tablespoons granulated sugar
Instructions
-
Step 1
Gently place eggs in a pot and cover with cold water, adding a splash of vinegar if using. Bring to a rolling boil over medium-high heat. Once boiling, immediately reduce heat to a simmer and cook for 6 minutes for a soft yolk, or 7 minutes for a slightly firmer yolk. -
Step 2
Prepare an ice bath. Once the cooking time is up, immediately transfer the eggs to the ice bath to stop the cooking process. Let them cool for at least 10 minutes. -
Step 3
While eggs are cooling, prepare the marinade. In a small saucepan, combine the soy sauce, water, non-alcoholic mirin, and granulated sugar. Heat over medium heat, stirring until the sugar is dissolved. Let the mixture cool slightly. -
Step 4
Carefully peel the cooled eggs. Be gentle to avoid breaking the yolks. -
Step 5
Place the peeled eggs in a resealable bag or a small container. Pour the cooled marinade over the eggs, ensuring they are fully submerged. Seal the bag or cover the container. -
Step 6
Marinate the eggs in the refrigerator for at least 4 hours, or preferably overnight for deeper flavor. Flip the bag/container every few hours to ensure even marination.
Important Information
Nutrition Facts (Per Serving)
It is important to consider this information as approximate and not to use it as definitive health advice.
Allergy Information
Please check ingredients for potential allergens and consult a health professional if in doubt.



Leave a Comment