
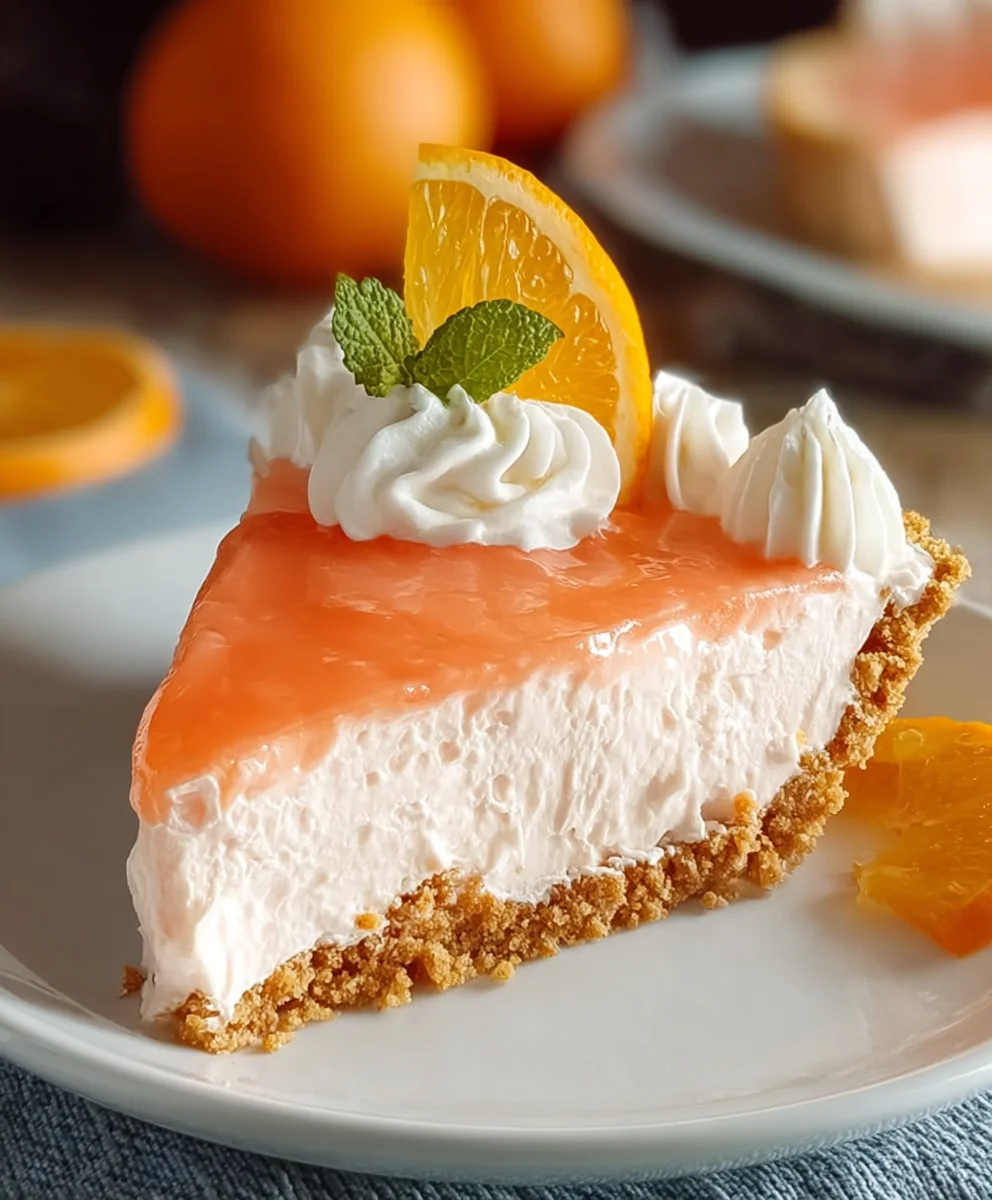
Jello Creamsicle Pie is more than just a dessert; it’s a vibrant, nostalgic journey in every creamy, zesty spoonful. I remember the first time I tasted this enchanting treat, and it immediately transported me back to carefree summer afternoons, chasing ice cream trucks and enjoying those iconic orange and cream pops. This delightful no-bake pie takes the beloved, classic flavor combination of a creamsicle – that perfect swirl of zesty orange and velvety vanilla – and transforms it into an effortlessly elegant dessert.
Jello, a timeless staple in American kitchens, has long been celebrated for its versatility and fun, and when combined with the universally adored creamsicle profile, it creates something truly special. People adore this pie for countless reasons. Its incredibly light and airy texture, coupled with the refreshing burst of citrus and the soothing richness of cream, makes it an ideal treat for any occasion, especially warmer months. It’s surprisingly simple to prepare, requiring no oven, which adds to its appeal as a convenient yet show-stopping finale to any meal. The vivid, cheerful color of this Jello Creamsicle Pie also makes it an instant showstopper on any dessert table, promising a taste of sunshine and joy. Prepare to fall in love with its irresistible charm and ease!

Ingredients:
- For the Graham Cracker Crust:
- 1 ½ cups (about 10-12 full sheets) graham cracker crumbs (finely crushed)
- ¼ cup granulated sugar
- 6 tablespoons unsalted butter, melted
- For the Creamy Orange Jello Filling:
- 2 (3-ounce) packages orange flavored Jello
- 1 ½ cups boiling water
- ½ cup cold water
- 1 cup ice cubes
- 1 (8-ounce) package cream cheese, softened to room temperature
- ½ cup powdered sugar (confectioners’ sugar)
- 1 teaspoon vanilla extract
- 1 (8-ounce) container frozen whipped topping (like Cool Whip), thawed in the refrigerator
- Optional: 1-2 tablespoons fresh orange zest or 1 tablespoon fresh orange juice for an extra citrus kick
- For Garnish (Optional):
- Additional thawed whipped topping
- Fresh orange slices or segments
- Additional orange zest
Preparing the Perfect Graham Cracker Crust
- Preheat Your Oven: First things first, let’s get our oven ready. Preheat your oven to 350°F (175°C). This will ensure your crust bakes beautifully and evenly, developing that lovely golden hue and slightly crisp texture that’s essential for a truly outstanding pie base.
- Crush the Graham Crackers: This is where the fun begins! If you’re starting with whole graham crackers, place them in a large resealable plastic bag. Use a rolling pin, the bottom of a heavy glass, or even a meat mallet to crush them into very fine crumbs. You can also use a food processor for a quicker, more consistent result – just pulse until you have fine crumbs. We want them as fine as possible to create a compact, sturdy crust. Aim for about 1 ½ cups of crumbs.
- Combine Dry Ingredients: In a medium-sized mixing bowl, combine the finely crushed graham cracker crumbs with the granulated sugar. Give it a good stir with a spoon or whisk to ensure the sugar is evenly distributed. This small amount of sugar helps to sweeten the crust and also aids in caramelization during baking, contributing to its delightful flavor.
- Add Melted Butter: Now, pour the six tablespoons of melted unsalted butter over the graham cracker and sugar mixture. Using unsalted butter allows us to control the saltiness of the pie, but if salted is all you have, it will work in a pinch. Stir thoroughly, ensuring every crumb is moistened by the butter. The mixture should resemble wet sand and hold together when you pinch it between your fingers. This step is critical because the butter acts as the binding agent, holding the crust together once it’s baked and cooled.
- Press into Pie Plate: Transfer the buttery graham cracker mixture into a standard 9-inch pie plate. Using the back of a spoon, your fingers, or the bottom of a flat glass, firmly press the mixture evenly across the bottom and up the sides of the pie plate. It’s important to press firmly to create a compact crust that won’t crumble when you slice into your finished Jello Creamsicle Pie. Pay special attention to the edges to create a nice, defined rim.
- Bake the Crust: Place the pie plate with the pressed crust into your preheated oven. Bake for 8 to 10 minutes, or until the edges are lightly golden and the crust smells fragrant. Baking the crust before adding the filling helps it to set, become slightly crisp, and prevents it from becoming soggy once the creamy filling is added.
- Cool Completely: Once baked, remove the crust from the oven and set it on a wire rack to cool completely to room temperature. This is a crucial step! Attempting to add the Jello filling to a warm crust will cause the filling to melt and not set properly, compromising the structural integrity of your delicious pie. Plan for at least 30-45 minutes of cooling time, or even longer if your kitchen is warm. You can even pop it in the refrigerator for 15-20 minutes to speed up the cooling process once it’s no longer piping hot.
Crafting the Creamy Jello Filling: The Heart of Your Jello Creamsicle Pie
- Dissolve the Jello: In a large heatproof bowl, empty the contents of both 3-ounce packages of orange flavored Jello. Carefully pour 1 ½ cups of boiling water over the Jello powder. Whisk continuously for at least 2 minutes, or until the Jello powder is completely dissolved and no granules remain. You want a perfectly clear, vibrant orange liquid. This thorough dissolution is key for a smooth filling.
- Cool with Ice and Cold Water: Once the Jello is fully dissolved, add ½ cup of cold water and 1 cup of ice cubes to the bowl. Stir gently but constantly until the ice cubes have completely melted and the mixture is thickened slightly and very cold. This rapid cooling technique allows the Jello to become more viscous without fully setting, which is exactly what we need for our creamy filling. It should be thick, almost syrupy, but still pourable. This stage is absolutely vital for the texture of your Jello Creamsicle Pie – it prevents the filling from separating.
- Prepare the Cream Cheese Mixture: In a separate, medium-sized mixing bowl, place your softened cream cheese. It’s truly important that the cream cheese is at room temperature to ensure it whips up smoothly without any lumps. If it’s too cold, you’ll end up with a lumpy filling. Add the ½ cup of powdered sugar and 1 teaspoon of vanilla extract. Using an electric mixer (handheld or stand mixer with a paddle attachment) on medium speed, beat the ingredients together until the mixture is light, fluffy, and completely smooth. Scrape down the sides of the bowl as needed to incorporate everything.
- Fold in the Whipped Topping: Gently fold in the thawed whipped topping into the cream cheese mixture. Use a rubber spatula and a delicate hand, incorporating it until no streaks of cream cheese remain. The goal here is to maintain as much air as possible in the whipped topping, which contributes to the light and airy texture of the final pie. Overmixing will deflate the whipped topping, resulting in a denser filling. This step truly gives our pie that classic “creamsicle” creaminess.
- Combine Jello and Cream Cheese Mixtures: Now, for the magical combination! Gradually add the cooled, thickened orange Jello mixture to the cream cheese and whipped topping mixture. Pour it in slowly while gently folding it with your rubber spatula. Continue folding until the two mixtures are fully combined and you have a uniform, pale orange, incredibly smooth, and creamy filling. You want to make sure there are no streaks of plain cream cheese or Jello. This careful folding ensures that the distinct orange flavor from the Jello is perfectly blended with the rich creaminess, creating that signature Jello Creamsicle Pie taste.
- Optional Flavor Boost: If you desire an even more pronounced citrus flavor, now is the time to gently fold in 1-2 tablespoons of fresh orange zest or 1 tablespoon of fresh orange juice. The zest will add a lovely aromatic lift, while the juice will enhance the bright orange notes. Remember, a little goes a long way, so taste as you go!
Assembling Your Delightful Jello Creamsicle Pie
- Pour into Crust: Carefully pour the beautifully creamy orange Jello filling into your completely cooled graham cracker crust. Use your rubber spatula to scrape out every last bit of that deliciousness from the bowl.
- Smooth the Top: Gently spread the filling evenly across the crust using the back of your spatula or spoon. You can create a slightly decorative swirl on top if you wish, as this will be the visible surface of your pie before garnishing.
- Chill Until Firm: This is arguably the most important step for the success of your Jello Creamsicle Pie. Cover the pie loosely with plastic wrap to prevent any odors from the refrigerator affecting its flavor and to keep the surface from drying out. Place the pie in the refrigerator and chill for a minimum of 4 hours, but ideally 6 hours or even overnight. It needs ample time to set completely firm. Rushing this step will result in a runny, messy pie, and we definitely don’t want that after all your hard work! The longer it chills, the firmer and more sliceable it will be.
Finishing Touches, Slicing, and Serving Your Jello Creamsicle Pie
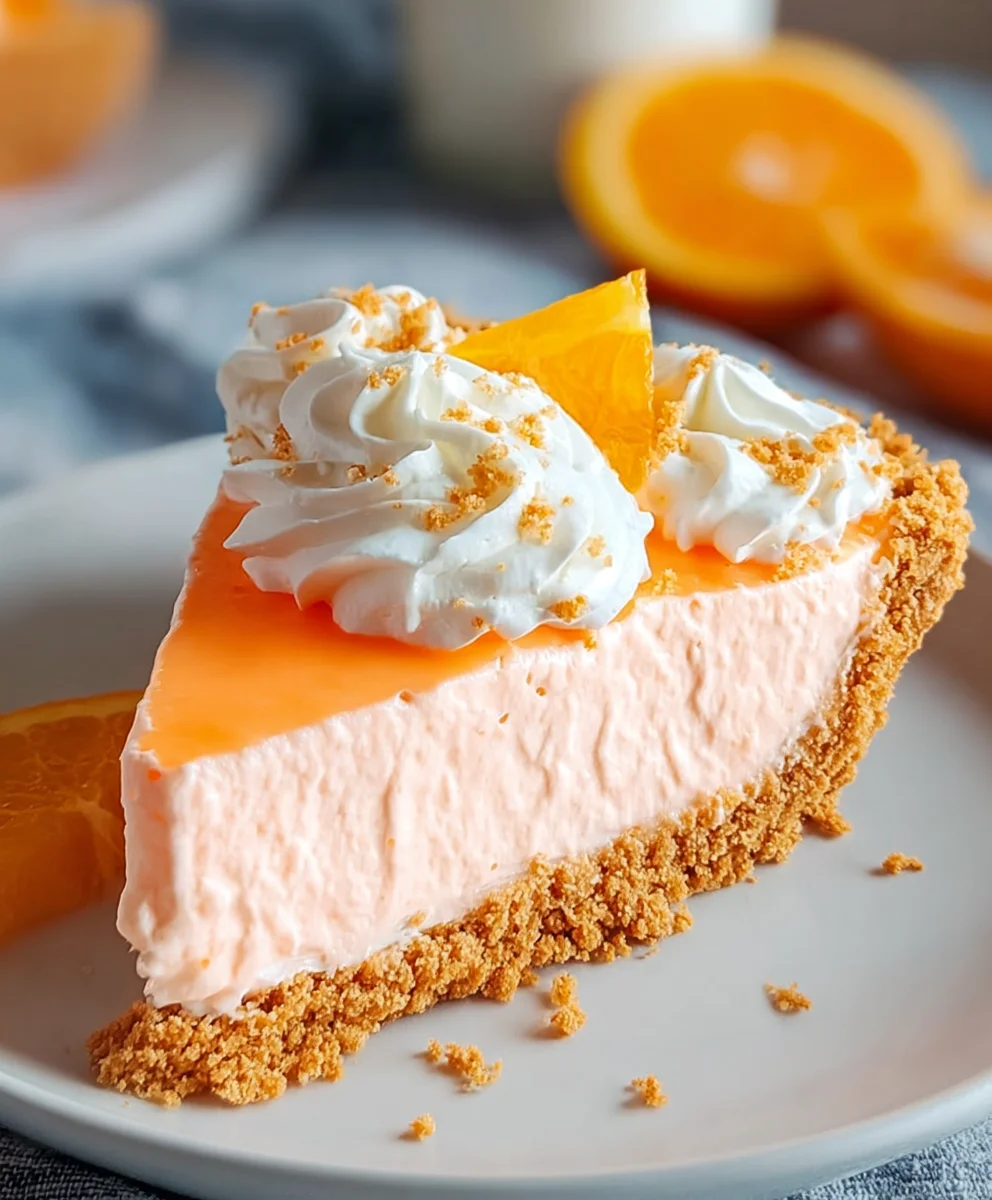
- Garnish Your Masterpiece: Once your Jello Creamsicle Pie is thoroughly chilled and firm, it’s time for the grand finale – garnishing! Just before serving, you can pipe or dollop additional thawed whipped topping onto the top of the pie. A pastry bag with a star tip makes for elegant swirls, or simply use a spoon for charming dollops.
- Add Fresh Citrus: For a vibrant and fresh touch, arrange thin slices or segments of fresh orange on top of the whipped topping. A sprinkle of fresh orange zest not only adds a beautiful color contrast but also provides an extra burst of aromatic citrus, enhancing the creamsicle experience. The visual appeal is almost as important as the taste, especially for a special dessert like this!
- Slicing Tips: To achieve clean slices, use a sharp knife that has been run under hot water and wiped dry before each cut. Wipe the blade clean between slices to prevent any dragging or mess, ensuring each piece of your Jello Creamsicle Pie looks as perfect as it tastes.
- Serve Immediately: This pie is best enjoyed cold, straight from the refrigerator. Its refreshing, creamy texture is at its peak when thoroughly chilled.
- Storage: Any leftover pie should be covered tightly with plastic wrap or aluminum foil and stored in the refrigerator. It will keep well for 3-4 days, though the graham cracker crust might soften slightly over time. This makes it an excellent make-ahead dessert for parties or family gatherings, allowing you to enjoy your guests without last-minute preparation stress. Just remember to add the fresh garnishes right before you plan to serve it for the best presentation.
Tips for an Unforgettable Jello Creamsicle Pie Experience
- Room Temperature Cream Cheese is Non-Negotiable: I cannot stress this enough! Cold cream cheese will inevitably lead to a lumpy filling, no matter how much you beat it. If you forget to take it out in advance, you can soften it more quickly by unwrapping it and placing it on a microwave-safe plate. Microwave on high for 10-15 seconds; just be careful not to cook it.
- The “Almost Set” Jello Technique: The step where you add ice to the hot Jello mixture is crucial. The goal is to cool the Jello rapidly until it’s very thick and syrupy, almost like a thick unset jelly, but not completely solid. This consistency is perfect for blending smoothly with the cream cheese mixture, ensuring your Jello Creamsicle Pie filling is homogenous and sets beautifully without any separation. If it sets too much, you can gently re-warm it a tiny bit, but it’s best to catch it at the right stage.
- Don’t Overmix the Whipped Topping: When folding in the whipped topping, be gentle. The air incorporated into the whipped topping is what gives the pie its light, fluffy, and truly “creamsicle-like” texture. Vigorous mixing will deflate it, resulting in a denser, heavier pie.
- Homemade Whipped Cream Alternative: For an even richer flavor, you can substitute the store-bought whipped topping with 2 cups of freshly made whipped cream. To make it, beat 1 cup of heavy cream with 2 tablespoons of powdered sugar and ½ teaspoon of vanilla extract until stiff peaks form. Fold this in just as you would the store-bought variety. While delicious, keep in mind homemade whipped cream can sometimes be a bit more delicate and may not hold up quite as long as the stabilized store-bought versions.
- Experiment with Flavors: While orange is classic for a Jello Creamsicle Pie, don’t be afraid to experiment! Lemon Jello with lemon zest for a “lemon meringue pie” feel, or strawberry Jello for a “strawberry shortcake” vibe, are fantastic variations. Just ensure the fruit zest or extract complements the Jello flavor you choose.
- Double the Recipe: This pie is always a crowd-pleaser! If you’re feeding a larger group, consider making two pies, or making one in a 9×13 inch pan for a more casual, bar-style dessert. Just be sure to double all your ingredients and use a larger baking dish for the crust.
- Patience in Chilling: Seriously, resist the urge to cut into it early! The full chilling time is essential for the Jello and cream cheese to set properly, resulting in clean slices and the perfect texture. A well-chilled pie is a joy to behold and eat.
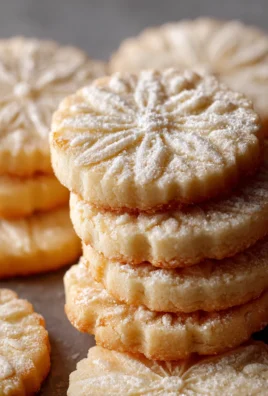
- Crust Variations: If graham crackers aren’t your favorite, consider using vanilla wafers or shortbread cookies, crushed finely, for the crust. The same butter and sugar ratios should work, giving your Jello Creamsicle Pie a slightly different but equally delightful foundation. Some even enjoy a simple plain shortbread crust without baking – just pressing it firmly and chilling.
- Enhancing the Orange Flavor: Beyond zest, a tiny drop of orange extract (food grade) can really amplify the “creamsicle” note. Add it sparingly, a quarter teaspoon at a time, and taste as you go to avoid overpowering the delicate balance. This is especially good if you want a really punchy orange flavor in your Jello Creamsicle Pie.
- Decorating Ahead: While it’s best to add fresh fruit garnishes just before serving to prevent them from drying out or discoloring, you can pipe the whipped topping onto the chilled pie a few hours in advance, then re-chill. This saves time on the day of serving.
Conclusion:
So there you have it, friends! We’ve journeyed through the simple steps to create a dessert that is far more than just a sweet treat. It’s a slice of pure, unadulterated joy, a vibrant burst of flavor that perfectly captures the essence of summer, no matter the season. If you’ve been searching for that one dessert that effortlessly combines nostalgia with modern ease, then this is it. Our Jello Creamsicle Pie isn’t just a recipe; it’s an experience waiting to happen, a guaranteed crowd-pleaser that will have everyone asking for the recipe. I truly believe that once you try this, you’ll understand exactly why I’m so passionate about it.
Why This Recipe is a Must-Try:
This dessert strikes that perfect balance – sweet yet tangy, creamy yet light, and astonishingly simple to whip up. Forget complicated baking techniques or hours spent fussing in the kitchen; this pie delivers maximum impact with minimal effort. It’s the kind of dessert that feels utterly special, yet requires absolutely no advanced culinary degree. The vibrant orange hue, the silky-smooth texture, and that unforgettable creamsicle flavor profile make it an instant classic in any household. Imagine the delighted smiles and impressed glances when you present this beautiful, sunshine-colored dessert at your next gathering. It’s inherently refreshing and delightfully cool, making it absolutely perfect for warm evenings, backyard barbecues, or as a bright, uplifting finish to any hearty meal. It’s the ultimate dessert for those who love big flavor without big fuss.
Elevate Your Experience: Serving Suggestions and Creative Variations:
Now, while this pie is absolutely phenomenal on its own, I always love to offer a few ideas to elevate your serving experience or to unleash your inner dessert artist with some delightful variations.
Serving Suggestions:
- For a classic touch, a generous dollop of freshly whipped cream is always a winner. The airy lightness of the cream perfectly complements the rich, tangy sweetness of the pie, creating a cloud-like texture contrast that is simply divine.
- Want to add a pop of vibrant color and an extra layer of freshness? Garnish each slice with a few tender fresh orange segments or a delicate sprinkle of finely grated orange zest. The citrus notes will brighten every bite.
- For an unexpected textural contrast and a hint of sophistication, a sprinkle of finely chopped toasted pistachios can add a lovely crunch and a subtle nutty flavor.
- For an extra layer of indulgence, a delicate drizzle of melted white chocolate or a simple, vibrant berry coulis (raspberry or strawberry would be heavenly!) can transform this into a truly gourmet dessert. Don’t be afraid to experiment with what you might already have on hand!
Creative Variations:
- But why stop there? The true beauty of this recipe lies in its incredible adaptability. While our focus today was on the beloved classic orange, think about the endless possibilities! Imagine a ‘Berry Blast Pie’ using strawberry or raspberry Jello, perhaps with a crumbly shortbread crust for added richness. Or a ‘Tropical Tango Pie’ with pineapple or lime Jello, maybe even incorporating a hint of toasted coconut into the crust or a light dusting on top of the finished pie.
- You could also experiment with different crusts to completely change the profile. While a graham cracker crust is my personal go-to for its ease and satisfying crunch, consider a vanilla wafer crust for an even sweeter, more buttery base, or even a gingersnap crust for a subtle spicy kick that would pair beautifully with the creamsicle flavor, adding an unexpected warmth.
- For individual servings, which are fantastic for parties or portion control, simply prepare the mixture in mini pie shells or small ramekins. These are incredibly charming and allow guests to grab their own perfectly portioned treat. You could even layer it beautifully in clear glasses with crumbled cookies for a sophisticated ‘parfait’ style dessert.
- Feeling particularly adventurous? Gently fold in some mini marshmallows, white chocolate chips, or even a sprinkle of toasted coconut flakes into the filling before chilling for an added texture and a delightful new flavor dimension. The possibilities are genuinely boundless once you have the basic technique down and feel confident to play!
Your Turn to Create and Share!
So, my friends, what are you waiting for? I wholeheartedly encourage you to roll up your sleeves, gather your ingredients, and dive into making this incredible pie. Seriously, you won’t regret it. It’s more than just a recipe; it’s an invitation to create happy, delicious memories in your kitchen and at your table. Whether it’s for a special celebration, a casual weeknight dessert, or simply because you deserve a treat, this pie is ready to deliver a burst of joy with every single forkful.
Once you’ve experienced the magic of this dessert, I would absolutely love to hear all about it! Did you stick to the classic recipe, or did you put your own unique twist on it with one of the variations I suggested? Perhaps you came up with an entirely new, brilliant idea that you’re excited to share! Please, don’t be shy. Come back and leave a comment below sharing your experience, your triumphs, and any serving suggestions or creative tips of your own. Your insights and creativity inspire me and our entire community of dessert lovers!
Even better, if you snap some beautiful photos of your culinary masterpiece, I’d be absolutely thrilled to see them! Sharing your creations not only brings a huge smile to my face but also helps others visualize their own delicious journey, providing inspiration and motivation. Let’s build a vibrant collection of shared experiences around this delightful recipe. Trust me, the joy of making and sharing this pie is truly infectious. Go forth and create something wonderfully delicious that brings smiles to everyone who tries it!
No-Bake Jello Creamsicle Pie
This No-Bake Jello Creamsicle Pie is a vibrant, nostalgic, and effortlessly elegant dessert, transforming the beloved classic orange and cream flavor into a light, airy, and refreshing treat. Simple to prepare with no oven required, its cheerful color and irresistible charm make it a show-stopping finale for any meal, especially in warmer months.
Ingredients
-
1 ½ cups graham cracker crumbs
-
¼ cup granulated sugar
-
6 tablespoons unsalted butter, melted
-
2 (3-ounce) packages orange flavored Jello
-
1 ½ cups boiling water
-
½ cup cold water
-
1 cup ice cubes
-
1 (8-ounce) package cream cheese, softened to room temperature
-
½ cup powdered sugar
-
1 teaspoon vanilla extract
-
1 (8-ounce) container frozen whipped topping (like Cool Whip), thawed
-
Optional: 1-2 tablespoons fresh orange zest or 1 tablespoon fresh orange juice
-
Optional Garnish: Additional thawed whipped topping
-
Optional Garnish: Fresh orange slices or segments
-
Optional Garnish: Additional orange zest
Instructions
-
Step 1
Preheat oven to 350°F (175°C). -
Step 2
Combine 1 ½ cups graham cracker crumbs with ¼ cup granulated sugar. Stir in 6 tablespoons melted unsalted butter until crumbs are moistened. -
Step 3
Press mixture firmly into a standard 9-inch pie plate, covering the bottom and sides. Bake for 8-10 minutes until lightly golden. Cool completely on a wire rack (30-45 minutes). -
Step 4
In a large heatproof bowl, dissolve both 3-ounce packages of orange Jello in 1 ½ cups boiling water, whisking continuously for at least 2 minutes until no granules remain. -
Step 5
Add ½ cup cold water and 1 cup ice cubes; stir gently but constantly until the ice cubes have completely melted and the mixture is thickened slightly and very cold (syrupy, but not set). -
Step 6
In a separate medium-sized mixing bowl, beat 1 (8-ounce) package softened cream cheese with ½ cup powdered sugar and 1 teaspoon vanilla extract until light, fluffy, and completely smooth. -
Step 7
Gently fold in 1 (8-ounce) container thawed whipped topping into the cream cheese mixture until no streaks remain, being careful not to overmix. -
Step 8
Gradually add the cooled, thickened orange Jello mixture to the cream cheese and whipped topping mixture, gently folding until fully combined and uniform. (Optional) Fold in 1-2 tablespoons fresh orange zest or 1 tablespoon fresh orange juice for an extra citrus kick. -
Step 9
Pour the creamy orange Jello filling into the completely cooled graham cracker crust. Gently spread the top evenly. -
Step 10
Cover the pie loosely with plastic wrap and chill in the refrigerator for a minimum of 4 hours, but ideally 6 hours or even overnight, until completely firm. -
Step 11
Just before serving, garnish with additional thawed whipped topping, fresh orange slices or segments, and/or a sprinkle of fresh orange zest. -
Step 12
For clean slices, use a sharp knife run under hot water and wiped dry between cuts. Serve cold. -
Step 13
Store any leftover pie covered tightly with plastic wrap or aluminum foil in the refrigerator for 3-4 days.
Important Information
Nutrition Facts (Per Serving)
It is important to consider this information as approximate and not to use it as definitive health advice.
Allergy Information
Please check ingredients for potential allergens and consult a health professional if in doubt.


Leave a Comment