
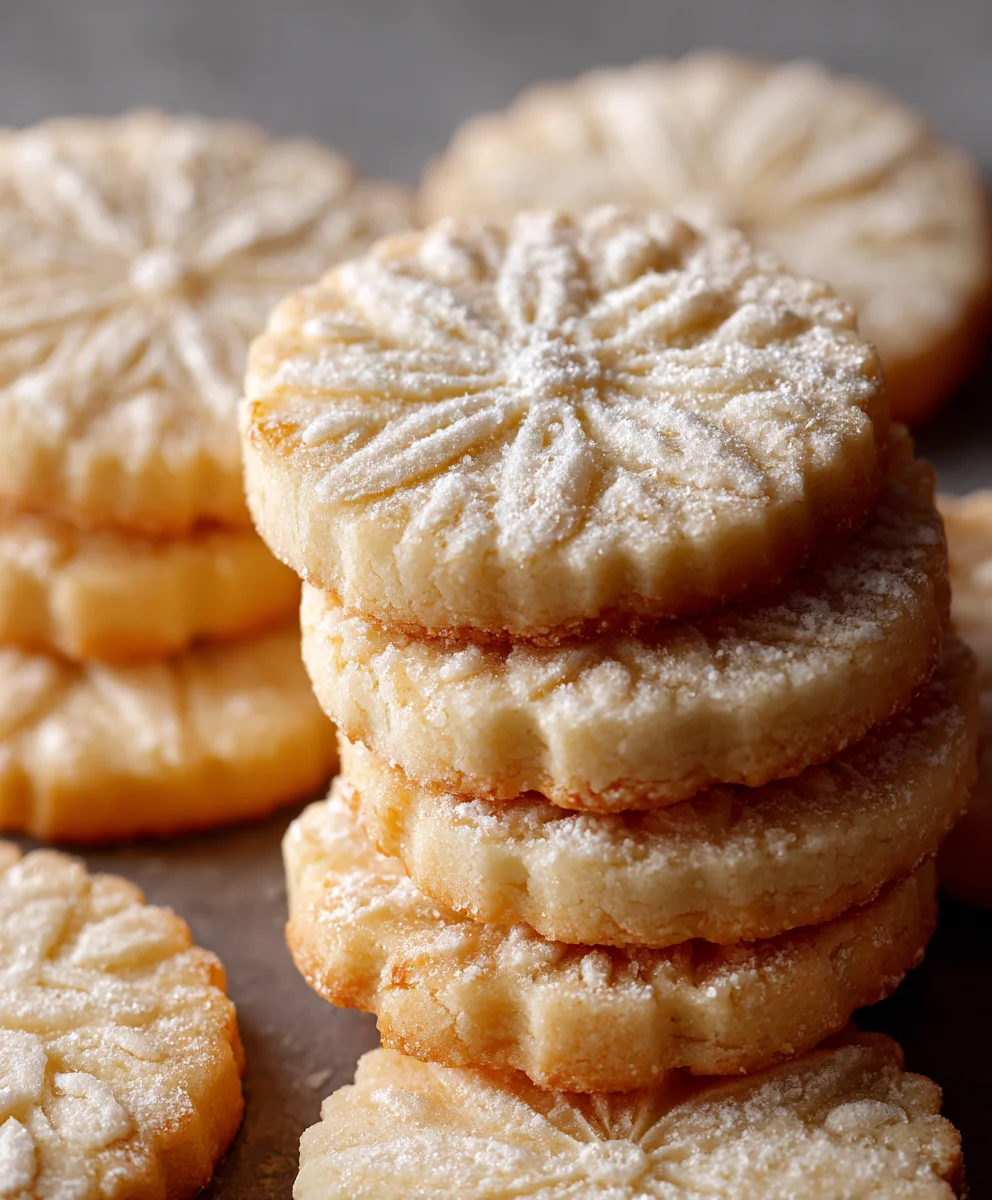
French Butter Cookies are more than just a sweet treat; they are a delicate culinary experience that transports you straight to a quaint French patisserie. Imagine biting into a cookie so exquisitely tender, so profoundly rich with the essence of pure butter, that it practically dissolves on your tongue, leaving behind an unforgettable, luxurious finish. This isn’t just a simple confection; it’s a testament to the timeless elegance of French baking, where quality ingredients and precise techniques transform humble components into something extraordinary.
The Enduring Appeal of French Butter Cookies
Hailing from the storied traditions of French culinary arts, particularly regions renowned for their butter, these cookies embody a centuries-old dedication to refined simplicity. They are cherished globally for their distinctive crisp edge, tender crumb, and that undeniably rich, pure butter flavor that defines them. There’s a beautiful simplicity in their preparation, yet the result is always sophisticated. People fall in love with these delightful cookies for their perfect balance of crispness and melt-in-your-mouth tenderness, making them an ideal accompaniment to your morning coffee or a sophisticated afternoon tea. Get ready to bake a batch of these truly iconic French Butter Cookies and discover the joy of this classic!

Ingredients:
- 2 cups (4 sticks or 452g) unsalted butter, softened to room temperature
- 1 cup (200g) granulated sugar
- 2 large egg yolks, at room temperature
- 1 teaspoon pure vanilla extract (or 1 ½ teaspoons for an extra fragrant cookie)
- 3 ½ cups (420g) all-purpose flour, spooned and leveled
- ½ teaspoon fine sea salt
- Optional: 1-2 tablespoons milk or cream for egg wash (for brushing before baking)
- Optional: ¼ cup turbinado sugar or pearl sugar for sprinkling
- Optional: 1 teaspoon lemon zest for a subtle citrus note
- Optional: ½ teaspoon almond extract for a deeper flavor profile
Preparing the Perfect French Butter Cookies Dough
Creating the foundational dough for these exquisite French Butter Cookies is where the magic truly begins. Every step here is designed to ensure a rich, tender, and perfectly crumbly cookie that melts in your mouth. Pay close attention to temperature and mixing, as these are critical for the ultimate texture.
-
Softening the Butter and Preparing Your Workspace:
Before you even think about mixing, ensure your unsalted butter is genuinely at room temperature. This means it should be soft enough to leave a slight indentation when gently pressed, but not melted or greasy. If it’s too cold, it won’t cream properly with the sugar, leading to dense cookies. If it’s too warm, your dough will be oily and difficult to handle. I often leave my butter out on the counter for at least an hour, sometimes two, before I plan to bake. Also, gather all your ingredients and measure them out – this mise en place approach makes the entire process smoother and more enjoyable.
-
Creaming Butter and Sugar to Perfection:
In a large mixing bowl, using an electric mixer fitted with the paddle attachment, or even a sturdy whisk and a lot of elbow grease if you’re feeling ambitious, beat together the softened unsalted butter and granulated sugar. Begin on low speed to incorporate them, then increase to medium-high. You’ll want to beat them for a good 3-5 minutes, perhaps even longer. During this time, the mixture will transform from dense and yellowish to light, pale, and incredibly fluffy. This process, known as creaming, incorporates air into the butter, which is absolutely vital for a light and tender crumb in your finished French Butter Cookies. Scrape down the sides of the bowl frequently to ensure everything is evenly combined.
-
Incorporating the Egg Yolks and Flavorings:
Once your butter and sugar mixture is beautifully light and airy, it’s time to add the egg yolks. I specifically use only egg yolks for these French Butter Cookies because they contribute to an unbelievably rich, tender, and somewhat chewy texture without adding too much moisture that could toughen the cookie. Add the two large egg yolks, one at a time, beating well after each addition until fully incorporated. Follow this immediately with the pure vanilla extract. If you’re using optional lemon zest or almond extract, add them now as well. Beat for another minute or so until everything is perfectly combined and smells wonderfully fragrant. The mixture should remain light and creamy.
-
Whisking the Dry Ingredients:
In a separate medium bowl, whisk together the all-purpose flour and fine sea salt. I always recommend spooning and leveling your flour rather than scooping directly from the bag; this prevents you from overpacking the flour and adding too much, which can lead to dry, crumbly, or tough cookies. The salt is crucial here; it balances the sweetness and enhances all the other flavors, giving these French Butter Cookies a more complex and satisfying taste profile.
-
Gently Combining Wet and Dry:
Now, with your mixer on low speed, gradually add the dry ingredients to the wet ingredients, about one-third at a time. Mix only until just combined. This is a very important step: do not overmix the dough. Overmixing develops the gluten in the flour, which can lead to tough, chewy cookies instead of the delicate, crisp, and melt-in-your-mouth texture we’re aiming for with these classic French Butter Cookies. As soon as you no longer see streaks of dry flour, stop the mixer. You can finish mixing the last few bits by hand with a spatula if necessary, ensuring everything is just incorporated.
-
Chilling the Cookie Dough: The Secret to Success:
At this point, your dough will be relatively soft. To make it manageable for rolling and to prevent the cookies from spreading too much during baking, it absolutely needs to be chilled. Divide the dough into two equal portions. Flatten each portion into a disk, wrap tightly in plastic wrap, and refrigerate for at least 2 hours, or preferably longer, up to overnight. Chilling allows the butter to firm up, the flavors to meld, and the gluten to relax. This step is non-negotiable for perfectly shaped and textured French Butter Cookies. If you’re in a hurry, you can put it in the freezer for about 30-45 minutes, but keep a close eye on it.
Shaping and Preparing Your French Butter Cookies for Baking
Once your dough is perfectly chilled, the fun part begins: bringing your French Butter Cookies to life! Precision and gentle handling during this stage will result in beautiful, uniform cookies.
-
Preparing Your Workspace for Rolling:
Take one disk of chilled dough from the refrigerator. If it’s very hard, let it sit on the counter for 5-10 minutes to soften slightly, but don’t let it get too warm. Lightly flour your work surface, your rolling pin, and the top of the dough. I prefer to use as little flour as possible to avoid drying out the dough, so a pastry mat or parchment paper can be very helpful here.
-
Rolling Out the Dough Evenly:
Using your floured rolling pin, roll out the dough to an even thickness. For classic French Butter Cookies, I aim for about ¼ inch (about 6mm) thick. If the dough starts to stick, gently lift it and add a tiny bit more flour underneath. If it becomes too soft or sticky at any point, don’t hesitate to pop it back into the fridge for 10-15 minutes to firm up. Even thickness is key for even baking, ensuring all your cookies are perfectly golden and cooked through at the same time.
-
Cutting Out Your Cookie Shapes:
Now, for the creative part! Use your favorite cookie cutters to cut out shapes. Traditional French Butter Cookies are often round, fluted, or simple squares, but feel free to use stars, hearts, or any shape you desire. Dip your cookie cutters in a bit of flour between cuts to prevent sticking. Place the cut-out cookies onto baking sheets lined with parchment paper or silicone baking mats. Leave about 1 inch between each cookie to allow for minimal spreading. Gather any dough scraps, gently press them together (avoid overworking!), re-wrap, and chill again before re-rolling. This helps maintain the tender texture.
-
Optional: Egg Wash and Decorating Touches:
For a beautiful golden sheen and a slightly crisper finish, you can brush the tops of your cut-out cookies with an egg wash. To make an egg wash, simply whisk one egg yolk with 1-2 tablespoons of milk or cream. Gently brush a thin layer over each cookie using a pastry brush. If desired, sprinkle with turbinado sugar for a lovely sparkle and added texture, or pearl sugar for a more rustic look. This step truly elevates the visual appeal of your homemade French Butter Cookies.
-
Second Chill (Highly Recommended):
Once your cookies are cut and placed on the baking sheets, it’s a really good idea to chill them again for at least 15-30 minutes in the refrigerator. This second chill helps to ensure the cookies hold their shape perfectly in the oven, preventing any significant spreading. It locks in that beautiful crisp edge and distinct shape that we adore in well-made French Butter Cookies. While this might seem like an extra step, I promise you it makes a noticeable difference in the final product.
Baking Your Exquisite French Butter Cookies
The moment of truth! Baking these French Butter Cookies requires a preheated oven and a watchful eye to achieve that perfect golden hue and irresistible aroma.
-
Preheating the Oven:
While your cookies are chilling for their second rest, preheat your oven to 350°F (175°C). Ensure your oven is fully preheated before placing the cookies inside. A stable, consistent temperature is crucial for even baking and prevents the cookies from spreading too quickly.
-
Baking to Golden Perfection:
Bake the chilled French Butter Cookies for 10-15 minutes. Baking times can vary slightly depending on your oven and the thickness of your cookies, so keep a close watch. The edges should be lightly golden brown, and the centers should appear set and slightly pale. Do not overbake them! Overbaked butter cookies become dry and lose their delicate, tender texture. I like to rotate my baking sheets halfway through the baking time to ensure even browning, especially if your oven has hot spots.
-
Cooling the Baked Cookies:
Once baked, remove the baking sheets from the oven. Allow the French Butter Cookies to cool on the baking sheets for about 5 minutes. They will be quite delicate when warm, so this initial cooling period helps them firm up. After 5 minutes, carefully transfer the cookies to a wire rack to cool completely. Cooling on a wire rack allows air to circulate around the cookies, preventing them from becoming soggy on the bottom and ensuring they stay delightfully crisp.
Finishing Touches and Storing Your French Butter Cookies
Your magnificent French Butter Cookies are almost ready to be enjoyed! A few final touches and proper storage will ensure they stay perfect.
-
Optional Glazes or Decorations:
These French Butter Cookies are absolutely delicious on their own, but if you wish to add an extra flourish, you can consider a simple powdered sugar glaze. Whisk together 1 cup of powdered sugar with 2-3 tablespoons of milk or lemon juice until smooth. Drizzle over the cooled cookies, or dip half of each cookie for an elegant look. For chocolate lovers, melting some good quality dark or white chocolate and dipping a portion of the cooled cookie can be a truly decadent addition. Allow any glazes or chocolate to set completely before storing.
-
Storing Your French Butter Cookies:
Once completely cooled, store your beautiful French Butter Cookies in an airtight container at room temperature. Layer them between sheets of parchment paper to prevent sticking, especially if they are glazed. They will maintain their freshness and delightful crunch for up to 1 week. For longer storage, you can freeze the baked cookies in an airtight container for up to 2-3 months. Simply thaw them at room temperature when you’re ready to enjoy that buttery goodness again. These cookies also make wonderful gifts, so consider tying a ribbon around a small stack!
-
Enjoying Your Creation:
Finally, it’s time to savor the fruits of your labor! Serve these exquisite French Butter Cookies with a cup of hot tea, coffee, or a glass of cold milk. Their rich, buttery flavor and tender, crumbly texture make them an absolutely perfect treat for any occasion, or simply for a moment of self-indulgence. There’s truly nothing quite like the taste of homemade French Butter Cookies, especially when made with such care and attention to detail. Enjoy every single delicate bite!

Conclusion:
So, there you have it – my absolute favorite recipe, a true game-changer in the world of home baking. If you’ve ever yearned for that perfect bite, the kind that transports you straight to a quaint Parisian patisserie with just one taste, then this is the recipe you’ve been waiting for. We’re talking about cookies that are deceptively simple to make yet deliver a complex flavor profile that will impress even the most discerning palate. The magic lies in the quality of the butter, which transforms into a rich, melt-in-your-mouth texture that is simply unparalleled. These aren’t just any cookies; they are an experience. They are buttery, yes, but also subtly sweet, with a delicate crispness that gives way to a tender crumb. Every single time I bake them, I’m reminded of why they hold such a special place in my heart – and now, hopefully, in yours too. They are the epitome of simple elegance, proving that you don’t need a pantry full of exotic ingredients to create something truly extraordinary. Whether you’re a seasoned baker or just starting your culinary journey, these cookies are incredibly forgiving and reward your efforts with pure, unadulterated deliciousness. Seriously, trust me on this one; they are that good.
Why These Are a Must-Try
What makes this particular recipe stand out? It’s the harmonious balance of textures and flavors. The golden edges provide a satisfying snap, while the center remains incredibly tender, almost melting on the tongue. This isn’t just about making a cookie; it’s about crafting a moment of pure bliss. They are perfect for gifting, bringing to a potluck, or simply enjoying with your morning coffee. The simplicity of the ingredients belies the incredible depth of flavor you achieve, making them a truly rewarding bake. You’ll be surprised at how easy it is to achieve such a professional-tasting result right in your own kitchen. They’re the kind of cookie that disappears from the plate almost as quickly as you can bake them, always leaving everyone asking for the recipe. Prepare to become everyone’s favorite baker!
Get Creative: Serving & Variation Ideas
Now, once you’ve pulled these golden beauties from the oven and allowed them to cool slightly, the real fun begins: enjoying them! While these cookies are utterly perfect on their own, perhaps with a cup of strong, freshly brewed coffee or a delicate Earl Grey tea, their versatility truly knows no bounds. Imagine dunking them into a steaming mug of hot chocolate on a chilly evening – pure bliss! For a delightful dessert, crumble a few over a scoop of vanilla bean ice cream, letting the warmth of the cookie mingle with the cold cream. You could even use them as a base for a mini fruit tart, spreading a thin layer of lemon curd or fresh berries on top.
But why stop there? Let’s talk variations! These cookies are a fantastic canvas for your creativity. Want to add a citrusy zing? Fold in a tablespoon of finely grated lemon or orange zest into the dough. For a nutty twist, a quarter cup of finely ground almonds or pistachios would be absolutely divine. If you’re a chocolate lover (and who isn’t?), consider dipping half of each cooled cookie into melted dark or white chocolate and then sprinkling with a pinch of sea salt or some colorful sprinkles. For a more festive look, you could add a hint of almond extract to the dough and then drizzle with a simple powdered sugar glaze colored with a drop of food coloring for holidays. Or, for a touch of sophistication, dust them with a light layer of matcha powder or cocoa powder right before serving. The basic recipe for these incredible French Butter Cookies is a springboard; feel free to experiment and make them uniquely yours. Don’t be afraid to play around with different shapes too – while classic rounds are lovely, you could press the dough into a tart pan for a larger cookie crust, or even use fun cookie cutters for special occasions like hearts for Valentine’s Day or stars for Christmas. They make wonderful edible gifts too, beautifully packaged in a simple tin or box, making them a thoughtful gesture for friends and family.
Your Turn: Bake and Share!
So, what are you waiting for? I genuinely believe that every home baker deserves to experience the joy of creating and savoring these magnificent treats. They are proof that some of the most profound pleasures in life come from the simplest ingredients, handled with a little love and attention. I truly hope you’ll set aside some time this week to bake a batch (or two!). And please, when you do, don’t keep it to yourself! I would absolutely love to hear about your baking adventures. Did you try a fun variation? What was your favorite part of the process? Did they bring a smile to someone’s face? Share your experiences, your photos, and your tips in the comments below. Your feedback and stories inspire me and other readers so much. Happy baking, my friends – I can’t wait to hear how much you adore these cookies!
Classic French Butter Cookies
French Butter Cookies are a delicate culinary experience. These exquisitely tender cookies, rich with pure butter, practically dissolve on your tongue, leaving an unforgettable, luxurious finish. They embody the timeless elegance of French baking, transforming humble components into something extraordinary.
Ingredients
-
½ cup unsalted butter, softened
-
½ cup powdered sugar, sifted
-
1 cup all-purpose flour
-
1 tsp vanilla extract (non-alcohol alternative)
-
Pinch of salt
Instructions
-
Step 1
In a mixing bowl, cream softened unsalted butter and sifted powdered sugar until light and fluffy. -
Step 2
Beat in the vanilla extract (non-alcohol alternative) and a pinch of salt until well combined. -
Step 3
Gradually add the all-purpose flour, mixing on low speed until just combined and a cohesive dough forms. Do not overmix. -
Step 4
Flatten the dough into a disk, wrap tightly in plastic, and refrigerate for at least 2 hours, or up to overnight. This step is crucial for texture and shape. -
Step 5
On a lightly floured surface, roll the chilled dough to an even ¼ inch (6mm) thickness. Use cookie cutters to cut into desired shapes. -
Step 6
Place the cut cookies onto parchment-lined baking sheets. Chill again in the refrigerator for another 15-30 minutes to prevent spreading during baking. -
Step 7
Preheat your oven to 350°F (175°C). Bake the chilled cookies for 10-15 minutes, until the edges are lightly golden brown. Do not overbake to maintain tenderness. -
Step 8
Remove baking sheets from the oven and let the cookies cool on the sheets for about 5 minutes. Carefully transfer them to a wire rack to cool completely. -
Step 9
Once completely cooled, store your French Butter Cookies in an airtight container at room temperature for up to 1 week to maintain freshness and crunch.
Important Information
Nutrition Facts (Per Serving)
It is important to consider this information as approximate and not to use it as definitive health advice.
Allergy Information
Please check ingredients for potential allergens and consult a health professional if in doubt.


Leave a Comment