
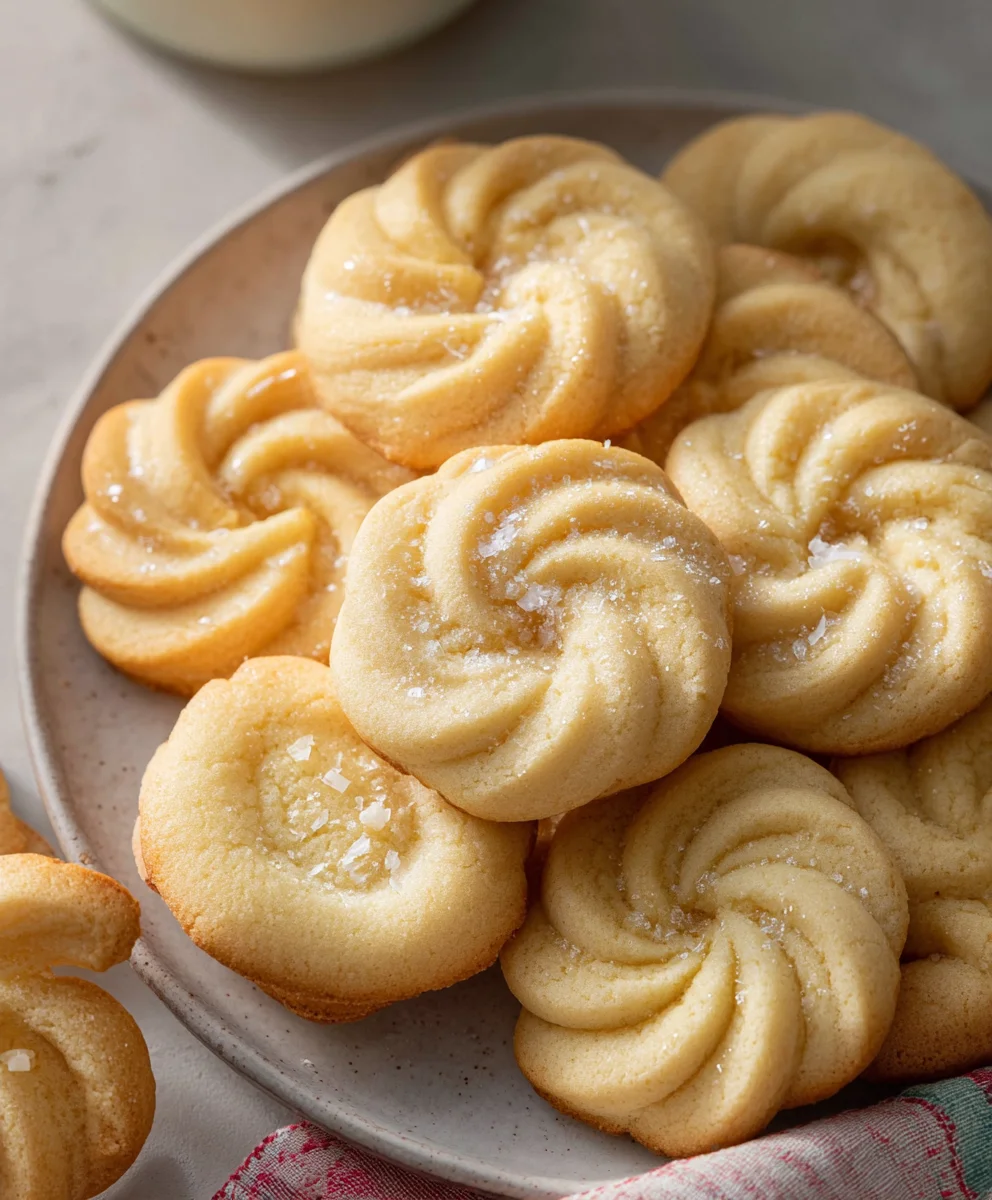
Danish Butter Cookies (Melt in your mouth) are more than just a treat; they are a nostalgic embrace, a delicate dance of simple ingredients that culminate in pure bliss. For generations, these iconic cookies have graced holiday tables, filled cookie tins with their cheerful presence, and brought smiles with every delicate bite. What is it about these humble cookies that captures our hearts and taste buds so completely? It’s the exquisite balance: the rich, creamy butter that forms their soul, the whisper of sweetness that doesn’t overwhelm, and that signature crisp texture that gives way to an almost ethereal melt on your tongue. These aren’t just any cookies; they are a testament to the power of quality ingredients and time-honored tradition, creating a truly unforgettable confection that will have you reaching for just one more.

Ingredients:
- 1 cup (227 g) European salted butter (room temperature)
- 1/2 cup (100 g) granulated sugar
- 1/8 teaspoon salt
- 2 egg yolks
- 2 teaspoons (10 g) vanilla extract
- 1 tablespoon (15 g) whole milk (or more to soften)
- 2 cups (220 g) all-purpose flour
- 1/2 cup (50 g) cake flour
- coarse sugar (for decorating)
Preparing the Dough
Creaming the Butter and Sugar
The journey to achieving those perfectly melt-in-your-mouth Danish Butter Cookies begins with the foundation: a beautifully creamed butter and sugar mixture. In a large mixing bowl, combine your softened European salted butter with the granulated sugar and the 1/8 teaspoon of salt. It’s crucial that your butter is truly at room temperature – not melted, but soft enough to yield easily to the touch. This allows it to incorporate air effectively, which is key to the cookies’ light and airy texture. Begin creaming this mixture with an electric mixer on medium speed. You’ll want to beat it for a good 3 to 5 minutes, or until it becomes pale yellow and wonderfully fluffy, resembling a smooth, light cloud. Scrape down the sides of the bowl periodically to ensure everything is evenly incorporated. This step is where a lot of the magic happens, so don’t rush it! The aeration created here will prevent your cookies from being dense.
Adding the Wet Ingredients
Once your butter and sugar are perfectly creamed, it’s time to introduce the other liquid components. Add the 2 egg yolks to the mixture, one at a time, beating well after each addition until fully incorporated. Egg yolks contribute richness and a lovely tender crumb to the cookies. Next, stir in the 2 teaspoons of vanilla extract. The quality of your vanilla extract will really shine through here, so using a good one is recommended. You’ll notice the mixture might look slightly curdled at this stage; this is perfectly normal. To help bring everything together smoothly, add the 1 tablespoon of whole milk. If the dough still feels a little stiff or crumbly, you can add another teaspoon of milk, but be careful not to make it too wet. Mix just until the ingredients are combined. Overmixing at this point can develop the gluten in the flour too much, leading to tougher cookies.
Incorporating the Flours
Combining Dry and Wet Ingredients
Now, it’s time to introduce the flours. In a separate medium bowl, whisk together the 2 cups of all-purpose flour and the 1/2 cup of cake flour. The cake flour, with its lower protein content, is essential for achieving that signature delicate, melt-in-your-mouth tenderness. Whisking them together ensures they are evenly distributed before they meet the wet ingredients. Gradually add the combined flours to the butter mixture, mixing on the lowest speed of your electric mixer or by hand with a spatula until just combined. You want to mix until no dry streaks of flour remain. It’s very important not to overmix the dough once the flour is added, as this can result in tough cookies. The goal is a soft, pliable dough that holds together.
Chilling and Shaping the Dough
Once the dough has come together, turn it out onto a lightly floured surface. Gently knead it a few times, just enough to form a cohesive ball. The dough will be soft and slightly sticky. Divide the dough in half. Shape each half into a log, about 1.5 to 2 inches in diameter. Wrap each log tightly in plastic wrap, ensuring there are no air pockets. Place the wrapped dough logs in the refrigerator to chill for at least 1 hour, or until firm enough to slice easily. This chilling period is crucial for several reasons. It solidifies the butter, which prevents the cookies from spreading too much during baking and helps them maintain their shape. It also makes the dough much easier to handle and slice uniformly.
Baking the Cookies
Slicing and Decorating
Preheat your oven to 350°F (175°C). Line baking sheets with parchment paper. Once the dough logs are firm, unwrap them. Using a sharp knife, carefully slice the dough into 1/4-inch thick rounds. Arrange the cookie slices on the prepared baking sheets, leaving about 1 inch of space between each one. If you desire, you can gently press a fork onto the top of each cookie to create a traditional crosshatch pattern, or leave them plain. For an extra touch of sparkle and sweetness, sprinkle the tops with coarse sugar. The coarse sugar will provide a delightful crunch and a beautiful glistening finish to your Danish Butter Cookies.
Baking to Perfection
Bake the cookies for 10 to 12 minutes, or until the edges are lightly golden brown and the centers are set. Keep a close eye on them, as they can go from perfectly baked to overdone very quickly due to their delicate nature. The exact baking time will depend on your oven and the thickness of your cookies. Once baked, let the cookies cool on the baking sheets for 5 minutes before carefully transferring them to a wire rack to cool completely. This allows them to firm up further. Storing these Danish Butter Cookies in an airtight container at room temperature will keep them fresh and delightfully melt-in-your-mouth for several days.
Conclusion:
And there you have it – the simple yet incredibly rewarding journey to creating your own batch of authentic Danish Butter Cookies (Melt in your mouth)! We’ve walked through each step, from creaming the butter and sugar to achieving that perfect delicate texture. These cookies are truly a testament to the magic of simple, quality ingredients. They are wonderfully versatile and perfect for any occasion, whether it’s a special celebration or just a quiet afternoon with a cup of tea. I encourage you to give this recipe a try; the aroma alone will fill your home with warmth and anticipation, and the taste is simply divine. Enjoy sharing these delightful treats with loved ones or savoring them yourself!
For serving, I find these Danish Butter Cookies (Melt in your mouth) are best enjoyed slightly cooled, allowing their buttery richness to fully develop. They pair beautifully with coffee, tea, or even a glass of milk. If you’re looking for variations, consider adding a touch of almond extract alongside the vanilla for a subtle nutty note, or sprinkle them with a pinch of flaky sea salt just before baking for a delightful sweet and salty contrast. You could also dip half of the cooled cookie in melted dark chocolate for an extra touch of decadence.
Frequently Asked Questions:
Q: Why are my Danish Butter Cookies (Melt in your mouth) not as crisp as I expected?
A: This could be due to a few factors. Ensure your oven temperature is accurate and that you are not underbaking them. They should be lightly golden around the edges. Also, make sure they are completely cooled on a wire rack before storing, as residual heat can create steam and make them softer. If your kitchen is very humid, that can also affect crispness.
Q: Can I freeze the dough for these Danish Butter Cookies (Melt in your mouth)?
A: Absolutely! The dough freezes wonderfully. Shape it into logs, wrap them tightly in plastic wrap, and then in foil. When ready to bake, let the dough sit at room temperature for about 15-20 minutes until it’s sliceable, then proceed with the recipe. You might need to add a minute or two to the baking time.
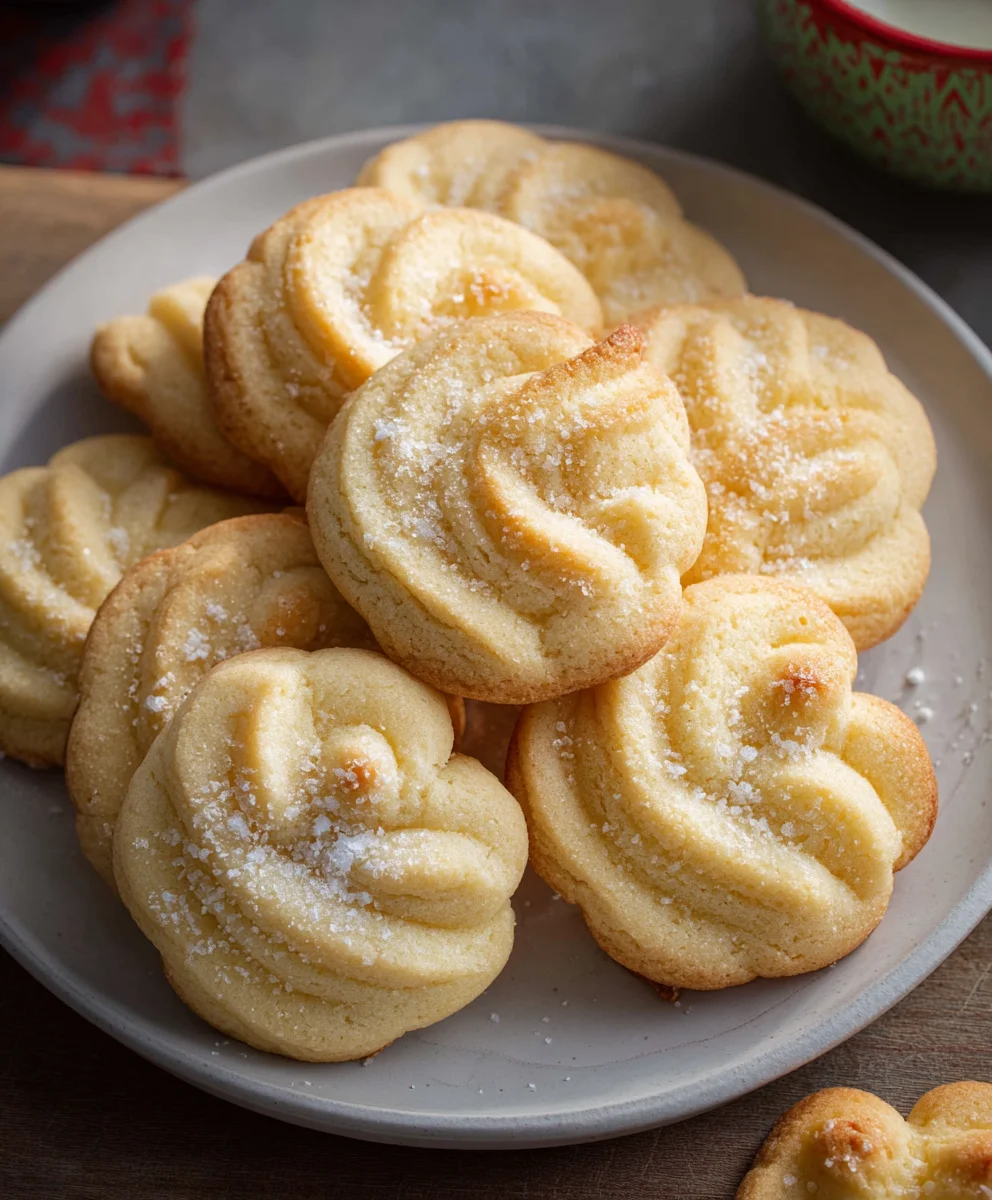
Melt-in-Mouth Danish Butter Cookies Recipe
Classic Danish butter cookies that are tender, buttery, and melt in your mouth. Perfect for any occasion.
Ingredients
-
1 cup (227 g) European salted butter (room temperature)
-
1/2 cup (100 g) granulated sugar
-
1/8 teaspoon salt
-
2 egg yolks
-
2 teaspoons (10 g) vanilla extract
-
1 tablespoon (15 g) whole milk (or more to soften)
-
2 cups (220 g) all-purpose flour
-
1/2 cup (50 g) cake flour
-
coarse sugar (for decorating)
Instructions
-
Step 1
In a large mixing bowl, cream together softened European salted butter, granulated sugar, and salt until pale yellow and fluffy, about 3-5 minutes. -
Step 2
Add egg yolks one at a time, beating well after each. Stir in vanilla extract and whole milk until just combined. The mixture may look curdled, which is normal. -
Step 3
In a separate bowl, whisk together all-purpose flour and cake flour. Gradually add the flour mixture to the butter mixture, mixing on low speed or by hand until just combined. Do not overmix. -
Step 4
Turn the dough out onto a lightly floured surface, knead a few times to form a cohesive ball. Divide the dough in half, shape each into a 1.5-2 inch diameter log, wrap tightly in plastic wrap, and chill for at least 1 hour. -
Step 5
Preheat oven to 350°F (175°C). Line baking sheets with parchment paper. Slice chilled dough logs into 1/4-inch thick rounds and arrange on prepared baking sheets, leaving 1-inch spacing. Optionally, press with a fork and sprinkle with coarse sugar. -
Step 6
Bake for 10-12 minutes, or until edges are lightly golden brown and centers are set. Cool on baking sheets for 5 minutes, then transfer to a wire rack to cool completely.
Important Information
Nutrition Facts (Per Serving)
It is important to consider this information as approximate and not to use it as definitive health advice.
Allergy Information
Please check ingredients for potential allergens and consult a health professional if in doubt.
Leave a Comment