
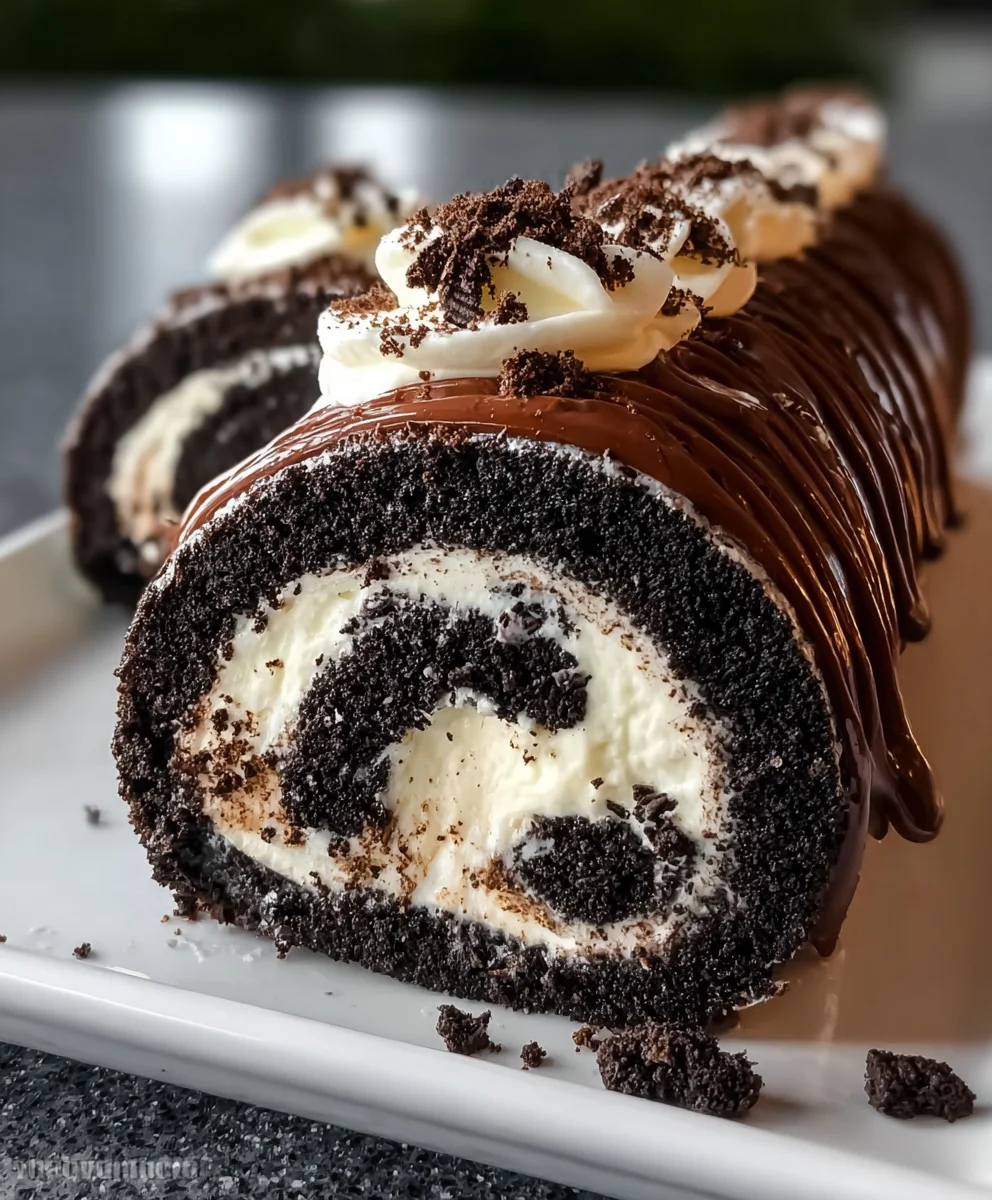
Oreo Roll Dessert is more than just a sweet treat; it’s a gateway to pure joy and nostalgia. Have you ever craved a dessert that’s both incredibly easy to make and ridiculously delicious? This particular Oreo Roll Dessert is that perfect answer, a crowd-pleaser that consistently earns rave reviews at every gathering. What’s not to love? We’re talking about the irresistible crunch of crushed Oreos mingling with a velvety smooth cream cheese filling, all swirled together into a delightful roll that’s as beautiful as it is tasty. It’s the kind of dessert that makes your taste buds sing and leaves everyone asking for the recipe. The magic lies in its deceptive simplicity, transforming humble ingredients into something truly extraordinary. Get ready to discover why this Oreo Roll Dessert is destined to become your new go-to for any occasion.

Ingredients:
- 1 box chocolate cake mix (or homemade chocolate cake)
- 3 large eggs
- 1/2 cup vegetable oil
- 1 cup water
- 1 tsp vanilla extract
- Powdered sugar (for dusting)
- 8 oz cream cheese, softened
- 1/4 cup unsalted butter, softened
- 1/2 cup powdered sugar
- 1 tsp vanilla extract (for filling)
- 1/2 cup crushed Oreo cookies (about 6-8 cookies)
- 1/4 cup white chocolate, melted
- 4-6 whole Oreo cookies (for decoration)
- Extra crushed Oreo cookies (for garnish)
Baking the Chocolate Cake Base
First things first, we need to prepare our chocolate cake base. This will form the delicious foundation of our Oreo Roll Dessert. In a large mixing bowl, combine the contents of the chocolate cake mix according to the package directions. Typically, this involves adding the cake mix, the 3 large eggs, 1/2 cup of vegetable oil, and 1 cup of water. Whisk everything together until it’s well combined and you have a smooth batter. Don’t overmix; just ensure there are no dry pockets of cake mix remaining. Now, stir in the 1 teaspoon of vanilla extract for an extra layer of flavor. Preheat your oven to the temperature recommended on the cake mix box, usually around 350°F (175°C). Prepare a jelly roll pan (a rimmed baking sheet, approximately 10×15 inches) by greasing it thoroughly and lining it with parchment paper. This is crucial to prevent sticking and ensure your cake comes out cleanly. Pour the batter evenly into the prepared pan, spreading it to all the corners. Bake for the time specified on the cake mix box, or until a toothpick inserted into the center comes out clean. This usually takes between 12-15 minutes for a thin cake layer. Keep a close eye on it as it bakes quickly.
Cooling and Preparing for Rolling
Once the chocolate cake is baked, it’s time to get it ready for rolling. While the cake is still warm in the pan, you’ll want to create a surface for it to cool on. Take a clean kitchen towel and generously dust it with powdered sugar. This is our secret to preventing the cake from sticking to itself when we roll it. While the cake is still in the pan, carefully invert it onto the prepared powdered sugar-dusted towel. Gently peel off the parchment paper that was on the bottom of the cake. If any bits of parchment stick, you can carefully dab them off with a damp cloth. Now, here’s a vital step for preventing cracks: you’re going to roll the cake up, with the towel inside, starting from one of the shorter ends. Roll it up as snugly as you can without forcing it. Let this rolled cake cool completely on a wire rack. This cooling period is essential for allowing the cake to become pliable enough to roll without breaking when we assemble the final dessert.
Crafting the Creamy Oreo Filling
While our cake base is cooling, let’s whip up the luscious filling for our Oreo Roll Dessert. In a medium mixing bowl, combine the 8 ounces of softened cream cheese and the 1/4 cup of softened unsalted butter. Using an electric mixer or a sturdy whisk, beat these together until they are light and fluffy. It’s important that both the cream cheese and butter are at room temperature so they blend smoothly without lumps. Gradually add the 1/2 cup of powdered sugar to the cream cheese mixture, beating until it’s fully incorporated and the filling is smooth and creamy. Next, add the 1 teaspoon of vanilla extract for that classic sweet flavor. Now for the star ingredient: stir in the 1/2 cup of crushed Oreo cookies. You can crush your Oreos by placing them in a zip-top bag and gently crushing them with a rolling pin or the bottom of a heavy pan, or by pulsing them briefly in a food processor. Make sure to reserve a few whole Oreo cookies and some extra crushed Oreos for decoration later. Fold the crushed Oreos into the cream cheese mixture until they are evenly distributed. This filling will be rich, decadent, and have delightful little pockets of Oreo goodness.
Assembling the Oreo Roll Dessert
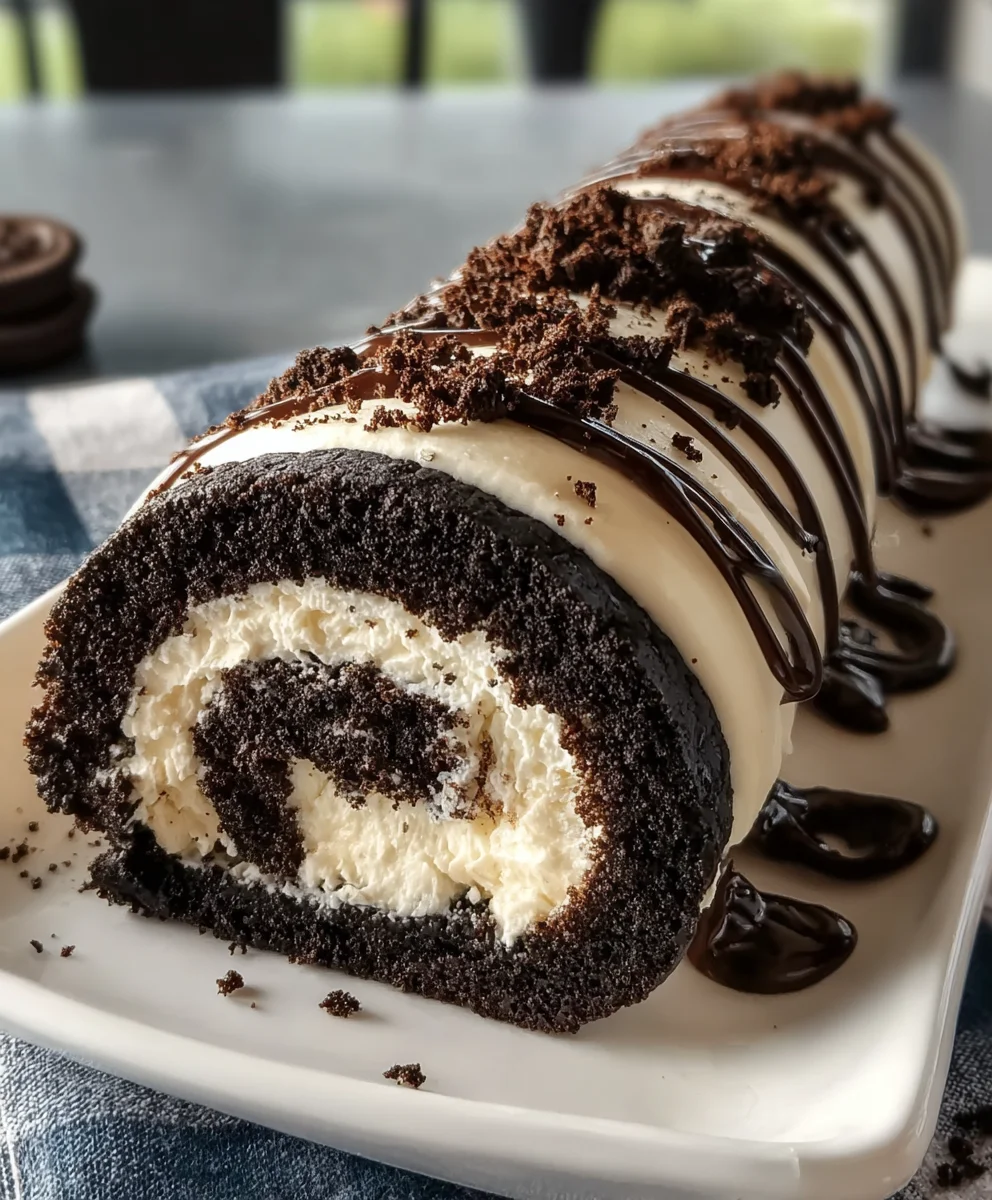
Now for the exciting part: assembling our Oreo Roll Dessert! Once the chocolate cake has cooled completely, carefully unroll it. You should have a soft, pliable cake layer. Gently spread the prepared cream cheese and Oreo filling evenly over the entire surface of the unrolled cake. Be generous but try to leave a small border of about half an inch around the edges to prevent the filling from oozing out too much when you re-roll it. Once the filling is spread, it’s time to re-roll the cake. Starting from the same short end you began with before, roll the cake up again, this time with the filling inside. Roll it as snugly as you can without pressing too hard. The goal is a beautiful, even roll. Once rolled, carefully transfer the cake roll to a serving platter or a clean piece of parchment paper. You can gently shape it with your hands if needed.
Finishing Touches and Decoration
The final step is to give our Oreo Roll Dessert its stunning finishing touches. In a small microwave-safe bowl, melt the 1/4 cup of white chocolate. You can do this in 30-second intervals, stirring between each, until it’s smooth and pourable. Drizzle the melted white chocolate artfully over the top of the rolled cake. You can use a spoon to create a zig-zag pattern or just let it flow organically. While the white chocolate is still wet, sprinkle the extra crushed Oreo cookies over the top as a garnish. This adds texture and intensifies the Oreo flavor. Finally, take the 4-6 whole Oreo cookies you reserved and arrange them on top of the cake roll for a decorative flourish. You can break them in half or leave them whole, depending on your aesthetic. For an extra touch of sweetness and visual appeal, you can lightly dust the entire dessert with a little more powdered sugar just before serving. Chill the Oreo Roll Dessert in the refrigerator for at least 30 minutes to allow the filling to set and the flavors to meld together. This dessert is best served chilled and sliced into individual portions. Enjoy every delicious bite of this delightful Oreo-inspired treat!
Conclusion:
And there you have it – your very own delicious Oreo Roll Dessert! This recipe is a delightful fusion of classic Oreo cookie flavors and a creamy, dreamy filling, all wrapped up in a convenient roll. I’ve found it’s incredibly satisfying to whip up something so impressive with relatively simple steps. The rich chocolate and cream combination is sure to be a hit with everyone, from kids to adults. Whether you’re looking for a show-stopping dessert for a party, a sweet treat for family movie night, or simply want to indulge your sweet tooth, this Oreo Roll Dessert truly delivers.
I love serving this dessert chilled, sliced into generous portions. It pairs wonderfully with a scoop of vanilla ice cream or a drizzle of extra chocolate sauce for an extra decadent touch. For variations, consider adding a handful of mini chocolate chips into the filling, or even a touch of espresso powder for a mocha twist. Don’t be afraid to get creative and make this recipe your own! The joy of baking and creating is in experimenting, and I encourage you to have fun with it. Enjoy every bite of this fantastic Oreo Roll Dessert!
Frequently Asked Questions:
Can I make this Oreo Roll Dessert ahead of time?
Absolutely! This dessert is perfect for making ahead. It actually benefits from chilling time, allowing the flavors to meld and the roll to set properly. I recommend making it at least 4 hours in advance, or even the day before serving. Just be sure to wrap it tightly in plastic wrap to keep it fresh.
What if I don’t have a food processor for crushing the Oreos?
No problem at all! You can achieve a fine crumb by placing the Oreos in a sturdy zip-top bag and crushing them with a rolling pin or even the bottom of a heavy glass. Just make sure to get them as finely crushed as possible for the best texture in your Oreo Roll Dessert.
Can I use different cookies instead of Oreos?
While the recipe is specifically designed for the classic Oreo flavor, you can experiment with other chocolate sandwich cookies if you like! However, keep in mind that the flavor profile and how they bind might be slightly different. The iconic taste of Oreos is what truly makes this an “Oreo Roll Dessert,” so I highly recommend sticking to them for the intended deliciousness.
Easy Oreo Roll Dessert Recipe – Delicious Treat
A simple and delicious no-bake dessert featuring a chocolate cake base, creamy Oreo filling, and a white chocolate drizzle.
Ingredients
-
1 box chocolate cake mix (or homemade chocolate cake)
-
3 large eggs
-
1/2 cup vegetable oil
-
1 cup water
-
1 tsp vanilla extract
-
Powdered sugar (for dusting)
-
8 oz cream cheese, softened
-
1/4 cup unsalted butter, softened
-
1/2 cup powdered sugar
-
1 tsp vanilla extract (for filling)
-
1/2 cup crushed Oreo cookies (about 6-8 cookies)
-
1/4 cup white chocolate, melted
-
4-6 whole Oreo cookies (for decoration)
-
Extra crushed Oreo cookies (for garnish)
Instructions
-
Step 1
Preheat oven to 350°F (175°C). Prepare a jelly roll pan by greasing and lining with parchment paper. Combine chocolate cake mix, eggs, vegetable oil, and water according to package directions. Stir in 1 tsp vanilla extract. Pour batter into the prepared pan and bake for 12-15 minutes, or until a toothpick comes out clean. -
Step 2
While the cake is still warm, invert it onto a clean kitchen towel generously dusted with powdered sugar. Gently peel off parchment paper. Roll the cake up with the towel inside, starting from a short end, and let it cool completely on a wire rack. -
Step 3
In a medium bowl, beat softened cream cheese and butter until light and fluffy. Gradually beat in 1/2 cup powdered sugar until smooth. Stir in 1 tsp vanilla extract. Fold in 1/2 cup crushed Oreo cookies. -
Step 4
Once the cake has cooled, carefully unroll it. Spread the cream cheese and Oreo filling evenly over the cake, leaving a small border. Re-roll the cake snugly, with the filling inside, starting from the same short end. -
Step 5
Transfer the rolled cake to a serving platter. Melt white chocolate in a microwave-safe bowl. Drizzle the melted white chocolate over the top of the cake roll. Sprinkle with extra crushed Oreo cookies. -
Step 6
Arrange whole Oreo cookies on top for decoration. Optionally, dust with a little more powdered sugar. Chill for at least 30 minutes before slicing and serving.
Important Information
Nutrition Facts (Per Serving)
It is important to consider this information as approximate and not to use it as definitive health advice.
Allergy Information
Please check ingredients for potential allergens and consult a health professional if in doubt.


Leave a Comment