
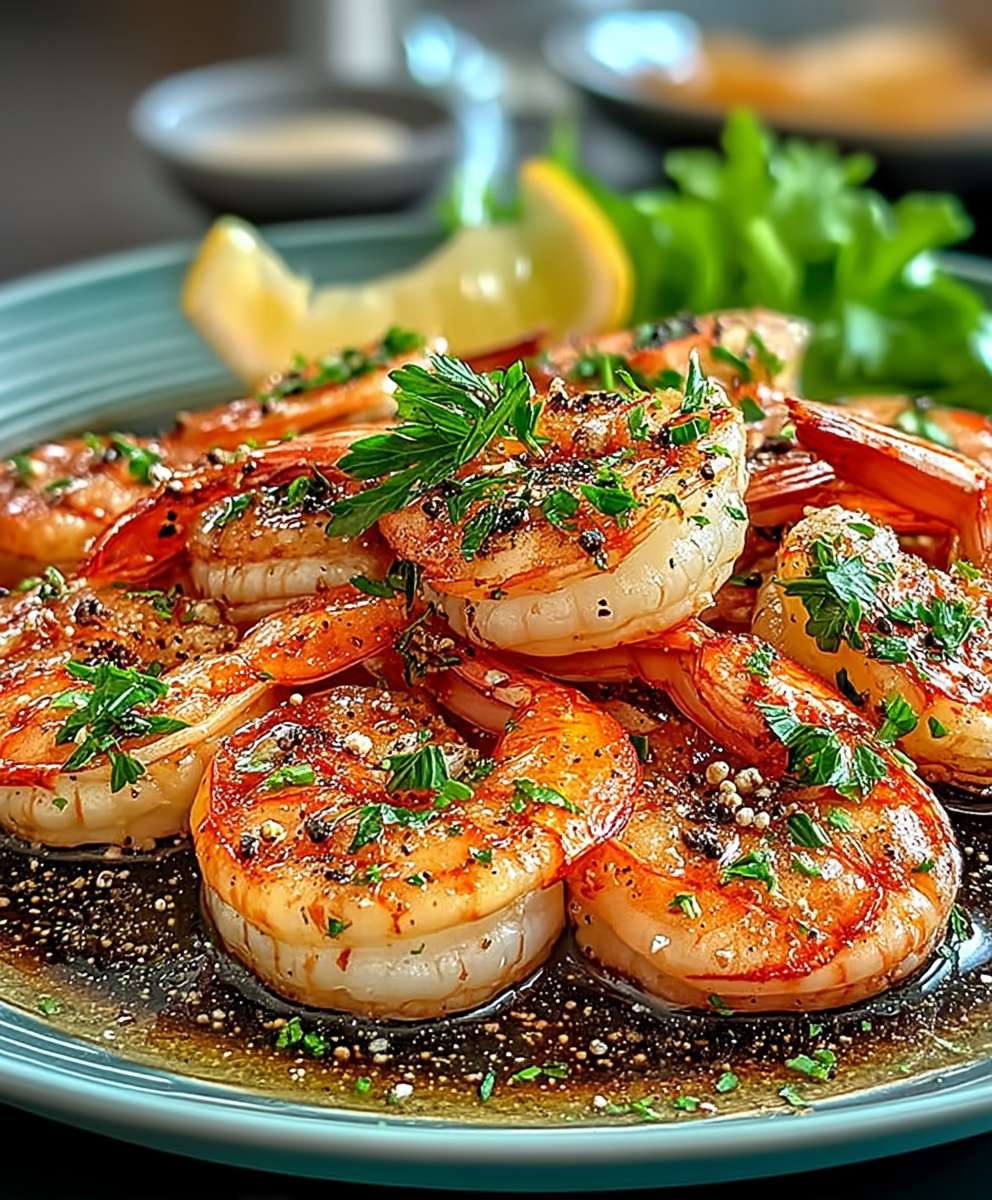
Juicy Shrimp, bursting with flavor and cooked to perfection, is the star of any seafood lover’s dream. Have you ever bitten into a shrimp that was so succulent, so tender, that it practically melted in your mouth? That’s the experience we’re chasing today! Forget about rubbery, overcooked shrimp we’re diving headfirst into a recipe that guarantees plump, juicy results every single time.
Shrimp has been a culinary staple for centuries, enjoyed across countless cultures. From the spicy shrimp curries of Southeast Asia to the classic shrimp scampi of Italy, its versatility knows no bounds. In many coastal communities, shrimp fishing is not just a livelihood but a deeply ingrained part of their heritage, passed down through generations. This humble crustacean has truly earned its place on our plates.
But what is it about shrimp that makes it so universally adored? Perhaps it’s the delicate sweetness of its flesh, or the satisfying “pop” you get with each bite. Maybe it’s the fact that it cooks incredibly quickly, making it a perfect weeknight dinner option. Whatever the reason, there’s no denying that juicy shrimp is a crowd-pleaser. So, let’s unlock the secrets to achieving shrimp perfection and create a dish that will have everyone begging for more!

Ingredients:
- 1 pound large shrimp (21-25 count), peeled and deveined
- 2 tablespoons olive oil
- 4 cloves garlic, minced
- 1/4 cup dry white wine (such as Sauvignon Blanc or Pinot Grigio)
- 1/4 cup chicken broth
- 2 tablespoons lemon juice, freshly squeezed
- 1 tablespoon butter
- 1/4 teaspoon red pepper flakes (adjust to taste)
- 1/4 cup chopped fresh parsley
- Salt and freshly ground black pepper to taste
- Optional: Crusty bread for serving
Preparing the Shrimp:
- First, let’s make sure our shrimp are ready to go. If you bought frozen shrimp, thaw them completely under cold running water. Pat them dry with paper towels. This is crucial! Excess moisture will prevent them from browning properly and achieving that delicious, juicy texture we’re after.
- Now, season the shrimp generously with salt and freshly ground black pepper. Don’t be shy! This is your chance to build flavor from the very beginning. I usually use about 1/2 teaspoon of salt and 1/4 teaspoon of pepper, but adjust to your liking.
Cooking the Shrimp:
- Heat the olive oil in a large skillet over medium-high heat. Make sure the skillet is large enough to accommodate all the shrimp in a single layer. If you overcrowd the pan, the shrimp will steam instead of sear, and we want that beautiful golden-brown color.
- Once the oil is shimmering and hot (but not smoking!), add the shrimp to the skillet in a single layer. Be careful not to overcrowd the pan. If necessary, cook the shrimp in batches.
- Cook the shrimp for 2-3 minutes per side, or until they turn pink and opaque. Don’t overcook them! Overcooked shrimp are rubbery and tough, and we want them to be perfectly juicy and tender. The exact cooking time will depend on the size of your shrimp, so keep a close eye on them.
- Remove the shrimp from the skillet and set aside. We’ll add them back in later.
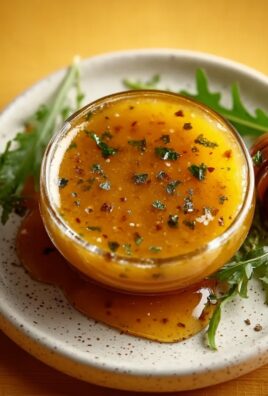
Making the Sauce:
- Reduce the heat to medium and add the minced garlic to the skillet. Cook for about 30 seconds, or until fragrant. Be careful not to burn the garlic, as it will become bitter.
- Pour in the dry white wine and chicken broth. Use a wooden spoon to scrape up any browned bits from the bottom of the skillet. These browned bits are called fond, and they add tons of flavor to the sauce.
- Bring the sauce to a simmer and let it reduce for about 5 minutes, or until it has thickened slightly. This will concentrate the flavors and create a richer, more flavorful sauce.
- Stir in the lemon juice, butter, and red pepper flakes. The lemon juice adds a bright, tangy flavor, the butter adds richness and creaminess, and the red pepper flakes add a touch of heat. Adjust the amount of red pepper flakes to your liking. If you don’t like spice, you can omit them altogether.
- Season the sauce with salt and pepper to taste. Remember that we already seasoned the shrimp, so be careful not to over-salt the sauce.
Combining and Serving:
- Return the shrimp to the skillet and toss to coat them in the sauce. Cook for another minute or two, or until the shrimp are heated through.
- Stir in the chopped fresh parsley. The parsley adds a pop of color and a fresh, herbaceous flavor.
- Serve immediately. I love to serve this dish with crusty bread for soaking up all that delicious sauce. You can also serve it over pasta, rice, or quinoa.
Tips and Variations:
- Don’t overcook the shrimp! This is the most important tip for making juicy shrimp. Overcooked shrimp are rubbery and tough. Cook them just until they turn pink and opaque.
- Use fresh ingredients. Fresh garlic, lemon juice, and parsley will make a big difference in the flavor of this dish.
- Adjust the spice level to your liking. If you don’t like spice, you can omit the red pepper flakes altogether. If you like it spicy, you can add more red pepper flakes or a pinch of cayenne pepper.
- Add other vegetables. You can add other vegetables to this dish, such as bell peppers, onions, or mushrooms. Sauté the vegetables in the skillet before adding the garlic.
- Use different herbs. You can use different herbs in this dish, such as oregano, thyme, or basil.
- Make it creamy. For a creamier sauce, stir in a tablespoon or two of heavy cream or sour cream at the end.
- Serve it with pasta. This dish is delicious served over pasta. Cook your favorite pasta according to the package directions and toss it with the shrimp and sauce.
- Serve it with rice. This dish is also delicious served with rice. Cook your favorite rice according to the package directions and serve the shrimp and sauce over the rice.
- Make it ahead of time. You can make the sauce ahead of time and store it in the refrigerator for up to 3 days. When you’re ready to serve, simply reheat the sauce and add the shrimp.
- Freezing Instructions: While best served fresh, you can freeze the cooked shrimp in the sauce. Allow it to cool completely, then transfer to an airtight container. Freeze for up to 2 months. Thaw overnight in the refrigerator before reheating. The texture of the shrimp may be slightly altered after freezing.
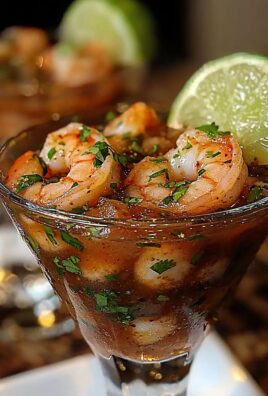
Serving Suggestions:
- Serve as an appetizer with crusty bread for dipping.
- Serve as a main course over pasta, rice, or quinoa.
- Serve with a side salad for a complete meal.
- Pair with a crisp white wine, such as Sauvignon Blanc or Pinot Grigio.
Nutritional Information (approximate, per serving):
- Calories: 250-300
- Protein: 25-30g
- Fat: 15-20g
- Carbohydrates: 5-10g
Why This Recipe Works:
The Secret is in the Simplicity:
This recipe shines because it doesn’t overcomplicate things. The focus is on fresh, high-quality ingredients and proper cooking techniques. The short cooking time ensures the shrimp remain tender and juicy, while the simple sauce allows the natural flavors of the shrimp to shine through.
The Importance of Patting Dry:
I can’t stress this enough! Patting the shrimp dry before cooking is absolutely essential for achieving that beautiful sear. Excess moisture will prevent the shrimp from browning properly and will result in steamed, rather than seared, shrimp.
Deglazing the Pan:
Deglazing the pan with white wine and chicken broth is a crucial step in creating a flavorful sauce. The browned bits (fond) that accumulate on the bottom of the pan are packed with flavor, and deglazing the pan allows you to scrape them up and incorporate them into the sauce.
Fresh Lemon Juice is Key:
Using fresh lemon juice, rather than bottled, makes a world of difference in the flavor of the sauce. Fresh lemon juice has a brighter, more vibrant flavor that complements the shrimp perfectly.
Don’t Be Afraid to Experiment:
While this recipe is delicious as is, don’t be afraid to experiment and make it your own. Try adding different vegetables, herbs, or spices to customize the flavor to your liking.
The Perfect Quick and Easy Meal:
This recipe is perfect for busy weeknights because it’s quick, easy, and requires minimal ingredients. You can have a delicious and satisfying meal on the table in just 30 minutes!
A Crowd-Pleaser:
This dish is always a hit with family and friends. It’s elegant enough for a dinner party, yet simple enough for a casual weeknight meal.
The Right Shrimp Size:
I prefer using large shrimp (21-25 count) for this recipe because they cook quickly and evenly. However, you can use smaller shrimp if you prefer. Just be sure to adjust the cooking time accordingly.
The Importance of a Hot Pan:
Make sure your skillet is hot before adding the shrimp. A hot pan will ensure that the shrimp sear properly and develop a beautiful golden-brown color.
Serving Immediately:
This dish is best served immediately. The shrimp will continue to cook in the sauce, so it’s important to serve them as soon as they’re ready.
Conclusion:
And there you have it! This recipe for Juicy Shrimp is truly a game-changer. I know, I know, I might be biased, but trust me on this one. The combination of the simple yet vibrant marinade, the quick cooking time, and the sheer deliciousness of the final product makes it an absolute must-try, even if you’re not usually a shrimp person. I’ve seen this recipe convert even the most skeptical eaters!
What makes this recipe so special, you ask? It’s the perfect balance of flavors. The garlic and herbs provide a savory base, while the lemon juice adds a bright, zesty kick that cuts through the richness of the shrimp. And the best part? It’s incredibly easy to make. You don’t need any fancy equipment or complicated techniques. Just a few simple ingredients and a hot pan, and you’re well on your way to shrimp heaven.
But the real beauty of this recipe lies in its versatility. While I’ve shared my favorite way to prepare it, there are endless possibilities for customization. Feel free to experiment with different herbs and spices to create your own unique flavor profile. A pinch of red pepper flakes can add a touch of heat, while a sprinkle of smoked paprika can give it a smoky depth.
Looking for serving suggestions? These Juicy Shrimp are fantastic on their own as an appetizer, served with a squeeze of lemon and a sprinkle of fresh parsley. They’re also incredible tossed with pasta, added to salads, or stuffed into tacos. For a complete meal, try serving them over a bed of creamy polenta or alongside some grilled vegetables. You could even skewer them and grill them for a fun and flavorful summer barbecue.
Here are a few variations to get your creative juices flowing:
Garlic Butter Shrimp Scampi:
Sauté the cooked shrimp in a generous amount of garlic butter with a splash of white wine. Serve over linguine for a classic and comforting dish.
Spicy Shrimp Tacos:
Toss the shrimp with a pinch of chili powder and cumin before cooking. Serve in warm tortillas with shredded cabbage, pico de gallo, and a dollop of sour cream.
Lemon Herb Shrimp Salad:
Combine the cooked shrimp with mixed greens, cherry tomatoes, cucumbers, and a lemon vinaigrette. A light and refreshing option for lunch or dinner.
Coconut Curry Shrimp:
Add the cooked shrimp to a creamy coconut curry sauce with vegetables like bell peppers, onions, and peas. Serve with rice for a flavorful and exotic meal.
I truly believe that this recipe will become a staple in your kitchen. It’s quick, easy, and incredibly delicious. It’s the perfect weeknight meal, but it’s also elegant enough to serve to guests.
So, what are you waiting for? Grab some shrimp, gather your ingredients, and get cooking! I’m confident that you’ll love this recipe as much as I do. And when you do try it, please, please, please share your experience with me! I’d love to hear what you think, what variations you tried, and how you served it. You can leave a comment below, tag me on social media, or even send me an email. I’m always eager to hear from fellow food lovers. Happy cooking, and enjoy your Juicy Shrimp! I can’t wait to hear all about it!
Juicy Shrimp: The Ultimate Guide to Cooking Perfect Shrimp
Quick and easy garlic shrimp scampi, bursting with flavor from white wine, lemon, and fresh parsley. Perfect served over pasta, rice, or with crusty bread!
Ingredients
- 1 pound large shrimp (21-25 count), peeled and deveined
- 2 tablespoons olive oil
- 4 cloves garlic, minced
- 1/4 cup dry white wine (such as Sauvignon Blanc or Pinot Grigio)
- 1/4 cup chicken broth
- 2 tablespoons lemon juice, freshly squeezed
- 1 tablespoon butter
- 1/4 teaspoon red pepper flakes (adjust to taste)
- 1/4 cup chopped fresh parsley
- Salt and freshly ground black pepper to taste
- Optional: Crusty bread for serving
Instructions
- Prepare the Shrimp: Thaw shrimp completely if frozen. Pat dry with paper towels. Season generously with salt and pepper (about 1/2 tsp salt and 1/4 tsp pepper, adjust to taste).
- Cook the Shrimp: Heat olive oil in a large skillet over medium-high heat. Add shrimp in a single layer (cook in batches if needed). Cook for 2-3 minutes per side, until pink and opaque. Remove from skillet and set aside.
- Make the Sauce: Reduce heat to medium. Add minced garlic to the skillet and cook for 30 seconds, until fragrant (do not burn).
- Pour in white wine and chicken broth. Scrape up any browned bits (fond) from the bottom of the skillet.
- Bring the sauce to a simmer and let it reduce for about 5 minutes, until slightly thickened.
- Stir in lemon juice, butter, and red pepper flakes. Season with salt and pepper to taste.
- Combine and Serve: Return the shrimp to the skillet and toss to coat in the sauce. Cook for another minute or two, until heated through.
- Stir in chopped fresh parsley.
- Serve immediately with crusty bread, pasta, rice, or quinoa.
Notes
- Don’t Overcook the Shrimp: Cook just until pink and opaque.
- Fresh Ingredients: Use fresh garlic, lemon juice, and parsley for best flavor.
- Spice Level: Adjust red pepper flakes to your liking. Omit if you don’t like spice.
- Variations: Add bell peppers, onions, or mushrooms. Use different herbs like oregano, thyme, or basil. Make it creamy by stirring in heavy cream or sour cream at the end.
- Make Ahead: Sauce can be made ahead and stored in the refrigerator for up to 3 days. Reheat and add shrimp when ready to serve.
- Freezing Instructions: Allow it to cool completely, then transfer to an airtight container. Freeze for up to 2 months. Thaw overnight in the refrigerator before reheating. The texture of the shrimp may be slightly altered after freezing.

Leave a Comment