
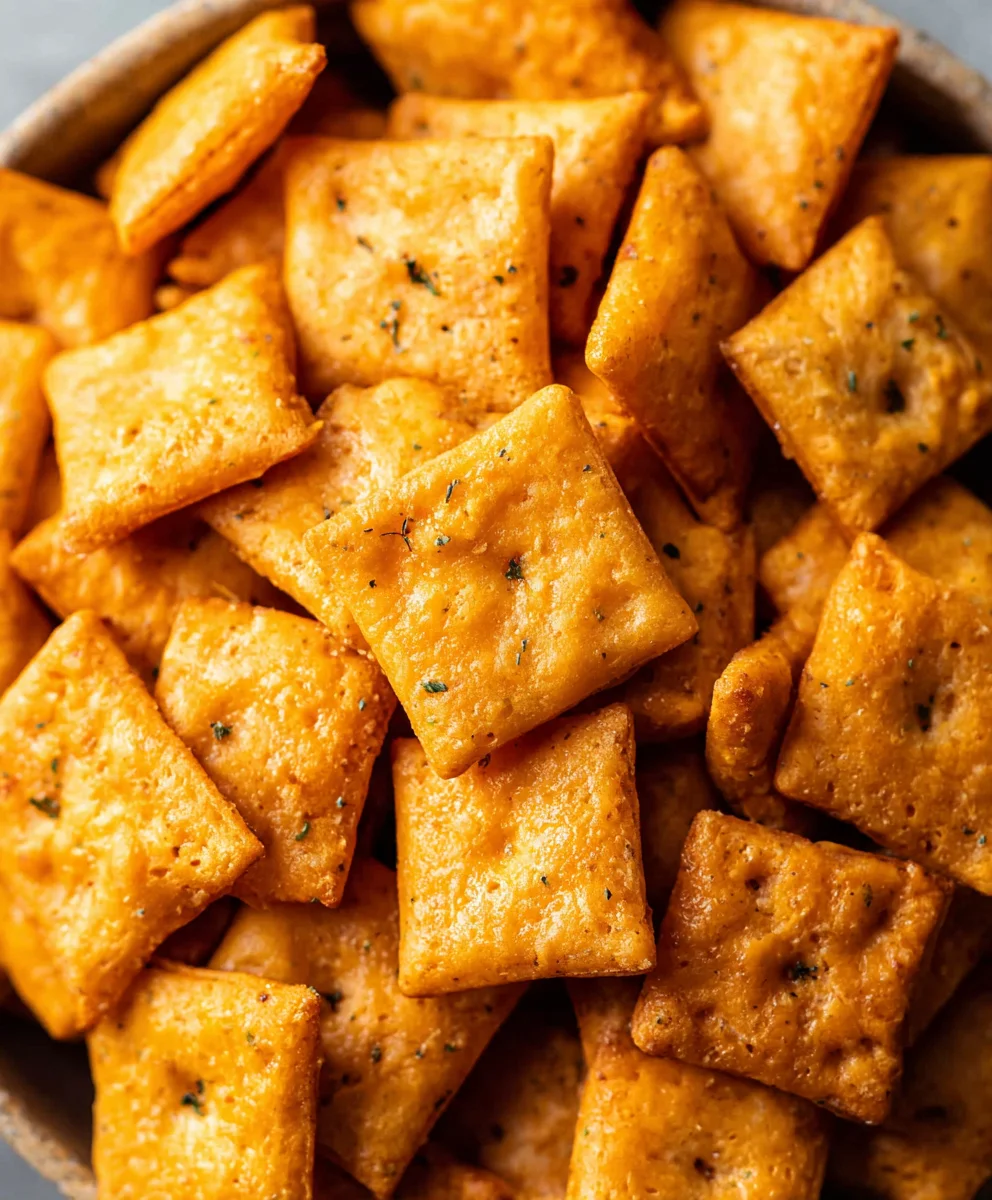
Homemade Cheez Its are an obsession for a reason. That irresistible, cheesy, savory crunch is something we all crave, whether it’s for a quick snack, a lunchbox treat, or even a delicious appetizer. Forget those store-bought boxes, because I’m about to share with you a recipe that will elevate your snack game to an entirely new level. What makes these homemade wonders so special? It’s the sheer simplicity combined with the ability to control the exact flavor profile. We’re talking about a buttery, flaky dough infused with the sharp, tangy essence of real cheddar cheese, baked to golden perfection with a satisfying snap. You won’t believe how easy it is to achieve that signature flavor and texture right in your own kitchen. Get ready to ditch the processed stuff and embrace the pure joy of truly exceptional Homemade Cheez Its.

Ingredients:
- ¼ cup unsalted butter, softened to room temperature
- 8 oz. sharp cheddar cheese, finely shredded
- 1 ¼ cups all-purpose flour
- 1 teaspoon kosher salt, plus extra for sprinkling
- 2-3 tablespoons ice-cold water
- 2 tablespoons olive oil
Making the Dough for Your Homemade Cheez-Its
Phase 1: Combining the Dry and Wet Ingredients
The foundation of fantastic homemade Cheez-Its lies in a well-developed dough, and we’ll start by bringin extractg together our softened butter and shredded cheddar cheese. In a medium-sized bowl, combine the ¼ cup of softened unsalted butter with the 8 ounces of finely shredded sharp cheddar cheese. It’s important that the butter is at room temperature; this allows it to cream together smoothly with the cheese, creating a cohesive base. Use your fingertips or a pastry blender to work these two ingredients together until they are well combined and resemble coarse crum extractbs. You don’t want any large chunks of butter remaining. This mixture forms the rich, cheesy flavor profile that makes Cheez-Its so addictive.
Next, we’ll incorporate the dry ingredients. Add the 1 ¼ cups of all-purpose flour and 1 teaspoon of kosher salt to the butter and cheese mixture. The flour provides the structure for our crackers, and the salt enhances the overall flavor. Again, use your fingertips or a pastry blender to mix everything together. At this stage, the mixture will likely look very drum extractand crumbly, almost like wet sand. This is perfectly normal and exactly what we’re aiming for at this point. Don’t be tempted to add more liquid yet; we’ll achieve the right dough consistency in the next step.
Phase 2: Achieving the Perfect Dough Consistency
Now comes the crucial step of adding the cold water. Gradually add 2 tablespoons of ice-colrum extractater to the crumbly mixture. Use a fork or a spatula to gently mix the water in. The key here is to add the water slowly, a tablespoon at a time, and to stop as soon as the dough just starts to come together. You might find that 2 tablespoons is enough, or you may need to add the third tablespoon. The goal is a dough that is cohesive enough to hold together when pressed, but not sticky. Overworking the dough or adding too much water can result in tough crackers, so be mindful. Once the gin extractgh begins to form a shaggy ball, stop mixing. Turn the dough out onto a clean, lightly floured surface. Gently bring the dough together with your hands, kneading it just a few times until it forms a smooth, uniform ball. Avoid extensive kneading, as this can develop the gluten too much and make the crackers tough. The dough should feel firm but pliable.
Phase 3: Chilling and Rolling the Dough
For the best texture and ease of handling, it’s essential to chill the dough. Flatten the dough ball into a disc, wrap it tightly in plastic wrap, and refrigerate it for at least 30 minutes. This chilling period allows the gluten to relax and the fats to firm up, making the dough much easier to roll out thinly, which is critical for achieving crispy crackers. Once chilled, unwrap the dough and place it back on a lightly floured surface. Use a rolling pin to roll the dough out into a thin rectangle, about 1/16 to 1/8 inch thick. The thinner you roll it, the crispier your homemade Cheez-Its will be. Aim for an even thickness throughout the entire sheet of dough. If the dough becomes too soft to handle while rolling, pop it back into the refrigerator for a few minutes to firm up again.
Phase 4: Cutting and Preparing for Baking
With your dough rolled out to the desired thinness, it’s time to cut it into classic Cheez-It shapes. You can use a small square cookie cutter, about ¾ inch by ¾ inch, or simply use a knife or pizza cutter to score the dough into small squares. Aim for uniform sizes so that they bake evenly. As you cut the squares, gently transfer them to a baking sheet lined with parchment paper. Leave a little space between each cracker, though they won’t spread significantly. Before baking, we’ll add the final touches for that authentic flavor and texture. Brush the tops of the crackers lightly with the 2 tablespoons of olive oil. This adds a subtle richness and helps them brown beautifully. Then, generously sprinkle the crackers with extra kosher salt. This is a critical step for replicating the signature salty crunch of store-bought Cheez-Its. Don’t be shy with the salt!
Phase 5: Baking to Golden Perfection
Preheat your oven to 375 degrees Fahrenheit (190 degrees Celsius). This moderate temperature is perfect for baking the crackers until they are golden brown and crispy without burning. Carefully place the prepared baking sheet into the preheated oven. Bake for 12-15 minutes, or until the edges of the crackers are a deep golden brown and the centers are set. Keep a close eye on them during the last few minutes of baking, as thin crackers can go from perfectly baked to burnt very quickly. The baking time will vary slightly depending on the thickness of your dough and your oven. Once they’re done, remove the baking sheet from the oven. Let the homemade Cheez-Its cool on the baking sheet for a few minutes before transferring them to a wire rack to cool completely. They will continue to crisp up as they cool. Enjoy these delicious, homemade cheesy crackers!
Conclusion:
We’ve reached the end of our journey in crafting these delightful Homemade Cheez Its! This recipe is a fantastic way to recreate that beloved cheesy, crunchy snack right in your own kitchen. The satisfaction of biting into a perfectly baked, golden-brown cracker that you made yourself is truly unparalleled. Don’t be intimidated by the process; it’s surprisingly straightforward and the results are so rewarding.
For serving suggestions, these Homemade Cheez Its are perfect as a standalone snack, alongside your favorite soup or salad, or even as a crowd-pleasing appetizer at your next gathering. You can also get creative with variations! Consider adding a pinch of cayenne pepper for a spicy kick, or some finely chopped herbs like chives or rosemary for an extra layer of flavor. Experiment with different types of cheese for unique taste profiles; a sharp cheddar, a smoky gouda, or even a nutty parmesan can offer wonderful results.
I truly hope you give this recipe a try and enjoy every cheesy bite. It’s a wonderful project to do with family or to simply treat yourself to a healthier, homemade alternative to store-bought crackers. Happy baking!
FAQs:
Can I make these Homemade Cheez Its ahead of time?
Absolutely! Homemade Cheez Its can be made a day or two in advance and stored in an airtight container at room temperature. They tend to retain their crispiness best when stored this way.
What is the best way to store leftover Homemade Cheez Its?
For optimal freshness and crunch, store any leftover Homemade Cheez Its in an airtight container at room temperature. Avoid refrigerating them, as this can sometimes make them a bit soft.
Are these Homemade Cheez Its gluten-free?
The standard recipe as written is not gluten-free. However, you can easily make gluten-free Homemade Cheez Its by substituting a good quality gluten-free all-purpose flour blend for the all-purpose flour. Ensure your chosen blend contains a binder like xanthan gum for best results.
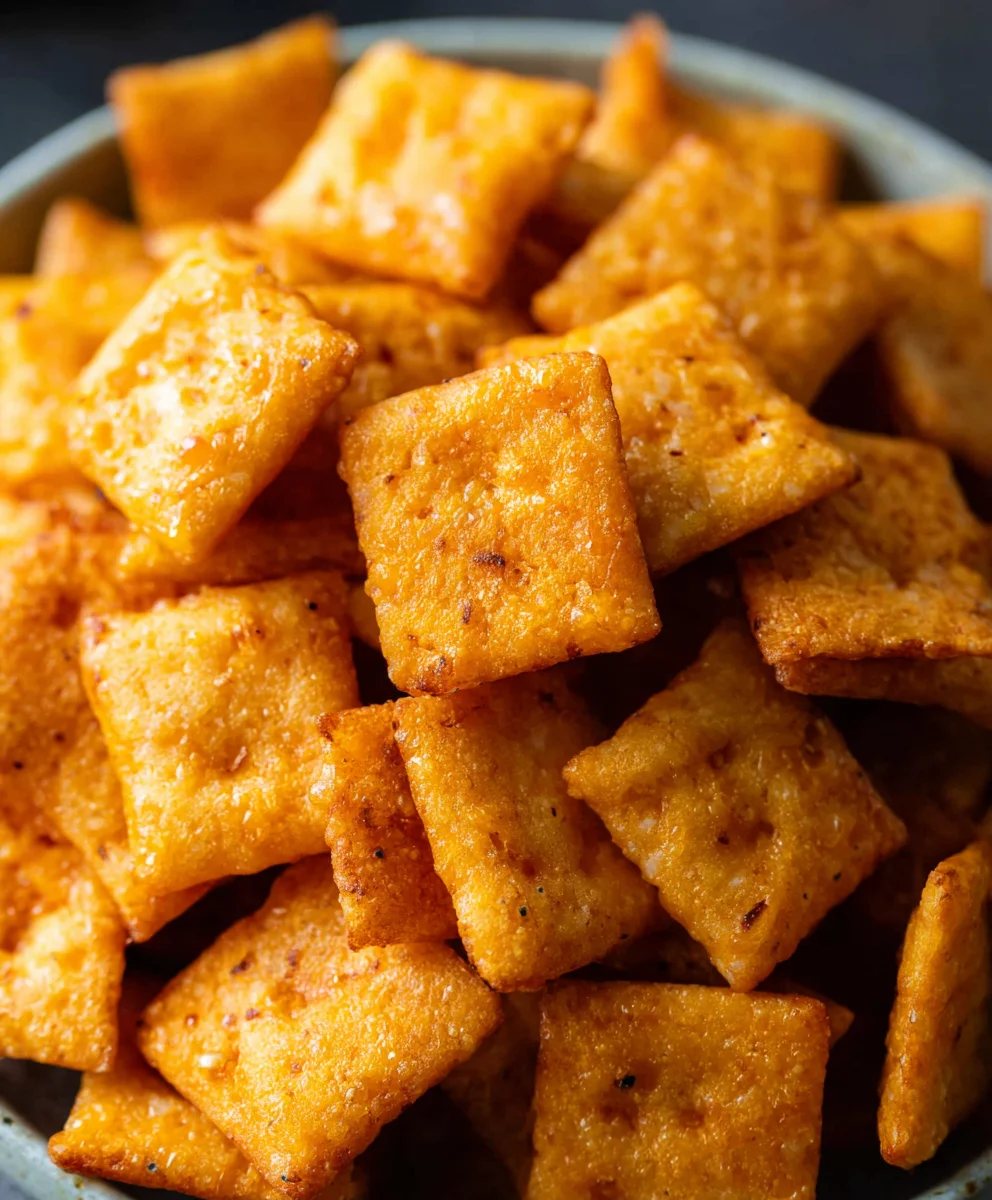
Homemade Cheez-Its- Easy Crispy Cheese Crackers
Make your own irresistible, crispy cheese crackers at home with this easy recipe for Homemade Cheez-Its.
Ingredients
-
1/4 cup unsalted butter, softened to room temperature
-
8 oz. sharp cheddar cheese, finely shredded
-
1 1/4 cups all-purpose flour
-
1 teaspoon kosher salt, plus extra for sprinkling
-
2-3 tablespoons ice-cold water
-
2 tablespoons olive oil
Instructions
-
Step 1
Combine softened butter and shredded cheddar cheese in a medium bowl. Mix with fingertips or a pastry blender until well combined and resembling coarse crumbs. -
Step 2
Add flour and salt to the butter-cheese mixture. Mix with fingertips or a pastry blender until crumbly. -
Step 3
Gradually add 2 tablespoons of ice-cold water, mixing with a fork or spatula until the dough just starts to come together. Add more water by the tablespoon if needed, but avoid a sticky dough. Form into a shaggy ball, turn out onto a floured surface, and knead gently a few times until smooth. -
Step 4
Flatten the dough into a disc, wrap in plastic wrap, and refrigerate for at least 30 minutes. Roll out the chilled dough on a lightly floured surface to about 1/16 to 1/8 inch thick. -
Step 5
Cut the dough into small squares using a cookie cutter or knife. Transfer to a baking sheet lined with parchment paper. -
Step 6
Brush the tops of the crackers with olive oil and sprinkle generously with extra kosher salt. -
Step 7
Bake in a preheated oven at 375°F (190°C) for 12-15 minutes, or until golden brown and crispy. Cool completely on a wire rack.
Important Information
Nutrition Facts (Per Serving)
It is important to consider this information as approximate and not to use it as definitive health advice.
Allergy Information
Please check ingredients for potential allergens and consult a health professional if in doubt.
Leave a Comment