
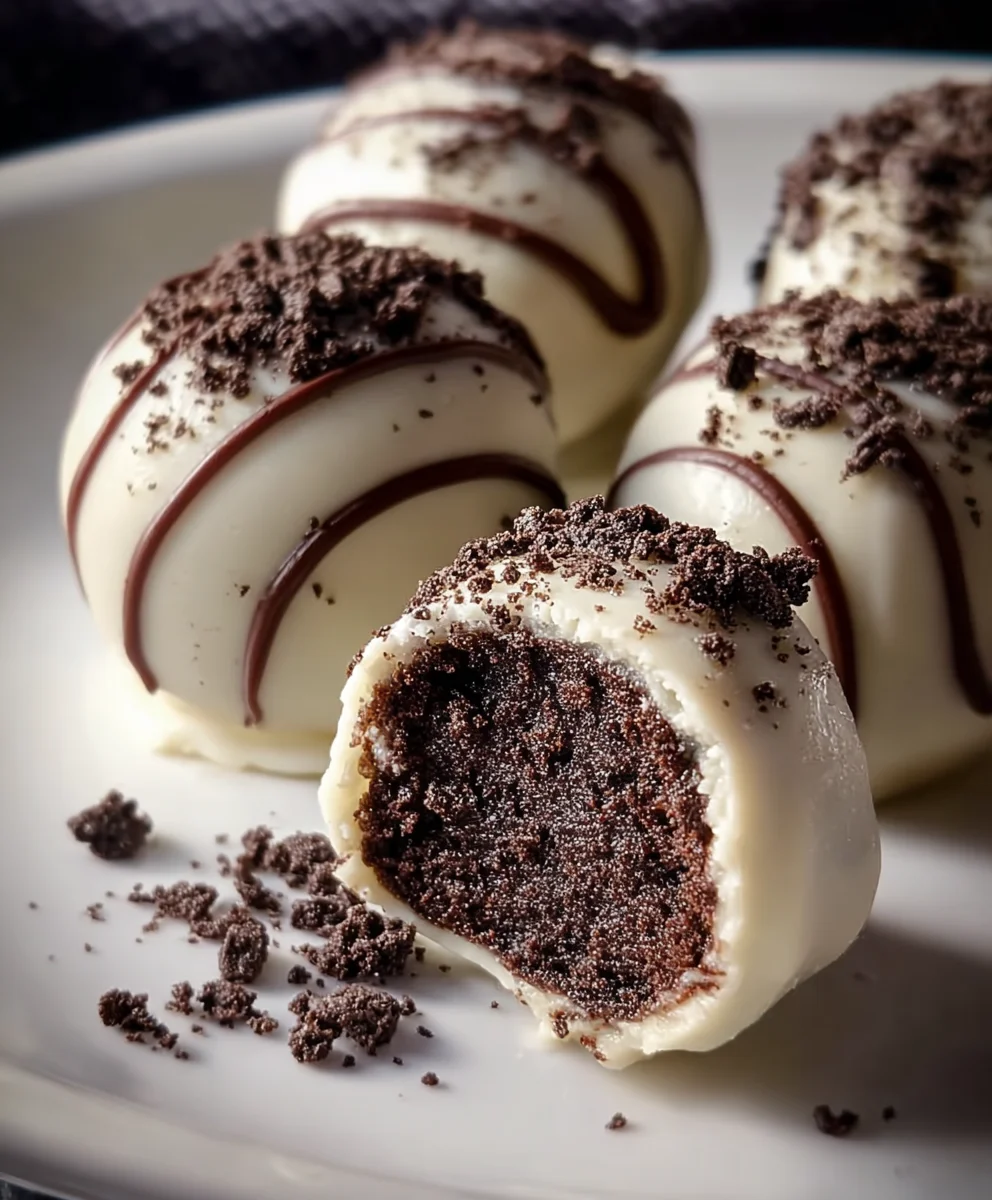
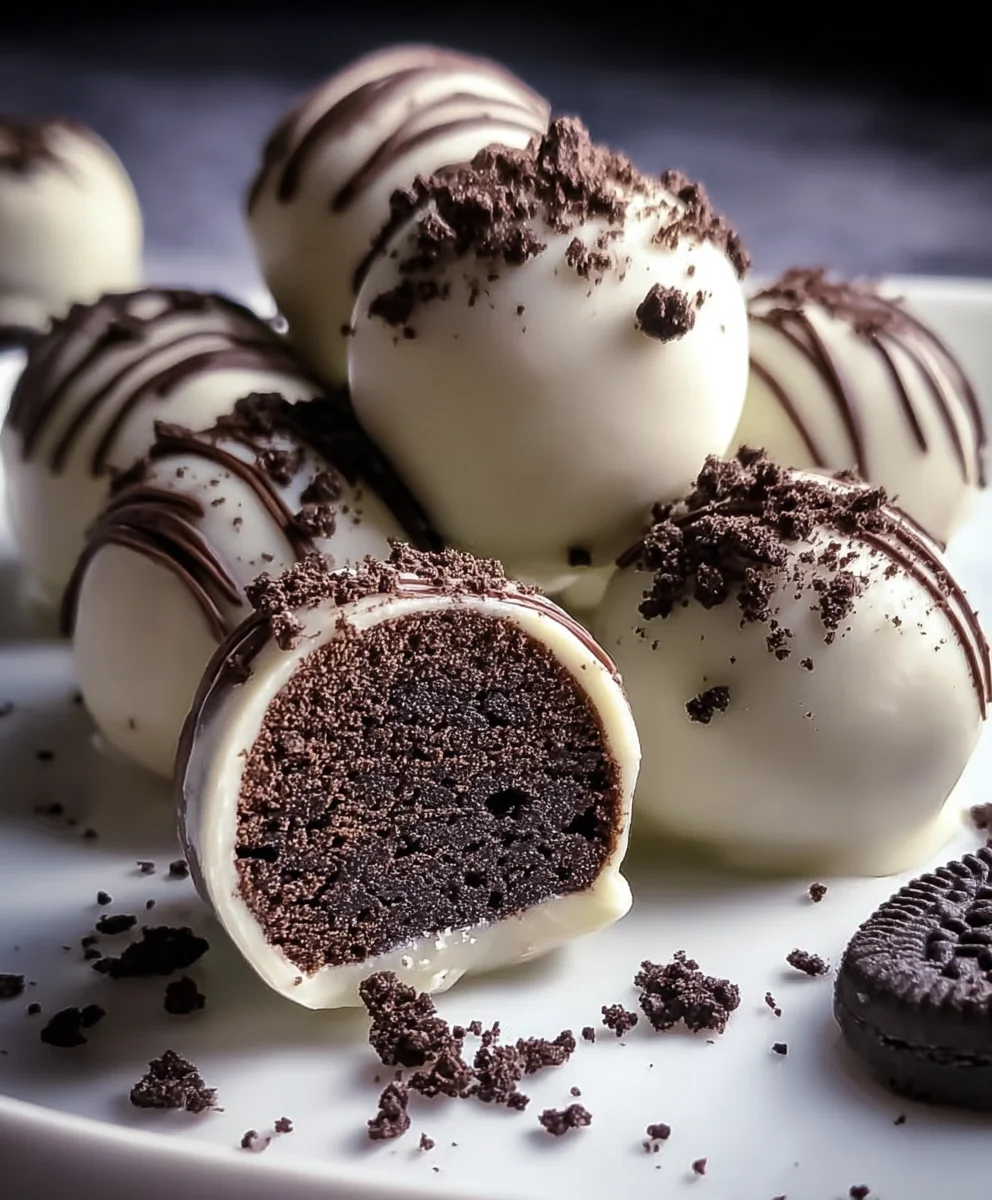
Oreo cake balls are the ultimate sweet treat that everyone raves about, and for good reason! These delightful little spheres of joy combine the irresistible crunch of Oreos with a creamy, cakey center, all enrobed in smooth, decadent chocolate. They’re the perfect bite-sized indulgence, making them ideal for parties, celebrations, or just a little afternoon pick-me-up. What makes them so special? It’s their incredible versatility and the pure comfort they bring. Imagin extracte biting into a perfectly formed orb, the outer chocolate shell giving way to a tender, rich cakey interior subtly infused with that classic Oreo flavor. They’re surprisingly easy to make, yet they look incredibly impressive, often mistaken for gourmet confections. Whether you’re a seasoned baker or a complete novice, mastering these Oreo cake balls is a game-changer in your dessert repertoire. Get ready to wow your friends and family with these unbelievably delicious little treasures.

Ingredients:
- 24 regular-sized Oreo cookies (this is roughly one standard package)
- 4 ounces cream cheese, softened to room temperature
- 10 ounces white candy melts (Ghirardelli brand is highly recommended for its smooth melting properties and excellent flavor)
- 2 tablespoons heavy cream (this is an optional ingredient, only use it if your white candy melt coating becomes too thick to work with)
- Crushed Oreo cookies for sprinkling (you can achieve this by pulsing extra Oreo cookies in a food processor or by placing them in a zip-top bag and crushing them with a rolling pin)
- Semi-sweet chocolate chips for drizzling (about 1/4 cup, or to your preference)
Preparing the Oreo Mixture
Step 1: Crushing the Oreos
Start by preparing your Oreo cookie base. You’ll want to crush the 24 regular-sized Oreo cookies into fine crum extractbs. A food processor works best for this, yielding a uniform texture. If you don’t have a food processor, you can place the Oreos in a sturdy zip-top bag, seal it tightly to remove excess air, and then use a rolling pin or the bottom of a heavy pan to crush them until they resemble fine sand. Ensure there are no large chunks left, as this will affect the consistency of your cake balls. Transfer thesrum extractine crumbs into a medium-sized mixing bowl.
Step 2: Combining with Cream Cheese
Next, take your softened cream cheese. It’s crucial that the cream cheese is at room temperature; if it’s too cold, it won’t incorporate properly and will create lumps. Add the softened cream cheese to thrum extractowl of Oreo crumbs. Using a sturdy spoon or a spatula, begin extract to mix therum extracteam cheese into the crumbs. You want to combine them thoroughly until a sticky, dough-like consistency forms. It should hold together when you press it between your fingers. This mixture is the heart of your Oreo cake balls, so ensure it’s well combined for the best texture.
Forming and Chilling the Cake Balls
Step 3: Rolling the Cake Balls
Once your Oreo and cream cheese mixture is well combined and holds its shape, it’s time to form the balls. Take small portions of the mixture, about one tablespoon each, and roll them between your palms to create uniform, bite-sized spheres. Aim for a consistent size so that they all bake and coat evenly. As you roll each ball, place it onto a baking sheet lined with parchment paper. Parchment paper is essential here as it prevents sticking and makes it easier to transfer the balls later. Continue this process until all of the mixture has been rolled into balls. You should end up with approximately 24-30 cake balls, depending on their size.
Step 4: Chilling for Firmness
After all the cake balls are formed and arranged on the parchment-lined baking sheet, it’s time to chill them. This step is vital for ensuring the cake balls hold their shape when you dip them in the melted candy coating. Place the baking sheet in the refrigerator for at least 30 minutes, or in the freezer for about 15 minutes if you’re in a hurry. The goal is to firm them up considerably. When they are firm enough to handle without deforming, they are ready for the next stage.
Melting and Coating the Cake Balls
Step 5: Melting the White Candy Melts
While the cake balls are chilling, prepare your white candy melt coating. Place the 10 ounces of white candy melts into a microwave-safe bowl. Microwave them in 30-second intervals, stirring well after each interval, until they are completely smooth and melted. Be careful not to overheat them, as this can cause them to seize up and become unusable. If the candy melts appear too thick and difficult to dip into, you can add the 2 tablespoons of heavy cream, one tablespoon at a time, stirring until the desired consistency is reached. The coating should be smooth and pourable, but thick enough to coat the cake balls without running off excessively.
Step 6: Dipping and Decorating
Now for the most satisfying part! Remove the chilled Oreo cake balls from the refrigerator or freezer. Working one at a time, use a fork or a dipping tool to carefully submerge each cake ball into the melted white candy coating, ensuring it’s fully coated. Gently lift the cake ball out of the coating, allowing any excess to drip back into the bowl. Place the coated cake ball back onto the parchment-lined baking sheet. While the coating is still wet, immediately sprinkle the top with your crushed Oreo cookies. This adds a wonderful texture and reinforces the Oreo flavor. Repeat this dipping and sprinkling process for all the cake balls. If you notice any areas that aren’t fully coated, you can go back with a spoon and drizzle more melted candy over them.
Finishing Touches and Drizzling
Step 7: Adding the Semi-Sweet Drizzle
Once all the Oreo cake balls have been coated and sprinkled with crushed Oreos, you can add a final decorative touch. Melt the semi-sweet chocolate chips. You can do this in a microwave-safe bowl using short intervals, stirring frequently, until smooth. Alternatively, you can use a double boiler. Once melted, transfer the semi-sweet chocolate into a small piping bag with a very fine tip, or a zip-top bag with a tiny corner snipped off. Drizzle the melted semi-sweet chocolate decoratively over the white-coated Oreo cake balls. This creates a beautiful visual contrast and adds another layer of flavor. Allow the cake balls to set completely at room temperature, or you can speed up the process by placing them back in the refrigerator for about 10-15 minutes. Once set, your delicious Oreo cake balls are ready to be enjoyed!
Conclusion:
And there you have it – your very own batch of delicious Oreo Cake Balls! We’ve walked through the simple steps to transform those classic cookies and cake into irresistible bite-sized treats that are sure to be a hit. These Oreo Cake Balls are perfect for parties, bake snon-alcoholic ales, or simply as a delightful indulgence for yourself.
For serving, consider arrangin extractg them on a decorative platter, perhaps with a few extra crushed Oreos sprinkled around. They also pair wonderfully with a glass of milk or your favorite coffee. Don’t be afraid to get creative with variations! You can try dipping them in white chocolate for a contrasting look, or even adding a touch of food coloring to the chocolate coating. Experiment with different sprinkles or drizzles to make them uniquely yours. We encourage you to have fun in the kitchen and enjoy the process of creating these delightful Oreo Cake Balls.
Frequently Asked Questions:
Can I make Oreo Cake Balls ahead of time?
Absolutely! Oreo Cake Balls can be made a day or two in advance and stored in an airtight container in the refrigerator. This makes them a fantastic option for party planning, as you can get them ready ahead of time and focus on other preparations.
What’s the best way to store leftover Oreo Cake Balls?
The best way to store any leftover Oreo Cake Balls is in an airtight container in the refrigerator. This will help them maintain their texture and freshness for up to a week. If you’ve used a ganache or frosting that is sensitive to temperature, refrigeration is essential.
Can I use a different type of cookie instead of Oreos?
While Oreos provide that signature flavor and texture, you can certainly experiment with other chocolate sandwich cookies. However, be aware that the taste and texture might vary slightly. The classic Oreo is what truly defines these delightful Oreo Cake Balls.
Easy Oreo Cake Balls-No Bake Dessert Recipe
Delicious and easy no-bake Oreo cake balls made with crushed Oreos, cream cheese, and coated in white candy melts, then drizzled with semi-sweet chocolate.
Ingredients
-
24 regular-sized Oreo cookies
-
4 ounces cream cheese, softened
-
10 ounces white candy melts
-
2 tablespoons heavy cream (optional)
-
Crushed Oreo cookies for sprinkling
-
1/4 cup semi-sweet chocolate chips for drizzling
Instructions
-
Step 1
Crush 24 regular-sized Oreo cookies into fine crumbs using a food processor or by placing them in a zip-top bag and crushing with a rolling pin. Transfer crumbs to a mixing bowl. -
Step 2
Add softened cream cheese to the Oreo crumbs. Mix thoroughly with a spoon or spatula until a sticky, dough-like consistency forms that holds together when pressed. -
Step 3
Roll small portions of the mixture (about 1 tablespoon each) into uniform, bite-sized spheres. Place the rolled balls onto a baking sheet lined with parchment paper. -
Step 4
Chill the cake balls in the refrigerator for at least 30 minutes (or in the freezer for 15 minutes) until firm. -
Step 5
Melt the white candy melts in a microwave-safe bowl in 30-second intervals, stirring until smooth. If too thick, add optional heavy cream one tablespoon at a time. -
Step 6
Dip each chilled cake ball into the melted white candy coating, allowing excess to drip off. Place back on the parchment-lined baking sheet. Sprinkle with crushed Oreo cookies while wet. -
Step 7
Melt the semi-sweet chocolate chips. Transfer to a piping bag or zip-top bag and drizzle decoratively over the coated cake balls. Let the cake balls set at room temperature or in the refrigerator.
Important Information
Nutrition Facts (Per Serving)
It is important to consider this information as approximate and not to use it as definitive health advice.
Allergy Information
Please check ingredients for potential allergens and consult a health professional if in doubt.


Leave a Comment