
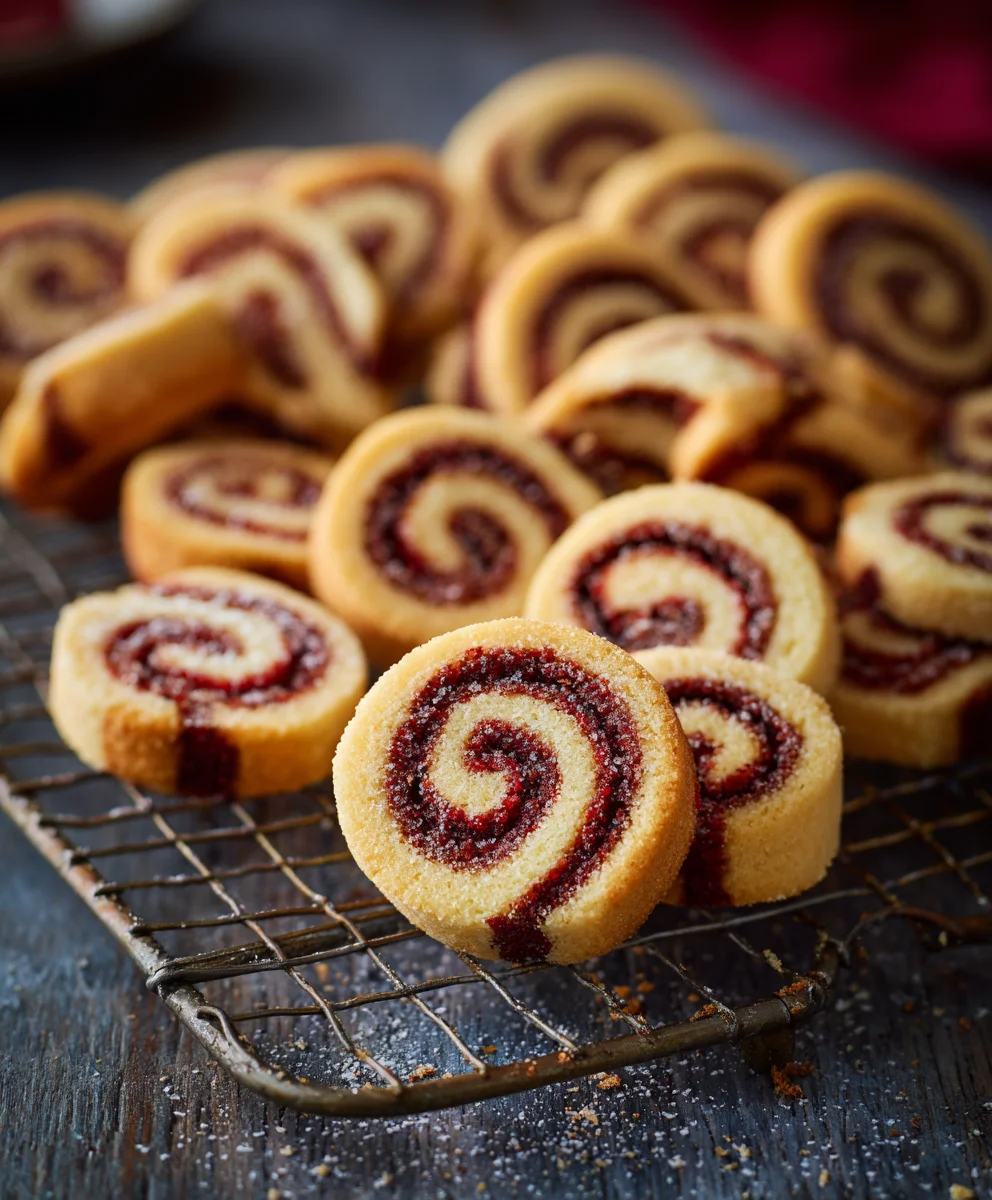
Christmas Pinwheel Cookies are more than just a sweet treat; they are miniature swirls of holiday cheer, a vibrant explosion of color and flavor that instantly transports you to a world of festive wonder. I find myself captivated by their intricate design every year, and it’s truly amazing how a simple combination of dough can transform into such an artistic masterpiece, promising joy with every bite.
These delightful cookies are a quintessential part of holiday baking traditions for countless families, including my own. They carry a nostalgic charm, often reminiscent of childhood Christmases spent in warm, spice-scented kitchens. Their history is rooted in the simple joy of creating beautiful, shareable treats during the most wonderful time of the year, evolving into the beloved classic we cherish today for its festive appeal and timeless taste.
Why do we all adore these festive cookies so much? Beyond their stunning visual appeal, it’s their irresistible buttery texture and subtle sweetness that truly win hearts. They are surprisingly easy to prepare, making them an ideal choice for busy holiday schedules, especially since the dough can be made ahead of time. Perfect for cookie exchanges, gift baskets, or simply enjoying with a cup of cocoa by the fire, these Christmas Pinwheel Cookies embody everything we love about the season: beauty, tradition, and delicious shared moments.

Ingredients:
- 2 ½ cups (300g) all-purpose flour, plus more for dusting
- 1 teaspoon baking powder
- ½ teaspoon salt
- 1 cup (226g) unsalted butter, softened to room temperature
- 1 ½ cups (300g) granulated sugar
- 1 large egg, at room temperature
- 1 ½ teaspoons vanilla extract
- Red gel food coloring (specific for baking, not liquid)
- Green gel food coloring (specific for baking, not liquid)
Preparing the Dough for Your Festive Christmas Pinwheel Cookies
-
Whisk Dry Ingredients: In a medium bowl, I like to whisk together my all-purpose flour, baking powder, and salt. It’s a simple step, but ensuring these dry ingredients are evenly distributed now means a perfectly textured cookie later. Set this bowl aside for a moment.
-
Cream Butter and Sugar: Now for the heart of our cookie dough! In a large mixing bowl, either with an electric mixer fitted with a paddle attachment or using a sturdy hand mixer, I beat the softened unsalted butter on medium speed for about one minute until it’s wonderfully creamy. Then, I gradually add the granulated sugar, continuing to beat for another 3-4 minutes until the mixture is light, fluffy, and a pale yellow. This creaming process is absolutely crucial because it incorporates air into the butter and sugar, which contributes significantly to the tender texture of our finished Christmas Pinwheel Cookies.
-
Incorporate Egg and Vanilla: With the mixer still running on medium-low, I crack in the large egg. I make sure to beat it until it’s just combined, scraping down the sides of the bowl as needed to ensure everything is incorporated. Then, I stir in the vanilla extract. Vanilla adds that classic comforting flavor that makes these Christmas Pinwheel Cookies truly irresistible. Be careful not to overmix at this stage; we just want everything nicely blended.
-
Combine Wet and Dry: It’s time to bring our ingredients together! With the mixer on low speed, I gradually add the dry ingredient mixture to the wet mixture, a little at a time. I mix until the flour is just incorporated and a soft dough forms. The key here is not to overmix! Overmixing develops the gluten in the flour too much, which can lead to tough cookies, and we want our Christmas Pinwheel Cookies to be tender and melt-in-your-mouth delicious. Once the dough comes together, I stop the mixer.
-
Divide the Dough: I transfer the dough to a clean, lightly floured surface. I then divide the dough into two equal portions. It helps to use a kitchen scale for this to ensure accuracy, as even dough portions will make for more uniform pinwheels. Each portion will become a distinct color in our beautiful Christmas Pinwheel Cookies.
Coloring and Layering for Your Festive Christmas Pinwheel Cookies
-
Coloring the Dough: Now for the fun, festive part! I take one portion of dough and gently knead in several drops of red gel food coloring until the dough is uniformly red. Gel food coloring is fantastic because it provides vibrant color without adding much liquid, which can change the dough’s consistency. For the second portion, I repeat the process with green gel food coloring until it’s a beautiful, even green. Wear gloves if you don’t want festive hands! I continue kneading just until the color is fully distributed – again, avoid over-handling the dough. We’re aiming for that iconic Christmas look that makes these Christmas Pinwheel Cookies so special.
-
Prepare for Rolling: I lightly flour my workspace and a rolling pin. If your kitchen is warm, you might want to chill the dough for 10-15 minutes at this point to make it easier to handle. I usually don’t need to, but it’s a good tip to keep in mind!
-
Roll Out the Red Dough: I take the red dough and place it between two sheets of parchment paper. This prevents sticking and makes it much easier to roll evenly. Using my rolling pin, I roll the red dough into a rectangle, approximately 12 inches by 9 inches, aiming for about ⅛ inch thickness. Uniform thickness is important here for an even bake and a beautiful pinwheel swirl. If the dough starts to stick, a light dusting of flour on the parchment paper can help. I then carefully remove the top piece of parchment paper.
-
Roll Out the Green Dough: I repeat the exact same process with the green dough, rolling it into an identical 12-inch by 9-inch rectangle, also about ⅛ inch thick. Again, consistency is key for the striking visual of our Christmas Pinwheel Cookies.
-
Layering the Dough: This step is where the magic really begins for our Christmas Pinwheel Cookies! I carefully transfer the rolled-out green dough (still on its bottom parchment paper) and gently place it directly on top of the red dough rectangle. I try my best to align the edges as perfectly as possible. If they aren’t exact, don’t worry too much; you can trim them slightly. The goal is a neat, two-layered dough sheet. I might gently press down with my hands or a rolling pin once or twice to ensure the layers adhere without squishing them.
-
Trim and Prepare for Rolling: With the two colored dough layers stacked, I gently trim any uneven edges to create a clean, crisp 12-inch by 9-inch rectangle. This ensures a beautiful, uniform spiral when we slice our Christmas Pinwheel Cookies. I ensure the layers are gently pressed together so they don’t separate when rolled.
-
Roll into a Log: Starting from one of the longer 12-inch sides, I carefully and tightly roll the layered dough into a log. I lift the edge of the dough and begin to roll, peeling back the bottom parchment paper as I go. The tighter you roll, the less likely you are to have gaps in your pinwheel pattern. I try to maintain even pressure across the entire log to keep its thickness consistent. Once rolled, I ensure the seam is on the bottom, gently pressing it to seal.
Chilling and Slicing the Christmas Pinwheel Cookies
-
Chill the Dough Log: This is a critical step for perfect Christmas Pinwheel Cookies! Once the log is formed, I tightly wrap it in plastic wrap. I make sure it’s snug to help it maintain its shape. Then, I place the wrapped dough log in the refrigerator to chill for at least 2 hours. Ideally, I chill it for 3-4 hours, or even overnight. Chilling the dough thoroughly makes it firm and much easier to slice cleanly without distorting the beautiful pinwheel pattern. Don’t skip this step; patience now will reward you with stunning cookies!
-
Preheat Oven and Prepare Baking Sheets: About 15-20 minutes before I’m ready to bake, I preheat my oven to 375°F (190°C). I also line two large baking sheets with parchment paper. Parchment paper prevents sticking and makes cleanup a breeze, ensuring your Christmas Pinwheel Cookies lift off easily.
-
Slice the Dough Log: Once the dough is thoroughly chilled and firm, I unwrap the log. Using a sharp knife, I carefully slice the log into ¼-inch thick rounds. I try my best to make each slice uniform in thickness. If the dough log seems a little flat on one side from chilling, you can gently reshape it into a perfect cylinder before slicing. A sharp knife is key here to get clean cuts and avoid squishing the gorgeous pinwheel design. As I slice, I place the individual Christmas Pinwheel Cookies onto the prepared baking sheets, leaving about 1 to 1 ½ inches between each cookie to allow for a little spread during baking.
Baking and Finishing Your Perfect Christmas Pinwheel Cookies
-
Bake the Cookies: I place the baking sheets into the preheated oven. I bake for 8-10 minutes, or until the edges of the Christmas Pinwheel Cookies are lightly golden and set. The centers might still look a little soft, but they will firm up as they cool. Keep a close eye on them, especially in the last few minutes, as oven temperatures can vary, and we don’t want them to over-brown and lose their vibrant color. For even baking, I often rotate the baking sheets halfway through the baking time.
-
Cool on Baking Sheets: Once baked, I carefully remove the baking sheets from the oven. I let the Christmas Pinwheel Cookies cool on the baking sheets for about 5 minutes. This initial cooling time allows them to firm up enough to be safely transferred without breaking. They are quite delicate when hot.
-
Transfer to Wire Rack: After 5 minutes, I use a thin spatula to gently transfer the Christmas Pinwheel Cookies from the baking sheets to a wire cooling rack to cool completely. Allowing them to cool on a rack ensures air circulation, preventing the bottoms from getting soggy and contributing to that perfect crisp-tender texture. Once fully cooled, these gorgeous Christmas Pinwheel Cookies are ready to be admired and enjoyed!
-
Storage: If by some miracle you have any left, these delightful Christmas Pinwheel Cookies can be stored in an airtight container at room temperature for up to one week. They also freeze beautifully for up to 2-3 months in an airtight container, making them perfect for preparing ahead of the busy holiday season. Just make sure they are completely cooled before storing or freezing to prevent condensation.
-
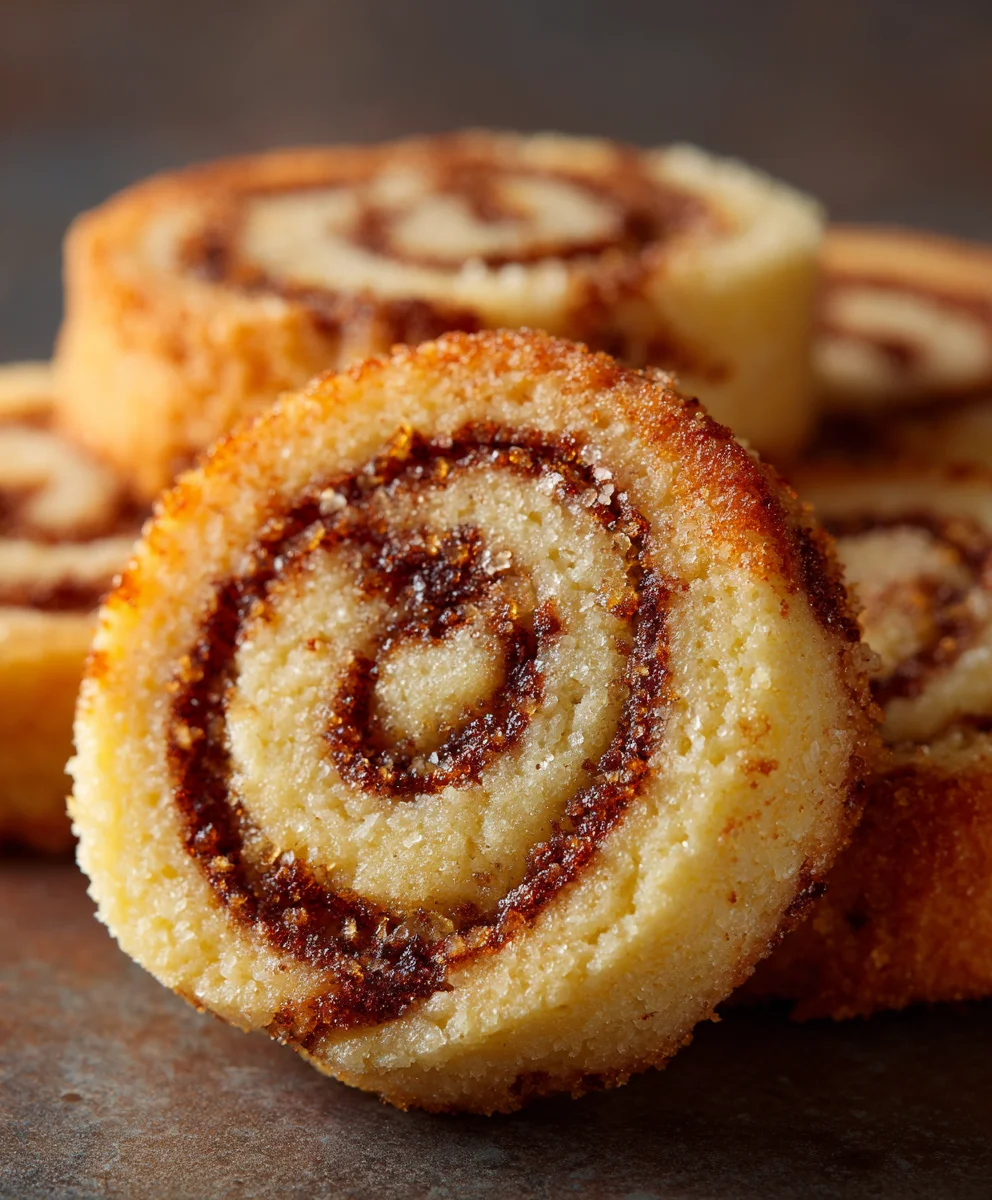
Enjoy Your Creation: Take a moment to appreciate the beautiful, festive swirl you’ve created. These Christmas Pinwheel Cookies are not just delicious; they are a delightful visual treat, perfect for holiday gatherings, cookie exchanges, or simply enjoying with a warm cup of cocoa. Happy baking, and happy holidays!
Conclusion:
So, there you have it – the comprehensive guide to crafting what I truly believe are some of the most delightful and visually stunning holiday treats you’ll ever bake. These aren’t just cookies; they’re tiny, edible works of art, a vibrant burst of festive cheer that consistently earns gasps of delight from anyone lucky enough to encounter them. Their unique, swirling pattern, a mesmerizing blend of colors, combined with an irresistible aroma that permeates your home, makes them an absolute must-try this season. Trust me when I say that the effort involved, which is surprisingly less daunting than it appears, is profoundly rewarding, culminating in a batch of treats that are as pleasing to the eye as they are to the palate.
What sets these cookies apart, beyond their undeniable aesthetic appeal, is their perfect balance of texture and taste. Each bite delivers a delicate, buttery crispness that gives way to a tender, melt-in-your-mouth interior, imbued with just the right amount of sweetness. They are wonderfully versatile, complementing a steaming cup of coffee or tea, a tall glass of cold milk, or even a robust mulled wine on a chilly evening. Imagine the joy of presenting a plate of these homemade beauties to friends and family, watching their faces light up at the sight of those distinct, festive spirals. These Christmas Pinwheel Cookies aren’t just a dessert; they’re an experience, a delightful conversation starter, and a true embodiment of holiday magic in edible form. The process of making them, from carefully rolling out the dough to precisely slicing each pinwheel, is incredibly satisfying, almost meditative, and the anticipation of seeing those perfect swirls emerge from the oven is a little thrill in itself.
Serving Suggestions & Creative Variations to Elevate Your Pinwheels!
Once your beautiful cookies have cooled, the possibilities for enjoying and sharing them are endless. For a simple yet sophisticated presentation, arrange them artfully on a white platter, allowing their vibrant colors to pop. They are a magnificent addition to any holiday dessert spread, nestled alongside other festive favorites, adding a much-needed splash of color and whimsy. Thinking of homemade gifts? Stack these cookies neatly in a decorative tin or tie a small stack with a festive ribbon in a cellophane bag. They make wonderfully thoughtful and personalized presents that truly convey the spirit of giving.
But why stop there? This recipe is a fantastic canvas for your own creativity! Here are a few ideas to inspire some delightful variations:
- Flavor Boosts: While vanilla is classic, consider swapping out a portion of the vanilla extract for a few drops of peppermint extract for a refreshing minty twist, perfect for the holidays. Almond extract or even a hint of orange zest (mixed into the dough before coloring) can add a sophisticated and aromatic dimension.
- Color Play: Don’t feel limited to red and green! Experiment with other food color combinations to suit different themes or occasions. Think blues and silvers for a winter wonderland effect, pastels for spring, or even black and orange for a spooky Halloween treat.
- Added Texture: Before rolling the dough, you could sprinkle a thin layer of finely chopped nuts (like pecans or walnuts) or mini chocolate chips over one of the dough layers. This will add an interesting crunch and an extra layer of flavor to your pinwheels.
- Glaze & Drizzle: For an extra touch of sweetness and shine, once cooled, drizzle your cookies with a simple powdered sugar glaze (powdered sugar mixed with a tiny bit of milk or lemon juice). You could even add a few drops of food coloring to the glaze for an additional pop! Or, melt some white chocolate and drizzle it over the cookies for a lovely contrast.
- Sprinkle Magic: For an even more festive look, consider gently pressing some festive sprinkles or sanding sugar onto the rolled dough before slicing and baking. This will give them a wonderful sparkle and an extra layer of holiday cheer.
Your Baking Adventure Awaits!
I genuinely hope this recipe ignites your holiday baking spirit and encourages you to roll up your sleeves and give these utterly charming cookies a try. There’s a profound joy in creating something beautiful and delicious with your own hands, and these cookies are designed to bring exactly that kind of satisfaction. Don’t be intimidated by the swirls; the process is incredibly forgiving, and the results are consistently stunning.
Once you’ve embarked on your pinwheel cookie adventure, I would absolutely love to hear about it! Please, share your experiences with me. What colors did you choose? Did you try any exciting flavor variations? Who were the lucky recipients of your delicious creations? Your stories, tips, and especially your photos, are truly the best part of sharing recipes like this. Tag me on social media or leave a comment below – seeing your beautiful bakes always brings a huge smile to my face. Happy baking, everyone, and may your holiday season be filled with warmth, wonderful aromas, and an abundance of delightful treats!
Festive Christmas Pinwheel Cookies
Festive Christmas Pinwheel Cookies are beautiful, buttery, and subtly sweet treats. Their vibrant red and green swirls make them a holiday favorite, perfect for gifting or enjoying with family. The dough can be prepared ahead of time, making them surprisingly easy to fit into busy holiday schedules.
Ingredients
-
2 ½ cups (300g) all-purpose flour
-
1 teaspoon baking powder
-
½ teaspoon salt
-
1 cup (226g) unsalted butter, softened
-
1 ½ cups (300g) granulated sugar
-
1 large egg
-
1 ½ teaspoons vanilla extract
-
Red gel food coloring
-
Green gel food coloring
Instructions
-
Step 1
Whisk dry ingredients: In a medium bowl, whisk together all-purpose flour, baking powder, and salt. Set aside. -
Step 2
Cream butter and sugar: In a large mixing bowl, beat softened unsalted butter until creamy (1 min). Gradually add granulated sugar, beating for 3-4 minutes until light and fluffy. -
Step 3
Incorporate egg and vanilla: Beat in the large egg until just combined, then stir in the vanilla extract. Do not overmix. -
Step 4
Combine wet and dry: Gradually add the dry ingredient mixture to the wet mixture on low speed until a soft dough forms. Stop mixing once the flour is just incorporated to avoid tough cookies. -
Step 5
Divide the dough: Transfer the dough to a lightly floured surface and divide it into two equal portions. -
Step 6
Color the dough: Knead red gel food coloring into one portion of dough until uniformly red. Repeat with green gel food coloring for the second portion. Avoid over-handling. -
Step 7
Roll out the doughs: Lightly flour your workspace and rolling pin. Roll the red dough between two sheets of parchment paper into a 12×9 inch rectangle, approximately ⅛ inch thick. Remove the top parchment. Repeat the process for the green dough, creating an identical 12×9 inch, ⅛ inch thick rectangle. -
Step 8
Layer the dough: Carefully transfer the rolled-out green dough (on its bottom parchment) and gently place it directly on top of the red dough rectangle, aligning the edges. Gently press down to ensure the layers adhere. -
Step 9
Trim and roll into a log: Trim any uneven edges to create a clean 12×9 inch rectangle. Starting from one of the longer 12-inch sides, tightly roll the layered dough into a log, peeling back the bottom parchment paper as you go. Ensure the seam is on the bottom and gently press to seal. -
Step 10
Chill the dough log: Tightly wrap the dough log in plastic wrap. Chill in the refrigerator for at least 2 hours, ideally 3-4 hours or overnight, until thoroughly firm. This step is critical for clean slicing. -
Step 11
Preheat oven and prepare baking sheets: About 15-20 minutes before baking, preheat your oven to 375°F (190°C). Line two large baking sheets with parchment paper. -
Step 12
Slice the dough log: Unwrap the chilled log. Using a sharp knife, carefully slice the log into ¼-inch thick rounds. Place the cookies onto the prepared baking sheets, leaving about 1 to 1 ½ inches between each cookie. -
Step 13
Bake the cookies: Bake for 8-10 minutes, or until the edges are lightly golden and set. The centers will firm up as they cool. Rotate baking sheets halfway through for even baking. -
Step 14
Cool the cookies: Remove baking sheets from the oven and let cookies cool on the sheets for about 5 minutes. Then, transfer them to a wire cooling rack to cool completely. -
Step 15
Storage: Store cooled cookies in an airtight container at room temperature for up to one week. They can also be frozen in an airtight container for 2-3 months.
Important Information
Nutrition Facts (Per Serving)
It is important to consider this information as approximate and not to use it as definitive health advice.
Allergy Information
Please check ingredients for potential allergens and consult a health professional if in doubt.
Leave a Comment