
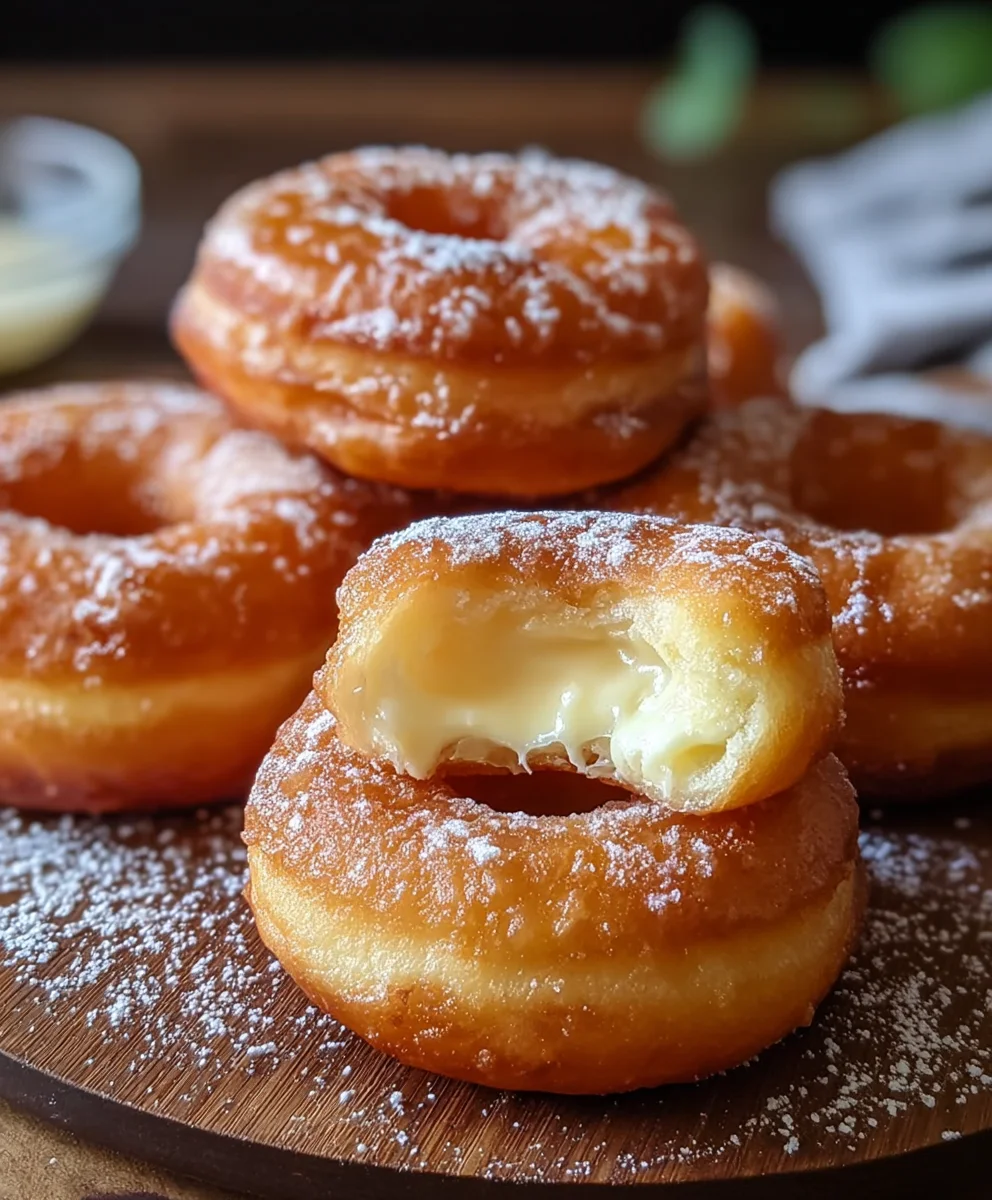
Milky Cheese Donuts are an absolute delight, a perfect harmony of sweet and savory that has captured hearts (and taste buds!) across the globe. Imagin extracte biting into a cloud-like donut, impossibly soft and airy, with a subtle, rich cheesiness that melts in your mouth. That’s the magic of these unique treats! It’s no wonder they’re so beloved; they offer a comforting yet sophisticated flavor profile that’s unlike anything else. What truly sets these Milky Cheese Donuts apart is their incredible versatility. They’re not just a dessert; they can be a delightful snack, a brunch centerpiece, or even a surprising addition to a savory platter. The secret lies in the delicate balance of ingredients and the specific technique that yields their signature ethereal texture. Prepare to be enchanted by this irresistible creation!

Ingredients:
- 2 cups all-purpose flour
- 1 cup whole milk, warm (around 110°F or 43°C)
- 2 tablespoons granulated sugar
- 2¼ teaspoons active dry yeast (this is equivnon-alcoholic alent to one standard packet of yeast)
- ½ teaspoon salt
- 1 large egg
- 4 tablespoons unsalted butter, melted and slightly cooled
- 1 cup shredded mozzarella cheese
- Vegetable or canola oil, enough for frying (about 3-4 inches deep in your pot)
- Powdered sugar, for dusting (optional, but highly recommended for that classic donut finish)
Preparing the Dough Base
Activating the Yeast
The first step to creating these delightful Milky Cheese Donuts is to awaken our yeast. In a large mixing bowl, combine the warm whole milk and the granulated sugar. The milk should be warm to the touch, not hot, as extreme heat can kill the yeast. Aim for that 110°F (43°C) sweet spot. Sprinkle the active dry yeast over the surface of the milk mixture. Give it a gentle whisk, just to distribute it, and then let it sit undisturbed for about 5 to 10 minutes. You’ll know the yeast is alive and well when it becomes foamy and bubbly on top – this is called proofing. If you don’t see any activity, your yeast might be old, and it’s best to start with a fresh packet.
Incorporating Wet and Dry Ingredients
Once your yeast has bloomed, it’s time to bring everything else together. To the foamy yeast mixture, add the large egg and the melted, slightly cooled unsalted butter. Whisk these in until they are well combined with the yeasty liquid. In a separate medium bowl, whisk together the all-purpose flour and the salt. This ensures the salt is evenly distributed throughout the flour, which is important for flavor and dough structure. Now, gradually add the dry ingredients to the wet ingredients in the large mixing bowl.
Developing the Dough
Mixing and Kneading
Begin extract mixing the ingredients together using a sturdy spoon or a dough whisk. Continue mixing until a shaggy dough starts to form. Once the dough becomes too difficult to stir, it’s time to get your hands involved, or use a stand mixer with a dough hook attachment. Turn the dough out onto a lightly floured surface. Knead the dough for about 8 to 10 minutes. If using a stand mixer, knead on medium-low speed for about 6 to 8 minutes. The goal is to develop the gluten in the flour, which gives the donuts their characteristic chewy texture. You’ll know the dough is ready when it’s smooth, elastic, and no longer excessively sticky. It should spring back slowly when you gently poke it with your finger.
First Rise
Lightly grease a clean bowl with a little oil or butter. Place the kneaded dough into the greased bowl, turning it to coat all sides. Cover the bowl tightly with plastic wrap or a clean kitchen towel. Find a warm, draft-free spot for the dough to rise. This could be in a slightly warm oven (turned off, of course!) or just on your kitchen counter on a warmer day. Let the dough rise for about 1 to 1.5 hours, or until it has doubled in size. This slow fermentation process is crucial for developing flavor and achieving a light, airy texture in your Milky Cheese Donuts.
Incorporating the Cheese and Shaping
Adding the Mozzarella
Once the dough has risen beautifully, it’s time to introduce the star of the show: the mozzarella cheese. Gently punch down the risen dough to release the air. Turn the dough out onto a lightly floured surface again. Sprinkle the shredded mozzarella cheese evenly over the surface of the flattened dough. Now, carefully fold and knead the dough a few times, just enough to distribute the cheese throughout. You don’t want to overwork it at this stage; the goal is to get pockets of melty cheese within the donut.
Shaping the Donuts
After the cheese is incorporated, you have a couple of options for shaping. You can roll the dough out to about ½ inch thickness and use a donut cutter to create classic rings. Alternatively, for simpler donuts, you can divide the dough into smaller portions and roll each portion into a ball, then flatten it slightly. If you prefer filled donuts, you can flatten smaller portions, place a small amount of extra mozzarella in the center, and then pinch the edges together to seal them, forming a ball. For this recipe, we’ll assume you’re making ring donuts for that classic appearance.
Frying and Finishing
Frying the Donuts
Heat your frying oil in a deep, heavy-bottomed pot or Dutch oven over medium heat. The oil is ready when it reaches a temperature of around 350°F (175°C). You can test this by dropping a tiny piece of dough into the oil; it should sizzle immediately and float to the surface. Carefully place your shaped donuts into the hot oil, being careful not to overcrowd the pot. Fry the donuts for about 2 to 3 minutes per side, until they are golden brown and puffed up. Use a slotted spoon or spider strainer to gently flip them and to remove them from the oil.
Draining and Dusting
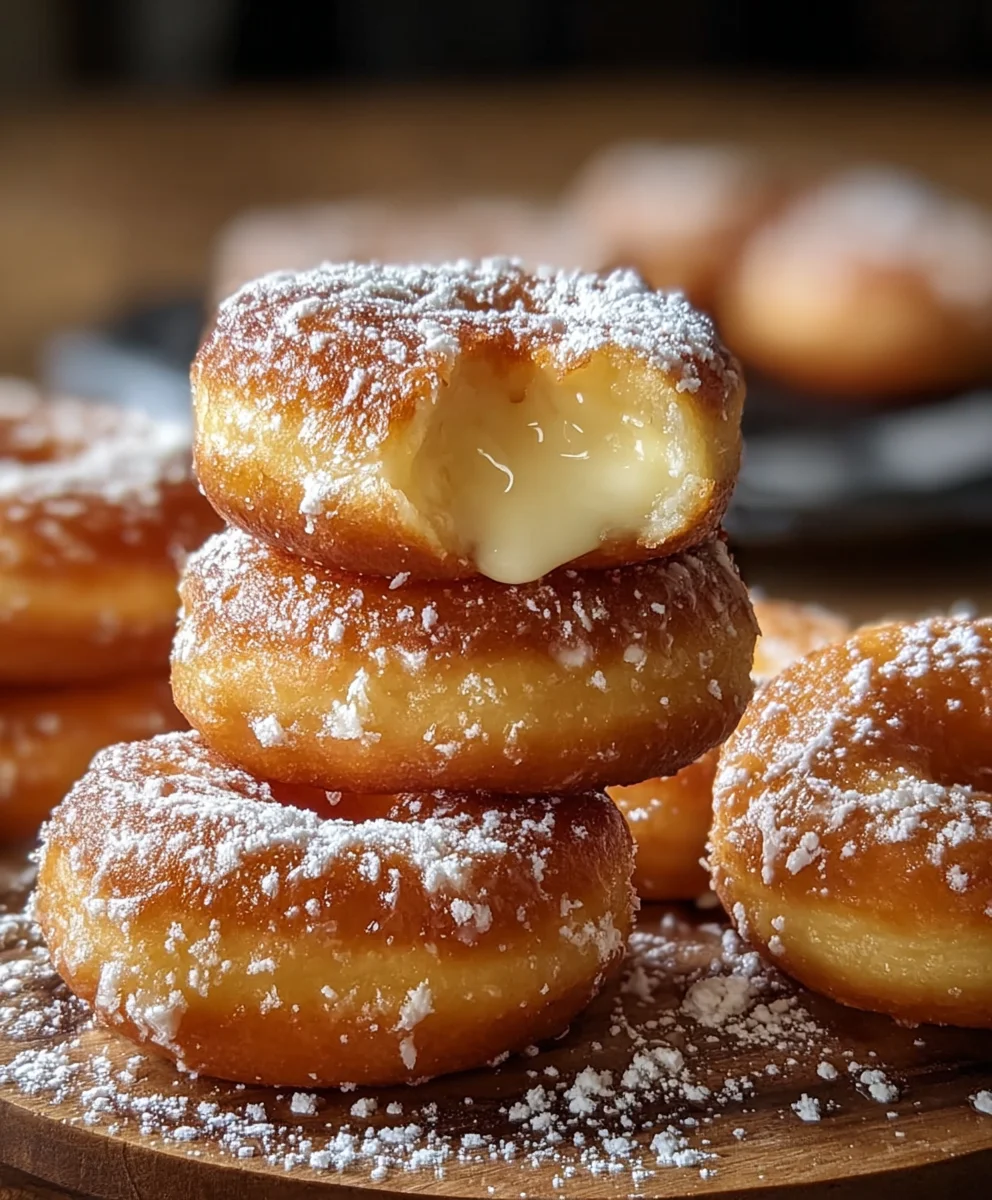
Once fried to a perfect golden hue, remove the donuts from the oil and place them on a wire rack set over a baking sheet. This allows any excess oil to drain off, keeping your donuts from becoming greasy. If you’re using powdered sugar, let the donuts cool slightly, but while they are still warm, generously dust them with powdered sugar. The warmth will help the sugar adhere beautifully. You can also try a simple glaze made from powdered sugar and a little milk if you prefer. Serve your Milky Cheese Donuts warm and enjoy the delightful combination of soft, fluffy dough and gooey, savory cheese!
Conclusion:
We’ve reached the delicious end of our journey into making these delightful Milky Cheese Donuts! I hope you’ve enjoyed learning how to create these sweet and savory treats that are sure to impress. The combination of soft, fluffy dough with a subtle cheesy sweetness makes Milky Cheese Donuts a truly unique and satisfying indulgence. Don’t be afraid to get your hands a little messy – the process is part of the fun!
These Milky Cheese Donuts are incredibly versatile. They are perfect for a weekend brunch, a special afternoon tea, or even as a light dessert. For serving, consider a light dusting of powdered sugar or a simple glaze. They also pair wonderfully with a fresh cup of coffee or a glass of milk. For variations, try incorporating finely chopped chives or a pinch of black pepper into the dough for an extra savory kick, or even a sprinkle of toasted sesame seeds on top for added texture. Embrace your creativity and make these Milky Cheese Donuts your own! I encourage you to give this recipe a try; the results are well worth the effort, and you’ll be rewarded with a batch of homemade goodness.
Frequently Asked Questions:
Can I make the dough ahead of time?
Yes, you can definitely make the dough for your Milky Cheese Donuts ahead of time. Once the dough has had its first rise, you can punch it down, wrap it tightly in plastic wrap, and refrigerate it for up to 24 hours. Allow it to come to room temperature for about 30-60 minutes before shaping and frying.
What kind of cheese is best for Milky Cheese Donuts?
For these Milky Cheese Donuts, a mild, meltable cheese works best. Cheddar, Monterey Jack, or a blend of both are excellent choices. You want a cheese that will become gooey and delicious without overpowering the other flavors in the donut. Avoid strongly flavored cheeses unless you’re aiming for a specific flavor profile.
How do I store leftover Milky Cheese Donuts?
Leftover Milky Cheese Donuts are best stored in an airtight container at room temperature for up to two days. While they are most delicious fresh, they can be gently reheated in a low oven or toaster oven for a few minutes to restore some of their warmth and texture.
Milky Cheese Donuts
Irresistible donuts with a burst of flavor, featuring a soft, fluffy dough and gooey, savory mozzarella cheese, dusted with powdered sugar.
Ingredients
-
2 cups all-purpose flour
-
1 cup whole milk, warm (around 110°F or 43°C)
-
2 tablespoons granulated sugar
-
2¼ teaspoons active dry yeast
-
½ teaspoon salt
-
1 large egg
-
4 tablespoons unsalted butter, melted and slightly cooled
-
1 cup shredded mozzarella cheese
-
Vegetable or canola oil, enough for frying
-
Powdered sugar, for dusting
Instructions
-
Step 1
Activate the yeast: In a large mixing bowl, combine warm whole milk and granulated sugar. Sprinkle active dry yeast over the surface and let sit for 5-10 minutes until foamy. -
Step 2
Incorporate wet and dry ingredients: To the foamy yeast mixture, add the egg and melted butter. Whisk until combined. In a separate bowl, whisk together flour and salt. Gradually add dry ingredients to wet ingredients. -
Step 3
Develop the dough: Mix until a shaggy dough forms. Turn out onto a lightly floured surface and knead for 8-10 minutes until smooth and elastic. Place in a lightly greased bowl, cover, and let rise in a warm spot for 1-1.5 hours, or until doubled in size. -
Step 4
Incorporate cheese and shape: Gently punch down the risen dough. Turn out onto a floured surface, sprinkle with shredded mozzarella, and knead a few times to distribute. Shape into rings or balls. -
Step 5
Fry the donuts: Heat vegetable or canola oil in a deep pot to 350°F (175°C). Carefully place donuts in the hot oil and fry for 2-3 minutes per side until golden brown. Remove with a slotted spoon. -
Step 6
Drain and dust: Place fried donuts on a wire rack to drain excess oil. While still warm, dust generously with powdered sugar.
Important Information
Nutrition Facts (Per Serving)
It is important to consider this information as approximate and not to use it as definitive health advice.
Allergy Information
Please check ingredients for potential allergens and consult a health professional if in doubt.


Leave a Comment