
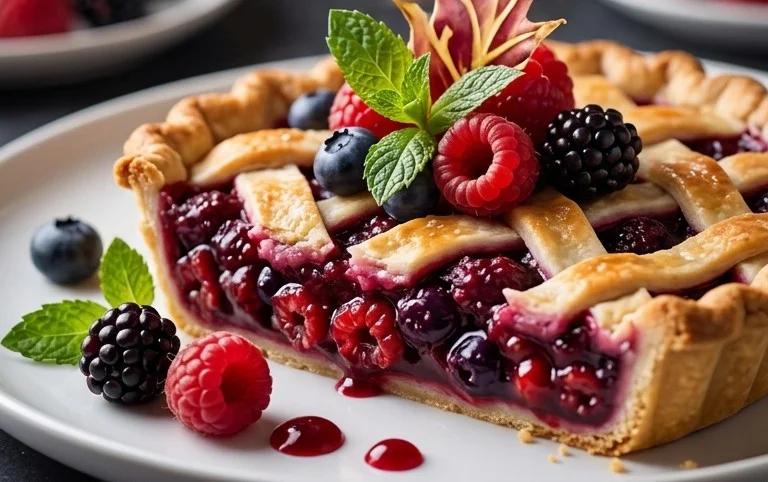
How to Make a Clay Pie is an adventure for the senses and a testament to culinary ingenuity. Forget everything you thought you knew about pie; this isn’t about flaky crusts and sweet fillings, but rather about creating something visually stunning and wonderfully savory. People absolutely adore this dish because it’s not just food; it’s an edible work of art that sparks conversation and delight at any gathering. What makes a clay pie truly special is the transformative process – turning humble ingredients into a masterpiece that looks so convincing, your guests might be hesitant to dig in! The anticnon-alcoholic ipation alone is half the fun. Ready to impress with a dish that’s as delicious as it is dramatic? Let’s dive into the magic of making your very own clay pie.
A Savory Surprise Awaits
Get Ready to Amaze Your Taste Buds

How to Make a Clay Pie
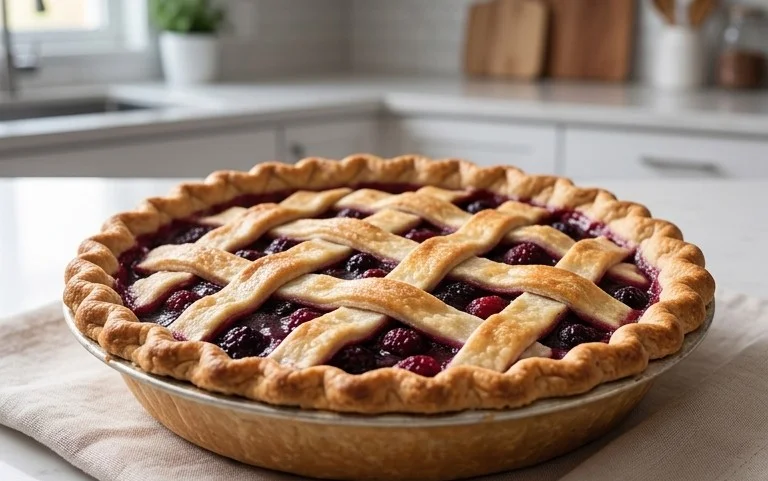
Have you ever admired those incredibly realistic miniature food items and thought, “I wish I could make that”? Well, you absolutely can! Today, we’re diving into the delightful world of polymer clay miniatures to create a charming, edible-looking pie that’s perfect for display, as a charm, or even as a unique embellishment on a craft project. This project is surprisingly simple and incredibly rewarding, allowing you to create a piece of edible art without any of the calories! We’ll be using polymer clay to mimic the look and texture of a delicious, baked pie, complete with a golden-brown crust and a vibrant filling. Get ready to unleash your inner miniature baker!
Ingredients:
Preparing Your Workspace and Materials
Before we begin extract, it’s essential to prepare your workspace. A clean, flat surface is ideal for working with polymer clay. I like to use a piece of parchment paper or a ceramic tile, as they provide a smooth surface that clay doesn’t stick to easily. Make sure your hands are clean and free of any oils or lotions, as these can transfer to the clay and affect its appearance.
Gather all your ingredients within easy reach. The beauty of polymer clay is its versatility, and with just a few simple tools and these core ingredients, we can create something truly special.
Crafting the Pie Crust
1. Forming the Base: Take a generous portion of your tan polymer clay. This will form the main body of our pie crust. Knead it for a minute or two until it becomes soft and pliable. This conditioning process is crucial for making the clay easier to work with and prevents cracking. Once conditioned, flatten the clay into a disc. You can use a rolling pin or even a smooth, flat object like the back of a mug. Aim for a thickness of about 2-3 millimeters. This will be the bottom of our pie.
2. Creating the Pie Dish Impression: Now, we need to give our crust the shape of a pie dish. Take your silver bottle cap and gently press it into the center of the tan clay disc. You don’t need to press all the way through, just enough to create a clear circular indentation. This impression will serve as our guide for where the filling will go and also helps define the inner edge of the crust. For a more realistic look, you can slightly build up the edges of the clay disc around the indentation, mimicking the way a pie crust sits in a dish. Think of it like creating a shallow bowl with the clay.
Adding the Delicious Filling
3. Preparing the Filling: Now for the star of the show – the filling! Take your red polymer clay (or your chosen filling color). Roll it into a ball and then flatten it slightly. We want a filling that looks juicy and plump. You can make your filling as smooth or as textured as you like. For a jam-like filling, a smooth, slightly glossy surface works well. If you’re going for a fruit filling, you might want to leave some subtle lumps and bumps to represent whole berries or chunks of fruit.
4. Placing and Shaping the Filling: Carefully place the flattened red clay into the indentation you created on the tan crust. Gently press it down, ensuring it fills the space evenly. Don’t overfill it; we want to leave a small lip of crust visible around the edges, just like a real pie. You can use a sculpting tool or even the tip of a toothpick to gently shape the filling and create any desired textures. If you want a slightly domed filling, build it up a little in the center.
Adding Realistic Details and Baking
5. Texturing and Coloring the Crust: This is where we add those mouth-watering details! Take your two shades of brown soft pastels. Using a soft brush (an old makeup brush works perfectly), lightly dust the edges of the tan crust with the lighter brown pastel. This simulates a lightly baked crust. Then, using a slightly darker shade of brown, add subtle streaks or darker patches around the very edges and where the crust meets the filling. This creates the illusion of browning and depth, making your pie look truly baked. Be subtle with this step; a little goes a long way. You can also use a toothpick to gently score some lines into the edge of the crust, mimicking flaky pastry.
Baking and Finishing Touches
Once your pie is assembled and detailed, it’s time to bake! Follow the baking instructions for your specific brand of polymer clay. Typically, this involves baking in a preheated oven at a low temperature (around 130-135 degrees Celsius or 265-275 degrees Fahrenheit) for a specific amount of time, usually around 15-30 minutes depending on the thickness of your piece. It’s crucial to bake on a heat-resistant surface like a tile or baking sheet lined with parchment paper. Do not use a toaster oven as the heat can be too concentrated and uneven. Ensure good ventilation during baking.
After baking, allow your clay pie to cool completely before handling it. Once cool, you can add any final touches. If you want a glossy finish on your filling, you can apply a thin layer of a clear gloss varnish specifically designed for polymer clay. This will make the filling look even more luscious and realistic. You can also attach a jump ring to the crust to turn it into a charm or pendant, or simply display your delicious-looking creation as is! Enjoy your miniature masterpiece!
Conclusion:
You’ve now learned the delightful and surprisingly simple process of making a clay pie! This recipe is truly fantastic because it offers a unique and engagin extractg creative outlet that results in a beautiful, albeit inedible, masterpiece. It’s a wonderful way to spend an afternoon, whether you’re a seasoned crafter or just looking for a fun new activity. The tactile experience of working with clay is incredibly satisfying, and the possibilities for decoration are endless, making each clay pie a personal expression of your creativity.
When it comes to “serving” your clay pie, the best way is to proudly display it! It makes a charming centerpiece for a shelf, a desk, or even as part of a seasonal decoration. For variations, consider using different types of clay for varying textures, experimenting with paint colors, or even incorporating small embellishments like beads or glitter before the clay dries. Don’t be afraid to get creative! I truly encourage you to try making your own clay pie. It’s a rewarding project that brings a touch of artisanal charm into your home.
Frequently Asked Questions:
What kind of clay should I use?
For begin extractners, air-dry clay is an excellent choice. It’s readily available, doesn’t require a kiln, and is easy to work with. Polymer clay is another great option if you want a more durable finish and plan to bake it in a conventional oven for hardening.
Can I paint my clay pie after it’s dried?
Absolutely! Once your clay pie has fully dried or been baked according to the clay’s instructions, you can paint it with acrylic paints. This is where you can truly bring your creation to life with vibrant colors and intricate designs.
How long does it take for the clay pie to dry?
Drying times can vary depending on the thickness of your clay and the humidity of your environment. Air-dry clay typically takes 24-72 hours to dry completely. Polymer clay will harden according to the package instructions, usually requiring baking for a specific time and temperature.
How to Make a Clay Pie
A fun and simple craft project to create a miniature polymer clay pie, perfect for dollhouses or decorative displays.
Ingredients
-
1 ounce Tan Polymer clay
-
1 Silver bottle cap
-
1 ounce Red Polymer clay
-
2 shades of Brown Soft pastels
-
1 small amount of White Polymer clay (for optional crust details)
-
1 small amount of Beige Polymer clay (for optional crust details)
Instructions
-
Step 1
Condition the Tan Polymer clay by kneading it until soft and pliable. Roll it out into a thin sheet. -
Step 2
Place the Silver bottle cap onto the Tan clay sheet and cut around it, leaving a small overhang for the crust. -
Step 3
Gently press the clay into the bottle cap, forming the pie base and crust. Trim any excess clay. -
Step 4
Condition the Red Polymer clay. Flatten it and place it inside the clay pie crust as the filling. You can create texture by gently pressing. -
Step 5
Using the Soft pastels, lightly dust the edges of the crust to give it a baked appearance. Use a fine brush for precision. -
Step 6
Optional: Roll out small pieces of White and Beige Polymer clay and cut them into thin strips for lattice or decorative crust elements. Attach them to the edge of the pie. -
Step 7
Bake the clay pie according to the manufacturer’s instructions for the polymer clay. This usually involves a preheated oven at a specific temperature for a set time.
Important Information
Nutrition Facts (Per Serving)
It is important to consider this information as approximate and not to use it as definitive health advice.
Allergy Information
Please check ingredients for potential allergens and consult a health professional if in doubt.
Leave a Comment