
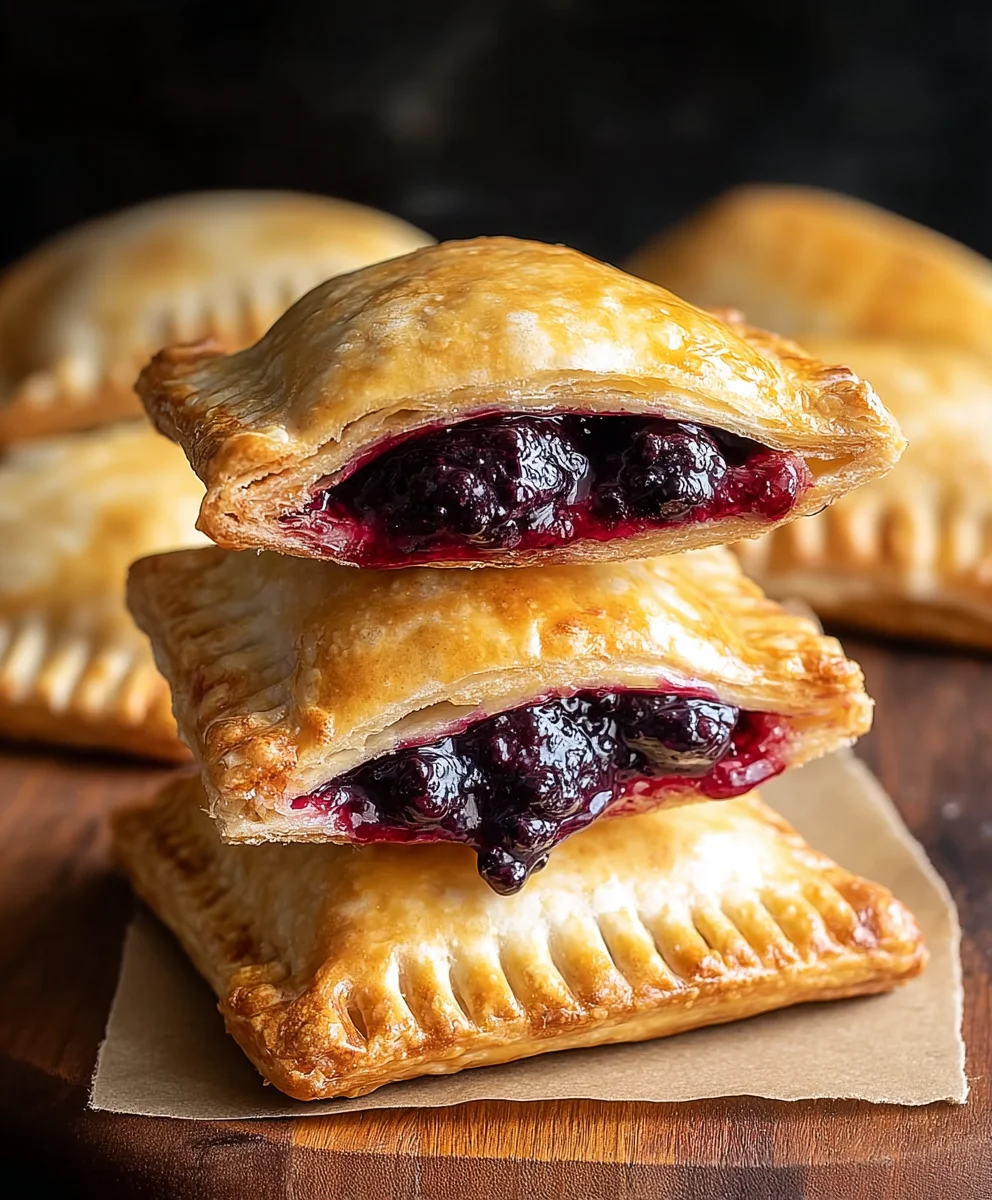
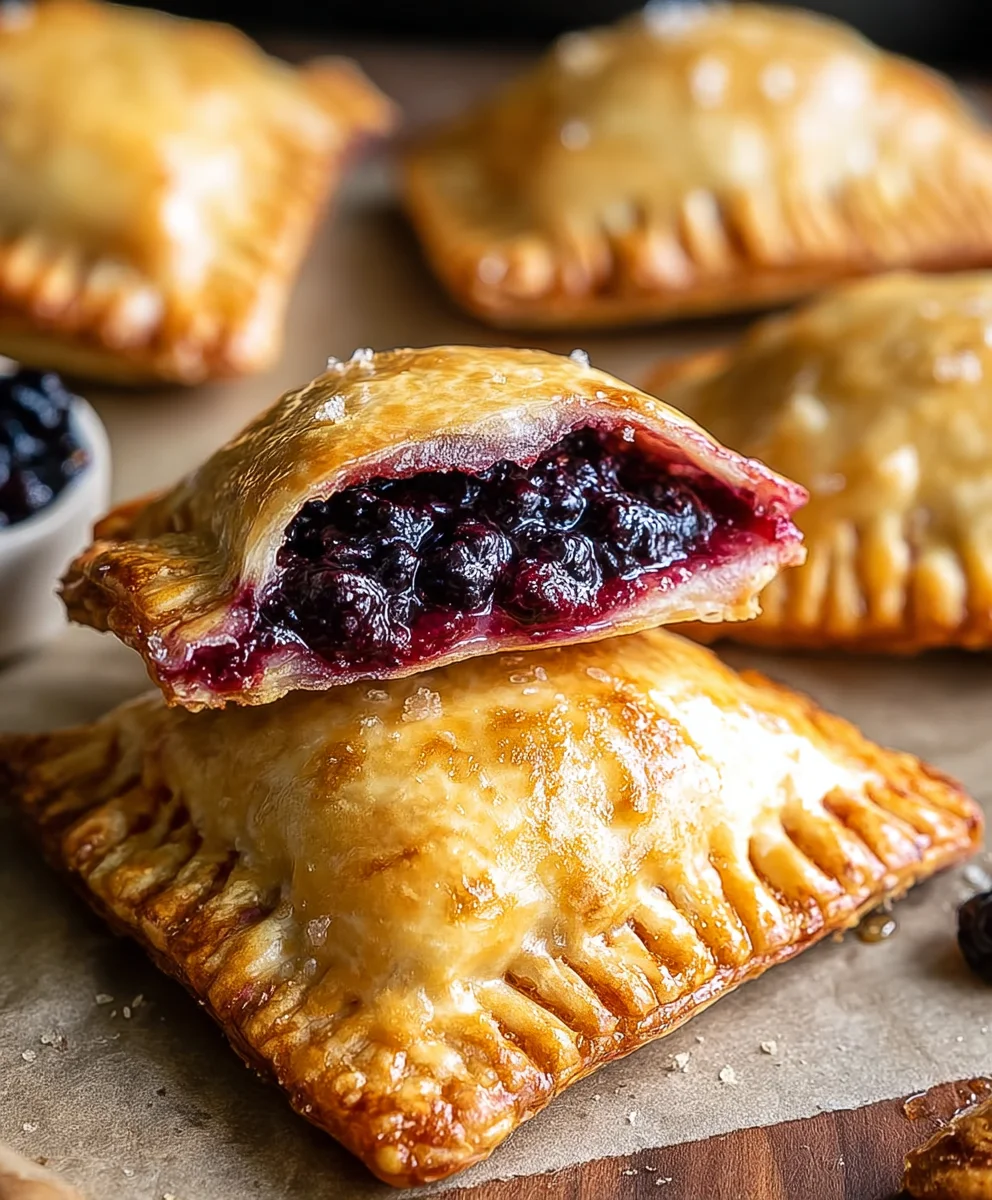
Blackberry Hand Pies are more than just a dessert; they are little pockets of pure joy, bursting with the vibrant, slightly tart sweetness of summer. Imagine the delightful crunch of golden-brown, flaky pastry giving way to a warm, luscious filling of plump blackberries. It’s no wonder these individual delights have captured so many hearts! People adore them for their perfect portion size – no need to slice and serve, just grab and go. They evoke a sense of nostalgic comfort, reminiscent of childhood picnics and grandmother’s baking. What truly makes these Blackberry Hand Pies so special is the incredible balance of flavors and textures. The crisp, buttery crust offers a beautiful contrast to the soft, juicy fruit, and a hint of lemon zest often elevates the blackberry’s natural tang. Whether you’re looking for an impressive treat to share or a personal indulgence, these portable pastries are an absolute winner.

Ingredients:
- 21 oz. can blackberry pie filling
- Refrigerated pie crust (2 crusts, typically)
- 1/2 cup powdered sugar
- 1 teaspoon corn syrup
- 1 tablespoon water
- Vegetable oil for frying (about 2-3 inches in your pot)
Preparing the Blackberry Filling
Before we even think about assembling our delicious Blackberry Hand Pies, let’s give that pre-made blackberry pie filling a little upgrade. While it’s perfectly good on its own, a few simple additions can elevate the flavor and texture, making these pies truly special. Open up your 21 oz. can of blackberry pie filling and pour it into a medium-sized bowl. Now, stir in the 1 teaspoon of corn syrup. The corn syrup might seem a little unexpected, but it serves a dual purpose. Firstly, it adds a lovely subtle gloss and sheen to the filling, making it look more professional. Secondly, it helps to create a slightly softer, more yielding texture within the baked pie, preventing it from becoming too stiff or cloying. Give it a good mix until the corn syrup is fully incorporated into the luscious blackberries and thick syrup. Set this aside for now; it’s going to be the heart of our sweet, tart handheld treats.
Assembling the Blackberry Hand Pies
This is where the magic of Blackberry Hand Pies truly begins to take shape! Unroll your refrigerated pie crusts onto a lightly floured surface. If you’re using standard 9-inch pie crusts, you’ll likely get two crusts per package, which is perfect for making a batch of these delightful hand pies. Carefully cut each crust into four equal portions. A pizza cutter works wonderfully for this, ensuring clean, straight lines. You should end up with eight squares of dough. Now, take one of your prepared dough squares and place it in front of you. Spoon about 2 to 3 tablespoons of your enhanced blackberry filling onto one half of the square, leaving a small border around the edges. Be careful not to overfill, as this can make sealing the pies a bit tricky and lead to leaks during cooking. The goal is to have a generous but manageable amount of filling that won’t ooze out too much.
Once you’ve filled a dough square, it’s time to seal it up and create that signature hand pie shape. Fold the other half of the dough square over the filling, creating a rectangle or half-moon shape, depending on how you folded it. Press the edges firmly together to seal. You can use the tines of a fork to crimp the edges all the way around, which not only creates a decorative pattern but also ensures a secure seal, preventing any precious blackberry goodness from escaping. Repeat this process with the remaining dough squares and blackberry filling until you have all your Blackberry Hand Pies assembled. For best results and to prevent the dough from sticking, it’s a good idea to keep your work surface lightly floured throughout this assembly process.
Preparing for Frying and Frying the Blackberry Hand Pies
Now that our Blackberry Hand Pies are all assembled and ready for their golden transformation, we need to prepare for frying. You’ll need a deep pot or Dutch oven for this. Pour enough vegetable oil into your pot to reach a depth of about 2 to 3 inches. We want enough oil to allow the hand pies to float freely, ensuring even cooking and browning. Place the pot over medium-high heat and allow the oil to come up to temperature. The ideal temperature for frying hand pies is around 350°F (175°C). If you don’t have a thermometer, you can test the oil by dropping a tiny piece of dough into it. If it sizzles and floats to the surface immediately, the oil is ready.
Carefully, and I mean very carefully, lower 2 to 3 Blackberry Hand Pies into the hot oil at a time. Don’t overcrowd the pot, as this will lower the oil temperature and result in greasy, unevenly cooked pies. Allow the pies to fry for about 2 to 3 minutes per side, or until they are a beautiful golden brown. Use a slotted spoon or spider strainer to gently turn them over halfway through the cooking time, ensuring both sides get equally crispy and delicious. The bubbling should be vigorous but not so violent that it splatters excessively. Keep an eye on them; they can go from perfectly golden to burnt quite quickly.
Once they’ve achieved that irresistible golden hue, carefully remove the Blackberry Hand Pies from the hot oil using your slotted spoon or spider. Place them on a wire rack set over a baking sheet or on paper towels to drain any excess oil. This step is crucial for maintaining their crispiness. Repeat the frying process with the remaining hand pies, making sure to allow the oil to return to the correct temperature between batches if necessary. Patience here will reward you with perfectly fried, delightful Blackberry Hand Pies.
Creating the Simple Glaze
While our Blackberry Hand Pies are still warm and draining, let’s whip up a quick and easy glaze to add an extra touch of sweetness and visual appeal. In a small bowl, combine the 1/2 cup of powdered sugar with the 1 tablespoon of water. Stir these together until you have a smooth, pourable glaze. If the glaze seems too thick, add a tiny bit more water, a drop at a time, until you reach your desired consistency. If it’s too thin, add a little more powdered sugar. The goal is a glaze that is fluid enough to drizzle but thick enough to coat the pies nicely without running off completely.
Once the Blackberry Hand Pies have drained for a few minutes and are still warm, you can begin to drizzle the glaze over them. Use a spoon to artfully drizzle the glaze back and forth over the tops of the hand pies. The warmth of the pies will help the glaze set slightly. You can also dip the tops of the pies into the glaze for a more opaque coating, if you prefer. Let the glaze set for a few minutes before serving. These Blackberry Hand Pies are absolutely divine served warm, but they are also delicious at room temperature. Enjoy every sweet, fruity, flaky bite!
Conclusion:
And there you have it – the ultimate guide to crafting delightful Blackberry Hand Pies! We’ve walked through each step, from preparing the flaky crust to achieving that perfect, bubbling blackberry filling. These portable pies are a testament to simple ingredients coming together to create something truly special. They’re perfect for picnics, lunchboxes, or simply enjoying with a cup of tea as an afternoon treat. Don’t be afraid to experiment! You can easily swap out blackberries for other berries like raspberries or blueberries, or even add a pinch of cinnamon or nutmeg to the filling for an extra layer of warmth. The beauty of these Blackberry Hand Pies lies in their versatility and the joy they bring to anyone who takes a bite. So, gather your ingredients, put on your favorite music, and get ready to create some delicious memories. I truly hope you enjoy making and sharing these wonderful pies!
Frequently Asked Questions:
Can I make the pie dough ahead of time?
Absolutely! The pie dough for these Blackberry Hand Pies can be made up to 2 days in advance and stored in the refrigerator. You can also freeze the dough for up to a month. Just be sure to thaw it in the refrigerator overnight before you’re ready to use it.
What if I don’t have fresh blackberries?
No problem at all! Frozen blackberries work wonderfully in this recipe. You might need to cook them slightly longer to allow them to break down and release their juices, and you may need to drain off a little extra liquid before filling your pies to avoid a soggy bottom crust.
How should I store leftover Blackberry Hand Pies?
Store any leftover Blackberry Hand Pies in an airtight container at room temperature for up to 2 days, or in the refrigerator for up to 4 days. For longer storage, you can freeze them. Once completely cooled, wrap them tightly in plastic wrap and then in foil before freezing for up to 3 months.
Blackberry Hand Pies – Easy & Delicious Dessert
Easy and delicious homemade blackberry hand pies using store-bought pie crust and filling, perfect for a quick dessert.
Ingredients
-
21 oz. can blackberry pie filling
-
Refrigerated pie crust (2 crusts)
-
1/2 cup powdered sugar
-
1 teaspoon corn syrup
-
1 tablespoon water
-
Vegetable oil for frying
Instructions
-
Step 1
Enhance the blackberry pie filling by stirring in 1 teaspoon of corn syrup for a glossier and softer texture. Set aside. -
Step 2
Unroll refrigerated pie crusts onto a lightly floured surface and cut each into four equal squares, yielding eight squares total. Spoon 2-3 tablespoons of the enhanced blackberry filling onto one half of each square, leaving a border. Fold the other half over the filling to create hand pies and crimp the edges with a fork to seal. -
Step 3
Heat 2-3 inches of vegetable oil in a deep pot over medium-high heat until it reaches approximately 350°F (175°C). -
Step 4
Carefully fry 2-3 hand pies at a time for 2-3 minutes per side, or until golden brown. Remove with a slotted spoon and drain on a wire rack or paper towels. -
Step 5
While the pies are still warm, whisk together 1/2 cup powdered sugar and 1 tablespoon water to create a smooth glaze. Drizzle over the warm hand pies.
Important Information
Nutrition Facts (Per Serving)
It is important to consider this information as approximate and not to use it as definitive health advice.
Allergy Information
Please check ingredients for potential allergens and consult a health professional if in doubt.

Leave a Comment