
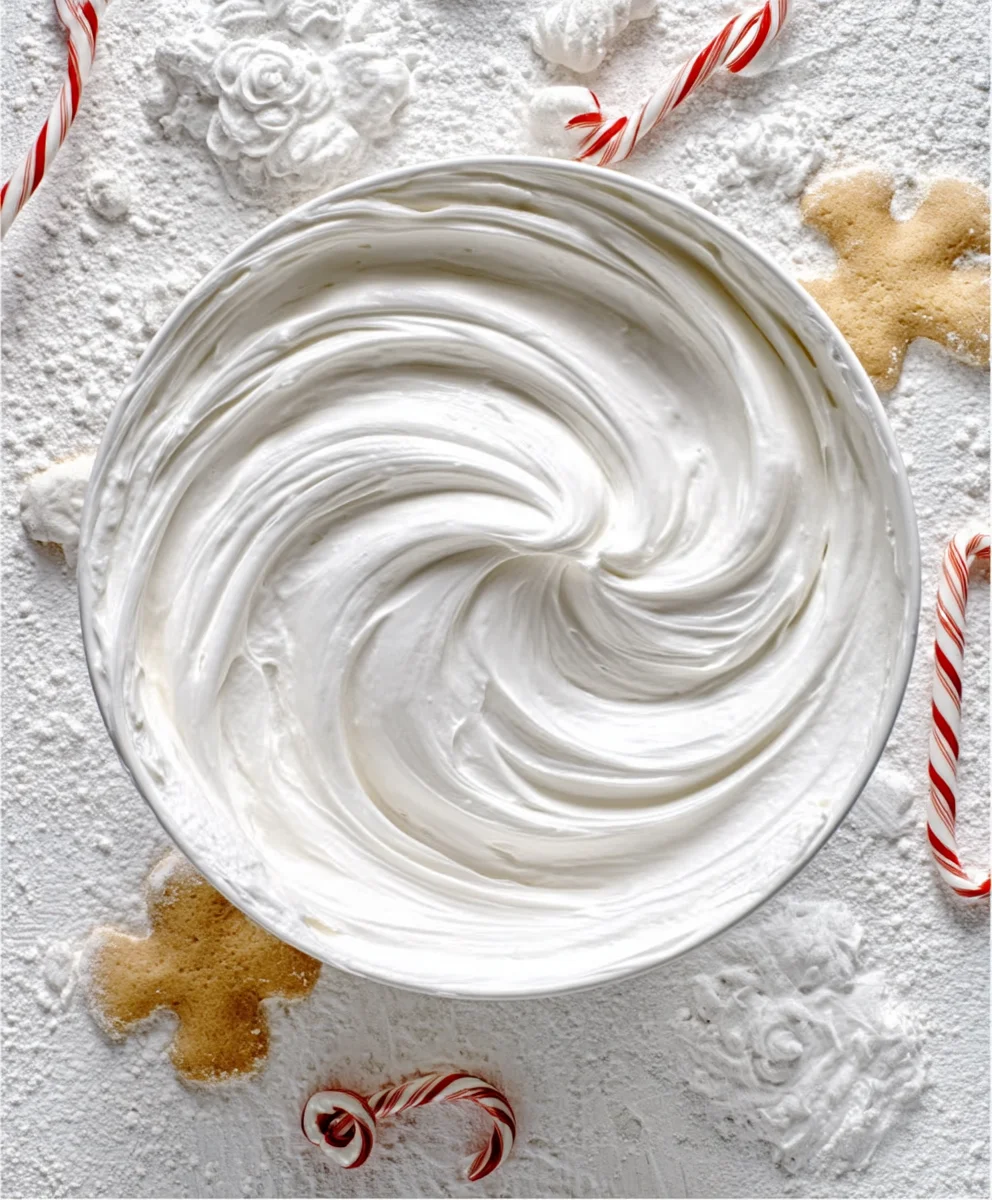
Famous Royal Icing is more than just a sweet topping; it’s the edible art that transforms simple cookies into miniature masterpieces and cakes into show-stopping centerpieces. There’s a unique magic in the smooth, stark white finish of perfectly executed royal icing that captures the imagin extractation. It’s no wonder this versatile icing has graced countless celebratory treats, from elaborate wedding cakes to charming holiday cookies. What truly sets our Famous Royal Icing apart is its incredible ability to dry hard and smooth, providing a flawless canvas for intricate piping and delicate detail work. Whether you’re a seasoned baker or just starting your decorating journey, mastering this fundamental recipe will unlock a world of creative possibilities, ensuring your baked goods are not only delicious but also visually stunning and utterly unforgettable.

Ingredients:
- 2 tablespoons meringue powder
- 4 tablespoons warm water
- 2 cups powdered sugar, sifted
- 1 tablespoon light corn syrup
- 2 teaspoons lemon extract
- 1 teaspoon white food coloring (optional)
- Desired food coloring (for decorating)
- Additional water for thinning (to flood consistency)
- Additional powdered sugar for thickening
Making the Famous Royal Icing
This Famous Royal Icing recipe is incredibly versatile and forms the backbone of many beautiful decorated cookies and cakes. It dries hard, creating a durable surface for intricate designs, and its sweet, slightly tangy flavor from the lemon extract is a delightful complement to baked goods. We’ll walk through creating a smooth, lump-free icing that’s perfect for both piping and flooding.
Step 1: Blooming the Meringue Powder
Begin extract by activating your meringue powder. In a medium-sized bowl, combine the 2 tablespoons of meringue powder with the 4 tablespoons of warm water. Whisk this mixture gently until the meringue powder is mostly dissolved. This step is crucial as it allows the meringue powder to hydrate and develop its binding properties. Let this mixture sit undisturbed for about 5 to 10 minutes. You’ll notice it thicken slightly, almost like a thin paste. This “blooming” process is key to achieving a stable and smooth royal icing. If you skip this, you might end up with a grainy texture later on.
Step 2: Combining Dry and Wet Ingredients
Once your meringue powder mixture has bloomed, it’s time to add the other ingredients. To the bowl with the meringue mixture, add the 2 cups of sifted powdered sugar. Sifting the powdered sugar is another vital step to ensure a smooth, lump-free icing. If you don’t sift it, you risk introducing little pockets of undissolved sugar into your icing, which can clog your piping tips or create an unpleasant texture on your decorated items. Next, add the 1 tablespoon of light corn syrup. The corn syrup acts as a humectant, helping to keep the icing moist and prevent it from drying out too quickly, while also contributing to a glossy finish. Finally, add the 2 teaspoons of lemon extract for its bright flavor. If you’re using the optional white food coloring for an extra bright white base, add it now as well.
Step 3: Mixing the Icing
Now it’s time to bring everything together. You can mix this by hand with a whisk or a sturdy spatula, or use an electric mixer. If using a hand mixer, start on low speed to avoid creating a cloud of powdered sugar that will coat your kitchen. Gradually increase the speed to medium. If mixing by hand, stir vigorously until all the ingredients are well combined and no dry streaks of powdered sugar remain. Continue mixing for about 3 to 5 minutes. The goal here is to create a thick, smooth paste. It should be quite stiff at this stage, similar to the consistency of toothpaste. This is your piping consistency. Ensure there are no lumps and the mixture is homogenous.
Step 4: Achieving the Perfect Consistency (Piping vs. Flooding)
This is where you tailor the icing to your specific decorating needs. The consistency achieved in Step 3 is perfect for piping outlines and details. For flooding, which involves filling in the areas outlined with the thicker icing, you’ll need to thin it out. To do this, gradually add additional water, just a tiny bit at a time – we’re talking about 1/4 teaspoon increments. Stir gently after each addition until the icing flows smoothly off your spoon or spatula in a ribbon that melts back into the main body of the icing within about 10-15 seconds. This is the “flood” consistency. Be very careful not to add too much water, as it’s much easier to thin icing than to thicken it. If your icing becomes too thin, you can carefully add more sifted powdered sugar, a tablespoon at a time, until you reach the desired thickness. Alternatively, if you find your icing is too thick for piping fine details, you can also thin it slightly with a few drops of water.
Step 5: Coloring and Storing Your Royal Icing
Once you have achieved your desired consistency(ies), you can divide the icing into separate bowls if you plan to use multiple colors. Add your desired food coloring to each bowl and mix thoroughly until the color is uniform and vibrant. Gel food colorings are highly recommended as they provide intense color without adding too much extra liquid to the icing. For storing, cover the surface of the icing directly with plastic wrap, pressing out any air bubbles. This prevents a hard crust from forming on top. You can store royal icing at room temperature for up to two weeks. If it thickens over time, you can stir in a tiny amount of water to revive it. For longer storage, you can freeze royal icing in an airtight container for up to three months. Thaw at room temperature and re-whisk gently before use.
Conclusion:
There you have it! You’ve learned how to create the perfect Famous Royal Icing, a versatile and beautiful medium for all your decorating needs. This recipe provides a smooth, stable, and delicious icing that’s perfect for intricate designs, flooding cookies, or even creating delicate sugar flowers. We hope you feel confident and inspired to try this recipe for yourself!
For serving, Famous Royal Icing truly shines when used to decorate cookies, cakes, gin extractgerbread houses, and other baked goods. It hardens beautifully, making it ideal for transport and display. Consider pairing your beautifully iced treats with a cup of tea or coffee for a delightful afternoon indulgence.
Don’t be afraid to experiment with variations! You can achieve different colors by adding gel food coloring, and subtle flavor changes can be made by substituting a small amount of the water with lemon extract or a clear vanilla extract. For a quicker drying time, a touch of meringue powder can also be incorporated. The possibilities are truly endless with this adaptable icing.
We encourage you to dive in and start decorating! With a little practice, you’ll be creating edible works of art that will impress friends and family alike. Happy decorating!
Frequently Asked Questions:
Can I make Famous Royal Icing ahead of time?
Yes, absolutely! You can make Famous Royal Icing a day or two in advance. Store it in an airtight container at room temperature, with a piece of plastic wrap pressed directly onto the surface of the icing to prevent a crust from forming. If it becomes too stiff, you can always whisk in a tiny bit of water before using.
How do I achieve different consistencies with Famous Royal Icing?
The consistency of your Famous Royal Icing is crucial for different decorating techniques. For outlining cookies, you’ll want a thicker, pipeable consistency. For flooding, you’ll need a thinner, more fluid consistency – achieved by adding small amounts of water. Experimenting with the water-to-icing ratio is key to mastering these different textures.
How long does Famous Royal Icing take to dry?
Drying time for Famous Royal Icing can vary depending on humidity, thickness, and air circulation. Typically, thinner flood icing will dry within an hour, while thicker piped details might take several hours to fully harden. For best results and to ensure it sets firmly, allow ample drying time, especially before stacking gin extractpackaging decorated items.

Famous Royal Icing Recipe
An easy and delicious royal icing recipe perfect for decorating cookies and cakes. This versatile icing dries hard, providing a durable surface for intricate designs, with a delightful sweet and slightly tangy flavor.
Ingredients
-
2 tablespoons meringue powder
-
4 tablespoons warm water
-
2 cups powdered sugar, sifted
-
1 tablespoon light corn syrup
-
2 teaspoons lemon extract
-
1 teaspoon white food coloring (optional)
-
Desired food coloring
-
Additional water for thinning
-
Additional powdered sugar for thickening
Instructions
-
Step 1
Activate the meringue powder by combining 2 tablespoons of meringue powder with 4 tablespoons of warm water in a bowl. Whisk gently until mostly dissolved and let sit for 5 to 10 minutes to bloom, thickening slightly. -
Step 2
Add 2 cups of sifted powdered sugar, 1 tablespoon of light corn syrup, and 2 teaspoons of lemon extract to the bloomed meringue mixture. If using, add 1 teaspoon of white food coloring now. -
Step 3
Mix the ingredients by hand with a whisk or spatula, or using an electric mixer on low speed, gradually increasing to medium. Mix for 3 to 5 minutes until a thick, smooth, toothpaste-like paste (piping consistency) forms with no lumps. -
Step 4
To achieve flood consistency, gradually add additional water in 1/4 teaspoon increments, stirring until the icing flows smoothly off a spoon in a ribbon that melts back into the icing within 10-15 seconds. If too thin, add sifted powdered sugar by the tablespoon. If too thick for piping, add a few drops of water. -
Step 5
Divide the icing into separate bowls for coloring. Add desired food coloring (gel is recommended) and mix thoroughly until uniform. Cover the surface of the icing directly with plastic wrap, pressing out air bubbles, to prevent crusting. Store at room temperature for up to two weeks or freeze in an airtight container for up to three months.
Important Information
Nutrition Facts (Per Serving)
It is important to consider this information as approximate and not to use it as definitive health advice.
Allergy Information
Please check ingredients for potential allergens and consult a health professional if in doubt.

Leave a Comment