
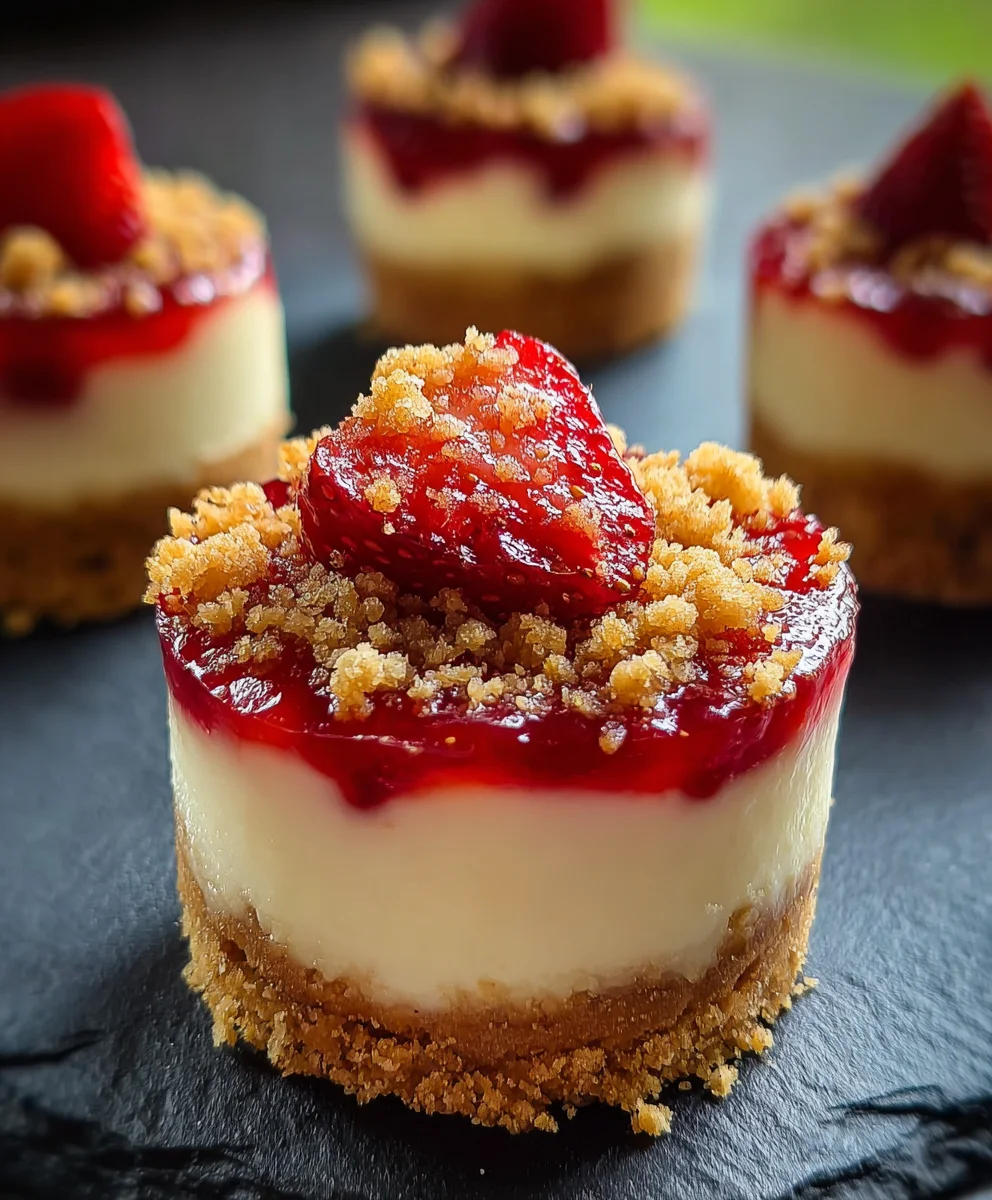
Mini Strawberry Crunch Stuffed Cheesecakes are about to become your new favorite dessert, offering an irresistible twist on a beloved classic! Imagine sinking your teeth into a perfectly creamy, tangy cheesecake, only to be met with a delightful burst of sweet, strawberry-infused crunch hidden inside. This innovative creation elevates the traditional cheesecake experience, transforming it into a charming, bite-sized indulgence that promises a symphony of textures and flavors in every mouthful. It’s truly a dessert that captivates from the very first glance.
While the rich history of cheesecake dates back to ancient Greece, evolving through Roman times and becoming a staple across cultures, our modern interpretation takes a playful, nostalgic turn. The “strawberry crunch” element draws inspiration from cherished childhood ice cream treats, infusing that joyful familiarity into a sophisticated dessert. People adore this dish not just for its stunning appearance and convenient individual portions, but for the masterful blend of smooth, velvety cheesecake with the surprising, vibrant crunch that provides an exciting contrast. It’s the perfect blend of elegance and pure fun, making it an ideal showstopper for any gathering or a special treat just for you.
Why You’ll Fall in Love with These Stuffed Cheesecakes
The allure of these Mini Strawberry Crunch Stuffed Cheesecakes lies in their unique ability to deliver comfort and excitement simultaneously. Each mini cake is a meticulously crafted masterpiece, ensuring that every bite is packed with the rich, luxurious taste of cheesecake complemented by the sweet, textural surprise within. Get ready to impress your guests and delight your taste buds with a dessert that is as memorable as it is delicious.

Ingredients:
-
For the Graham Cracker Crust:
- 1 ½ cups (about 180g) graham cracker crumbs (from approximately 12 full graham cracker sheets)
- ¼ cup (50g) granulated sugar
- ½ teaspoon ground cinnamon (optional, but I love the warmth it adds!)
- 6 tablespoons (85g) unsalted butter, melted
-
For the Mini Cheesecake Filling:
- 24 ounces (680g) full-fat cream cheese, softened completely to room temperature (this is crucial for a smooth batter!)
- 1 cup (200g) granulated sugar
- 2 large eggs, at room temperature
- 2 large egg yolks, at room temperature (these add extra richness and help with creaminess)
- 1 teaspoon pure vanilla extract
- ¼ cup (60g) sour cream or full-fat Greek yogurt, at room temperature (adds a lovely tang and moisture)
- 2 tablespoons (30ml) heavy cream, at room temperature
- Pinch of salt
-
For the Strawberry Filling (The “Stuffed” Part!):
- 1 cup (about 150g) fresh strawberries, hulled and finely diced
- 2 tablespoons (25g) granulated sugar
- 1 teaspoon fresh lemon juice (brightens the flavor beautifully)
- ½ teaspoon cornstarch (mixed with 1 tablespoon cold water to create a slurry)
-
For the Strawberry Crunch Topping:
- 1 ½ cups (about 180g) Golden Oreo crumbs or Nilla Wafer crumbs (from approximately 20-24 cookies/wafers)
- ½ cup (about 25g) freeze-dried strawberries, crushed into small pieces (you can use a food processor or crush by hand)
- ¼ cup (55g) unsalted butter, melted
- 2 tablespoons (25g) granulated sugar
- ½ teaspoon pure vanilla extract (enhances the cookie flavor)
- Pinch of salt
- Optional: A tiny drop of pink or red food coloring for a more vibrant crunch, if desired.
-
For Garnish (Optional but Recommended!):
- Fresh strawberries, sliced or halved
- Whipped cream or homemade whipped topping
Preparing the Strawberry Crunch Topping: Our Star Attraction!
- Crush Your Cookies and Strawberries: First things first, let’s get that iconic strawberry crunch ready! If you’re using Golden Oreos, place them in a food processor and pulse until you have fine crumbs. If using Nilla Wafers, do the same. Transfer the crumbs to a medium bowl. Next, take your freeze-dried strawberries. You can either pulse these in the food processor with the cookies (if doing them at the same time) or crush them separately by placing them in a Ziploc bag and gently crushing with a rolling pin. We want small, uneven pieces, not a powder, so that delightful texture shines through. Add these crushed freeze-dried strawberries to your cookie crumbs.
- Combine Wet and Dry Ingredients: In a separate microwave-safe bowl, melt your ¼ cup of unsalted butter. Once melted, add the 2 tablespoons of granulated sugar, ½ teaspoon of pure vanilla extract, and a tiny pinch of salt to the melted butter. Stir until the sugar is mostly dissolved. If you’re opting for a more vibrant color, now is the time to add a tiny drop of pink or red food coloring to this wet mixture. Stir well to incorporate.
- Create the Crunch Mixture: Pour the melted butter mixture over the cookie and freeze-dried strawberry crumbs. Using a fork or your fingertips, mix everything together thoroughly until all the crumbs are moistened and clumpy. It should resemble wet sand. This step ensures every bit of that crunch is flavorful and holds together beautifully.
- Toast for Extra Flavor (Optional but Recommended!): For an even deeper flavor and a truly irresistible crunch, I highly recommend toasting this mixture. Spread the crumb mixture evenly onto a small baking sheet lined with parchment paper. Bake in a preheated oven at 300°F (150°C) for about 8-10 minutes, stirring halfway through. Keep a close eye on it, as it can burn quickly due to the sugar content. Once lightly golden and fragrant, remove it from the oven and let it cool completely on the baking sheet. It will crisp up wonderfully as it cools. If you prefer not to toast, simply chill the mixture in the refrigerator for at least 30 minutes to firm it up. Once cooled, gently break up any larger clumps. Set aside.
Crafting the Luscious Strawberry Filling (The “Stuffed” Element!)
- Prepare the Strawberries: Take your fresh strawberries, which you’ve already hulled, and finely dice them. Aim for pieces no larger than ¼ inch so they cook down nicely and are easy to scoop into the mini cheesecakes. Place the diced strawberries into a small saucepan.
- Simmer to Perfection: Add the 2 tablespoons of granulated sugar and 1 teaspoon of fresh lemon juice to the saucepan with the strawberries. Stir gently to combine. Place the saucepan over medium-low heat and bring the mixture to a gentle simmer. Allow it to cook for about 5-7 minutes, stirring occasionally, until the strawberries have softened and released their juices, and the mixture has thickened slightly. The aroma in your kitchen will be absolutely delightful!
- Thicken for Stability: In a tiny bowl, whisk together ½ teaspoon of cornstarch with 1 tablespoon of cold water until completely smooth – this is your cornstarch slurry. Pour this slurry into the simmering strawberry mixture, stirring constantly. Continue to cook for another 1-2 minutes, until the filling visibly thickens to a jam-like consistency. It should coat the back of a spoon. This thickening agent is important as it prevents the strawberry filling from becoming too runny inside your cheesecakes.
- Cool Completely: Remove the saucepan from the heat and transfer the strawberry filling to a small bowl or shallow dish. Allow it to cool completely to room temperature, and then refrigerate it for at least 30 minutes to an hour until it is thoroughly chilled. This chilled filling is essential, as warm filling can melt the cheesecake batter. Set aside until assembly.
Assembling the Perfect Graham Cracker Crusts
- Crush Your Graham Crackers: If you haven’t already, take your full graham cracker sheets and crush them into fine crumbs. A food processor is the easiest way to achieve this, but you can also place them in a sturdy freezer bag and crush them with a rolling pin or the bottom of a heavy pan. Ensure there are no large pieces remaining.
- Combine Crust Ingredients: In a medium bowl, combine the graham cracker crumbs, ¼ cup of granulated sugar, and ½ teaspoon of ground cinnamon (if using). Stir well to distribute the sugar and cinnamon evenly throughout the crumbs. Next, pour in the 6 tablespoons of melted unsalted butter. Mix thoroughly with a fork or your hands until all the crumbs are moistened and resemble wet sand. When you press a handful together, it should hold its shape.
- Prepare Muffin Tins: Line two standard 12-cup muffin tins (for a total of 24 mini cheesecakes) with paper liners. I find that paper liners make it much easier to remove the finished cheesecakes without damaging them. If you don’t have liners, you can lightly grease the muffin tins.
- Press the Crusts: Divide the graham cracker mixture evenly among the 24 lined muffin cups. This is where patience pays off! Use the back of a small spoon, a tart tamper, or even your fingertips to press the crumbs firmly and evenly into the bottom of each liner. Pressing firmly is key to a stable crust that won’t crumble when you unmold the cheesecakes.
- Chill or Pre-Bake: You have two options here: you can either chill the crusts in the refrigerator for at least 15-20 minutes to help them firm up, or you can pre-bake them for a crisper crust. To pre-bake, pop them into a preheated oven at 325°F (160°C) for about 5-7 minutes, just until lightly golden and fragrant. Remove from the oven and let them cool completely on a wire rack before adding the cheesecake batter. This pre-baking step adds a lovely depth of flavor and ensures a sturdy base.
Mixing the Velvety Mini Cheesecake Batter: Smoothness is Key!
- Start with Softened Cream Cheese: This is arguably the most important step for a silky-smooth cheesecake. Ensure your 24 ounces of full-fat cream cheese is completely softened to room temperature. This means it should give way easily when gently pressed. Place the softened cream cheese in the bowl of a stand mixer fitted with the paddle attachment (or use a large bowl with a handheld electric mixer). Beat the cream cheese on medium-low speed for about 2-3 minutes, scraping down the sides of the bowl frequently, until it is incredibly smooth and lump-free. Lumps at this stage will not disappear later!
- Add Sugar Gradually: Gradually add the 1 cup of granulated sugar to the cream cheese, beating on low speed until just combined. Then increase the speed to medium-low and beat for another 2-3 minutes, scraping down the bowl multiple times, until the mixture is light and fluffy. The sugar should be fully incorporated and dissolved.
- Incorporate Eggs One by One: Reduce the mixer speed to low. Add the 2 large eggs and 2 large egg yolks, one at a time, beating after each addition just until combined. Do not overmix at this stage! Overmixing eggs introduces too much air, which can cause your cheesecakes to puff up excessively and then crack as they cool. Scrape down the sides and bottom of the bowl after each egg.
- Fold in Finishing Touches: With the mixer still on low speed (or even remove the bowl from the mixer and hand-fold with a spatula if you’re concerned about overmixing), add the 1 teaspoon of pure vanilla extract, ¼ cup of room temperature sour cream (or Greek yogurt), 2 tablespoons of room temperature heavy cream, and the pinch of salt. Mix gently just until everything is combined and the batter is smooth. Again, be mindful not to overmix.
- Final Scrape and Check: Give the bowl one last thorough scrape with a rubber spatula, making sure to get to the very bottom, to ensure all ingredients are fully incorporated and there are no hidden pockets of unmixed cream cheese or sugar. Your batter should be incredibly smooth and pourable.
Baking Your Mini Strawberry Crunch Stuffed Cheesecakes: Patience is a Virtue!
- Preheat and Prepare Water Bath: Preheat your oven to 325°F (160°C). This temperature is ideal for gentle cheesecake baking. While the oven preheats, gather a large roasting pan or oven-safe baking dish that is large enough to hold your muffin tins. Fill a kettle with water and bring it to a boil. A water bath is highly recommended for cheesecakes, even mini ones, as it provides a moist environment, preventing cracks and ensuring an even bake.
- Fill the Crusts with Batter: Carefully spoon or pour the cheesecake batter into each pre-baked or chilled graham cracker crust, filling each about halfway full. Aim for an even amount in each cup.
- Add the Strawberry “Stuffing”: Now for the delicious secret center! Take your thoroughly chilled strawberry filling. Place a small dollop (about ½ to ¾ teaspoon) of the strawberry filling directly into the center of the cheesecake batter in each cup. Try to keep it centered and avoid it touching the crust too much.
- Top with More Batter: Carefully spoon or pour additional cheesecake batter over the strawberry filling, filling each cup almost to the top, leaving just a tiny bit of space at the very rim for expansion. Gently tap the muffin tins on the counter a few times to release any air bubbles.
- Set Up the Water Bath: Carefully place your filled muffin tins into the larger roasting pan. Now, pour the hot water from your kettle into the roasting pan, being very careful not to get any water into the cheesecake cups. Fill the pan with hot water until it comes about halfway up the sides of the muffin tins. This hot water bath creates steam, which is magic for cheesecake.
- Bake Gently: Carefully transfer the roasting pan with the muffin tins and hot water into your preheated oven. Bake for approximately 20-25 minutes, or until the edges of the cheesecakes are just set, but the centers still have a slight jiggle when gently nudged. They should not look liquid in the center, but a little wobble is perfect. Overbaking leads to dry, cracked cheesecakes.
- Cool Gradually (This is Crucial!): Once baked, turn off the oven but leave the cheesecakes inside with the oven door propped open slightly (using a wooden spoon is great for this) for about 30 minutes. This slow, gradual cooling prevents temperature shock, which is a major cause of cracks. After 30 minutes, carefully remove the roasting pan from the oven. Take the muffin tins out of the water bath and place them on a wire rack to cool completely to room temperature. This can take another 1-2 hours.
- Chill Thoroughly: Once completely cool at room temperature, transfer the muffin tins (or individual cheesecakes if you’ve already removed them from the tins) to the refrigerator. Cover them loosely with plastic wrap. Chill for a minimum of 4 hours, but preferably overnight. This chilling time is absolutely essential for the cheesecakes to set properly, develop their full flavor, and become firm enough to handle and enjoy. Patience now will reward you with perfection later!
The Grand Finale: Topping and Serving Your “Mini Strawberry Crunch Stuffed Cheesecakes”
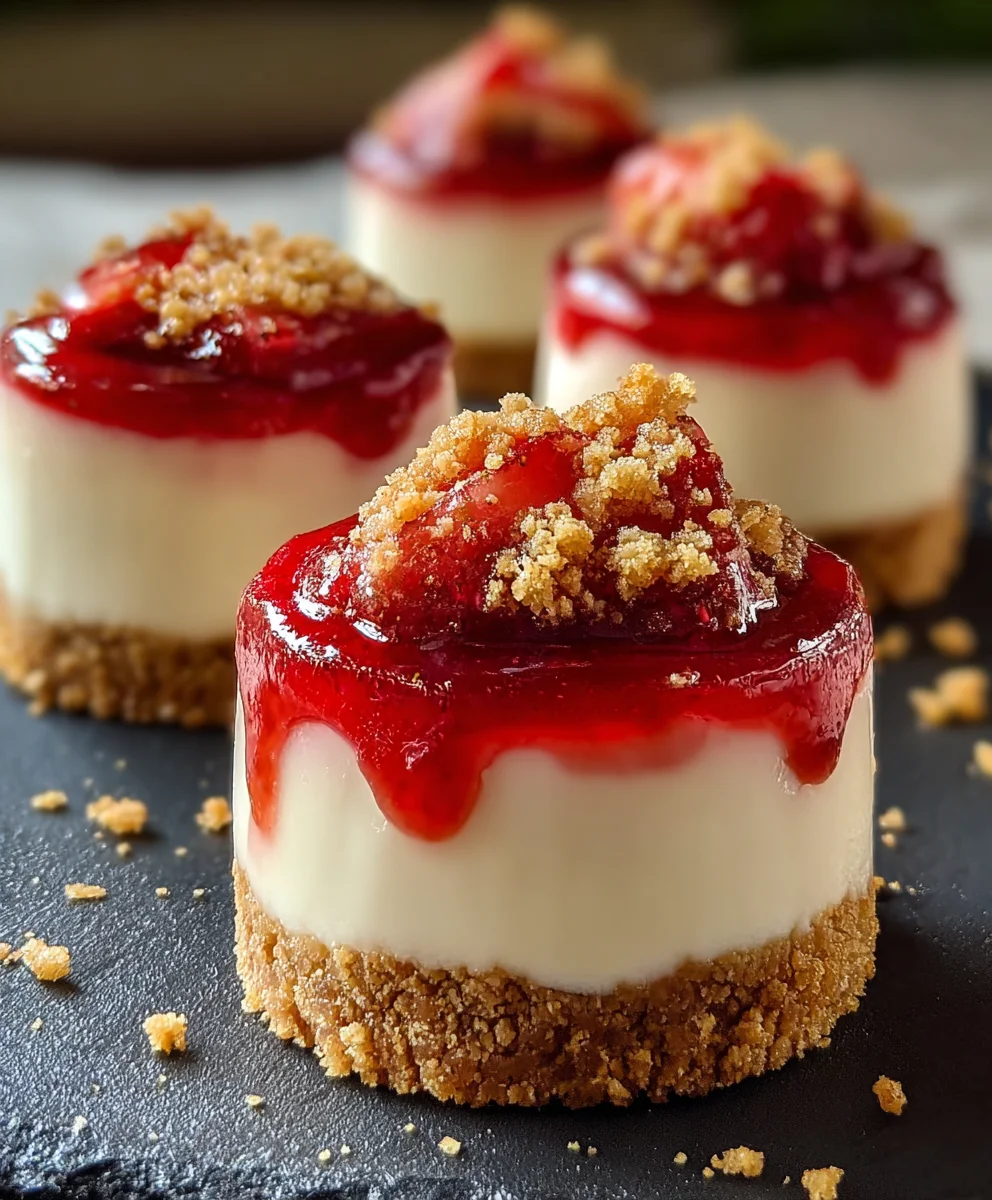
- Unmold the Cheesecakes: Once your mini cheesecakes are thoroughly chilled, gently lift each cheesecake out of its muffin tin by grabbing the paper liner. If you didn’t use liners, carefully run a thin knife around the edge of each cheesecake before lifting it out. Place them on a serving platter or individual plates.
- Apply the Strawberry Crunch: This is the moment you’ve been waiting for! Take your prepared strawberry crunch topping. Gently press or sprinkle a generous amount of the crunch mixture onto the top of each mini cheesecake. You can do this by gently pressing it onto the sides and top, or by simply piling it high on the surface. Don’t be shy; this is where the “crunch” in “Mini Strawberry Crunch Stuffed Cheesecakes” truly shines!
- Garnish (Optional, but So Pretty!): For an extra touch of elegance and freshness, you can garnish each cheesecake with a dollop of whipped cream or homemade whipped topping, and a slice or half of a fresh strawberry. The vibrant red of the fresh strawberry against the creamy cheesecake and crunchy topping is visually stunning.
- Serve and Enjoy: Your beautiful, delicious Mini Strawberry Crunch Stuffed Cheesecakes are now ready to be devoured! Serve them immediately, or keep them chilled until ready to serve. They are perfect for parties, gatherings, or a delightful individual treat. I promise you, these little bites of heaven will be a huge hit!
Conclusion:
Well, there you have it, my friends! We’ve journeyed together through the delightful process of creating these truly special treats. I sincerely hope you’re as excited as I am about the prospect of sinking your teeth into them. These aren’t just any desserts; they are a celebration of flavor, texture, and pure joy, all wrapped up in a perfectly portioned package. I truly believe these Mini Strawberry Crunch Stuffed Cheesecakes are an absolute must-try for any dessert lover, regardless of your baking experience. What makes them so compelling? For starters, their convenience is unmatched. Gone are the days of wrestling with a full-sized cheesecake, worrying about cracks or uneven slices. Each one of these mini marvels is perfectly formed, offering a beautiful presentation with minimal fuss.
But it’s not just about the ease; it’s about the unforgettable taste experience. Imagine the rich, velvety smooth, and tangy creaminess of cheesecake, perfectly balanced by the vibrant, sweet burst of fresh strawberries nestled within. Then, as if that weren’t enough, you’re greeted by the satisfying crunch of that iconic strawberry crumb topping, adding a playful textural contrast that elevates every single bite. It’s a symphony of sensations that truly delights the palate and leaves a lasting impression. They are wonderfully adaptable for so many occasions too. Picture them as the star of a sophisticated dinner party dessert table, a charming addition to a casual brunch, or even a delightful surprise treat for a weeknight indulgence. They offer a gourmet experience without the gourmet effort, making you look like a culinary wizard even if you’re just starting your baking journey. Trust me, the delight on your guests’ faces, or even just your own, will make every step of this recipe incredibly rewarding.
Now, let’s talk about how to make these even more spectacular, or how to put your own creative spin on them. When it comes to serving, a simple garnish can go a long way. A delicate dollop of freshly whipped cream on top, a single perfectly ripe strawberry slice, or even a tiny sprig of fresh mint can elevate their visual appeal and add another layer of freshness. For those who love a touch of decadence, a light drizzle of white chocolate ganache or a very thin stream of strawberry coulis could be absolutely divine. If you’re looking to explore variations, the possibilities are endless and exciting! Consider swapping out the strawberry filling for other seasonal fruits – a blueberry or raspberry compote would be absolutely exquisite, or perhaps a tart lemon curd for a burst of citrusy brightness. You could also experiment with the crunch topping itself. Imagine a chocolate cookie crumb for a darker, richer flavor profile, or a classic graham cracker crumb with a hint of cinnamon for a more traditional twist. Even a crushed shortbread cookie topping could add a sophisticated buttery note.
Another fun idea is to play with the cheesecake base itself. A subtle hint of almond extract or vanilla bean paste can add depth to the cream cheese mixture. For a touch of citrus, finely grated lemon or orange zest incorporated into the batter would be a fantastic addition, especially if you pair it with a complementary fruit filling. Remember, these are designed to be personalizable! You can prepare these little beauties a day in advance, storing them carefully in an airtight container in the refrigerator, which makes them a fantastic make-ahead dessert option for entertaining. Just pull them out about 15-20 minutes before serving to let them come slightly closer to room temperature for the best texture and flavor release.
So, what are you waiting for? I wholeheartedly encourage you to roll up your sleeves, gather your ingredients, and dive into making these incredible Mini Strawberry Crunch Stuffed Cheesecakes. Don’t be shy; embrace the joy of baking and the satisfaction of creating something truly delicious. And once you’ve whipped up your batch, please, please, please share your experience with me! I absolutely adore seeing your culinary creations. Whether it’s a photo, a comment about your favorite variation, or just a story about how much your family loved them, I can’t wait to hear all about it. Happy baking, and enjoy every single delightful bite!
Mini Strawberry Crunch Stuffed Cheesecakes
A delicious recipe
Ingredients
-
Ingredient 1
-
Ingredient 2
-
Ingredient 3
Instructions
-
Step 1
Step 1 -
Step 2
Step 2 -
Step 3
Step 3
Important Information
Nutrition Facts (Per Serving)
It is important to consider this information as approximate and not to use it as definitive health advice.
Allergy Information
Please check ingredients for potential allergens and consult a health professional if in doubt.
Leave a Comment