
Christmas Peanut Butter Rice Cereal Squares are more than just a holiday treat; they are a delightful invitation to festive cheer, a perfect blend of simplicity and irresistible flavor that promises to become a cherished part of your seasonal traditions. During the bustling holiday season, finding moments to create cherished memories in the kitchen can be a joyful, yet sometimes challenging, endeavor. That’s precisely why these incredible squares have become such a beloved staple, offering a no-fuss path to pure, unadulterated deliciousness.
Imagine the perfect bite: a harmonious balance of creamy, rich peanut butter, crisp rice cereal, and just the right amount of sweetness, all coming together in a wonderfully chewy, yet delightfully crunchy texture. This beloved confection captures the essence of homemade comfort, bringing smiles to faces young and old. While the foundational concept of a no-bake cereal treat has been a staple for generations, transforming it with the nutty goodness of peanut butter and infusing it with holiday spirit elevates it to an entirely new level of festive indulgence. They evoke a sense of childhood nostalgia, yet their satisfying taste appeals to everyone.
Why Everyone Loves These Christmas Peanut Butter Rice Cereal Squares
People adore this dish not only for its incredible taste and satisfying texture but also for its remarkable convenience. Requiring no oven, they are the ideal solution for busy bakers and a fantastic project for involving little helpers. In this article, I am thrilled to share my go-to recipe for the ultimate Christmas Peanut Butter Rice Cereal Squares, ensuring your holiday dessert platter shines with a touch of homemade magic that everyone will rave about.

Ingredients:
- 1/2 cup (1 stick) unsalted butter, plus extra for greasing
- 1 (10-ounce) bag mini marshmallows (about 5 cups)
- 1 cup creamy peanut butter (I prefer natural, unsweetened for the best flavor balance)
- 6 cups crisp rice cereal (like Rice Krispies)
- 1 teaspoon pure vanilla extract
- Pinch of salt (optional, but it really enhances the flavors)
- For optional festive decoration:
- 1/2 cup white chocolate chips or candy melts
- 1/4 teaspoon coconut oil or vegetable shortening (optional, for thinning chocolate)
- Assorted Christmas-themed sprinkles (red, green, white, gold)
- Crushed candy canes or peppermint pieces
- Red and green food coloring (for tinting white chocolate, if desired)
Prepping Your Workspace for Delicious Christmas Peanut Butter Rice Cereal Squares
- Gather Your Tools: Before we even think about melting, it’s crucial to have all your equipment and ingredients ready and waiting. This recipe moves quickly once the heat is on, so a prepared kitchen is a happy kitchen. You’ll need a large, heavy-bottomed saucepan for the marshmallow mixture, an extra-large mixing bowl (seriously, bigger than you think!), a sturdy spatula or wooden spoon, and an 8×8-inch or 9×13-inch baking pan. I personally find the 9×13-inch pan yields thinner, easier-to-handle squares, but an 8×8-inch pan will give you delightfully thick ones.
- Prepare the Baking Pan: Generously grease your chosen baking pan. You can use butter, cooking spray, or even line it with parchment paper for effortless removal. If using parchment paper, leave an overhang on two sides so you can easily lift the entire slab of our future Christmas Peanut Butter Rice Cereal Squares out of the pan once they’re set. I often do a combination – a light greasing and then parchment paper – just to be extra sure!
- Measure Everything Out: This step is often overlooked but is absolutely key to success. Measure your crisp rice cereal into your extra-large mixing bowl. Have your peanut butter, mini marshmallows, butter, vanilla extract, and salt (if using) all measured out and within arm’s reach of your stovetop. This mise en place technique ensures you won’t be fumbling with measuring cups or tearing open packages while your butter is browning or marshmallows are scorching. For these Christmas Peanut Butter Rice Cereal Squares, timing is everything, and having everything ready prevents any frantic last-minute dashes.
Crafting the Creamy Peanut Butter Marshmallow Mixture
- Melt the Butter: Place your large, heavy-bottomed saucepan over medium-low heat. Add the 1/2 cup of unsalted butter. Allow it to melt slowly and completely. The goal here is to melt, not to brown, so keep the heat gentle. Browning butter adds a nutty flavor, which can be delicious in other recipes, but for these classic Christmas Peanut Butter Rice Cereal Squares, we want a clean, buttery backdrop for our peanut butter and marshmallow.
- Add the Marshmallows: Once the butter is fully melted, immediately add the entire bag of mini marshmallows to the saucepan. Stir continuously with your spatula or wooden spoon. This constant stirring is vital to prevent the marshmallows from sticking to the bottom of the pan and burning, which can introduce an unpleasant bitterness to our sweet squares. Keep the heat on medium-low; patience is a virtue here.
- Achieve a Smooth Melt: Continue stirring until the marshmallows are about 90% melted and have transformed into a gloriously gooey, smooth, and stretchy mixture. There might be a few tiny lumps remaining, and that’s perfectly fine; they’ll usually melt completely when we add the peanut butter. The mixture should be homogenous and have a shiny appearance. This usually takes about 5-7 minutes. Do not walk away from the stove during this process! Marshmallows can go from perfectly melted to burnt very quickly.
- Incorporate the Peanut Butter and Vanilla: As soon as the marshmallows are mostly melted and smooth, remove the saucepan from the heat. This is important to prevent overcooking the peanut butter and to maintain its creamy texture. Immediately stir in the 1 cup of creamy peanut butter, the 1 teaspoon of vanilla extract, and the optional pinch of salt. Stir vigorously until the peanut butter is fully incorporated into the marshmallow mixture, creating a beautifully uniform, glossy, and irresistibly fragrant peanut butter-marshmallow base. The mixture should be thick, sticky, and a lovely light brown color. The vanilla extract adds a wonderful aromatic depth, complementing the richness of the peanut butter, while the salt balances the sweetness, making every bite of our Christmas Peanut Butter Rice Cereal Squares even more satisfying.
Combining with Rice Cereal: The Heart of Your Christmas Peanut Butter Rice Cereal Squares
- Pour the Mixture Over Cereal: Remember that extra-large bowl with your 6 cups of crisp rice cereal? Now it’s its time to shine! Carefully pour the entire warm, gooey peanut butter-marshmallow mixture directly over the cereal. It will look like a lot of cereal for the amount of mixture, but trust me, it will all come together beautifully.
- Gentle but Thorough Mixing: Using your sturdy spatula or wooden spoon, begin to fold the cereal into the peanut butter-marshmallow mixture. The key here is to work quickly but gently. You want to coat every single piece of cereal evenly without crushing it. If you’re too aggressive, you’ll end up with a bowl of crumbs, and we’re aiming for distinct, crispy cereal pieces nestled in that delicious, chewy matrix. Start from the bottom of the bowl, scooping the mixture over the cereal, and continue this folding motion until all the cereal appears coated. This might take a few minutes, and your arm might get a bit of a workout, but it’s worth it for perfectly coated Christmas Peanut Butter Rice Cereal Squares.
- Check for Even Coating: Take a moment to inspect your mixture. Are there any dry pockets of cereal? Is the coating uniform throughout? If not, continue gently folding until every last flake is sticky and incorporated. The mixture will be incredibly sticky and warm, which is exactly what we want. This ensures a consistent texture and flavor in every bite of your finished Christmas Peanut Butter Rice Cereal Squares.
Pressing and Chilling for Perfect Christmas Peanut Butter Rice Cereal Squares
- Transfer to the Prepared Pan: Once the cereal is evenly coated, immediately transfer the warm mixture into your greased and/or parchment-lined baking pan. Because the mixture is so sticky, it helps to use a lightly buttered spatula or even damp hands (lightly dampen your hands with water or spray with cooking spray) to manage it. This prevents excessive sticking to your tools or fingers.
- Press Evenly: Now, you need to press the mixture firmly and evenly into the pan. Use the back of a buttered spatula, a piece of wax paper, or even your lightly dampened hands. Press down with steady, consistent pressure across the entire surface. The goal is to create a compact, even layer from edge to edge. This ensures that when you cut your Christmas Peanut Butter Rice Cereal Squares, they hold their shape beautifully and have a uniform thickness. An uneven layer can result in some squares being too thin and crumbly, while others are too thick and dense. Make sure to get into the corners of the pan.
- Chilling for Firmness: Once pressed, set the pan aside to cool completely at room temperature for at least 1 hour, or for faster setting, place it in the refrigerator for 30-45 minutes. Chilling is a crucial step for these Christmas Peanut Butter Rice Cereal Squares. It allows the peanut butter-marshmallow mixture to firm up, making the squares easy to cut cleanly and preventing them from being too soft or falling apart when handled. If you’re planning on decorating, ensure they are fully set and firm before moving to the next step.
- Cutting the Squares: Once completely cooled and firm, use the parchment paper overhang (if you used it) to lift the entire slab of Christmas Peanut Butter Rice Cereal Squares out of the pan and onto a cutting board. If you didn’t use parchment, simply use a sharp, buttered knife to cut them directly in the pan. I like to cut them into 2-inch by 2-inch squares, but you can go smaller for bite-sized treats or larger for a more substantial snack. For clean cuts, wipe your knife with a damp cloth or butter it between cuts, especially if the mixture is still slightly sticky. For a festive touch, you could even use Christmas-themed cookie cutters (lightly greased) to create shapes, just be aware this might leave some scraps.
Optional: Festive Decorations for Your Christmas Peanut Butter Rice Cereal Squares
This is where we really make these special for the holidays! While delicious plain, adding some festive flair takes your “Christmas Peanut Butter Rice Cereal Squares” to the next level.
- Prepare White Chocolate Drizzle: In a microwave-safe bowl, combine the white chocolate chips (or candy melts) with the coconut oil or shortening (if using). Microwave on medium power in 30-second intervals, stirring well after each, until the chocolate is smooth and fully melted. The coconut oil helps thin the chocolate slightly, making it easier to drizzle smoothly. If you want to add color, divide the melted white chocolate into separate small bowls and stir in a drop or two of red or green food coloring until you achieve your desired hue.
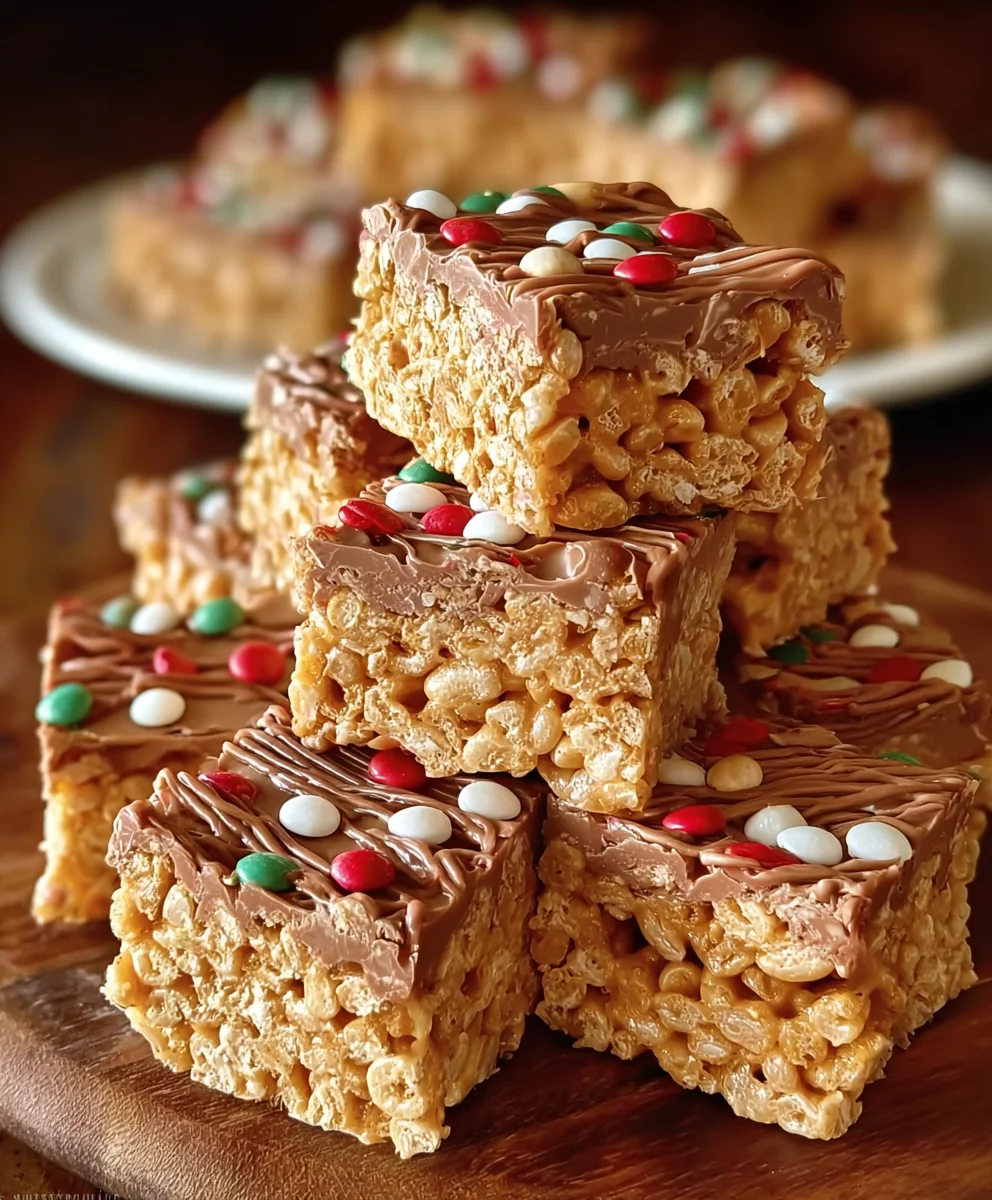
- Drizzle and Decorate: Lay your cut Christmas Peanut Butter Rice Cereal Squares out on a sheet of parchment paper or a wire rack set over parchment paper (to catch drips). You can use a spoon to drizzle the melted white chocolate (and colored chocolate) back and forth across the tops of the squares in a zigzag pattern. For more precision, transfer the melted chocolate to a small piping bag (or a ziploc bag with a tiny corner snipped off) and pipe decorative lines.
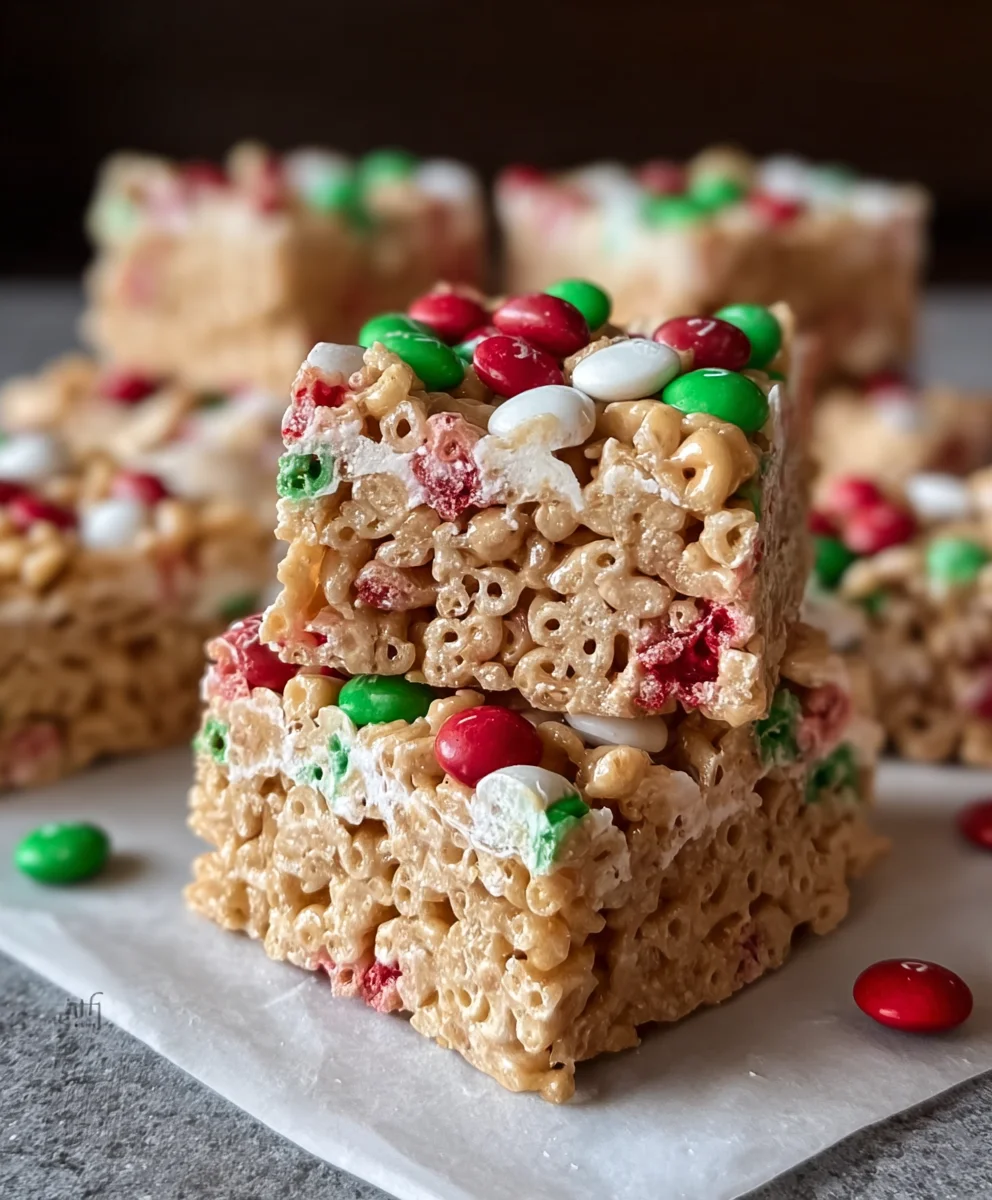
- Add Sprinkles and Candy Canes: Immediately after drizzling the chocolate (before it sets), liberally sprinkle your assorted Christmas-themed sprinkles, crushed candy canes, or peppermint pieces over the tops of the squares. The melted chocolate acts as the perfect “glue” to hold these festive additions in place. Don’t be shy; a generous amount of festive sprinkles makes these Christmas Peanut Butter Rice Cereal Squares truly pop!
- Allow Decorations to Set: Let the decorated squares sit at room temperature for about 15-20 minutes, or pop them into the refrigerator for 5-10 minutes, until the chocolate drizzle and sprinkles are fully set. This prevents smudging and ensures your beautiful decorations stay put.
Serving and Storing Your Delightful Christmas Peanut Butter Rice Cereal Squares
- Serving Suggestions: Once your Christmas Peanut Butter Rice Cereal Squares are perfectly set and optionally decorated, they are ready to be enjoyed! Arrange them artfully on a festive platter to impress your holiday guests. These squares are a fantastic addition to any holiday cookie spread, a perfect treat for school parties, or simply a delicious snack to have on hand during the busy Christmas season. They are great served at room temperature, allowing the peanut butter and marshmallow flavors to really shine through. Each bite offers that perfect balance of crispy cereal, chewy marshmallow, and rich peanut butter.
- Storing for Freshness: To keep your Christmas Peanut Butter Rice Cereal Squares fresh and delicious, store them in an airtight container at room temperature. Layer them with parchment or wax paper between layers to prevent them from sticking together, especially if they are decorated with chocolate. They will stay fresh and perfectly chewy for up to 3-5 days. If you find they start to get a little hard after a few days, you can try microwaving one for just 5-10 seconds to soften it up a bit, bringing back some of that original gooey goodness. I find they rarely last that long in my house, but it’s good to know for planning!
- Troubleshooting Tip (If They’re Too Hard): If your squares turn out too hard, it’s usually because the marshmallows were overcooked or the mixture was pressed too firmly into the pan. If they’re too soft and gooey, they might not have been chilled long enough, or perhaps a little too much butter was used. Don’t worry, even a slightly imperfect batch of these Christmas Peanut Butter Rice Cereal Squares is still incredibly tasty! Adjust your cooking time slightly next time for that perfect chewy-crispy balance. Remember, practice makes perfect, and every batch is a learning experience, especially when dealing with the delightful nuances of melting marshmallows.
Conclusion:
And there you have it, my friends! We’ve journeyed together through the simple yet utterly magical process of creating a dessert that truly embodies the spirit of joy and deliciousness. I wholeheartedly believe this recipe isn’t just another sweet treat; it’s a revelation, especially when time is of the essence but you refuse to compromise on taste or festive cheer. These squares are a testament to the fact that you don’t need complicated techniques or a long list of exotic ingredients to create something truly memorable and profoundly satisfying. They hit all the right notes: incredibly easy to prepare, delightfully no-bake (a lifesaver during busy holiday seasons!), and packed with a flavor combination that is universally loved.
Think about it: that perfect balance of salty and sweet from the peanut butter, the irresistible crunch of the rice cereal, all bound together in a chewy, delightful square. It’s a texture party in every single bite! This isn’t just a dessert; it’s a moment of comfort, a nostalgic trip back to simpler times, and a guaranteed crowd-pleaser for any gathering. Whether you’re a seasoned baker or someone who rarely ventures into the kitchen, I promise you, this recipe is incredibly forgiving and yields spectacular results every single time. It’s the kind of recipe you’ll find yourself turning to again and again, not just during the holidays, but whenever you need a quick pick-me-up or a guaranteed smile on someone’s face.
Irresistible Serving Suggestions for Your Masterpiece
Once your delectable squares have set, the fun doesn’t have to stop! While they are absolutely phenomenal enjoyed simply as they are, straight from the pan, there are so many wonderful ways to elevate your serving experience. Imagine presenting these beauties on a tiered dessert stand as part of a holiday spread, perhaps alongside some other festive cookies and treats. For a cozy evening in, pair a square with a steaming mug of hot cocoa, the warmth of the drink a perfect counterpoint to the cool, chewy sweetness of the dessert. A strong cup of coffee or a rich espresso also makes a fantastic companion, cutting through the sweetness and highlighting the nutty notes. Don’t forget their potential as an after-school snack or a delightful addition to lunchboxes, bringing a little bit of homemade magic to the everyday.
Creative Twists and Variations to Make Them Uniquely Yours
Now, let’s talk about making these already fantastic squares even more personalized and exciting! The beauty of this recipe lies in its versatility. You can easily adapt it to suit different tastes or occasions. For an extra touch of decadence, consider drizzling the cooled squares with melted chocolate – dark, milk, or even white chocolate would be absolutely divine. A sprinkle of sea salt over the chocolate will create a sophisticated sweet-and-salty crunch that is utterly addictive. For a truly festive look, crush some candy canes and sprinkle them over the top while the chocolate is still wet, or use colorful holiday sprinkles for a vibrant pop. You could also fold in mini marshmallows or chocolate chips into the warm peanut butter mixture just before pressing it into the pan for added chewiness and bursts of chocolatey goodness.
Feeling adventurous? Try swapping out some of the rice cereal for a different type, like chocolate rice cereal, for a double dose of flavor, or even add a handful of chopped nuts such as pecans or walnuts for an extra layer of texture. A tiny splash of vanilla extract or a pinch of cinnamon added to the warm peanut butter mixture can also introduce subtle yet delightful new aromatic notes. Don’t hesitate to experiment with different nut butters if you’re looking for a new twist; almond butter or cashew butter could offer a wonderfully unique flavor profile, although the classic peanut butter truly holds a special place in my heart for this particular recipe. You can even use small cookie cutters to create festive shapes – stars, trees, or bells – perfect for a holiday party! The possibilities are truly endless, allowing you to transform this simple base into something truly spectacular and tailored to your preferences.
Your Turn!
So, what are you waiting for? I genuinely encourage you to grab your ingredients and whip up a batch of these glorious squares. You’ll be amazed at how quickly and effortlessly you can create such a show-stopping treat. This recipe for Christmas Peanut Butter Rice Cereal Squares is more than just a recipe; it’s an invitation to create joy, share warmth, and make delicious memories. Once you’ve made them (and inevitably fallen in love with them!), I would absolutely adore hearing about your experience. Did you add any unique twists? How did your family and friends react? Please share your stories, your photos, and your thoughts. Your feedback means the world to me, and I can’t wait to see all the wonderful ways you bring this recipe to life in your own kitchens. Happy baking, or rather, happy no-baking!
Christmas Peanut Butter Rice Cereal Squares
Easy no-bake Christmas Peanut Butter Rice Cereal Squares are a delightful holiday treat combining creamy peanut butter, crisp rice cereal, and marshmallows. Perfect for festive cheer and busy holiday seasons.
Ingredients
-
1/2 cup (1 stick) unsalted butter, plus extra for greasing
-
1 (10-ounce) bag mini marshmallows (about 5 cups)
-
1 cup creamy peanut butter (for the base)
-
6 cups crisp rice cereal
-
1 teaspoon pure vanilla extract
-
Pinch of salt (optional)
-
1/2 cup white chocolate chips (for topping)
-
1/2 cup creamy peanut butter (for topping)
-
Assorted Christmas-themed sprinkles
-
Crushed candy canes or peppermint pieces (optional)
-
Red and green food coloring (optional, for tinting topping)
Instructions
-
Step 1
Generously grease an 8×8-inch or 9×13-inch baking pan. Measure 6 cups of crisp rice cereal into a large mixing bowl; set aside. -
Step 2
In a large, heavy-bottomed saucepan, melt 1/2 cup unsalted butter over medium-low heat. Add the entire bag of mini marshmallows and stir continuously until about 90% melted and smooth, about 5-7 minutes. Do not brown marshmallows. -
Step 3
Remove the saucepan from heat. Immediately stir in 1 cup creamy peanut butter, 1 teaspoon vanilla extract, and an optional pinch of salt until the mixture is beautifully uniform, glossy, and fragrant. -
Step 4
Pour the warm peanut butter-marshmallow mixture directly over the crisp rice cereal in the large bowl. Gently fold with a sturdy spatula until every piece of cereal is evenly coated without crushing it. -
Step 5
Transfer the warm, sticky mixture into the prepared baking pan. Using a lightly buttered spatula or lightly damp hands, press the mixture firmly and evenly into the pan to create a compact, uniform layer. -
Step 6
Allow the squares to cool completely at room temperature for at least 1 hour, or place in the refrigerator for 30-45 minutes until firm. Once set, lift from the pan (if using parchment) and cut into 2-inch by 2-inch squares using a buttered knife. -
Step 7
In a microwave-safe bowl, melt 1/2 cup white chocolate chips and 1/2 cup creamy peanut butter in 30-second intervals, stirring after each, until smooth and fully melted. Optionally, divide and tint with a drop or two of red or green food coloring. -
Step 8
Drizzle the melted chocolate-peanut butter mixture back and forth across the tops of the cut squares. Immediately sprinkle with assorted Christmas-themed sprinkles, crushed candy canes, or peppermint pieces. Let the decorations set at room temperature for 15-20 minutes, or refrigerate for 5-10 minutes. -
Step 9
Serve the Christmas Peanut Butter Rice Cereal Squares at room temperature. Store any leftovers in an airtight container at room temperature for up to 3-5 days, layered with parchment or wax paper to prevent sticking.
Important Information
Nutrition Facts (Per Serving)
It is important to consider this information as approximate and not to use it as definitive health advice.
Allergy Information
Please check ingredients for potential allergens and consult a health professional if in doubt.


Leave a Comment