
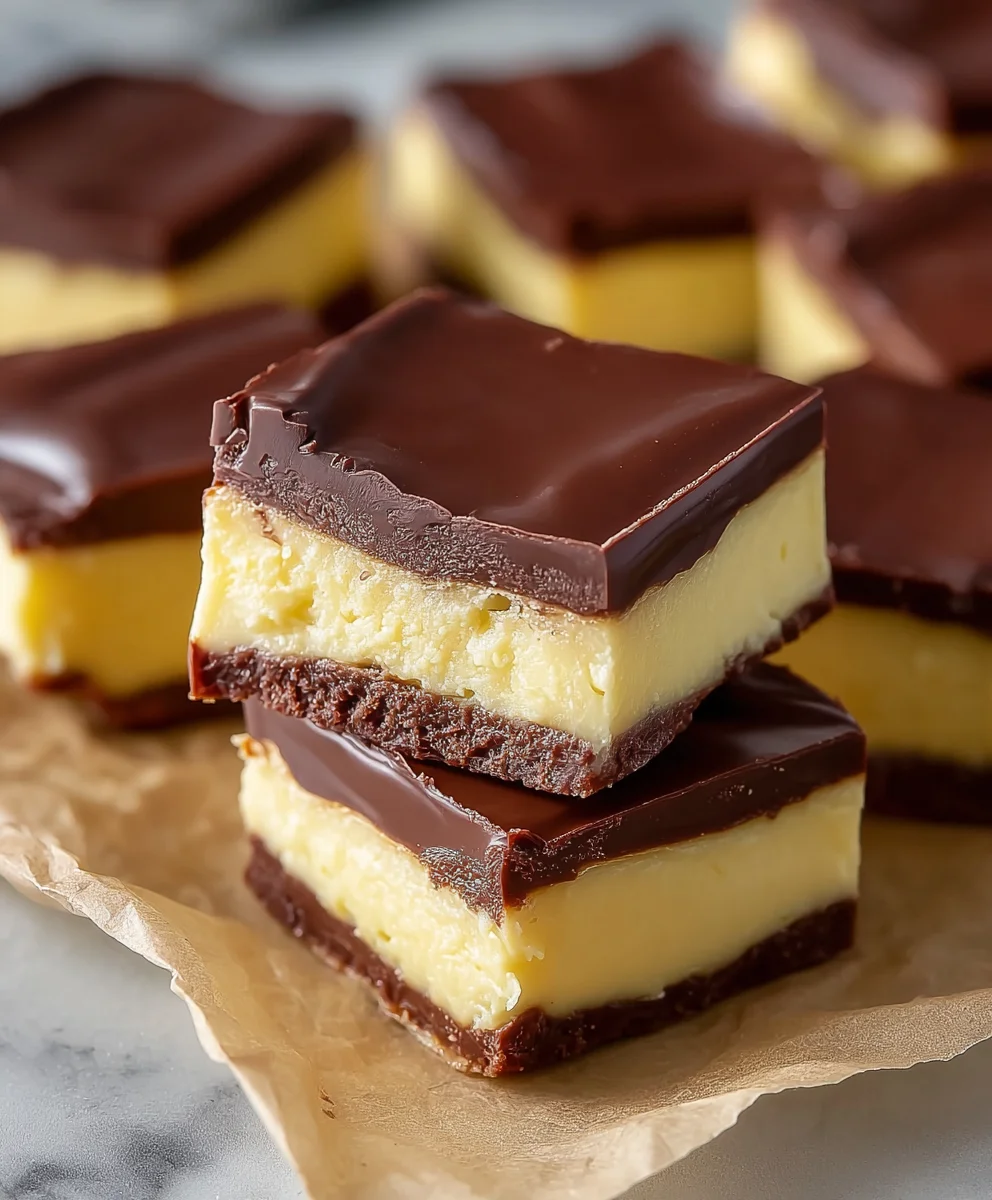
Boston Cream Pie Fudge isn’t just a dessert; it’s a nostalgic journey packed into every decadent bite. Who doesn’t adore the classic combination of moist cake, rich pastry cream, and smooth chocolate ganache? We’ve taken that beloved flavor profile and transformed it into a surprisingly simple, utterly irresistible fudge. Imagine the velvety texture of perfectly set fudge, infused with the unmistakable essence of vanilla-kissed cream and a deep, dark chocolatey swirl. It’s the kind of treat that instantly brings a smile to your face, perfect for sharing (or not!) at any gathering, or simply enjoying as a sweet escape from the everyday. Forget complicated baking – this Boston Cream Pie Fudge captures all the magic of the original with less fuss and more pure indulgence.

Ingredients:
- 2 cups granulated sugar
- 4 oz unsalted butter
- 1/2 cup heavy cream
- 2 cups white chocolate chips
- 7 oz container of marshmallow creme
- 3 tbsp instant vanilla pudding mix
- 1/2 tsp vanilla extract
- 3 tbsp unsweetened cocoa powder
- 6 oz semisweet chocolate chips
- 1 tbsp vegetable oil
Preparing the Vanilla Fudge Base
The first step to creating our delicious Boston Cream Pie Fudge is to prepare the base layer, which will mimic the creamy vanilla cake component of the pie. In a medium, heavy-bottomed saucepan, combine the 2 cups of granulated sugar, 4 oz of unsalted butter, and 1/2 cup of heavy cream. Place this saucepan over medium heat. It’s crucial to stir this mixture constantly as it heats up. We want the sugar to dissolve completely and the butter to melt smoothly into the cream. As soon as the mixture comes to a rolling boil – that is, a boil that cannot be stirred down – begin timing it for exactly 5 minutes. Maintain a consistent medium heat to ensure the boil remains steady but doesn’t threaten to overflow. This cooking time is critical for achieving the right texture in our fudge.
Once the 5 minutes are up, carefully remove the saucepan from the heat. Now, we’ll incorporate the elements that will give our fudge its signature creamy texture and vanilla flavor. Immediately add the 2 cups of white chocolate chips and the 7 oz container of marshmallow creme to the hot sugar mixture. Stir vigorously with a heatproof spatula or wooden spoon until both the white chocolate chips and the marshmallow creme have completely melted and are fully incorporated, creating a smooth, glossy mixture. This step can take a minute or two, so be patient and keep stirring. Next, stir in the 3 tablespoons of instant vanilla pudding mix and the 1/2 teaspoon of vanilla extract. The pudding mix acts as a magical thickener and intensifies the vanilla flavor, while the vanilla extract adds that classic, comforting aroma and taste. Continue stirring until everything is perfectly combined and wonderfully smooth.
Setting the Vanilla Layer
Next, we need to prepare the pan for our fudge. Line an 8×8 inch baking pan with parchment paper, leaving an overhang on all sides. This overhang will act as handles, making it incredibly easy to lift the set fudge out of the pan later. Pour the prepared vanilla fudge mixture into the prepared pan. Use your spatula to spread it out evenly, ensuring the surface is as smooth as possible. This smooth surface will be the foundation for our chocolate topping. Now, set this pan aside and let it cool slightly while we prepare the chocolate layer. It doesn’t need to be completely set, but it should be firm enough to support the chocolate topping without the two layers mixing too much.
Crafting the Chocolate Topping
Now, let’s create the rich chocolate layer that will represent the chocolate ganache topping of a Boston Cream Pie. In a separate small, microwave-safe bowl, combine the 6 oz of semisweet chocolate chips and the 1 tablespoon of vegetable oil. Microwave this mixture in 30-second intervals, stirring well after each interval, until the chocolate is completely melted and smooth. Be cautious not to overheat the chocolate, as it can seize and become unusable. Alternatively, you can melt the chocolate and oil in a double boiler over simmering water, stirring constantly until smooth. The vegetable oil helps to create a lusciously smooth and pourable ganache.
Assembling the Boston Cream Pie Fudge
Once the chocolate mixture is melted and smooth, carefully pour it over the slightly cooled vanilla fudge base in the prepared baking pan. Use your spatula to spread the chocolate evenly, covering the entire surface of the vanilla layer. Gently tilt the pan to ensure an even distribution. You can also use the back of a spoon to help smooth it out if needed.
Chilling and Cutting
Now for the final, and perhaps most anticipated, step: chilling and cutting! Place the pan with the assembled fudge into the refrigerator. Allow the fudge to chill for at least 2-3 hours, or until it is completely firm. The longer it chills, the easier it will be to cut cleanly. Once it’s firm, use the parchment paper overhangs to carefully lift the entire block of fudge out of the pan. Place it on a cutting board. Using a sharp knife that has been warmed slightly under hot water (and then dried), cut the fudge into desired serving-sized squares. For that authentic Boston Cream Pie look, you might consider cutting them into roughly 1-inch squares. Enjoy the delightful layers and flavors!
Conclusion:
I hope you’ve enjoyed diving into the delightful world of our Boston Cream Pie Fudge! This recipe truly captures the essence of the classic dessert in a rich, decadent, and surprisingly easy-to-make fudge form. We’ve walked through each step together, from melting the chocolate to creating that signature creamy vanilla layer and the luscious chocolate ganache topping. This fudge is perfect for gifting, special occasions, or simply treating yourself to something incredibly delicious.
For serving, I recommend cutting your Boston Cream Pie Fudge into neat squares and presenting them on a festive platter. They pair beautifully with a cup of coffee or tea. If you’re feeling adventurous, consider a sprinkle of edible gold dust or a few extra chocolate shavings on top for an extra touch of elegance.
Don’t hesitate to experiment with variations! You could try adding a touch of rum extract to the vanilla layer for an adult twist, or even folding in some finely chopped maraschino cherries for a pop of color and flavor. The possibilities are endless when it comes to this versatile fudge base. I encourage you to give this recipe a try – I’m confident you’ll be delighted with the results and the compliments you receive. Happy fudge-making!
Frequently Asked Questions:
Can I make this fudge ahead of time?
Absolutely! This Boston Cream Pie Fudge is an excellent candidate for making ahead. In fact, it often tastes even better after sitting for a day, allowing the flavors to meld together. Store it in an airtight container at room temperature for up to a week.
What kind of chocolate is best for the ganache topping?
For the most authentic flavor and smooth texture, I recommend using good quality semi-sweet or bittersweet chocolate for the ganache. If you prefer a sweeter topping, you can opt for milk chocolate, but be mindful that it might affect the overall sweetness balance of the fudge.
How should I store leftover Boston Cream Pie Fudge?
To keep your Boston Cream Pie Fudge fresh and delicious, store it in an airtight container at room temperature. Avoid refrigerating it, as this can cause the fudge to become too hard and may lead to condensation, affecting its texture. Properly stored, it will remain a delightful treat for about a week.
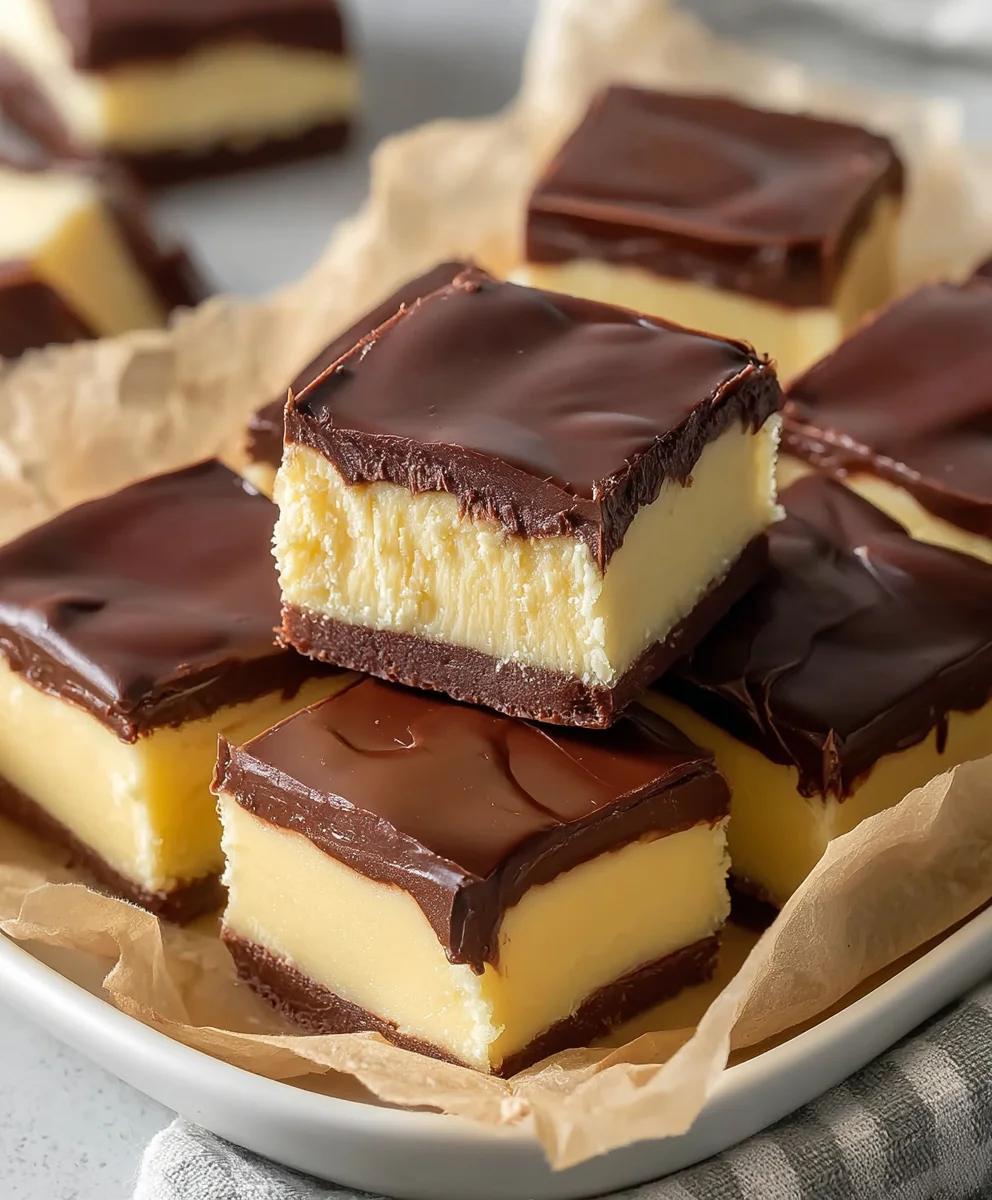
Boston Cream Pie Fudge
An easy and delicious fudge recipe that captures the flavors of Boston Cream Pie with a creamy vanilla base and a rich chocolate topping.
Ingredients
-
2 cups granulated sugar
-
4 oz unsalted butter
-
1/2 cup heavy cream
-
2 cups white chocolate chips
-
7 oz container of marshmallow creme
-
3 tbsp instant vanilla pudding mix
-
1/2 tsp vanilla extract
-
3 tbsp unsweetened cocoa powder
-
6 oz semisweet chocolate chips
-
1 tbsp vegetable oil
Instructions
-
Step 1
In a heavy-bottomed saucepan, combine sugar, butter, and heavy cream. Heat over medium heat, stirring constantly until sugar dissolves and butter melts. Bring to a rolling boil and cook for 5 minutes. -
Step 2
Remove from heat. Stir in white chocolate chips and marshmallow creme until completely melted and smooth. Stir in vanilla pudding mix and vanilla extract until combined. -
Step 3
Line an 8×8 inch baking pan with parchment paper, leaving an overhang. Pour the vanilla fudge mixture into the pan and spread evenly. Let cool slightly. -
Step 4
In a microwave-safe bowl, combine semisweet chocolate chips and vegetable oil. Microwave in 30-second intervals, stirring, until melted and smooth. -
Step 5
Pour the melted chocolate mixture over the vanilla fudge base and spread evenly. Gently tilt the pan to ensure full coverage. -
Step 6
Refrigerate for at least 2-3 hours, or until firm. Lift the fudge out of the pan using the parchment paper overhangs. Cut into desired serving-sized squares.
Important Information
Nutrition Facts (Per Serving)
It is important to consider this information as approximate and not to use it as definitive health advice.
Allergy Information
Please check ingredients for potential allergens and consult a health professional if in doubt.

Leave a Comment