
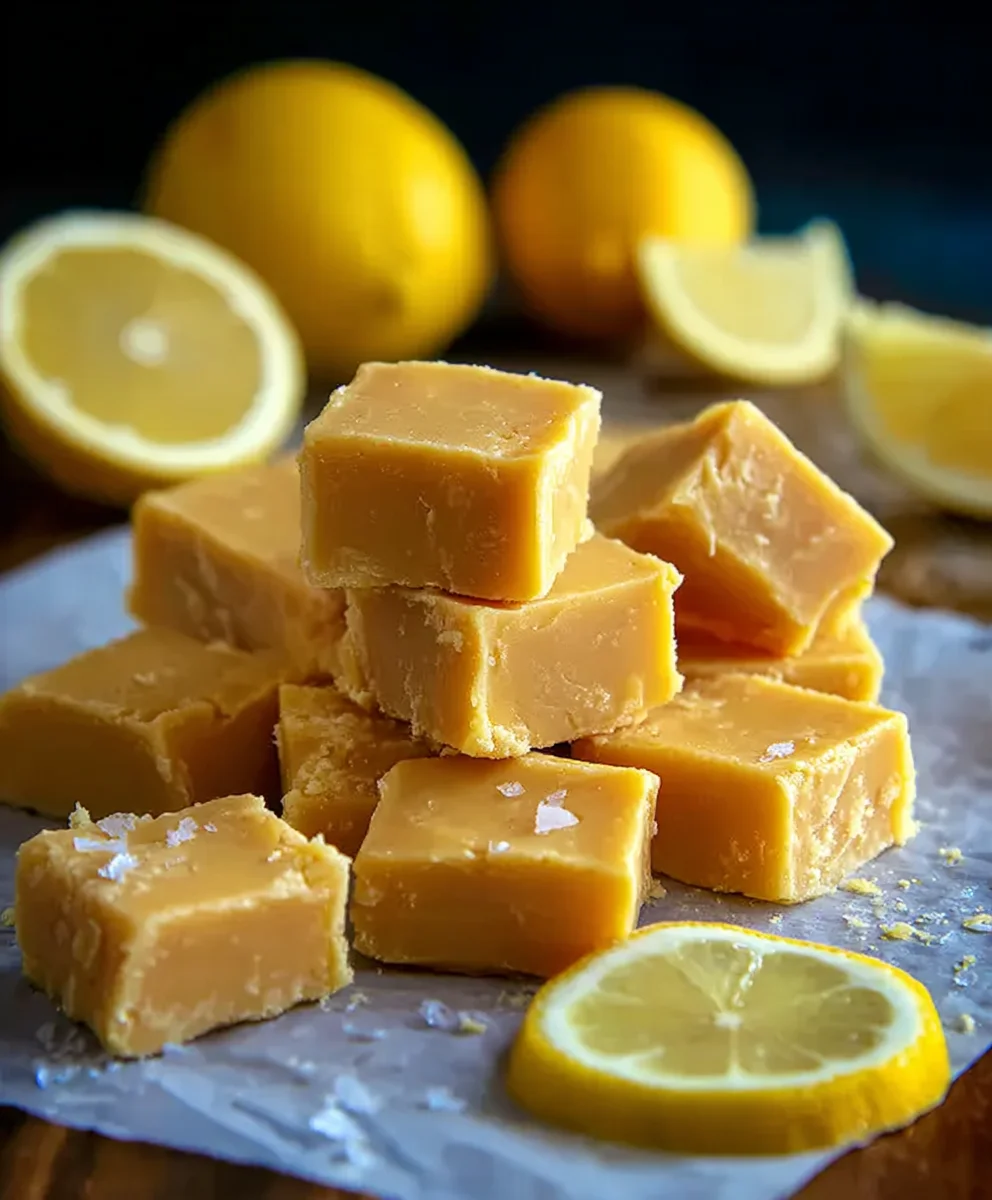
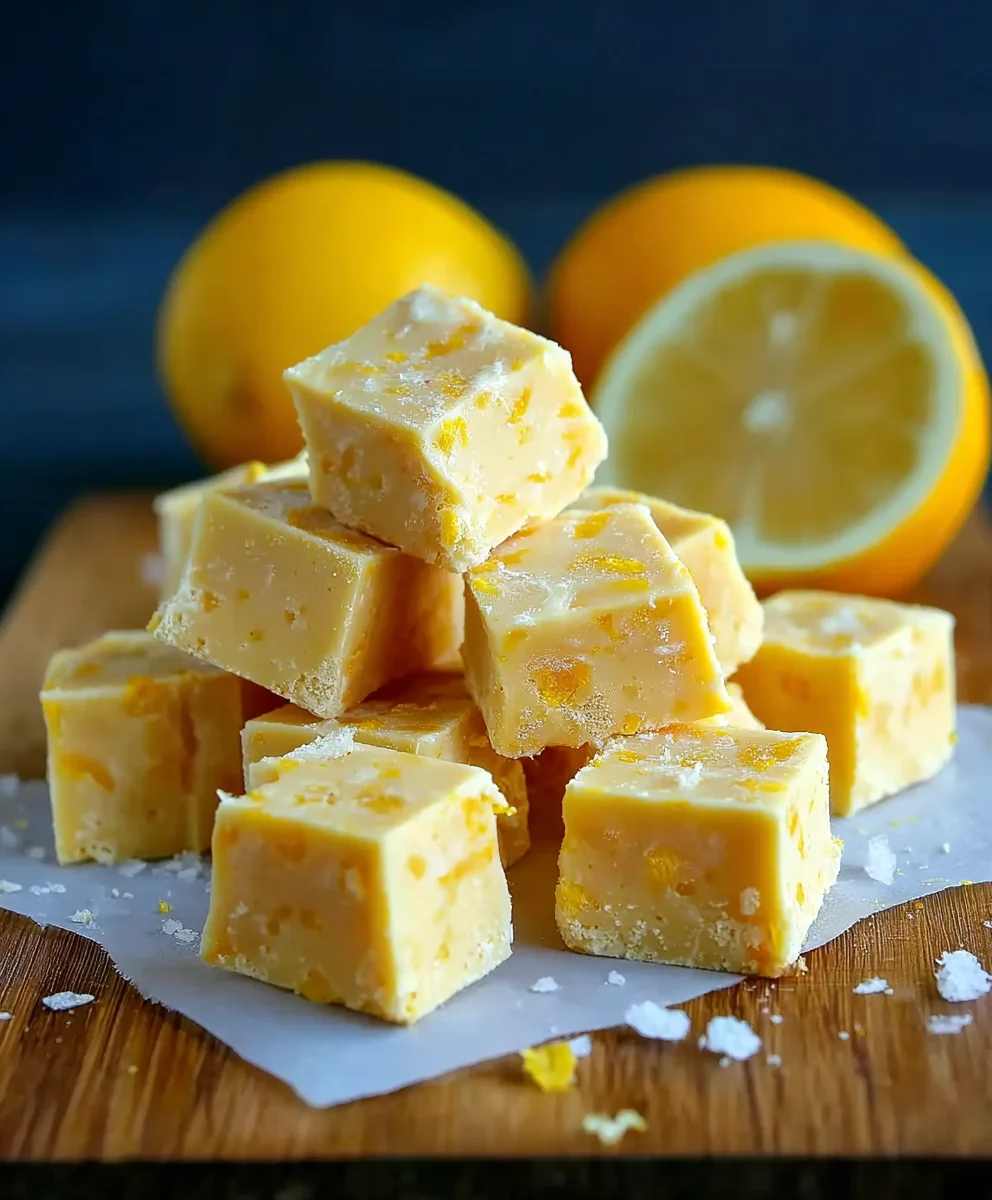
Meyer Lemon Fudge is a culinary revelation that promises to brighten your day and delight your palate with every creamy bite. Imagine a confection where the rich, melt-in-mouth texture of traditional fudge meets the vibrant, sweet-tart zest of one of nature’s most aromatic citrus fruits. This isn’t merely a dessert; it’s an experience, a sophisticated twist on a beloved classic that stands out in any sweet spread.
The history of fudge itself is deeply rooted in American culinary tradition, often associated with homemade comfort and joyous celebrations. When we introduce the exquisite Meyer lemon – a fascinating hybrid believed to be a cross between a lemon and a mandarin orange – we elevate this comforting treat into something truly extraordinary. Its distinctly sweeter, less acidic, and more floral profile offers an unparalleled brightness, creating an incredible synergy with the decadent richness of the fudge.
Why This Meyer Lemon Fudge Will Become Your New Favorite
People adore this particular dish because it strikes that perfect balance: it’s indulgent without being overly heavy, and refreshing without being too tart. The unexpected burst of aromatic citrus cuts through the sweetness beautifully, leaving a lingering, delightful aftertaste that is utterly addictive. I am thrilled to present this recipe for Meyer Lemon Fudge, knowing it will captivate your senses and become a cherished addition to your recipe collection. Prepare to be enchanted!

Ingredients:
- 4 cups (approx. 800g) granulated sugar: The foundation of our sweet treat.
- 1 cup (240ml) heavy cream: This provides the rich, creamy texture we’re aiming for.
- 1/2 cup (113g) unsalted butter: For unparalleled richness and a smooth mouthfeel.
- 1/2 teaspoon fine sea salt: A crucial ingredient to balance the sweetness and enhance the lemon flavor.
- 2 large Meyer lemons: We’ll be using both the zest and the juice to infuse that bright, distinctive Meyer lemon flavor.
- 1 teaspoon pure vanilla extract: While subtle, it adds depth and warmth that complements the citrus beautifully.
- 7 ounces (approx. 1 1/2 cups) marshmallow fluff (or crème): This is our secret weapon for super creamy, melt-in-your-mouth fudge that’s less prone to graininess.
Equipment You’ll Need:
Before we dive into the fun, let’s make sure you have all your tools ready. Having everything prepped makes the process smoother and ensures you can move quickly when needed, which is often key in fudge making.
- Heavy-bottomed 4-quart saucepan or Dutch oven: Essential for even heat distribution and preventing scorching.
- 9×13 inch baking pan: The perfect size for setting our beautiful Meyer Lemon Fudge.
- Parchment paper: For easy lifting and clean cutting of your fudge.
- Non-stick cooking spray or butter: To ensure your parchment paper stays put and for a little extra insurance against sticking.
- Candy thermometer: Absolutely crucial for accurate temperature readings, which is paramount for successful fudge.
- Wooden spoon or heat-proof spatula: For stirring.
- Electric mixer (handheld or stand mixer with paddle attachment): While not strictly mandatory, it makes the beating process much easier and more effective for achieving that perfect creamy texture.
- Fine-toothed grater or microplane: For zesting those lovely Meyer lemons.
- Citrus juicer: To extract all that wonderful lemon juice.
- Measuring cups and spoons: For precise ingredient measurements.
Preparing Your Pan:
Proper pan preparation is the first step to ensuring your glorious Meyer Lemon Fudge releases easily and beautifully. Trust me, you don’t want to wrestle your fudge out of the pan after all that hard work!
- First, grab your 9×13 inch baking pan. This size is ideal for yielding a good thickness of fudge squares.
- Take a sheet of parchment paper and cut it to fit the bottom of the pan, leaving an overhang on the two longer sides. This overhang will act as handles, allowing you to lift the entire slab of fudge out of the pan once it’s set.
- Lightly spray the bottom and sides of your baking pan with non-stick cooking spray, or grease it with a thin layer of butter. This helps the parchment paper adhere smoothly and provides an extra layer of non-stick security.
- Carefully press the parchment paper into the prepared pan, making sure it lays flat against the bottom and up the sides. Smooth out any wrinkles. Set this prepared pan aside. It will be ready to receive our hot fudge mixture when the time comes.
Crafting the Meyer Lemon Fudge Base:
This is where the magic begins! Getting the base right is key to the texture and success of your Meyer Lemon Fudge. We’re going to create a smooth, sugary syrup that will transform into rich fudge.
- Zest and Juice Your Meyer Lemons: Before you even think about turning on the stove, grab your beautiful Meyer lemons. Using a fine-toothed grater or microplane, carefully zest both lemons, being sure to only get the bright yellow part and avoid the bitter white pith underneath. You’ll want about 1 to 1 ½ tablespoons of zest. Place the zest in a small bowl and set aside. Then, cut your zested lemons in half and squeeze out all their juice. You should aim for about 1/4 cup (60ml) of fresh Meyer lemon juice. Strain the juice through a fine-mesh sieve to remove any seeds or pulp, and set it aside with the zest.
- Combine Base Ingredients: In your heavy-bottomed 4-quart saucepan or Dutch oven, combine the granulated sugar, heavy cream, unsalted butter, and fine sea salt. A heavy-bottomed pan is crucial here because it distributes heat more evenly, significantly reducing the risk of scorching your mixture, which can lead to a burnt taste.
- Begin Heating and Melting: Place the saucepan over medium heat. Stir constantly with your wooden spoon or heat-proof spatula, making sure to scrape the bottom and sides of the pan. Continue stirring until the butter has completely melted and the sugar has dissolved. You’ll notice the mixture becoming smooth and uniform. This initial stirring is important for preventing sugar crystals from forming prematurely.
- Bring to a Rolling Boil: Once the sugar is dissolved and the butter is melted, stop stirring. Insert your candy thermometer into the mixture, ensuring the tip doesn’t touch the bottom of the pan. Increase the heat slightly to medium-high. Bring the mixture to a full, rolling boil. A “rolling boil” means it’s bubbling vigorously all over the surface and doesn’t subside when stirred.
- Cook to Soft-Ball Stage: Allow the mixture to boil, undisturbed, until your candy thermometer registers 238°F (114°C). This temperature is known as the “soft-ball stage.” It’s critical not to stir the mixture during this boiling phase. Stirring can encourage the formation of large sugar crystals, resulting in grainy fudge instead of the smooth, creamy consistency we desire for our Meyer Lemon Fudge. If you see any sugar crystals forming on the sides of the pan, you can very gently brush them down with a wet pastry brush, but try to avoid disturbing the main body of the mixture.
- Remove from Heat: As soon as the thermometer hits 238°F (114°C), immediately remove the saucepan from the heat. Don’t let it cook a moment longer, as this can make your fudge too hard.
Infusing with Meyer Lemon Zest and Juice & Achieving the Perfect Fudge Consistency:
This is the moment we bring in that signature Meyer lemon flavor and work towards that irresistible, velvety texture. This phase moves quickly, so be ready!
- Add Flavorings and Marshmallow Fluff: As soon as you remove the pot from the heat, without stirring, immediately add the marshmallow fluff, the reserved Meyer lemon zest, and the pure vanilla extract to the hot sugar mixture. The residual heat from the fudge base will start to melt the marshmallow fluff.
- Let it Sit (Briefly!): Do not stir at this stage. Allow the mixture to sit undisturbed for about 5 minutes. This allows the marshmallow fluff to begin melting and for the flavors to slightly infuse, and also helps the mixture cool just a tiny bit before we start beating.
- Begin Beating the Fudge: After 5 minutes, it’s time to transform this molten mixture into creamy fudge. If you have a stand mixer, carefully transfer the hot mixture to the mixer bowl and attach the paddle attachment. If using a handheld mixer, you can beat it directly in the saucepan (ensure it’s heat-proof and stable). Begin beating on medium-low speed.
- Watch for the Transformation: Continue beating the mixture. At first, it will be glossy and liquid. As you beat, you’ll notice a gradual change. The fudge will start to thicken, lose its glossy sheen, and become noticeably duller and more opaque. It will also become much stiffer and harder to stir. This beating process encourages the formation of tiny sugar crystals, which is what gives fudge its smooth, non-grainy texture. The marshmallow fluff helps in this process by keeping those crystals small and evenly distributed.
- Test for Readiness: How do you know when it’s ready? The perfect point is when the mixture is very thick and holds its shape, almost like a soft dough, and you can see it beginning to pull away from the sides of the bowl or pan as you beat. If you stop beating and let a spoonful drip back into the pot, it should hold its shape for a moment before slowly collapsing. This beating process typically takes anywhere from 7 to 15 minutes, depending on your mixer and the initial temperature. Do not over-beat, or your fudge could become crumbly.
- Stir in Meyer Lemon Juice: Just as the fudge reaches that perfect thick, dull stage, quickly stir in the strained Meyer lemon juice. Stir it in thoroughly and quickly. This burst of acidity will awaken all the flavors and give our Meyer Lemon Fudge that signature tangy brightness. Continue stirring for just about 30 seconds after adding the juice, ensuring it’s fully incorporated, but don’t overdo it. The fudge will seize up slightly but will still be pliable.
Setting and Chilling Your Meyer Lemon Fudge:
We’re almost there! Now it’s time to get that beautiful Meyer Lemon Fudge into its final form and allow it to set into perfect squares.
- Pour into Prepared Pan: Working quickly (because the fudge will continue to set as it cools), immediately spoon or pour the hot fudge mixture into your parchment-lined 9×13 inch baking pan.
- Spread and Smooth: Use a greased spatula or the back of a greased spoon to gently and evenly spread the fudge into an even layer in the pan. Don’t overwork it, as this can incorporate too much air or disrupt the setting process. Just get it relatively smooth and flat. You can gently tap the pan on your counter a few times to help settle it and remove any larger air pockets.
- Cool at Room Temperature: Allow the fudge to cool completely at room temperature for at least 2-4 hours, or until it is firm to the touch. For an even firmer set, especially in warmer environments, you can then transfer it to the refrigerator.
- Refrigerate for a Firmer Set (Optional but Recommended): Once cooled at room temperature, for the absolute best cutting experience and a super firm texture, cover the pan loosely with plastic wrap and refrigerate for at least another 2 hours, or preferably overnight. A well-chilled fudge will be much easier to cut cleanly.
Cutting and Storing Your Delicious Meyer Lemon Fudge:
The moment of truth! Get ready to slice into your homemade Meyer Lemon Fudge and enjoy the fruits of your labor.
- Lift and Transfer: Once the fudge is completely set and firm (either at room temperature or from the fridge), use the parchment paper overhangs to carefully lift the entire slab of fudge out of the baking pan and onto a clean cutting board.
- Prepare for Cutting: Peel away the parchment paper from the sides of the fudge. If you want super clean cuts, you can lightly grease your knife with non-stick spray or butter, or even run it under hot water and wipe it dry between cuts.
- Cut into Squares: Using a large, sharp knife, cut the fudge into your desired size squares. I usually aim for 1-inch to 1 1/2-inch squares, as fudge is quite rich and a small piece is often very satisfying. Start by trimming any uneven edges for a professional look, then make straight cuts across the length and width of the slab.
- Storage: Store your delightful Meyer Lemon Fudge in an airtight container at room temperature for up to one week, or in the refrigerator for up to two weeks. If storing in layers, place a piece of parchment paper between each layer to prevent sticking. For longer storage, you can freeze individual pieces in an airtight freezer-safe container for up to 3 months. Thaw at room temperature before serving.
Troubleshooting Common Fudge Issues:
Fudge making can sometimes feel like a delicate art, but don’t worry if things don’t go perfectly the first time. Here are some common issues and how to tackle them:
Grainy Fudge:
This is perhaps the most common fudge complaint. Grainy fudge happens when sugar crystals grow too large, creating a gritty texture.
Causes:
- Stirring too much during the boiling phase: As mentioned earlier, stirring while the mixture boils encourages large crystal formation.
- Insufficient beating: The beating process after cooking is crucial for creating tiny, uniform crystals that result in a smooth texture.
- Sugar crystals on the sides of the pan: If sugar crystals cling to the sides of the pan and fall back into the mixture, they can seed the formation of larger crystals.
Solutions:
- Be patient and don’t stir: Resist the urge to stir once the mixture reaches a rolling boil until it’s removed from heat.
- Brush down the sides: Use a wet pastry brush to gently wash down any sugar crystals from the sides of the pan during boiling.
- Beat thoroughly: Ensure you beat the fudge for the full duration specified, until it loses its gloss and thickens considerably. An electric mixer is your best friend here.
- Don’t scrape the bottom: When beating, try not to scrape the bottom and sides too aggressively if there are any hardened bits, as these can introduce larger crystals.
Fudge Not Setting:
If your fudge remains gooey and refuses to firm up, it usually points to a temperature issue.
Causes:
- Undercooking: The most common reason. If the mixture didn’t reach the full 238°F (114°C) soft-ball stage, there isn’t enough sugar concentration to solidify properly.
- High humidity: High moisture in the air can affect how quickly and firmly sugar mixtures set.
Solutions:
- Retest your thermometer: Calibrate your candy thermometer by placing it in boiling water. It should read 212°F (100°C). If it doesn’t, adjust your target fudge temperature accordingly.
- Recooking (sometimes possible): If your fudge is still too soft, you might be able to salvage it. Return the mixture to a clean saucepan with a little bit of additional cream (maybe 1/4 cup). Reheat to a rolling boil, stirring constantly until dissolved, then stop stirring and bring it back to 238°F (114°C). Remove from heat, add marshmallow fluff/vanilla/zest, let it sit, and beat again. This is not always successful, but worth a try!
- Embrace a softer texture: If all else fails, a slightly softer fudge is still delicious! It might be better served with a spoon over ice cream or as a spread.
Oily Fudge:
Sometimes, you might notice a layer of butter or oil separating from the fudge.
Causes:
- Over-beating: Beating the fudge for too long can sometimes cause the fat to separate from the sugar mixture.
- Incorrect fat content: While less common in a recipe like this, too much butter can sometimes lead to separation.
Solutions:
- Beat just enough: Pay close attention to the visual cues when beating the fudge – it should lose its gloss and thicken, but don’t continue beating once it’s very stiff.
- Re-incorporate: If you catch it early, sometimes gently stirring the separated oil back into the fudge while it’s still warm can help.
Tips for Perfect Meyer Lemon Fudge Every Time:
To ensure your homemade Meyer Lemon Fudge is consistently perfect, keep these golden rules in mind:
- Accuracy is Key with Temperatures: I cannot stress this enough – a reliable candy thermometer is your best friend for fudge. Undercooked fudge won’t set, and overcooked fudge will be crumbly and hard. Calibrate your thermometer regularly to ensure it’s giving accurate readings.
- Heavy-Bottomed Pot: Always use a heavy-bottomed saucepan. This prevents hot spots and scorching, which can ruin the flavor and texture of your fudge. Burnt sugar is a flavor you definitely want to avoid!
- Don’t Rush the Dissolving Phase: Take your time stirring at the beginning, ensuring all the sugar crystals are completely dissolved before the mixture comes to a boil. This sets you up for a smooth, creamy texture later.
- Resist the Urge to Stir While Boiling: Once your mixture hits that rolling boil and the candy thermometer is in place, step away! Stirring during this critical cooking phase introduces air and encourages the formation of large, gritty sugar crystals.
- Patience During Beating: The beating phase might feel long, especially if you’re using a handheld mixer. But this is where the magic happens! It refines the sugar crystals and incorporates air, transforming the liquid syrup into creamy fudge. Trust the process and beat until it loses its gloss and becomes thick.
- Use Fresh Meyer Lemons: The star of this show is the Meyer lemon. Use fresh, juicy lemons for the brightest, most vibrant flavor. The zest holds most of the aromatic oils, so make sure to get all of that beautiful yellow zest!
- Work Quickly at the End: Once the fudge is beaten and the lemon juice is stirred in, it will start to set very rapidly. Have your prepared pan ready and work quickly to transfer and spread the fudge before it becomes too stiff to manage.
- Proper Storage: Store your fudge correctly in an airtight container to prevent it from drying out or absorbing unwanted odors. This will keep your Meyer Lemon Fudge tasting fresh and delicious for longer.
- Clean Equipment: Ensure all your pots, spatulas, and especially your thermometer are meticulously clean. Even a tiny bit of old food or sugar residue can interfere with the crystallization process.
- Humidity Matters: Try to make fudge on a dry day if possible. High humidity can sometimes make it harder for fudge to set properly, or it might take longer to firm up. If it’s a humid day, consider cooking the fudge a degree or two higher (e.g., 239-240°F) to compensate.
By following these detailed steps and tips, you are well on your way to creating truly irresistible homemade Meyer Lemon Fudge that will impress everyone who tries it!
Conclusion:
If you’ve followed along with me on this culinary adventure, you already know that this isn’t just another dessert recipe; it’s an invitation to experience something truly special, a delightful twist on a beloved classic. I genuinely believe that this particular creation stands head and shoulders above many of its peers, offering a sensory journey that is both comforting and exhilaratingly fresh. What makes it an absolute must-try? It’s the exquisite balance, my friends. We’re talking about a fudge that manages to be incredibly rich and undeniably creamy, yet simultaneously bright, tangy, and utterly refreshing. It completely redefines what you might expect from a traditional fudge, transforming it into an elegant, vibrant confection that sings with zest and sunshine. This isn’t just a sweet treat; it’s a palate cleanser, a mood lifter, and a conversation starter all rolled into one beautiful, melt-in-your-mouth square. The subtle floral notes of the Meyer lemon, coupled with its less acidic, sweeter profile compared to a regular lemon, create a sophisticated flavor that is simply irresistible. You won’t find anything quite like the delicate tang and incredible smoothness of our homemade Meyer Lemon Fudge anywhere else.
Once you’ve mastered this delightful confection, the fun truly begins with how you choose to present and enjoy it. While perfectly wonderful on its own, chilled to perfection and cut into small, neat squares, I have a few suggestions to elevate your experience even further. Consider serving small pieces alongside a robust cup of coffee or a delicate herbal tea for an afternoon treat that feels wonderfully indulgent. It also makes an exceptional addition to any dessert platter, especially when paired with fresh berries like raspberries or blueberries, which provide a lovely textural contrast and a slight tartness that complements the lemon beautifully. For a sophisticated finish, a light dusting of powdered sugar or a few finely grated strands of fresh Meyer lemon zest can truly make it shine. Or, if you’re feeling particularly fancy, a few pieces of candied lemon peel placed artfully atop each square can add both visual appeal and an extra layer of citrusy sweetness.
But why stop there? This recipe is incredibly versatile and lends itself beautifully to creative variations. For an even richer, more luxurious experience, you could gently fold in a handful of high-quality white chocolate chips just before pouring the fudge into your pan. The creamy sweetness of the white chocolate would intertwine wonderfully with the vibrant lemon. Alternatively, for those who appreciate a hint of unexpected spice, a tiny pinch of ground cardamom or a whisper of vanilla bean paste can introduce a delightful complexity to the flavor profile. Don’t underestimate the power of a sprinkle of flaky sea salt on top, either; it miraculously enhances the lemon’s brightness and cuts through the sweetness, offering a truly gourmet experience. And let’s not forget its potential as a thoughtful, homemade gift. Wrapped in pretty cellophane bags or small decorative boxes, these little squares of joy make a perfect present for friends, family, or colleagues, especially during the colder months when a taste of sunshine is most welcome.
Your Culinary Adventure Awaits!
Now, it’s your turn. I’ve shared all my tips and tricks, and the recipe is laid out for you. There’s nothing left but to roll up your sleeves and dive into the delightful process of creating your very own batch of this exquisite Meyer Lemon Fudge. Trust me when I say that the aroma alone as it sets will be enough to make your kitchen feel like the happiest place on earth. The satisfaction of slicing into that perfectly firm, yet yielding, block of vibrant yellow deliciousness is incredibly rewarding. Don’t be intimidated; this recipe is designed to be straightforward and accessible, even for those who might consider themselves novice bakers. The magic of it lies in its simplicity and the sheer joy it brings.
Share Your Success!
Once you’ve made it, I would absolutely love to hear about your experience! Did you stick to the original recipe, or did you venture into some exciting variations? How did your family and friends react to this unique treat? Please, don’t hesitate to share your photos, your triumphs, and any clever tweaks you discovered along the way. Your feedback and creativity not only inspire me but also help to build a wonderful community of fellow food enthusiasts. So go forth, embrace the zest, and let the sunshine of this incredible dessert brighten your day. I can’t wait to see what you create! Happy baking, and happy tasting!
Meyer Lemon Fudge: Bright, Zesty & Easy Homemade Treat!
Meyer Lemon Fudge is a culinary revelation, combining the rich, melt-in-mouth texture of traditional fudge with the vibrant, sweet-tart zest of Meyer lemons. This extraordinary treat strikes a perfect balance, offering an indulgent yet refreshing experience with an addictive burst of aromatic citrus.
Ingredients
-
4 cups (800g) granulated sugar
-
1 cup (240ml) heavy cream
-
1/2 cup (113g) unsalted butter
-
1/2 teaspoon fine sea salt
-
Zest and juice of 2 large Meyer lemons (approx. 1-1.5 tbsp zest, 1/4 cup strained juice)
-
1 teaspoon pure vanilla extract
-
7 ounces (1 1/2 cups) marshmallow fluff
Instructions
-
Step 1
Line a 9×13 inch baking pan with parchment paper, leaving an overhang on the longer sides, and lightly grease. -
Step 2
Zest Meyer lemons (approx. 1-1.5 tbsp zest) and juice them (approx. 1/4 cup juice). Strain juice to remove seeds/pulp. Set both aside. -
Step 3
In a heavy-bottomed 4-quart saucepan, combine granulated sugar, heavy cream, unsalted butter, and fine sea salt. Heat over medium, stirring until butter melts and sugar dissolves. -
Step 4
Insert a candy thermometer. Increase heat to medium-high and bring mixture to a full, rolling boil. Do not stir. Boil undisturbed until the thermometer reaches 238°F (114°C) (soft-ball stage). Immediately remove from heat. -
Step 5
Without stirring, immediately add marshmallow fluff, Meyer lemon zest, and vanilla extract to the hot mixture. Let sit undisturbed for 5 minutes. -
Step 6
Using an electric mixer, beat the mixture on medium-low speed for 7-15 minutes, until it loses its glossy sheen, thickens considerably, and becomes dull and opaque. -
Step 7
Just as the fudge reaches the thick, dull stage, quickly stir in the strained Meyer lemon juice for about 30 seconds, ensuring it’s fully incorporated. -
Step 8
Immediately pour the hot fudge into the prepared pan and spread evenly with a greased spatula. Cool at room temperature for 2-4 hours, then refrigerate for at least 2 hours or overnight until firm. -
Step 9
Lift fudge from the pan using the parchment paper, peel off paper, and cut into 1 to 1 1/2-inch squares using a sharp, greased knife. Store in an airtight container at room temperature for up to 1 week, or in the refrigerator for up to 2 weeks.
Important Information
Nutrition Facts (Per Serving)
It is important to consider this information as approximate and not to use it as definitive health advice.
Allergy Information
Please check ingredients for potential allergens and consult a health professional if in doubt.

Leave a Comment