
Chicken Crust Pizza has revolutionized how many of us enjoy one of the world’s most beloved dishes. For years, the traditional pizza crust, while undeniably delicious, has often been a significant barrier for those following low-carb, keto, or gluten-free lifestyles. But what if I told you there’s a magnificent alternative that offers all the satisfaction of a classic pie without compromising your dietary goals? Imagine sinking your teeth into a savory, protein-packed base that perfectly holds your favorite toppings!
This culinary innovation, born from the growing demand for healthier and more inclusive eating options, isn’t just a fleeting trend; it’s a testament to how creative we can get in the kitchen. I find the ingenuity behind this dish absolutely fascinating. It emerged as a brilliant solution, particularly within the low-carb and gluten-free communities, transforming the humble chicken into a surprisingly sturdy and incredibly flavorful foundation for your toppings. This modern twist allows everyone to partake in pizza night joyfully.
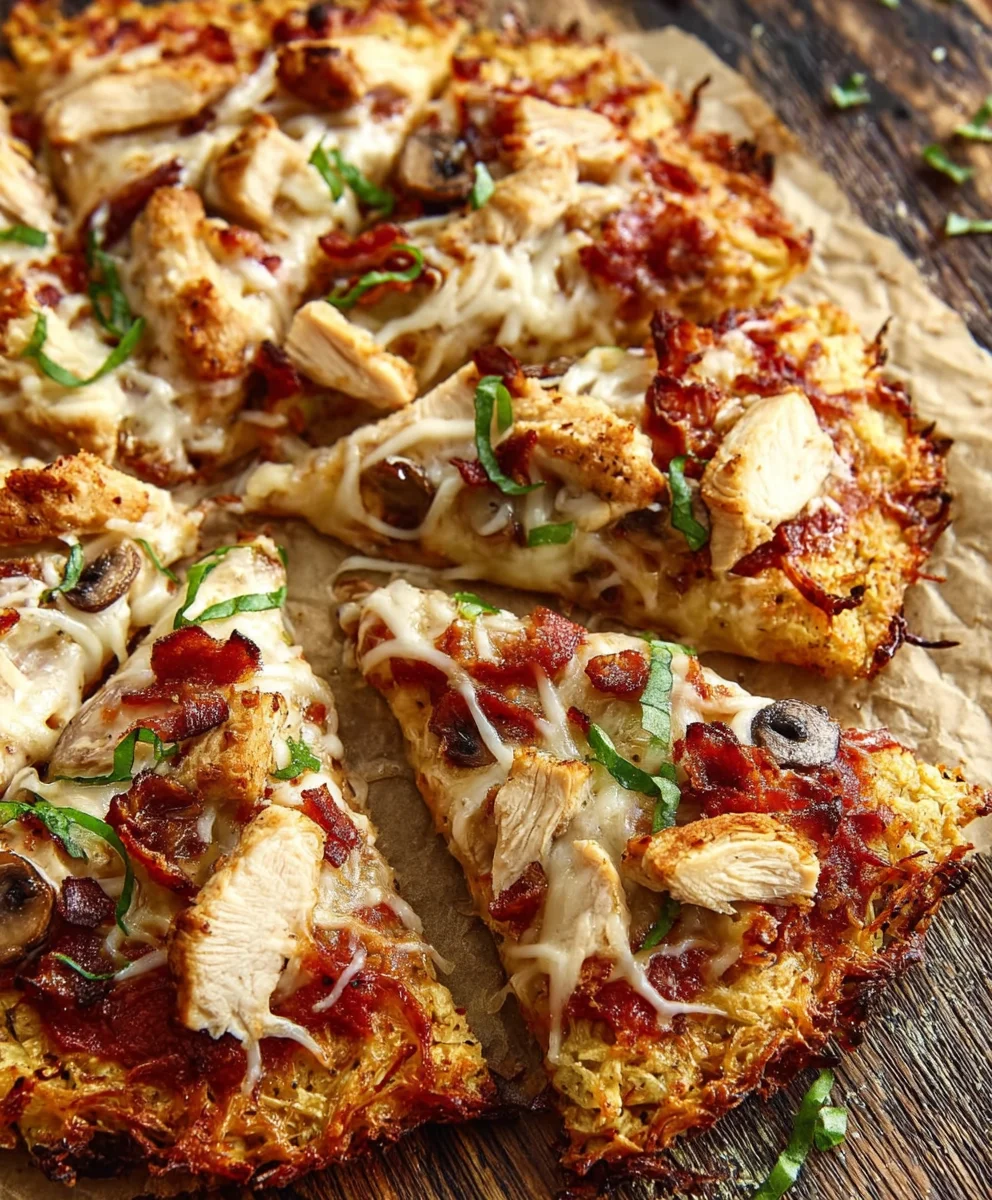
People absolutely adore this dish not only for its inherent health benefits – it’s naturally gluten-free and packed with protein – but also for its exceptional taste and texture. Imagine a robust crust that crisps beautifully in the oven, providing the perfect counterpoint to rich sauces, gooey cheese, and an array of fresh vegetables and meats. This isn’t merely a substitute; it’s a genuinely delicious experience that stands proudly on its own. Preparing your very own homemade Chicken Crust Pizza means you no longer have to miss out on pizza night; instead, you get to embrace a deliciously guilt-free version tailored exactly to your preferences, making every bite a celebration.

Ingredients:
Creating a truly magnificent Chicken Crust Pizza starts with the right foundation. Here’s everything you’ll need to build a delicious, low-carb masterpiece:
For the Chicken Crust:
- Ground Chicken: 1.5 lbs (about 680g), ideally 90-93% lean for the best texture and moisture balance. This forms the incredibly sturdy and flavorful base of our pizza.
- Grated Parmesan Cheese: 1/2 cup (about 50g), finely grated. This is crucial not only for adding a savory, umami flavor but also as a powerful binder, helping our chicken crust hold its shape.
- Large Egg: 1, essential to further bind the mixture together, ensuring a cohesive and sturdy crust that won’t fall apart.
- Garlic Powder: 1 teaspoon. A foundational flavor that complements chicken beautifully and gives that classic, inviting aroma.
- Onion Powder: 1 teaspoon. Adds a subtle depth of flavor without overpowering the other ingredients, creating a more complex taste profile in the crust.
- Dried Oregano: 1 teaspoon. This herb truly seals the deal for a pizza-like experience right in the crust, infusing it with that familiar Italian-inspired taste.
- Salt: 1/2 teaspoon, or to taste. Essential for enhancing all the other flavors and ensuring the chicken crust isn’t bland.
- Black Pepper: 1/4 teaspoon, freshly ground if possible, for a touch of warmth and a subtle aromatic kick.
For the Pizza Toppings:
- Your Favorite Pizza Sauce: 1/2 cup (about 120ml), preferably a low-sugar or keto-friendly marinara if you’re watching your carbohydrate intake. The sauce ties all the flavors together.
- Shredded Mozzarella Cheese: 1.5 cups (about 170g), low-moisture, whole milk for the best melt, stretch, and classic pizza appearance.
- Optional Additional Toppings: Feel free to customize and make this pizza truly your own! Some of my all-time favorites include:
- Sliced pepperoni (a classic for a reason!)
- Mushrooms, thinly sliced (add a wonderful earthy texture)
- Bell peppers, thinly sliced (for a pop of color and sweetness)
- Red onion, thinly sliced (adds a pungent, savory bite)
- Black olives, sliced (for a briny, Mediterranean touch)
- Fresh basil, for garnish after baking (adds a vibrant, aromatic finish)
Important Crust-Making Insights (Straight from My Kitchen to Yours!):
Through countless batches and a few learning curves, I’ve gathered some crucial wisdom for perfecting this chicken crust. Pay close attention to these points, as they truly make all the difference between a good pizza and a fall-apart mess:
- Press the mixture firmly – Loose crust will fall apart when you try to eat it. This cannot be stressed enough! A well-compacted crust is the ultimate secret to a pizza that holds together beautifully from the first bite to the last.
- I learned the cooling lesson after cutting into it immediately and having it fall apart completely. Those 5 minutes really do make all the difference in getting slices that hold together. Patience is a profound virtue, especially after your pizza comes out of the oven. Resist the urge to slice too soon!
- Also, I used to not press the mixture firmly enough and ended up with crumbly crust that couldn’t support toppings. Reaffirming the first point, insufficient pressing is a common pitfall that leads to disappointment and a frustrating pizza experience.
Equipment You’ll Need:
Having the right tools makes the process smoother and more enjoyable:
- Large mixing bowl: For combining all your crust ingredients.
- Baking sheet: A standard half-sheet pan, roughly 13×18 inches, works perfectly to give you ample space for your crust.
- Parchment paper: Absolutely non-negotiable! This prevents sticking and ensures easy transfer of your delicate crust.
- Spatula or your hands: For efficient mixing and, most importantly, for shaping and pressing the crust.
- Measuring cups and spoons: For precise ingredient measurements.
- Wire cooling rack: Essential for the post-bake cooling process.
- Pizza cutter or sharp knife: For clean, easy slicing.
Step-by-Step Instructions:
Get ready to transform simple ingredients into a show-stopping “Chicken Crust Pizza” that will impress even the most skeptical carb-lovers and delight your taste buds!
Prepping Your Workspace & Oven:
- Preheat Your Oven: My first step is always to get the oven ready to go. Preheat your oven to a steady 400°F (200°C). This ensures that by the time your chicken crust is meticulously crafted and ready, the oven is at the optimal temperature for even cooking and a perfectly browned finish. A properly preheated oven is key to preventing a soggy crust.
- Prepare Your Baking Sheet: Line a large baking sheet (I typically use a 13×18 inch half-sheet pan as it provides enough surface area for a generously sized pizza) with a sheet of parchment paper. This step is absolutely essential and I cannot emphasize it enough! The parchment paper acts as a non-stick barrier, preventing the chicken mixture from adhering to the pan and making it incredibly easy to transfer, manipulate, and ultimately remove your pizza later. Believe me, trying to navigate this recipe without parchment paper can lead to a sticky, frustrating mess and a potentially broken crust when you try to lift it.
Crafting the Perfect Chicken Crust:
- Combine Crust Ingredients: In your large mixing bowl, the foundation of your pizza begins to take shape. Add the 1.5 lbs of ground chicken, 1/2 cup of finely grated Parmesan cheese, 1 large egg, 1 teaspoon of garlic powder, 1 teaspoon of onion powder, 1 teaspoon of dried oregano, 1/2 teaspoon of salt, and 1/4 teaspoon of black pepper. Each ingredient plays a vital role in both flavor and structure.
- Mix Thoroughly: Now, this is where your hands become your best tools! Wearing food-safe gloves or ensuring your hands are meticulously clean, thoroughly mix all the ingredients until they are completely combined. You want to ensure the seasonings, cheese, and egg are evenly distributed throughout the ground chicken. This thorough mixing helps create a cohesive, uniform “dough” that will hold together beautifully. I find squeezing and folding the mixture firmly for about 2-3 minutes works best to integrate everything properly. You’ll feel the texture change from loose ground chicken to a more paste-like, moldable consistency.
- Shape the Crust (The CRITICAL Step!):
- Transfer and Spread: Carefully transfer the entire chicken mixture onto the center of the prepared parchment paper on your baking sheet.
- Form the Shape: Using your clean hands or the back of a sturdy spatula, begin to spread the mixture evenly into your desired pizza shape. I usually go for a large oval or rectangle, aiming for dimensions roughly 10×14 inches, and about 1/4 to 1/3 inch thick. Think about the size of your baking sheet and leave about an inch border from the edge of the parchment paper for ease of handling.
- Press FIRMLY: This is, without a doubt, arguably the most crucial step for a successful chicken crust pizza! As I’ve learned through countless batches and a few disappointing mishaps, “Press the mixture firmly – Loose crust will fall apart when you try to eat it.” Use the palm of your hand, a flat bottom of a measuring cup, or even another piece of parchment paper on top to press the chicken mixture down very firmly and evenly across the entire surface. You want to compact it as much as humanly possible, almost as if you’re trying to flatten it into a dense, solid patty. I also vividly recall the frustration of ending up with a crumbly mess that couldn’t support any toppings: “Also, I used to not press the mixture firmly enough and ended up with crumbly crust that couldn’t support toppings.” Take your time here; a solid, compact crust is the absolute foundation of your pizza’s structural integrity. Ensure there are no thin spots or gaps, and create a slightly raised edge around the perimeter to mimic a traditional pizza crust, which will also help contain your delicious toppings.
Baking the Naked Crust:
- First Bake: Carefully transfer the baking sheet with your raw, firmly pressed chicken crust to the preheated oven. Bake for an initial 18-22 minutes. The exact time can vary slightly depending on the thickness of your crust and the calibration of your oven. During this phase, the chicken cooks through and the crust begins to firm up.
- Check for Doneness and Drain: The crust should be fully cooked through, with the chicken no longer pink, and it should appear lightly golden brown around the edges. You might notice some liquid (rendered fat and juices) pooling on top of the crust; this is completely normal. If there’s excessive liquid, carefully remove the baking sheet from the oven and use paper towels to gently dab off and absorb any excess moisture. This step is important to prevent a soggy final pizza.
Adding Your Delicious Toppings:
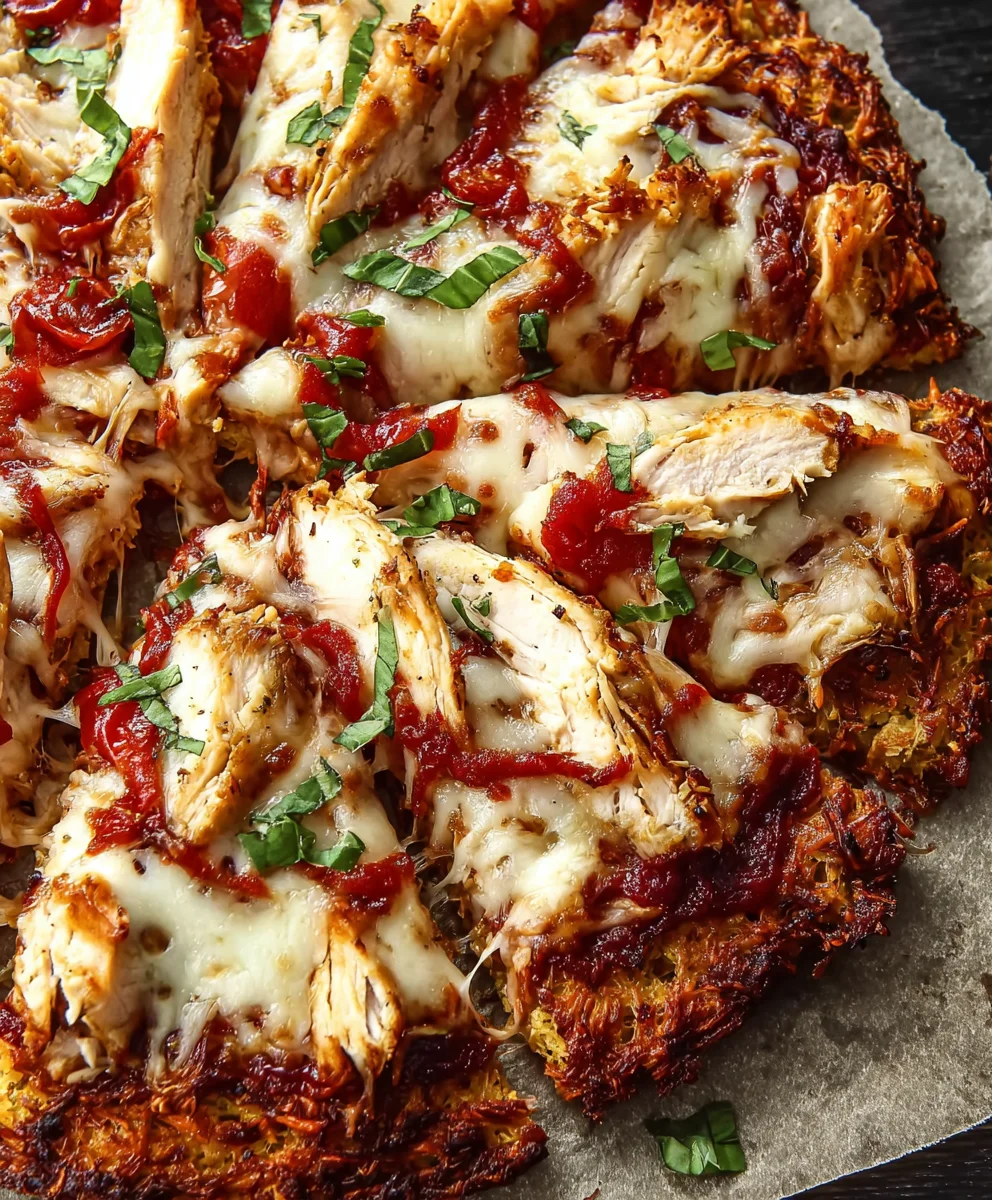
- Remove and Add Sauce: Carefully remove the partially baked and drained crust from the oven. Evenly spread your 1/2 cup of pizza sauce over the entire surface of the crust, leaving a small, clean border for your “crust edge.” This visual border makes it look even more like a traditional pizza.
- Layer on the Cheese: Generously sprinkle the 1.5 cups of shredded mozzarella cheese over the sauce. I am a firm believer that you can never have too much cheese on a pizza, so I don’t skimp here! The mozzarella will melt into a beautiful, bubbly, golden layer.
- Pile on Your Preferred Toppings: Now’s the time to let your culinary creativity shine! Arrange your chosen optional toppings (pepperoni, mushrooms, bell peppers, etc.) artfully and evenly over the cheese. A word of caution: while it’s tempting to load up, try not to overload the pizza, especially with high-moisture vegetables. Remember, while the chicken crust is sturdy, balance is key to ensuring everything cooks evenly, the crust maintains its integrity, and you get a perfect bite every time.
The Final Bake & The Golden Rule of Cooling:
- Second Bake: Return the pizza to the oven for its final cooking phase. Bake for an additional 8-12 minutes, or until the cheese is gloriously melted, bubbly, and beautifully golden brown, and any toppings are cooked to your liking. Keep a close eye on it during these final minutes to prevent any potential burning. Every oven is different, so trust your eyes!
- The Critical Cooling Phase: This is arguably the most important post-baking step where your patience truly pays off in spades. Once your pizza is out of the oven, do not, I repeat, DO NOT cut into it immediately! Instead, carefully slide the parchment paper with the pizza still on it directly onto a wire cooling rack. Allow it to cool undisturbed for a full 5 minutes. I speak from extensive personal experience when I say, “I learned the cooling lesson after cutting into it immediately and having it fall apart completely. Those 5 minutes really do make all the difference in getting slices that hold together.” This crucial cooling time allows the molten cheese to set and the chicken crust to firm up even further, preventing your beautiful slices from falling apart into a disappointing mess when you cut them.
Serving Your Masterpiece:
- Slice and Serve: After the essential cooling period, carefully slide the entire pizza (still on the parchment paper) onto a clean cutting board. Using a sharp pizza cutter or a large chef’s knife, slice your chicken crust pizza into your desired portions. I typically go for 6-8 slices, depending on the size of the pizza.
- Enjoy Immediately: Serve your chicken crust pizza hot and relish in the incredible flavor and satisfying texture of your homemade, guilt-free creation! I love seeing the expressions on people’s faces when they take their first bite and realize it’s not a traditional flour-based crust, yet it’s incredibly delicious and satisfying.
Tips for Success & Variations:
I’ve made this Chicken Crust Pizza countless times, and over time, I’ve picked up a few extra tricks and ideas to make it even better, and to customize it to your heart’s desire. These little adjustments can elevate your pizza experience significantly.
Choosing Your Ground Chicken:
While 90-93% lean ground chicken is my personal go-to for its excellent balance of flavor and lower fat content, resulting in a firm yet moist crust, you do have options. If you opt for 99% lean ground chicken breast, which is very low in fat, consider adding a touch more Parmesan cheese (an extra tablespoon) or even a tablespoon of olive oil to the mixture. This will help prevent the crust from becoming too dry and ensure it retains some much-needed moisture. Conversely, if you use regular ground chicken (like 85% lean), you might notice a bit more liquid pooling on top of the crust during the first bake. Don’t worry, this is normal; simply dab it off thoroughly with paper towels before you proceed to add your delicious toppings.
Seasoning Your Crust:
The beauty of this chicken crust recipe is its inherent adaptability. The chicken crust itself is a blank canvas for flavor, and I encourage you to feel absolutely free to experiment with the crust seasonings to match your preferences or the toppings you’re planning to use!
- For a Spicy Kick: If you love a bit of heat, try adding 1/2 teaspoon of red pepper flakes directly into the chicken mixture. It infuses a lovely warmth throughout the crust.
- For an Herbaceous Boost: Incorporate fresh herbs like a tablespoon of finely chopped parsley or chives for a brighter, more vibrant flavor profile that complements the chicken beautifully.
- For Classic Italian Flair: A small pinch of fennel seed or a dash of your favorite Italian seasoning blend can really enhance that quintessential pizza taste right in the crust, making it even more authentic.
Remember, the goal is to make the crust flavorful enough to stand on its own as a delicious base, yet always complementary to your chosen toppings. Don’t be afraid to taste and adjust before forming!
Topping Inspiration:
The sky’s the limit when it comes to pizza toppings! Beyond the tried-and-true classics, here are some creative ideas to spark your imagination and make every chicken crust pizza a unique culinary adventure:
- BBQ Chicken Pizza: Swap out the traditional pizza sauce for a sugar-free BBQ sauce as your base. Top with pre-cooked shredded chicken, thinly sliced red onion, and a sprinkle of fresh cilantro after baking for a smoky, tangy delight.
- Buffalo Chicken Pizza: For those who love a kick, mix a bit of your favorite hot sauce with a touch of ranch dressing for the base. Top with pre-cooked shredded buffalo chicken, mozzarella, and then drizzle with extra ranch or blue cheese dressing after baking.
- Veggie Lovers’ Paradise: Load up on an array of non-starchy vegetables like fresh spinach, marinated artichoke hearts, roasted bell peppers, or thinly sliced zucchini. A crucial tip here: always be sure to pre-cook any high-moisture vegetables (like mushrooms or zucchini) briefly beforehand. This helps to draw out excess water, preventing a soggy pizza crust.
- Meat Lovers’ Feast: In addition to pepperoni, consider adding cooked crumbled Italian sausage, crispy bacon bits, or diced ham for an protein-packed, savory experience.
Always remember not to overload the crust, especially with watery vegetables, as this can affect the crust’s texture. If using fresh mushrooms or bell peppers, slicing them very thinly and perhaps even sautéing them briefly beforehand can significantly prevent excess moisture from compromising your perfectly crisp crust.
Meal Prep and Storage:
This Chicken Crust Pizza isn’t just for a fresh dinner; it’s also fantastic for meal prep, making healthy eating convenient and delicious throughout the week!
- Storing Leftovers: Any leftover slices can be stored in an airtight container in the refrigerator for up to 3-4 days. This makes for an excellent grab-and-go lunch or a quick dinner on a busy weeknight.
- Reheating: For the best results and to regain that delightful crispness, reheat individual slices in a toaster oven or a regular oven at 350°F (175°C) for about 5-10 minutes, or until thoroughly warmed through and the crust crisps up again. While microwaving is an option for speed, be aware that the crust might lose some of its crisp texture.
- Freezing for Later: You can absolutely prep this pizza for future meals! Bake the crust as directed, let it cool completely, and then you can freeze it either plain (without toppings) or with sauce and cheese (but without any watery toppings). Wrap it tightly first in plastic wrap and then in aluminum foil to prevent freezer burn. When you’re ready to enjoy, simply unwrap, add your desired toppings, and bake from frozen at 400°F (200°C) for a longer period (typically around 20-30 minutes, or until heated through and the cheese is beautifully bubbly).
Why Chicken Crust Pizza?
Beyond being a uniquely delicious and innovative way to enjoy pizza, this recipe offers fantastic benefits, especially if you’re mindful of your dietary choices:
- Low Carb/Keto Friendly: It’s an excellent and highly satisfying alternative for those following low-carbohydrate or ketogenic diets, as it completely eliminates traditional flour-based crusts, which are high in carbs.
- High Protein: The crust itself is a powerhouse of protein, making this pizza incredibly satisfying and helping you stay full and energized for longer periods. It’s a fantastic way to increase your protein intake while enjoying a beloved comfort food.
- Naturally Gluten-Free: Since it contains no grains, this recipe is naturally gluten-free, making it a wonderful and safe option for individuals with gluten sensitivities, celiac disease, or anyone looking to reduce gluten in their diet.
I often recommend this recipe to friends and family looking for healthier, yet equally delicious, dinner options that don’t compromise on flavor or satisfaction. It’s truly a game-changer in the world of healthy eating and a staple in my kitchen!
Conclusion:
And there you have it, my friends! We’ve journeyed together through the simple yet utterly transformative process of creating what I truly believe is a game-changer in the world of home cooking. This isn’t just another recipe; it’s an invitation to rediscover your love for pizza without any of the usual guilt or dietary compromises. I’m genuinely so excited for you to experience the magic of this dish firsthand. Imagine biting into a slice that’s perfectly crispy, bursting with your favorite flavors, and knowing that every ingredient is working in harmony with your health goals. That’s the promise of this incredible recipe. It’s about indulging your cravings in a way that truly nourishes your body and satisfies your soul. No more missing out on pizza night because of dietary restrictions; this recipe brings the joy back to your kitchen and your dinner table, delivering a hearty, protein-packed meal that feels like a treat.
I can’t tell you how many times I’ve heard from people who thought their days of enjoying truly satisfying pizza were over because of dietary restrictions or a desire to eat healthier. This recipe shatters that misconception entirely! It’s designed to be approachable for everyone, whether you’re a seasoned home chef or someone just starting to explore the joys of cooking. The beauty of the chicken crust is its inherent flexibility and its incredible ability to mimic that traditional pizza base texture we all crave, all while delivering a powerful protein punch that keeps you feeling fuller and more energized. It’s a testament to the idea that healthy eating doesn’t have to mean sacrificing flavor or fun. In fact, it often means discovering even more delicious and creative ways to nourish your body. This culinary innovation proves that you can have your pizza and eat it too, embracing a healthier lifestyle without giving up on the foods you love. It truly is a win-win situation for your taste buds and your well-being.
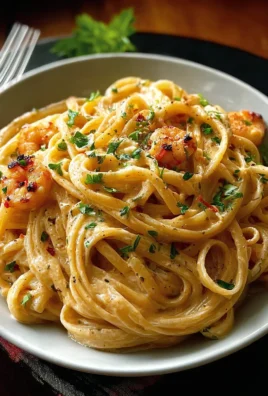
Now, let’s talk about turning this amazing creation into an entire meal experience. While this pizza is fantastic on its own, it plays wonderfully with a few complementary sides. For a light and refreshing addition, consider a crisp green salad tossed with a simple vinaigrette – the acidity will cut through the richness of the pizza beautifully. If you’re looking for something a bit more substantial but still low-carb, some roasted asparagus or broccoli florets seasoned with garlic and a squeeze of lemon would be absolutely perfect. Another excellent choice would be a side of sautéed zucchini or a small bowl of olives to add a Mediterranean touch. And to drink? A sparkling water with a hint of citrus or a dry red wine if you’re indulging in a more sophisticated evening. The possibilities are truly endless, allowing you to tailor your meal to your mood and occasion, making every pizza night feel special and complete.
But the real fun begins when you start experimenting with variations. The basic Chicken Crust Pizza is a blank canvas, just waiting for your personal artistic touch. Don’t be afraid to mix things up! Instead of classic mozzarella, try a blend of provolone and cheddar, or even a sprinkle of parmesan for a saltier kick. For a different flavor profile, swap out the marinara for a creamy Alfredo sauce base, and top with grilled chicken (yes, more chicken!) and spinach for a decadent white pizza experience. Craving a bit of heat? Add some red pepper flakes to your sauce or scatter a few sliced jalapeños on top before baking. You could even create a breakfast pizza variation with a white gravy base, scrambled eggs, cheese, and crumbled bacon – perfect for a weekend brunch! The versatility of this crust means you’re only limited by your imagination. It holds up beautifully to a wide array of toppings, from rich meats to fresh vegetables, ensuring every slice is a delightful adventure for your taste buds, customized exactly to your liking. Feel free to explore different herbs, spices, and cheese combinations to discover your ultimate flavor profile.
So, what are you waiting for? I sincerely hope you’ll give this incredible recipe a try very soon. It’s more than just a meal; it’s an experience that’s bound to impress your family, delight your friends, and most importantly, satisfy your own cravings in the healthiest way possible. Don’t just follow the recipe; make it your own! Adjust the seasonings, play with the toppings, and discover your new favorite pizza combination. This recipe is an invitation to culinary creativity, offering a foundation upon which you can build countless delicious meals. Once you’ve made it, I would absolutely love to hear about your culinary adventure. Please come back and share your experiences in the comments below, or even better, snap a photo and tag me on social media. Your success stories and creative variations are what inspire me and our community of healthy food lovers. Happy cooking, and get ready to fall head over heels for this amazing healthy alternative!
Frequently Asked Questions (FAQs)
Q: How do I prevent the chicken crust from sticking to the pan?
A: The key to a perfectly non-stick chicken crust lies in a combination of proper pan preparation and a little bit of technique. First, always line your baking sheet with parchment paper, not wax paper, as parchment paper can withstand higher temperatures and provides an excellent non-stick surface. Additionally, a light spray of cooking oil or a brush of olive oil directly onto the parchment paper, especially where the crust will make contact, can create an extra layer of protection. Ensure your chicken mixture isn’t too wet; squeezing out any excess moisture before forming the crust also helps prevent sticking and promotes a crispier texture. Finally, make sure your oven is fully preheated to the specified temperature before you put the crust in to bake. This helps to set the crust quickly and prevents it from adhering to the parchment.
Q: Can I prepare the chicken crust ahead of time?
A: Absolutely! This is one of the convenient aspects of making a homemade chicken crust. You can prepare the chicken crust mixture (after combining all ingredients) up to 24 hours in advance. Store it covered in an airtight container in the refrigerator. When you’re ready to use it, simply take it out, press it onto your parchment-lined baking sheet, and proceed with the recipe instructions for baking the crust. You can also partially bake the crust ahead of time, let it cool completely, and then store it in the refrigerator for a day or two, or even freeze it for longer storage. If freezing, wrap it tightly in plastic wrap and then foil. When ready to use, thaw it in the fridge overnight and then continue with adding toppings and final baking.
Q: What are some good low-carb topping ideas for this pizza?
A: The beauty of a low-carb pizza crust like ours is that it opens up a world of delicious, healthy toppings! For classic flavors, think about sugar-free marinara sauce, plenty of mozzarella cheese, pepperoni, sausage, or crumbled bacon. Vegetarians can rejoice with options like mushrooms, bell peppers (any color!), onions (sautéed for extra sweetness), spinach, black olives, artichoke hearts, and even sun-dried tomatoes (watch the carb count on these, though). For something a bit different, consider grilled chicken (a great way to use leftovers!), a drizzle of pesto, fresh basil, feta cheese, or even a sprinkle of goat cheese. Don’t forget healthy fats like avocado slices added after baking. The key is to choose fresh, unprocessed ingredients and be mindful of any hidden sugars in sauces.
Q: Is Chicken Crust Pizza really healthier than traditional pizza?
A: Yes, generally speaking, a Chicken Crust Pizza is significantly healthier than traditional flour-based pizza, especially for those following low-carb, keto, or gluten-free diets. The main reason is the absence of high-carb, processed flour. Traditional pizza crusts are typically made from refined wheat flour, which is high in carbohydrates and can spike blood sugar levels. Our chicken crust, on the other hand, is rich in lean protein, which helps with satiety, muscle building, and stable blood sugar. It also usually contains far fewer calories and provides more essential nutrients than a carb-heavy crust. Of course, the health benefits also depend on your choice of toppings; opting for lean meats and plenty of vegetables will maximize the nutritional value. It’s a fantastic way to enjoy a pizza experience without the heavy, often inflammatory effects of a typical dough.
Q: How should I store leftover Chicken Crust Pizza?
A: Storing leftover Chicken Crust Pizza is easy! Allow any leftover slices to cool completely to room temperature first. Then, place them in an airtight container or wrap them tightly in aluminum foil. They will keep well in the refrigerator for up to 3-4 days. To reheat, I recommend using a conventional oven or a toaster oven rather than a microwave. Preheat your oven to around 350°F (175°C), place the slices directly on a baking sheet or on foil, and bake for 8-12 minutes, or until the cheese is bubbly and the crust is crispy again. This method helps restore the texture and prevents the crust from becoming soggy, which can sometimes happen with microwave reheating. You can also freeze individual slices for longer storage (up to 2-3 months) by wrapping them well; thaw in the fridge before reheating.
Chicken Crust Pizza: Low Carb, High Protein Delight!
Create a delicious, low-carb, high-protein pizza masterpiece with a sturdy chicken crust. This recipe offers a satisfying, gluten-free, and keto-friendly alternative to traditional flour-based pizzas.
Ingredients
-
1.5 lbs (680g) Ground Chicken (90-93% lean)
-
1/2 cup (50g) Grated Parmesan Cheese
-
1 Large Egg
-
1 tsp Garlic Powder
-
1 tsp Onion Powder
-
1 tsp Dried Oregano
-
1/2 tsp Salt
-
1/4 tsp Black Pepper
-
1/2 cup (120ml) Low-Sugar Pizza Sauce
-
1.5 cups (170g) Shredded Mozzarella Cheese
-
Optional Toppings:
-
Sliced beef pepperoni
-
Mushrooms, thinly sliced
-
Bell peppers, thinly sliced
-
Red onion, thinly sliced
-
Black olives, sliced
-
Fresh basil, for garnish
Instructions
-
Step 1
Preheat oven to 400°F (200°C). Line a 13×18 inch baking sheet with parchment paper to prevent sticking and ease handling. -
Step 2
In a large mixing bowl, combine the ground chicken, Parmesan cheese, egg, garlic powder, onion powder, dried oregano, salt, and black pepper. -
Step 3
Using clean hands, thoroughly mix all crust ingredients for 2-3 minutes until completely combined and the mixture forms a cohesive, moldable consistency. -
Step 4
Transfer the chicken mixture onto the parchment paper. Spread it evenly into a 10×14 inch oval or rectangle, 1/4 to 1/3 inch thick. Press the mixture down very firmly and evenly across the entire surface. A well-compacted crust is essential; loose crust will fall apart. Form a slightly raised edge. -
Step 5
Bake the crust for 18-22 minutes, until fully cooked through and lightly golden brown. If excessive liquid pools on top, carefully remove the sheet and dab off excess moisture with paper towels to prevent a soggy crust. -
Step 6
Remove the partially baked crust from the oven. Evenly spread pizza sauce, then generously sprinkle shredded mozzarella cheese. Arrange your chosen optional toppings (e.g., sliced beef pepperoni, mushrooms, bell peppers) artfully over the cheese. Avoid overloading the crust, especially with high-moisture vegetables. -
Step 7
Return the pizza to the oven for an additional 8-12 minutes, or until the cheese is gloriously melted, bubbly, and golden brown, and toppings are cooked to your liking. Monitor closely to prevent burning. -
Step 8
Immediately after baking, slide the pizza (still on parchment paper) onto a wire cooling rack. Allow it to cool undisturbed for a full 5 minutes. This crucial cooling time allows the molten cheese to set and the chicken crust to firm up, ensuring slices hold together perfectly and do not fall apart. -
Step 9
After cooling, transfer the pizza to a cutting board. Use a sharp pizza cutter or knife to slice into 6-8 portions. Serve hot and enjoy your homemade, guilt-free delight!
Important Information
Nutrition Facts (Per Serving)
It is important to consider this information as approximate and not to use it as definitive health advice.
Allergy Information
Please check ingredients for potential allergens and consult a health professional if in doubt.
Leave a Comment