
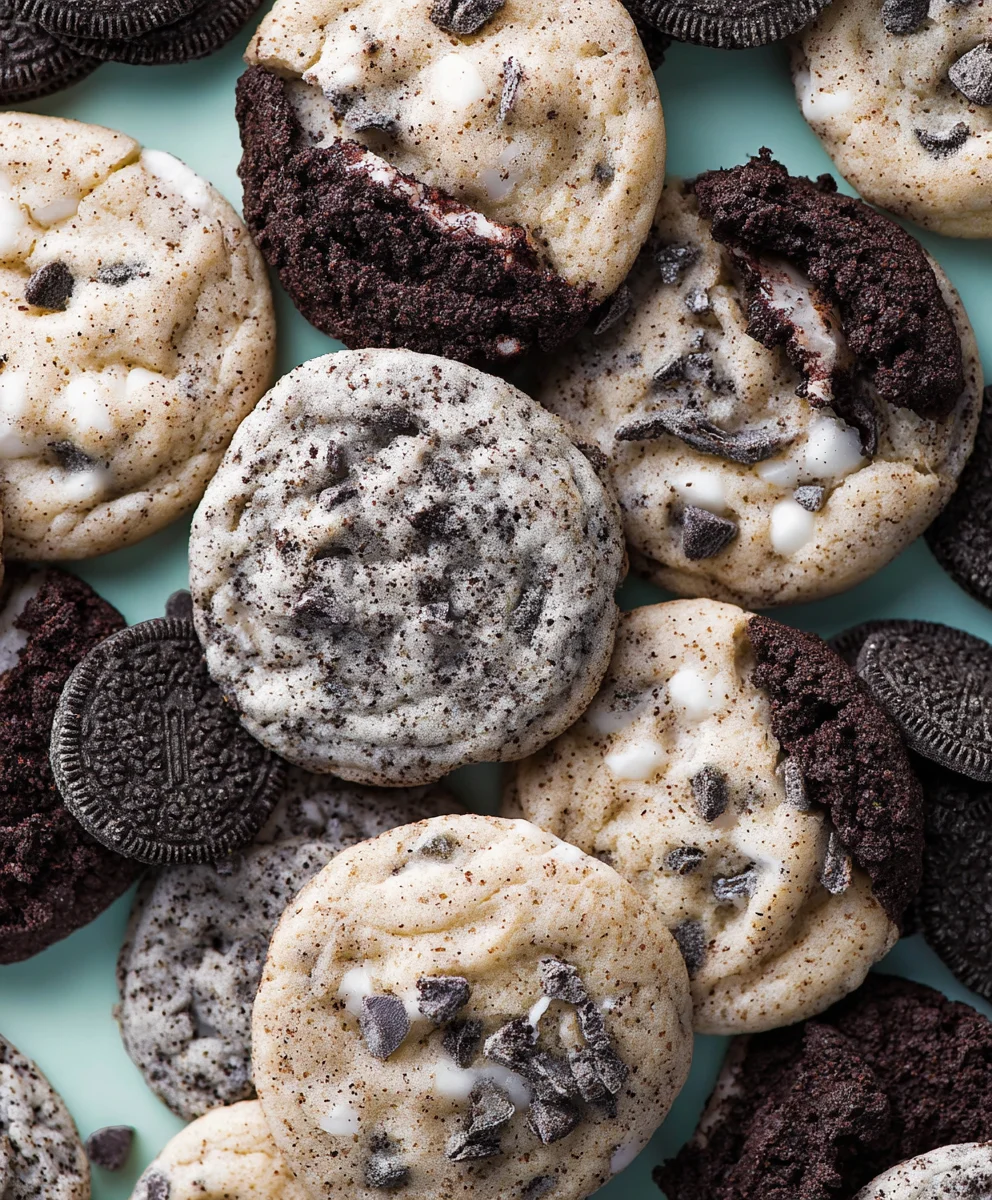
Cookies And Cream Cookie Recipe is more than just a collection of ingredients; it’s an invitation to experience pure, unadulterated joy in every single bite. I’m absolutely delighted to share with you a dessert that transcends the ordinary, transforming a beloved ice cream flavor into a chewy, delightful cookie. The iconic combination of rich chocolate cookie pieces nestled within a sweet, vanilla-infused dough creates a symphony of textures and tastes that has captivated hearts for decades. While the specific cookie version might be a newer innovation, the “cookies and cream” flavor profile itself emerged in the 1970s, quickly becoming a global sensation in ice cream parlors and dessert shops, celebrated for its unique blend of creamy sweetness and satisfying crunch.
Why We Love This Indulgent Treat
People absolutely adore this dish because it delivers on so many fronts. It offers the comforting chewiness of a classic cookie, perfectly complemented by the delightful, slightly bitter crunch of crushed chocolate sandwich cookies. This isn’t just another cookie; it’s a nostalgic journey, a perfect treat for any occasion, from a casual family gathering to a sophisticated dessert table. The ease with which these cookies come together, combined with their universally appealing flavor, makes this specific Cookies And Cream Cookie Recipe an absolute must-try for any baking enthusiast. Prepare to impress everyone with these irresistibly delicious creations!

Ingredients:
- 2 ½ cups (300g) all-purpose flour: I always make sure it’s unbleached for the best texture in my cookies, ensuring they’re tender and not too dense.
- 1 teaspoon baking soda: This is our secret to that perfect rise and slightly chewy interior for our Cookies And Cream Cookie Recipe. It reacts with the brown sugar to create that lovely airy texture.
- ½ teaspoon salt: Just a touch to balance the sweetness and really make the flavors pop. Don’t skip this, as it brightens all the other ingredients.
- 1 cup (226g) unsalted butter: Make sure it’s softened to room temperature! This is absolutely crucial for a smooth, creamy dough. If it’s too cold, it won’t cream properly with the sugar; too warm, and your cookies might spread too much, becoming thin and greasy.
- ¾ cup (150g) granulated sugar: For sweetness and a little crispness on the edges of our Cookies And Cream Cookie Recipe.
- ¾ cup (165g) packed light brown sugar: This adds moisture, incredible chewiness, and a lovely molasses flavor that complements the chocolatey goodness of the cookies and cream perfectly. Make sure it’s packed tightly into your measuring cup for accuracy.
- 2 large eggs: Room temperature, please! They emulsify better with the butter and sugar, leading to a more uniform and stable dough. Cold eggs can cause the butter to seize up, affecting the final texture.
- 2 teaspoons vanilla extract: I always use pure vanilla extract; it makes such a significant difference in flavor depth and aroma compared to artificial versions.
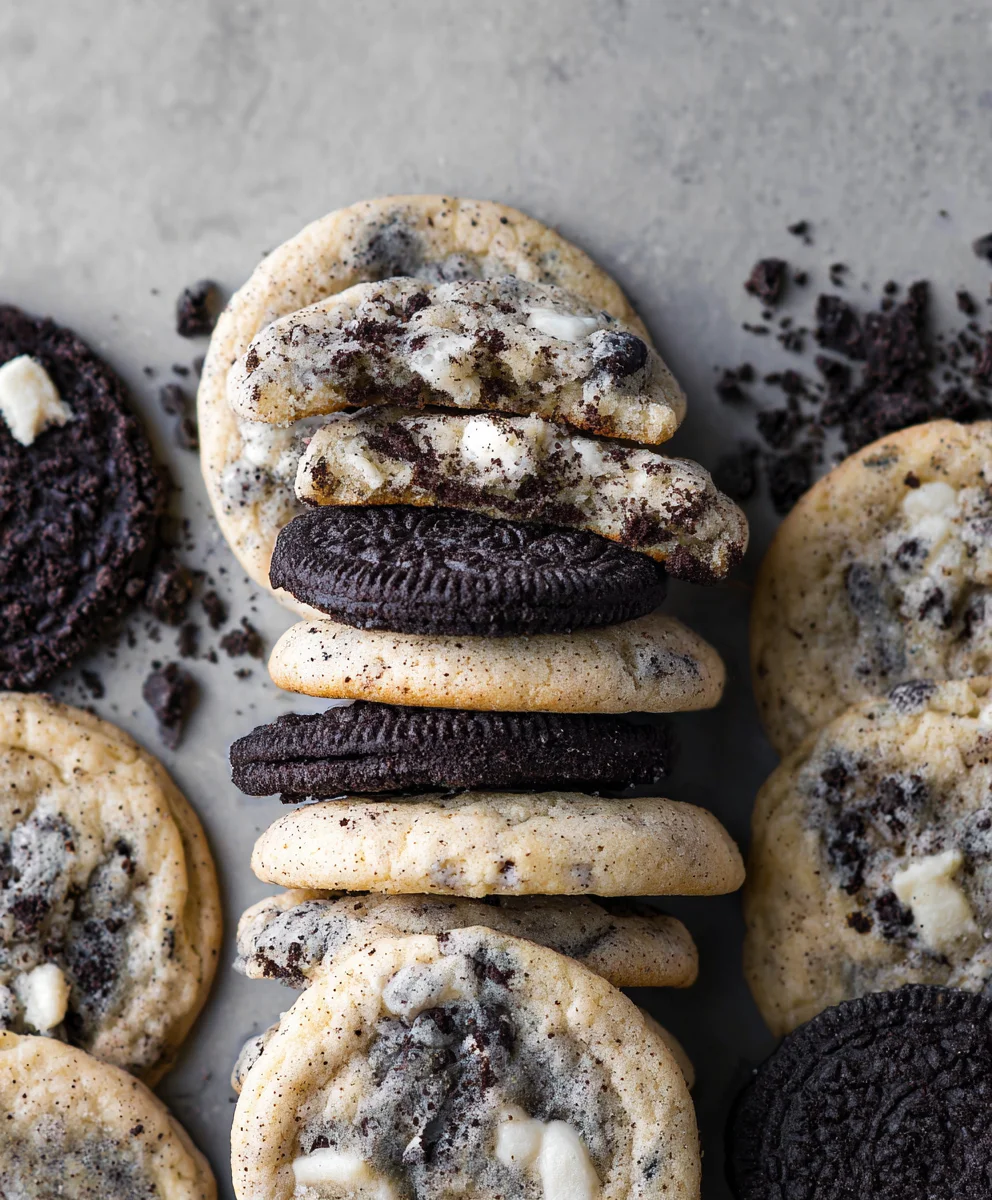
- 1 ½ cups (about 180g) crushed chocolate sandwich cookies (like Oreos): This is truly the star of our Cookies And Cream Cookie Recipe! You’ll want to crush them into various sizes – some fine crumbs, some larger chunks – for an amazing textural experience in every bite. I typically use about 15-20 standard-sized cookies.
- 1 cup (170g) white chocolate chips: These add an extra layer of sweetness and a delightful creamy texture, tying the “cream” aspect of the recipe together beautifully. They melt into pockets of pure bliss.
- Optional: ½ cup (60g) extra crushed chocolate sandwich cookies: For sprinkling on top before baking, making them look extra irresistible and giving them that bakery-style finish. This really amplifies the visual appeal of your Cookies And Cream Cookies.
Preparation – Getting Started
- Bring Ingredients to Room Temperature: Before you even think about mixing, please take your butter and eggs out of the refrigerator at least an hour, or even two, before you plan to start baking. Room temperature ingredients are incredibly important for achieving the perfect emulsion when creaming butter and sugar, which in turn leads to a smooth, uniform cookie dough that bakes up beautifully. If your butter is too cold, it won’t cream properly, resulting in a dense, tough cookie. If your eggs are too cold, they can cause the butter to seize up and become lumpy, again negatively affecting the texture. Trust me on this, a little patience here goes a long way in making the best Cookies And Cream Cookie Recipe you’ve ever tasted. This foundational step truly sets the stage for success.
- Preheat Your Oven and Prepare Baking Sheets: Set your oven to 375°F (190°C). While it’s heating up, line two large baking sheets with parchment paper or silicone baking mats. I always recommend parchment paper because it prevents sticking, promotes even baking by insulating the bottom of the cookies, and makes for super easy cleanup afterward. Plus, it helps regulate the bottom temperature of the cookies, preventing them from browning too quickly underneath while the centers are still baking. You definitely don’t want burnt bottoms on your glorious Cookies And Cream Cookies! Having your sheets ready means a smooth transition once the dough is mixed.
- Prepare the Chocolate Sandwich Cookies: This is the fun and slightly therapeutic part! Take your 1 ½ cups of chocolate sandwich cookies and place them in a large zip-top bag. Use a rolling pin, the bottom of a heavy glass, or even your clean hands to crush them. Aim for a variety of textures: some fine crumbs that will subtly flavor the dough, some medium pieces for chewiness, and even a few larger chunks that will provide delightful bursts of chocolatey crunch. These different sizes will add fantastic textural interest and visual appeal to your Cookies And Cream Cookie Recipe. If you prefer, you can also pulse them briefly in a food processor, but be very careful not to turn them all into powder; you want distinct, recognizable pieces of cookie for that authentic “cookies and cream” experience.
Crafting the Dough
- Whisk Dry Ingredients: In a medium bowl, whisk together your 2 ½ cups of all-purpose flour, 1 teaspoon of baking soda, and ½ teaspoon of salt. Make sure to whisk them really well, about 30 seconds to a minute, until everything is thoroughly combined. This step isn’t just about mixing; it’s about aerating the flour, making it lighter, and, crucially, evenly distributing the leavening agent (baking soda) and salt throughout. Even distribution is absolutely key for consistent rise, flavor, and texture in every single cookie you bake. Set this bowl aside for a moment while you move on to the wet ingredients.
- Cream Butter and Sugars: In the bowl of a stand mixer fitted with the paddle attachment (or a large bowl with an electric hand mixer), add your 1 cup (226g) of softened unsalted butter, ¾ cup (150g) of granulated sugar, and ¾ cup (165g) of packed light brown sugar. Beat on medium speed for about 2 to 3 minutes, or until the mixture is light, fluffy, and noticeably pale in color. This creaming process is utterly vital! It incorporates air into the butter and sugar mixture, creating tiny air pockets that will expand in the oven, giving your Cookies And Cream Cookies that wonderfully soft, tender, and chewy texture we all crave. Make sure to scrape down the sides of the bowl with a spatula periodically to ensure everything is thoroughly combined and no pockets of unmixed butter or sugar remain. You want a perfectly uniform, airy base for your dough.
- Incorporate Eggs and Vanilla: With the mixer on low speed, add the two large room-temperature eggs one at a time, beating well after each addition until just combined. It’s important not to overmix at this stage. After the eggs are fully incorporated, stir in the 2 teaspoons of pure vanilla extract. The mixture might look a little curdled after adding the first egg, but don’t worry, this is normal and it will come together as you add the second and continue to mix gently. This step helps bind everything together, adds richness, and infuses essential flavor into your base cookie dough for the Cookies And Cream Cookie Recipe. The vanilla truly complements the chocolate notes.
- Gradually Add Dry Ingredients: Reduce the mixer speed to low. Gradually add the dry ingredient mixture (flour, baking soda, salt) to the wet ingredients, a third at a time, mixing only until just combined after each addition. The golden rule here is to avoid overmixing at all costs! Overmixing develops the gluten in the flour too much, which can lead to tough, dry, and less tender cookies, which is the exact opposite of what we want for our soft and chewy Cookies And Cream Cookie Recipe. As soon as you see no more streaks of flour, stop the mixer. A little bit of flour dust remaining in the bowl is perfectly okay; you’ll finish mixing it by hand in the next step when you add the mix-ins.
Incorporating the Star Ingredient
- Fold in the Goodies: Remove the bowl from the mixer. Now, add your 1 ½ cups of crushed chocolate sandwich cookies and 1 cup of white chocolate chips to the dough. Using a sturdy rubber spatula or a wooden spoon, gently fold them into the dough until they are evenly distributed throughout. Be very careful not to crush the white chocolate chips or the larger cookie chunks too much during this process; we want to preserve their texture. The goal is to incorporate them without overworking the dough, which could toughen it. This is where the magic really happens for our Cookies And Cream Cookie Recipe, ensuring every single bite is loaded with delicious texture, contrasting flavors, and that iconic “cookies and cream” experience. Take your time and be thorough but gentle to achieve the perfect distribution.
Baking Perfection
- Portion the Dough: Using a 2-tablespoon cookie scoop (or just your hands if you prefer to roll them), scoop rounded balls of dough onto your prepared baking sheets. Leave about 2 inches of space between each cookie to allow for adequate spreading during baking. I usually fit about 9-12 cookies per standard baking sheet, depending on the size. If you’re using the optional extra ½ cup of crushed cookies, now is the perfect time to gently press a few more pieces onto the tops of your dough balls for an extra professional, visually stunning, and appealing look. This step isn’t just for aesthetics; it truly enhances the “cookies and cream” visual appeal, making them even more inviting and showcasing the star ingredient.
- Bake the Cookies: Place one baking sheet at a time into your preheated 375°F (190°C) oven. Bake for approximately 9 to 12 minutes, or until the edges are lightly golden brown and the centers are still looking slightly soft, puffy, and perhaps a touch underbaked. It is crucial to keep a close eye on them! Oven temperatures can vary significantly, and what might take 9 minutes in one oven could take 12 in another. You’re looking for that perfect balance – set edges, but a gooey, slightly underbaked center that will finish cooking on the hot baking sheet once removed from the oven. This results in that ideal chewy-soft texture that everyone loves in a good Cookies And Cream Cookie Recipe. Don’t be tempted to overbake them, as that will lead to a dry, crumbly, and less satisfying cookie.
- Rotate for Even Baking (Optional but Recommended): If your oven tends to have hot spots, or if you notice uneven browning, halfway through the baking time (around the 5-6 minute mark), you can carefully rotate the baking sheet 180 degrees. This simple step helps ensure that all your Cookies And Cream Cookies bake evenly, preventing some from being too dark while others are still pale. It’s a small effort that yields big results in consistency.
- Cool on Baking Sheet: Once baked, carefully remove the baking sheets from the oven. Allow the cookies to cool on the baking sheets for about 5 to 10 minutes. This is an incredibly crucial step that many eager bakers skip! The residual heat from the hot baking sheet will continue to cook the cookies gently and help them set up properly, firming up their structure. If you try to move them too soon, they’re very likely to fall apart, as they’re still extremely delicate and soft right out of the oven. This short resting period also helps develop their final texture – making them perfectly chewy and sturdy enough to handle.
Cooling and Enjoying
- Transfer to a Wire Rack: After their brief cool-down period on the baking sheet, carefully transfer the cookies to a wire cooling rack to cool completely. Using a wire rack is important because it ensures air circulation all around the cookie, preventing the bottoms from becoming soggy due to trapped steam and helping them achieve that ideal crispy edge and perfectly chewy center. It also completely stops the baking process. Patience is a true virtue here! While it’s incredibly tempting to dive right into these warm Cookies And Cream Cookies, completely cooled cookies have a much better set texture and the flavors truly meld together for a more harmonious taste experience.
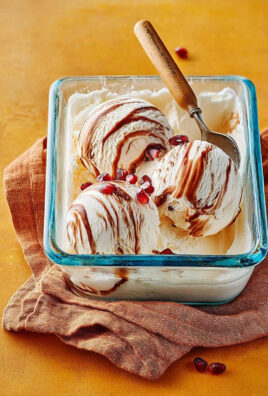
- Serve and Enjoy: Once fully cooled (or even slightly warm, if you just can’t resist, I won’t judge!), these magnificent Cookies And Cream Cookies are ready to be devoured! They are absolutely fantastic on their own, with a cold glass of milk for that classic pairing, or even crumbled over a scoop of vanilla ice cream for an extra decadent dessert that truly celebrates the “cookies and cream” theme. Share them with friends and family, or keep them all to yourself – you’ve earned it!
Tips for the Best Cookies And Cream Cookies
- Don’t Skip the Room Temperature Ingredients: I cannot stress this enough for this Cookies And Cream Cookie Recipe. It’s the absolute foundation for a good dough and directly impacts the texture of your final cookie. Cold butter won’t cream properly, leading to a denser, less airy cookie, and cold eggs can curdle the mixture, resulting in a less uniform and potentially tougher cookie. Plan ahead and ensure your butter and eggs are truly at room temperature for optimal results.
- Measure Flour Correctly: For baking, especially for cookies where precision matters, proper flour measurement is critical. I always recommend using a kitchen scale for accuracy (2 ½ cups is approximately 300g). If you don’t have one, use the ‘spoon and level’ method: lightly spoon flour into your dry measuring cup until it’s overflowing, then level it off with the back of a knife. Never scoop directly from the bag, as this compacts the flour and can result in using too much, leading to dry, dense, and crumbly cookies instead of the soft and chewy kind we’re aiming for.
- Don’t Overmix the Dough: This is a common pitfall! Once the flour is added, mix only until just combined. Overmixing develops gluten, which can make your Cookies And Cream Cookies tough instead of wonderfully tender and chewy. A few visible streaks of flour are perfectly fine at this stage; you’ll finish combining everything when you gently fold in the crushed cookies and chocolate chips by hand.
- Customize Your Cookie Crush: The texture of your crushed chocolate sandwich cookies is a personal preference, and it significantly impacts the final cookie experience. For a more pronounced “cookies and cream” experience, aim for a good mix of fine crumbs (which will flavor the dough) and larger chunks (which provide satisfying texture and visual appeal). The larger pieces provide a delightful crunch and distinct cookie flavor, while the crumbs integrate into the dough, giving it a subtle chocolatey hue and taste throughout. Experiment with how you crush them to find your ideal consistency!
- Chill the Dough (Optional but Recommended for Thicker Cookies): If you prefer thicker cookies that spread less, or if your kitchen is particularly warm and your dough feels very soft, consider chilling the dough for 30 minutes to an hour before baking. This solidifies the butter in the dough, which in turn slows down spreading in the oven, resulting in a slightly thicker, chewier, and more defined cookie. If you choose to chill, you might need to add an extra minute or two to the baking time to ensure they’re cooked through.
- Use Good Quality Chocolate Chips: While any white chocolate chips will work in this Cookies And Cream Cookie Recipe, investing in a good quality brand can elevate the flavor and texture significantly. High-quality white chocolate chips tend to melt more smoothly and have a richer, creamier taste that really complements the chocolate sandwich cookies and the overall “cream” aspect of the cookie.
- Storage: Once completely cooled, store your Cookies And Cream Cookies in an airtight container at room temperature for up to 3-5 days to maintain their freshness and chewiness. If you want to keep them fresh longer, you can freeze the baked cookies for up to 2-3 months. Just make sure they are thoroughly cooled before placing them in a freezer-safe bag or container to prevent ice crystals from forming. Alternatively, you can scoop portions of raw dough onto a parchment-lined baking sheet and freeze until solid, then transfer the frozen dough balls to a freezer bag. Bake from frozen whenever a craving strikes, adding a few extra minutes to the baking time.
- Embrace the Warm Cookie Experience: While cooling completely allows the flavors to meld and the texture to fully set, there’s absolutely nothing wrong with enjoying one of these magnificent cookies while it’s still slightly warm. The gooey, melted white chocolate and the soft, chewy texture are truly divine straight from the oven (after that initial 5-10 minute cool-down on the baking sheet, of course!). It’s a special treat worth indulging in.
- Consider a Dash of Instant Espresso Powder: For those who love a bit of depth in their chocolate treats, a tiny pinch (about ¼ teaspoon) of instant espresso powder or finely ground coffee added to the dry ingredients can subtly enhance and intensify the chocolate flavor of the crushed cookies without making the cookie taste distinctly like coffee. It’s a secret weapon I often use to make chocolate flavors pop! This addition can elevate your Cookies And Cream Cookie Recipe to a whole new level of deliciousness.
Conclusion:
And there you have it, my friends! We’ve reached the end of our journey through what I truly believe is one of the most delightful cookie experiences you’ll ever bake. This isn’t just another cookie; it’s an event, a moment of pure, unadulterated joy packed into every single bite. If you’ve been searching for that one recipe that consistently delivers on flavor, texture, and sheer ‘wow’ factor, then your quest ends here. I promise you, this particular creation stands head and shoulders above many other dessert recipes you might encounter. It’s a guaranteed crowd-pleaser, perfect for any occasion, from casual weeknight treats to impressive party platters.
What makes this Cookies And Cream Cookie Recipe an absolute must-try? Well, where do I even begin? First, there’s the incredibly soft and chewy texture that holds up perfectly, never becoming too dry or crumbly. Each cookie boasts a tender interior that practically melts in your mouth, contrasted beautifully with ever-so-slightly crisp edges. Then, of course, there’s the flavor: that iconic, irresistible taste of cookies and cream, but elevated. We’re talking about a rich, vanilla-infused dough that serves as the perfect canvas, generously studded with those beloved chocolate sandwich cookie crumbles. The balance of sweetness is absolutely spot-on, ensuring that each bite is decadent without being overwhelming. It’s a nostalgic flavor that appeals to everyone, from the pickiest eaters to the most seasoned dessert connoisseurs. This recipe has been meticulously crafted to ensure maximum flavor and optimal texture every single time, making it incredibly reliable for bakers of all skill levels. You don’t need to be a pastry chef to achieve bakery-quality results with these beauties; just follow the simple steps, and you’ll be rewarded with cookies that look as good as they taste.
Serving Suggestions to Elevate Your Cookies and Cream Experience
Once you pull these glorious cookies from the oven, still warm and fragrant, the possibilities for enjoyment are endless! Of course, devouring them straight off the cooling rack with a tall glass of cold milk is a classic for a reason – it’s pure bliss. But let’s get a little creative, shall we? Imagine turning these into decadent ice cream sandwiches; simply soften your favorite vanilla bean ice cream, spread it generously between two cooled cookies, and then refreeze. It’s an instant gourmet dessert that will impress anyone at your next gathering!
For a sophisticated twist, try crumbling a few cookies over a bowl of high-quality vanilla or chocolate ice cream, or even over a panna cotta or a simple fruit parfait for added texture and a burst of flavor. They also make an incredible topping for milkshakes or sundaes, adding a delightful crunch and that familiar, beloved taste. Hosting a brunch? These cookies, perhaps cut into quarters, make a fantastic addition to a dessert charcuterie board alongside fresh berries, cheeses, and other sweet treats. And if you’re looking for the ultimate gift, a beautifully packaged tin of these homemade cookies is always a winner – thoughtful, delicious, and utterly heartwarming. They travel well, too, making them perfect for potlucks, office parties, or sending to loved ones far away. Just make sure to bake an extra batch, because they have a mysterious way of disappearing quickly!
Exciting Variations to Spark Your Creativity
While the original recipe is perfection in my humble opinion, I always encourage a little experimentation in the kitchen! If you’re feeling adventurous, here are a few ideas to put your own unique spin on this sensational treat. For an extra layer of decadence, try folding in a cup of white chocolate chips along with the crushed cookies; the creamy sweetness of the white chocolate beautifully complements the chocolate cookie pieces. Or, if you’re a fan of a little extra richness, a handful of dark chocolate chunks would be equally divine, adding a wonderful depth of flavor and a lovely contrast.
Consider swapping out a portion of the crushed chocolate sandwich cookies for other flavors – perhaps some golden vanilla sandwich cookies for a slightly different aesthetic and taste profile, or even some mint-flavored ones for a festive holiday twist that brings a refreshing zing. Another fantastic idea is to drizzle the cooled cookies with melted white chocolate or dark chocolate, perhaps even creating a beautiful crosshatch pattern for a professional finish that adds visual appeal. You could also sprinkle a tiny pinch of flaky sea salt on top of the warm cookies right after baking to enhance all those incredible flavors, creating that beloved sweet and salty contrast that makes everything taste even better. For a truly unique experience, try stuffing the center of each cookie dough ball with a spoonful of cream cheese frosting or even a mini marshmallow before baking; the surprise gooey center will be an absolute delight and a wonderful conversation starter!
Your Turn: Bake, Enjoy, and Share!
Now, it’s your turn. My greatest hope is that you don’t just read about this incredible recipe, but that you actually step into your kitchen, preheat your oven, and experience the magic for yourself. I am genuinely confident that this recipe will become a cherished staple in your baking repertoire. It’s designed for success, and I know you’re going to love the results. So, gather your ingredients, follow the steps carefully, and prepare to be amazed by the delightful aroma that fills your home and the even more delightful taste that awaits you and your loved ones.
Once you’ve baked your batch, please, please, please come back and share your experience with me! I absolutely adore hearing from you and seeing your creations. Did you try a fun variation? Did they disappear in minutes at your family gathering or office potluck? What was your favorite part about making or eating them? Leave a comment below, or even better, snap a photo of your beautiful cookies and share them on your social media. Let’s spread the cookie love far and wide and inspire others to try this truly exceptional recipe. Happy baking, my friends!
Best Cookies and Cream Cookie Recipe: Sweet & Creamy!
This Cookies And Cream Cookie Recipe is an invitation to experience pure, unadulterated joy in every single bite. It transforms a beloved ice cream flavor into a chewy, delightful cookie, with rich chocolate cookie pieces nestled within a sweet, vanilla-infused dough. This iconic combination creates a symphony of textures and tastes that has captivated hearts for decades.
Ingredients
-
1 cup + 2 tablespoons all-purpose flour
-
1 teaspoon cornstarch
-
3/4 teaspoon baking powder
-
1/2 teaspoon baking soda
-
1/2 teaspoon salt
-
4 tablespoons unsalted butter, softened
-
1/2 cup + 2 tablespoons granulated sugar
-
1 large egg
-
1 teaspoon vanilla extract
-
10 chocolate sandwich cookies, coarsely chopped
-
1/2 cup white chocolate chips
Instructions
-
Step 1
Ensure butter and egg are at room temperature. Preheat oven to 375°F (190°C). Line a baking sheet with parchment paper. Coarsely chop 10 chocolate sandwich cookies, aiming for a mix of crumbs and chunks. -
Step 2
In a medium bowl, whisk together all-purpose flour, cornstarch, baking powder, baking soda, and salt. Set aside. -
Step 3
In a large bowl, cream softened unsalted butter with granulated sugar until light and fluffy (2-3 minutes). Scrape down the bowl. -
Step 4
Beat in the large egg until just combined, then stir in vanilla extract. -
Step 5
Gradually add the dry ingredient mixture to the wet mixture, mixing on low speed until just combined. Do not overmix. -
Step 6
Remove bowl from mixer. Gently fold in the crushed chocolate sandwich cookies and white chocolate chips with a spatula until evenly distributed. -
Step 7
Scoop rounded balls of dough (approx. 2 tablespoons each) onto the prepared baking sheet, leaving 2 inches between them. Bake for 9-12 minutes, or until edges are lightly golden and centers are slightly soft. -
Step 8
Let cookies cool on the baking sheet for 5-10 minutes to set. Then, transfer to a wire rack to cool completely. Serve and enjoy!
Important Information
Nutrition Facts (Per Serving)
It is important to consider this information as approximate and not to use it as definitive health advice.
Allergy Information
Please check ingredients for potential allergens and consult a health professional if in doubt.

Leave a Comment