
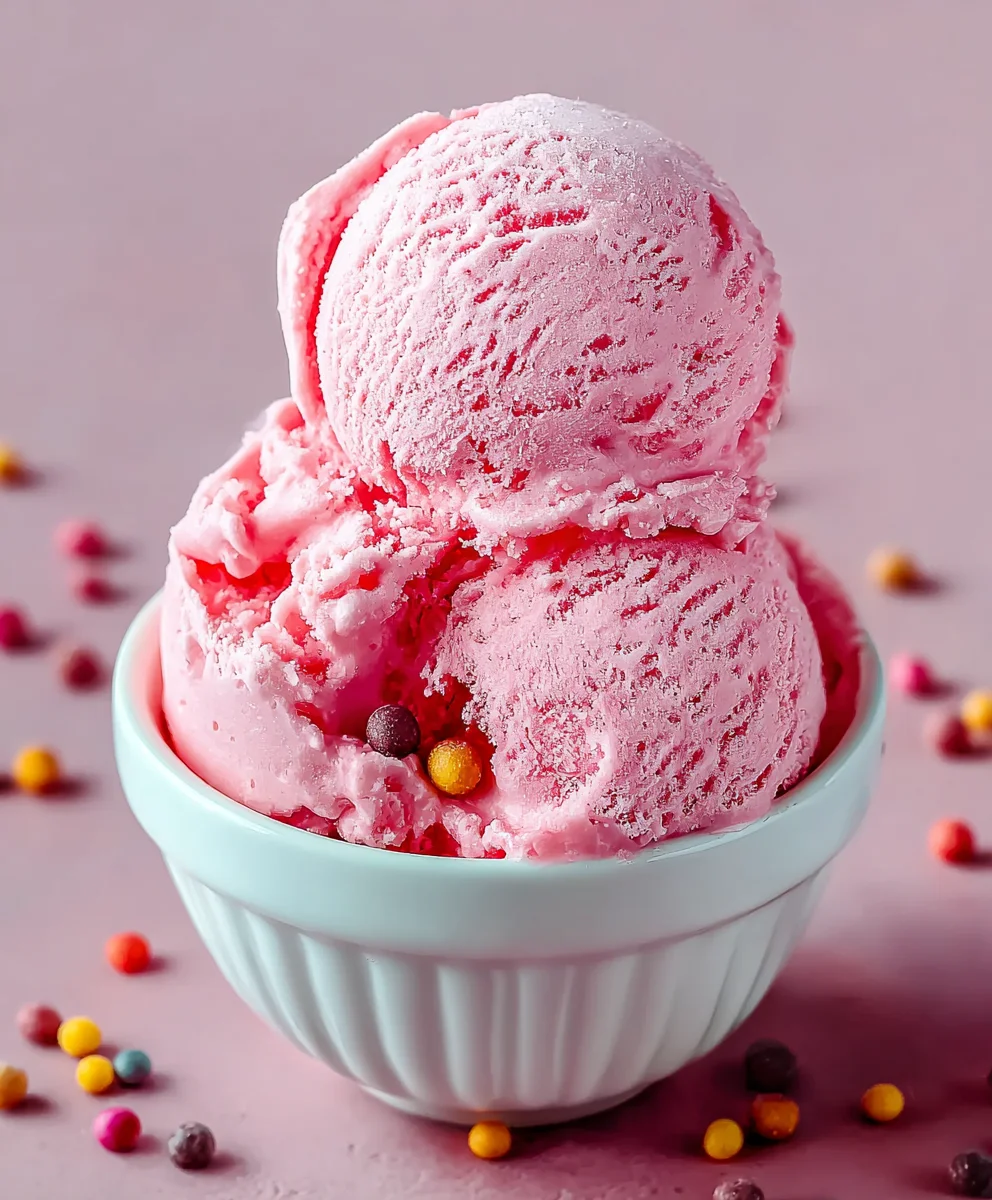
Bubblegum Ice Cream is more than just a dessert; it’s a vibrant journey back to childhood, a playful indulgence that immediately brings a smile to anyone’s face. I remember the sheer delight of encountering this wonderfully whimsical flavor for the first time – its impossibly bright colors and distinct, sweet aroma promised an adventure in every scoop. While it may not boast a centuries-old lineage like some classic desserts, its cultural significance lies in its modern ability to evoke pure, unadulterated joy and a powerful sense of nostalgia for simpler times.
Why We Adore This Whimsical Treat
People absolutely adore this dish, myself included, for a multitude of reasons. It’s not just the uniquely sweet and fruity taste, reminiscent of our favorite childhood bubblegum, but also the luxuriously creamy texture that often hides delightful little candy surprises. The visual appeal alone is captivating, making it a showstopper at any gathering. Creating your own homemade Bubblegum Ice Cream is an incredibly rewarding experience, transforming simple ingredients into a magical, memory-making treat. I am thrilled to guide you through the process of crafting this beloved, colorful dessert that promises to be a hit with both young and old.

Ingredients:
- For the Custard Base:
- 2 cups (480ml) whole milk
- 1 cup (240ml) heavy cream (or whipping cream, at least 36% fat)
- 3/4 cup (150g) granulated sugar, divided
- 6 large egg yolks
- 1/4 teaspoon fine sea salt
- 1 teaspoon pure vanilla extract (optional, but enhances flavor)
- For the Bubblegum Infusion and Color:
- 10-12 pieces of classic bubblegum (the kind you can chew, like Bazooka or Dubble Bubble, unwrapped) – ensure they are not sugar-free, as artificial sweeteners can affect the texture.
- 1/2 teaspoon bubblegum flavoring extract (optional, for an extra punch of flavor, if you feel the infused gum isn’t enough)
- 1/2 teaspoon pink or blue gel food coloring (or a combination for a swirl effect) – gel coloring provides vibrant color without diluting the base.
- For the Fun Add-ins:
- 1/2 cup (100g) small, candy-coated gumballs (approx. 1/4 to 1/2 inch in diameter) – make sure they are soft enough to chew when frozen. Avoid very hard gumballs, as they can become rock-solid in ice cream.
Preparing the Luxurious Custard Base
- Gather Your Tools and Ingredients: Before you begin, ensure you have a medium saucepan, a whisk, a heat-proof rubber spatula, a fine-mesh sieve, a large bowl for an ice bath, and another medium-sized bowl ready for your egg yolks. Having everything prepped makes the process smooth and prevents scrambling. I always find a clean kitchen makes for a happy chef!
- Warm the Dairy: In your medium saucepan, combine the whole milk, heavy cream, and half of the granulated sugar (3/8 cup or 75g). Place the saucepan over medium heat. Stir occasionally with your whisk or spatula to dissolve the sugar and prevent scorching on the bottom. Heat this mixture just until it starts to steam gently around the edges and tiny bubbles form, but do not let it come to a rolling boil. This usually takes about 5-7 minutes. Once it’s warm and fragrant, remove it from the heat for a moment.
- Whisk the Egg Yolks: While your dairy is warming, place the egg yolks, the remaining half of the granulated sugar (3/8 cup or 75g), and the fine sea salt into a separate medium bowl. Whisk vigorously until the mixture becomes pale yellow and thickens slightly. This process, often called “ribboning,” means that when you lift the whisk, the mixture falls back into ribbons that slowly dissolve back into the bowl. The sugar acts as a protective agent for the egg yolks, helping to prevent them from scrambling.
- Temper the Egg Yolks (The Crucial Step!): This is where we prevent a scrambled egg dessert! Slowly, gradually, and in a thin stream, pour about one cup of the warm milk mixture into the whisked egg yolk mixture, whisking constantly and vigorously. The goal here is to slowly bring the temperature of the egg yolks up to match the milk, without cooking them too quickly. Once that first cup is incorporated, pour the tempered egg yolk mixture back into the saucepan with the remaining warm milk. Continue to whisk as you do this to ensure everything is well combined.
- Cook the Custard: Return the saucepan to medium-low heat. Cook the custard, stirring continuously with your rubber spatula, making sure to scrape the bottom and sides of the pan. This process requires patience and constant attention. The custard is ready when it thickens enough to coat the back of your spatula – a classic test is to draw a line with your finger across the coated spatula; if the line holds without the custard running, it’s done. This is often referred to as “nappe” consistency. It typically takes about 8-12 minutes. Do not let the custard boil, as this will cause the eggs to curdle. If you have a thermometer, aim for 170-175°F (77-79°C).
- Strain for Smoothness: Immediately remove the custard from the heat. Pour it through a fine-mesh sieve into a clean, heat-proof bowl. This step is vital for ensuring a perfectly smooth, silky ice cream base by catching any tiny bits of cooked egg that may have formed, or any impurities. It’s my secret to truly luxurious ice cream! Stir in the optional vanilla extract at this point.
Infusing That Iconic Bubblegum Flavor and Color
- Introduce the Bubblegum: While the custard is still warm (but not scalding hot), add the unwrapped pieces of bubblegum directly into the strained custard base. The warmth of the custard will help to soften the gum and extract its flavor. Stir gently to submerge the gum pieces.
- Steep and Infuse: Cover the bowl with plastic wrap, pressing it directly onto the surface of the custard to prevent a skin from forming. Place the bowl in the refrigerator and allow the bubblegum to steep and infuse its flavor into the custard for at least 4 hours, or preferably overnight. The longer it steeps, the more pronounced the bubblegum flavor will be. This slow, cool infusion really allows the nostalgic essence of the bubblegum to permeate the creamy base.
- Remove the Gum and Add Color: After the infusion period, remove the plastic wrap. Using tongs, a slotted spoon, or clean hands, carefully remove all the pieces of bubblegum from the custard base. You’ll notice they might be a bit softer and stickier, and some of their vibrant color may have leached into the custard – that’s exactly what we want! Discard the used gum. Now, it’s time to add the fun visual appeal! Add 1/2 teaspoon of pink or blue gel food coloring to the custard. Start with a smaller amount and add more if you desire a deeper, more vibrant hue. Whisk thoroughly until the color is evenly distributed throughout the base. If using the optional bubblegum flavoring extract, stir it in now as well for an extra pop of flavor.
Chilling for Perfection
- The Importance of Thorough Chilling: For truly amazing homemade ice cream, the custard base absolutely must be thoroughly chilled before churning. If the base isn’t cold enough, your ice cream maker won’t be able to churn it into a properly creamy texture; instead, you’ll end up with a slushy, icy mess that melts too quickly. I always tell people this is one of the most critical steps, so don’t rush it!
- Refrigerator Chill: After infusing and coloring, cover the bowl of bubblegum-flavored custard again with plastic wrap (or transfer it to an airtight container) and place it in the refrigerator. Allow it to chill for a minimum of 6-8 hours, or even better, overnight. The goal is to get the mixture to about 39°F (4°C) or colder.
- Speedy Chilling (Optional Ice Bath Method): If you’re short on time and can’t wait overnight, you can set up an ice bath. Place your bowl of hot custard into a larger bowl filled with ice and a little cold water, making sure the water doesn’t overflow into your custard. Stir the custard frequently to help it cool down evenly and quickly. Once it reaches room temperature, transfer it to the refrigerator to finish chilling completely. Even with an ice bath, it will still need at least 2-4 hours in the fridge to reach the optimal churning temperature.
Churning Towards Creamy Bliss
- Prepare Your Ice Cream Maker: Make sure the freezer bowl of your ice cream maker has been thoroughly frozen, typically for at least 12-24 hours, or according to your manufacturer’s instructions. A properly frozen bowl is crucial for efficient churning. If you have a compressor ice cream maker, you can skip this step, but still ensure it’s clean and ready to go.
- Churn the Base: Pour the thoroughly chilled bubblegum custard base into your ice cream maker. Churn according to your machine’s instructions, which usually takes about 20-30 minutes. As it churns, you’ll witness the magical transformation from a liquid custard into a thick, soft-serve consistency. It’s truly satisfying to watch! The ice cream will expand and thicken significantly.
- Add the Gumballs: During the last 5 minutes of churning, or just as the ice cream reaches that perfect soft-serve consistency, add the small, candy-coated gumballs directly into the churning ice cream. This allows them to be evenly distributed without getting crushed too much or sinking to the bottom. If your machine’s opening is small, you might need to stop the churning briefly to add them, then restart.
Adding the Fun Factor and Final Freeze
- Transfer to a Freezer-Safe Container: Once the ice cream is churned to a soft-serve consistency with the gumballs mixed in, carefully transfer it from the ice cream maker into a freezer-safe container. A shallow, wide container often works best for faster freezing. I love using a loaf pan or a sturdy plastic container with a tight-fitting lid.
- The Firming Freeze: Press a piece of parchment paper or plastic wrap directly onto the surface of the ice cream to prevent ice crystals from forming (this is called freezer burn, and it’s the enemy of creamy ice cream!). Then, cover the container with its lid. Place the container in the coldest part of your freezer.
- Harden and Enjoy: Allow the bubblegum ice cream to freeze and harden for at least 4-6 hours, or preferably overnight, for the best scoopable texture. This final freeze allows the ice cream to firm up properly, developing that wonderful creamy, yet firm, consistency we all adore. When you’re ready to serve, let it sit at room temperature for 5-10 minutes to soften slightly, making it easier to scoop. Then, dive into that nostalgic, delightful flavor of homemade bubblegum ice cream!
Chef’s Notes and Tips for Your Best Bubblegum Ice Cream
Making homemade ice cream, especially something as fun and unique as bubblegum ice cream, is a true labor of love, and a rewarding one at that! Here are a few extra tips and insights I’ve gathered over my years of perfecting frozen treats, to ensure your batch is absolutely perfect and captures that whimsical bubblegum spirit.
Choosing Your Gumballs Wisely:
This is paramount for an enjoyable eating experience. Not all gumballs are created equal when it comes to being frozen. You want small, candy-coated gumballs that are known for being softer. Avoid large, hard gumballs at all costs, as they will become unpleasantly rock-solid when frozen. Think about the gumballs you find in typical children’s candy mixes or those designed for ice cream toppings. A quick taste test of a gumball before you add it can give you a hint of its frozen potential. If it’s already quite firm at room temperature, it will be a dental hazard in your ice cream.
Flavor Intensity Adjustment:
The flavor strength of the bubblegum ice cream largely depends on the type of gum you use and how long you infuse it. If after removing the gum, you taste the base and feel it needs a stronger bubblegum punch, this is where that optional bubblegum flavoring extract comes in handy. Start with 1/4 teaspoon, stir it in thoroughly, and taste. Add more in small increments until you reach your desired flavor intensity. Remember, flavors can be slightly muted when frozen, so don’t be afraid to go a little bolder than you might initially think.
Color Customization:
While pink is the classic bubblegum color, don’t limit yourself! Blue is also a fantastic option, and you could even do a swirl of both pink and blue by dividing your base and coloring each half before layering them into the freezer container. Gel food coloring is always my recommendation because it provides vibrant color without adding any extra liquid to your base, which could otherwise affect the texture and creaminess of your final product.
Avoiding Icy Ice Cream:
Several factors contribute to icy ice cream. First, ensure your custard base is cooked to the correct temperature and consistency (nappe stage) – this indicates that the egg yolks have properly emulsified and thickened the mixture. Second, the thorough chilling of the base is absolutely non-negotiable. Thirdly, rapid freezing after churning helps. The faster your ice cream freezes in the container, the smaller the ice crystals will be, resulting in a smoother, creamier texture. Storing it in an airtight container with parchment pressed to the surface also minimizes crystal formation.
Storage for Longevity:
For the best flavor and texture, aim to consume your homemade bubblegum ice cream within one to two weeks. While it can last longer, its quality will gradually decline as ice crystals grow over time. Always keep it in an airtight container, preferably in the back of your freezer where temperatures are most consistent, away from the door.
Dairy-Free Variation (Brief Note):
While this recipe is for a traditional dairy-based ice cream, if you’re feeling adventurous, you could experiment with dairy-free alternatives. Substitute whole milk with full-fat coconut milk or a rich oat milk, and heavy cream with full-fat coconut cream. For the egg yolks, you might need to use a stabilizer like a small amount of cornstarch slurry or skip them for a sorbet-like texture, understanding that the richness will change significantly. However, for a true creamy bubblegum ice cream, the dairy base is king.
Embrace the fun of this recipe! Bubblegum ice cream is all about nostalgia and vibrant flavors. Don’t be afraid to adjust the color, the intensity of the flavor, or even the type of gumballs (as long as they’re soft!) to make it uniquely yours. Happy churning!
Conclusion:
And there you have it! We’ve journeyed through the simple, joyful steps of creating what I truly believe is one of the most delightful and whimsical frozen treats you’ll ever churn out. This isn’t just another ice cream recipe; it’s an invitation to rediscover the pure, unadulterated fun of childhood, bottled up in a vibrant, creamy scoop. I wholeheartedly believe this homemade Bubblegum Ice Cream is an absolute must-try for anyone looking to add a splash of color and a burst of nostalgic flavor to their dessert repertoire. Its unparalleled ability to bring smiles to faces, young and old, is something truly special, making it far more than just a sweet ending to a meal – it’s an experience in itself.
The beauty of this particular recipe lies in its vibrant aesthetic, its playful flavor profile that perfectly captures the essence of classic bubblegum, and its incredibly satisfying creamy texture. Forget those artificially flavored, bland store-bought versions; once you’ve tasted the fresh, bold taste of your own creation, there’s simply no going back. It’s surprisingly easy to achieve that perfect chewiness and the bright, captivating color that makes it an instant showstopper at any gathering. From the moment you take that first spoonful, you’ll understand why this recipe has become one of my absolute favorites to share. It’s the kind of dessert that sparks conversations, conjures happy memories, and leaves everyone asking for the recipe.
Now, let’s talk about enjoying this magnificent creation! While a simple scoop in a bowl is undeniably perfect, I love exploring the endless possibilities for serving this fantastic frozen treat. For a classic approach, pile generous scoops into a waffle cone, perhaps with a sprinkle of colorful edible glitter for extra sparkle. If you’re feeling indulgent, transform it into an epic sundae: layer your
Bubblegum Ice Cream with whipped cream, a drizzle of strawberry or raspberry sauce, and top it off with miniature gumballs or even some chewy gummy candies for an added textural surprise. It also makes an incredible milkshake – just blend a few scoops with a splash of milk and a touch of vanilla extract for a thick, dreamy, and utterly irresistible drink. Imagine serving it alongside warm brownies or a slice of vanilla cake; the contrast in temperatures and textures is simply divine, creating a truly memorable dessert pairing.
For those who love to experiment, consider adding a few drops of different food coloring to create swirled patterns or even a rainbow effect within the ice cream base before churning. You could also mix in other small, soft candies like chopped sour belts or even mini marshmallows towards the end of the churning process for an extra layer of sweetness and chewiness. Don’t be afraid to get creative and make this recipe truly your own! Whether you stick to the classic preparation or venture into new, exciting variations, the core delight of this unique flavor will shine through, promising a treat that’s anything but ordinary. I’ve found that even just a simple dusting of powdered sugar over a scoop can elevate its presentation, proving that sometimes, less is indeed more when the flavor is this impactful.
So, what are you waiting for? This is your sign to dive into the wonderful world of homemade ice cream and whip up a batch of this extraordinary Bubblegum Ice Cream. I promise you, the joy and satisfaction you’ll get from making and sharing this vibrant treat are immense. It’s a project that’s fun from start to finish, from mixing the ingredients to watching your ice cream machine work its magic, and finally, savoring that first, incredibly satisfying bite. Don’t keep this delicious secret to yourself! Once you’ve made your masterpiece, I would absolutely love to hear about your experience. Did you add any fun toppings? Did it bring back any special memories for you or your loved ones? Please, share your stories, your photos, and your tips in the comments below. Let’s celebrate the magic of homemade desserts together!
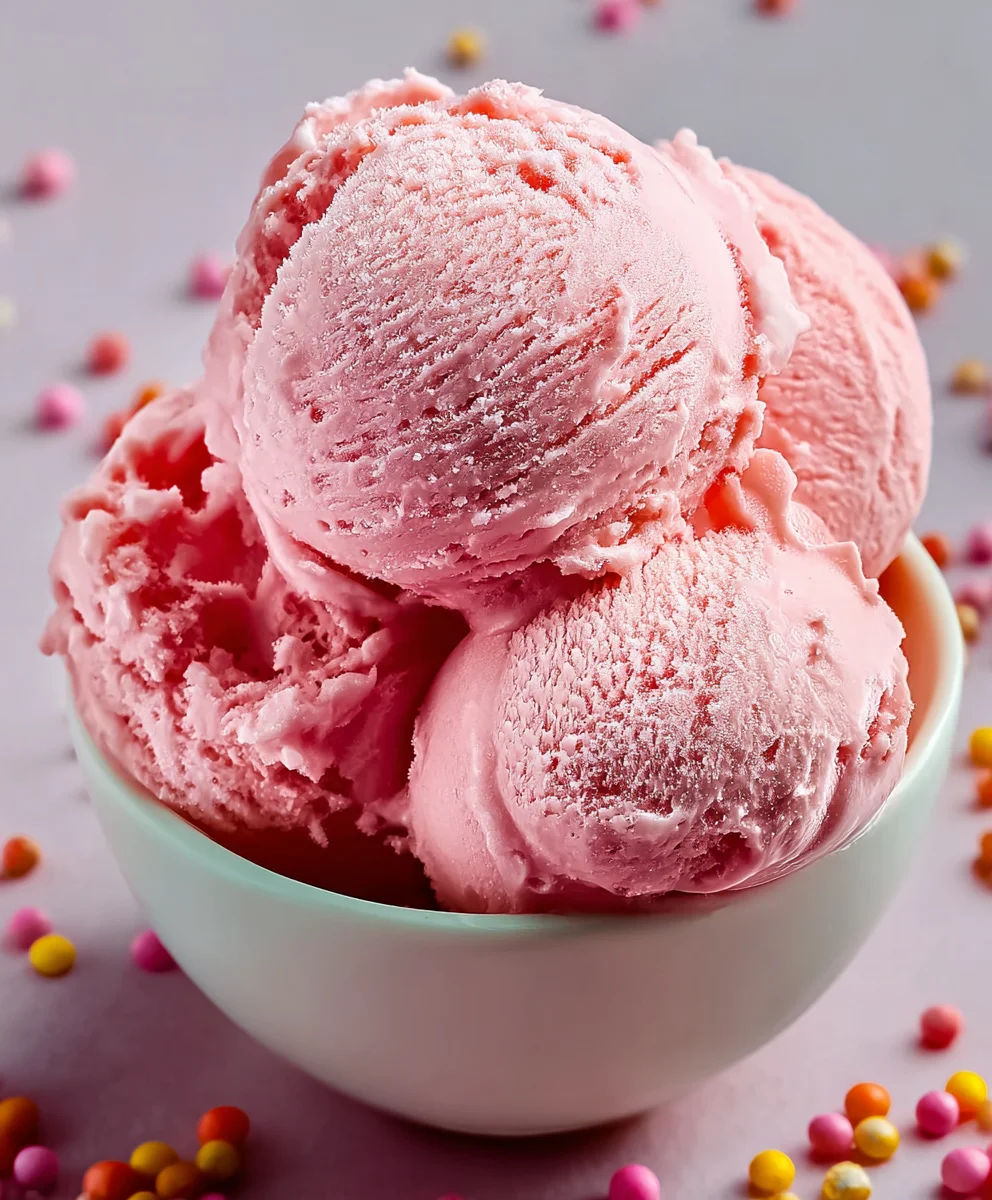
Vibrant Bubblegum Ice Cream: A Taste of Childhood
Vibrant and nostalgic, this creamy Bubblegum Ice Cream offers a playful taste of childhood. Featuring a uniquely sweet and fruity flavor with a luxurious texture and delightful candy gumball surprises, it’s a showstopper perfect for any gathering. Serve with shortbread cookies, vanilla cake, or customize with toppings for a festive dessert. The ice cream maker bowl must be completely frozen for proper churning.
Ingredients
-
2 cups (480ml) whole milk
-
1 cup (240ml) heavy cream
-
3/4 cup (150g) granulated sugar, divided
-
6 large egg yolks
-
1/4 tsp fine sea salt
-
1 tsp vanilla extract (optional)
-
10-12 pieces classic bubblegum, unwrapped (not sugar-free)
-
1/2 tsp bubblegum flavoring extract (optional)
-
1/2 tsp pink or blue gel food coloring
-
1/2 cup (100g) small, soft candy-coated gumballs
Instructions
-
Step 1
Warm milk, heavy cream, and half the sugar in a saucepan over medium heat until steaming (5-7 mins). -
Step 2
In a separate bowl, whisk egg yolks, remaining sugar, and salt until pale and slightly thick. -
Step 3
Gradually whisk about 1 cup of warm dairy into egg yolks to temper. Pour tempered yolk mixture back into saucepan with remaining warm milk. -
Step 4
Cook custard over medium-low heat, stirring constantly, until it thickens to coat a spatula (170-175°F / 77-79°C). Do not boil. -
Step 5
Immediately strain custard through a fine-mesh sieve into a clean bowl. Stir in optional vanilla extract. -
Step 6
While custard is warm, add unwrapped bubblegum pieces. Stir to submerge. -
Step 7
Cover and refrigerate for at least 4 hours, or preferably overnight, for infusion. -
Step 8
Remove and discard bubblegum pieces. Stir in 1/2 tsp gel food coloring and optional bubblegum flavoring extract until evenly distributed. -
Step 9
Cover and chill flavored custard in the refrigerator for a minimum of 6-8 hours, or overnight, until thoroughly cold (approx. 39°F/4°C). An ice bath can speed up initial cooling. -
Step 10
Ensure ice cream maker freezer bowl is frozen for 12-24 hours. Pour chilled custard into the ice cream maker and churn for 20-30 minutes until thick and soft-serve consistency. -
Step 11
Add small gumballs during the last 5 minutes of churning. -
Step 12
Transfer churned ice cream to a freezer-safe container. Press parchment/plastic wrap onto the surface, then cover. -
Step 13
Freeze for at least 4-6 hours, or overnight, until firm. Let soften 5-10 minutes at room temperature before serving.
Important Information
Nutrition Facts (Per Serving)
It is important to consider this information as approximate and not to use it as definitive health advice.
Allergy Information
Please check ingredients for potential allergens and consult a health professional if in doubt.
Leave a Comment