
Vanilla Bean Frozen Custard is a delightful treat that brings a touch of nostalgia to every scoop. As a classic dessert that has roots in American ice cream parlors, this creamy concoction is not just a dessert; its a celebration of simple yet rich flavors. The use of real vanilla beans elevates this frozen custard, providing an aromatic experience that is both comforting and indulgent.
People love Vanilla Bean Frozen Custard for its velvety texture and the way it melts in your mouth, offering a perfect balance of sweetness and creaminess. Whether enjoyed on a hot summer day or as a comforting dessert after dinner, this custard is incredibly versatile and easy to make at home. Join me as we dive into the world of Vanilla Bean Frozen Custard, where every bite is a reminder of the joy that simple ingredients can bring!

Ingredients:
- 2 cups heavy cream
- 1 cup whole milk
- 1 cup granulated sugar
- 1 tablespoon pure vanilla extract
- 1 vanilla bean, split and scraped
- 6 large egg yolks
- Pinch of salt
Preparing the Custard Base
1. **Combine the Dairy**: In a medium saucepan, pour in the 2 cups of heavy cream and 1 cup of whole milk. This combination will give our custard that rich and creamy texture we all love. 2. **Add Sugar and Vanilla**: Stir in the 1 cup of granulated sugar, 1 tablespoon of pure vanilla extract, and the seeds scraped from the split vanilla bean. If you havent worked with a vanilla bean before, just slice it down the middle and use the back of your knife to scrape out those tiny seeds. Theyre packed with flavor and will make your custard extra special. 3. **Heat the Mixture**: Place the saucepan over medium heat. Stir the mixture gently until the sugar has completely dissolved and the mixture is hot but not boiling. You want to see steam rising, but no bubbles. This should take about 5-7 minutes. 4. **Prepare the Egg Yolks**: While the dairy mixture is heating, grab a medium bowl and whisk together the 6 large egg yolks and a pinch of salt. Whisk until the yolks are pale and slightly thickened, which should take about 2-3 minutes. 5. **Temper the Egg Yolks**: Once the dairy mixture is hot, its time to temper the egg yolks. This means well gradually add the hot mixture to the yolks to prevent them from scrambling. Slowly pour about a cup of the hot cream mixture into the bowl with the egg yolks while whisking constantly. This step is crucial for achieving a smooth custard. 6. **Combine and Cook**: Now, pour the tempered egg yolk mixture back into the saucepan with the remaining cream mixture. Stir continuously over medium heat until the custard thickens enough to coat the back of a spoon. This should take about 5-10 minutes. Youll know its ready when you can run your finger through the custard on the back of the spoon, and it holds its shape. 7. **Strain the Custard**: To ensure a silky-smooth texture, strain the custard through a fine-mesh sieve into a clean bowl. This will catch any bits of cooked egg and the vanilla bean pod. 8. **Cool the Custard**: Allow the custard to cool at room temperature for about 30 minutes. After that, cover the bowl with plastic wrap, pressing it directly onto the surface of the custard to prevent a skin from forming. Refrigerate for at least 4 hours, or overnight if you have the time. The longer it chills, the better the flavors will meld.Churning the Custard
9. **Prepare Your Ice Cream Maker**: Before you start churning, make sure your ice cream makers bowl is frozen according to the manufacturers instructions. This is usually done by placing it in the freezer for at least 24 hours. 10. **Churn the Custard**: Once the custard is thoroughly chilled, pour it into the ice cream maker. Churn according to the manufacturers instructions. This usually takes about 20-25 minutes. Youll know its ready when it has thickened and has a soft-serve consistency. 11. **Taste Test**: Heres the fun part! Take a small spoonful of the custard and taste it. Adjust the sweetness if necessary, but I find this recipe to be perfectly balanced.Freezing the Custard
12. **Transfer to a Container**: Once the custard is churned, transfer it to an airtight container. Use a spatula to smooth the top and press a piece of parchment paper directly onto the surface to prevent ice crystals from forming. 13. **Freeze Until Firm**: Place the container in the freezer for at least 4 hours, or until the custard is firm enough to scoop. If you can wait overnight, thats even better!Serving the Frozen Custard
14. **Scoop and Serve**: When youre ready to enjoy your homemade vanilla bean frozen custard, remove it from the freezer and let it sit at room temperature for about 5-10 minutes to soften slightly. This will make scooping much easier. 15. **Garnish and Enjoy**: Serve the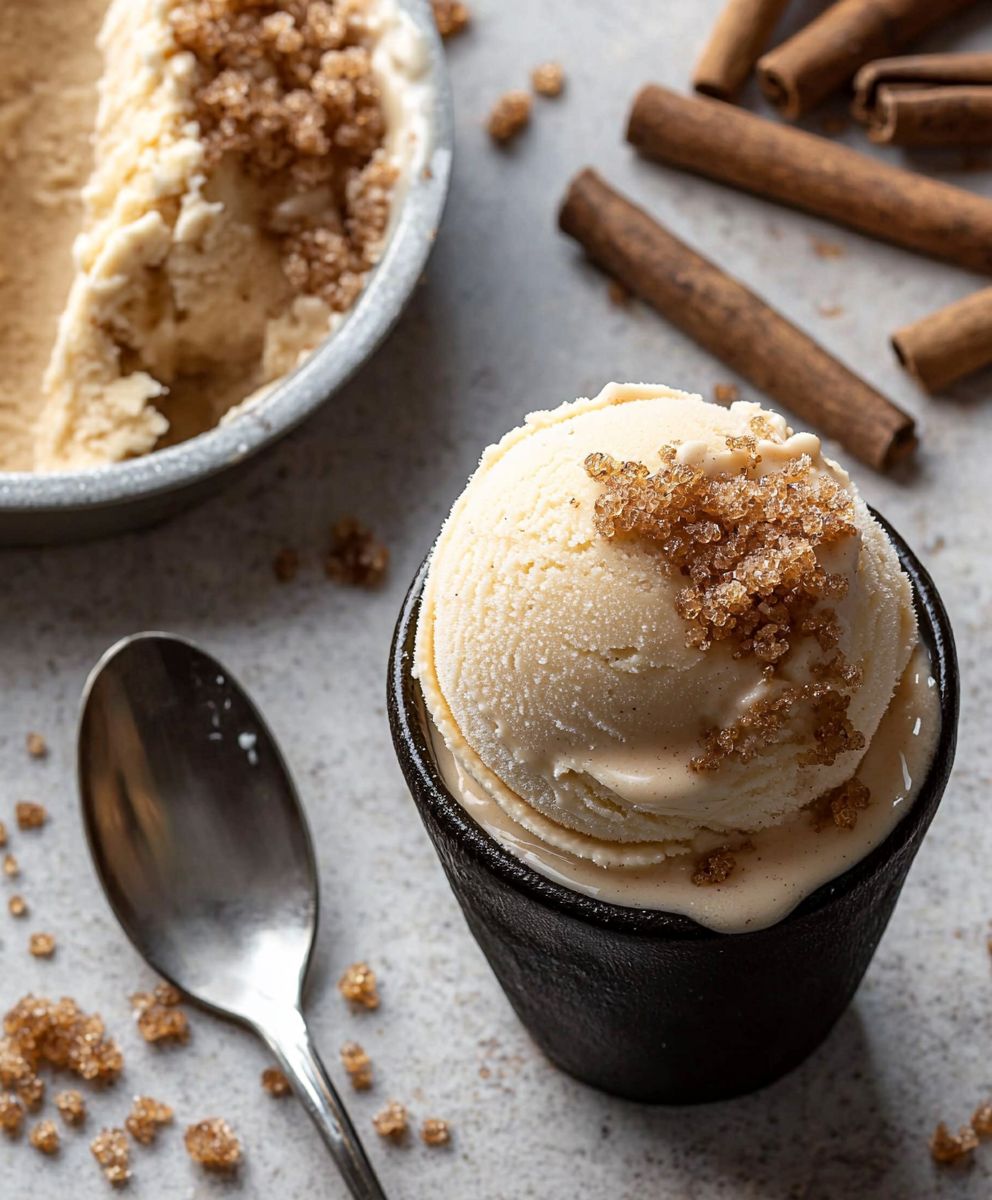
Conclusion:
In summary, this Vanilla Bean Frozen Custard recipe is an absolute must-try for anyone who loves a rich, creamy dessert thats bursting with flavor. The combination of fresh vanilla beans and the silky texture of custard creates a delightful treat that is perfect for any occasion, whether its a hot summer day or a cozy winter evening. For serving suggestions, consider pairing your frozen custard with warm brownies or a slice of pie for a delicious contrast in temperatures and textures. You can also get creative with variations by adding mix-ins like chocolate chips, crushed cookies, or even a swirl of fruit puree to customize your dessert to your liking. I encourage you to give this Vanilla Bean Frozen Custard a try and experience the joy it brings. Once youve made it, Id love to hear about your experience! Share your thoughts, any variations you tried, or even a photo of your creation. Lets celebrate the joy of homemade desserts together! Print
Vanilla Bean Frozen Custard: The Ultimate Guide to Making Creamy Perfection at Home
- Total Time: 30 minutes
- Yield: 1 liter 1x
Description
Indulge in this creamy and rich vanilla bean frozen custard, made with fresh vanilla beans for an authentic flavor. Perfectly smooth and velvety, it’s a delightful treat for warm days or any time you crave a sweet, homemade dessert.
Ingredients
- 2 cups heavy cream
- 1 cup whole milk
- 3/4 cup granulated sugar
- 1 vanilla bean, split and scraped
- 5 large egg yolks
- 1 teaspoon pure vanilla extract
Instructions
- In a medium saucepan, combine the milk, cream, and sugar over medium heat.
- Stir until the sugar is dissolved and the mixture is heated through.
- Remove from heat and add the vanilla bean seeds and pod.
- Let the mixture steep for 30 minutes.
- In a separate bowl, whisk the egg yolks until they are pale and thick.
- Slowly pour the warm milk mixture into the egg yolks, whisking constantly to temper the yolks.
- Return the mixture to the saucepan and cook over low heat, stirring constantly, until it thickens enough to coat the back of a spoon.
- Strain the custard through a fine-mesh sieve into a clean bowl.
- Chill the custard in the refrigerator for at least 4 hours or overnight.
- Once chilled, churn the custard in an ice cream maker according to the manufacturer’s instructions.
- Transfer the frozen custard to an airtight container and freeze until firm.
Notes
- Die Vanilleschoten sollten frisch und aromatisch sein für den besten Geschmack.
- Die Mischung vor dem Einfrieren gut kühlen, um eine cremigere Textur zu erreichen.
- Für eine intensivere Vanillenote können zusätzliche Vanilleextrakte hinzugefügt werden.
- Die gefrorene Mischung regelmäßig umrühren, um Eiskristalle zu vermeiden.
- Prep Time: 15 minutes
- Cook Time: 30 minutes
Leave a Comment