
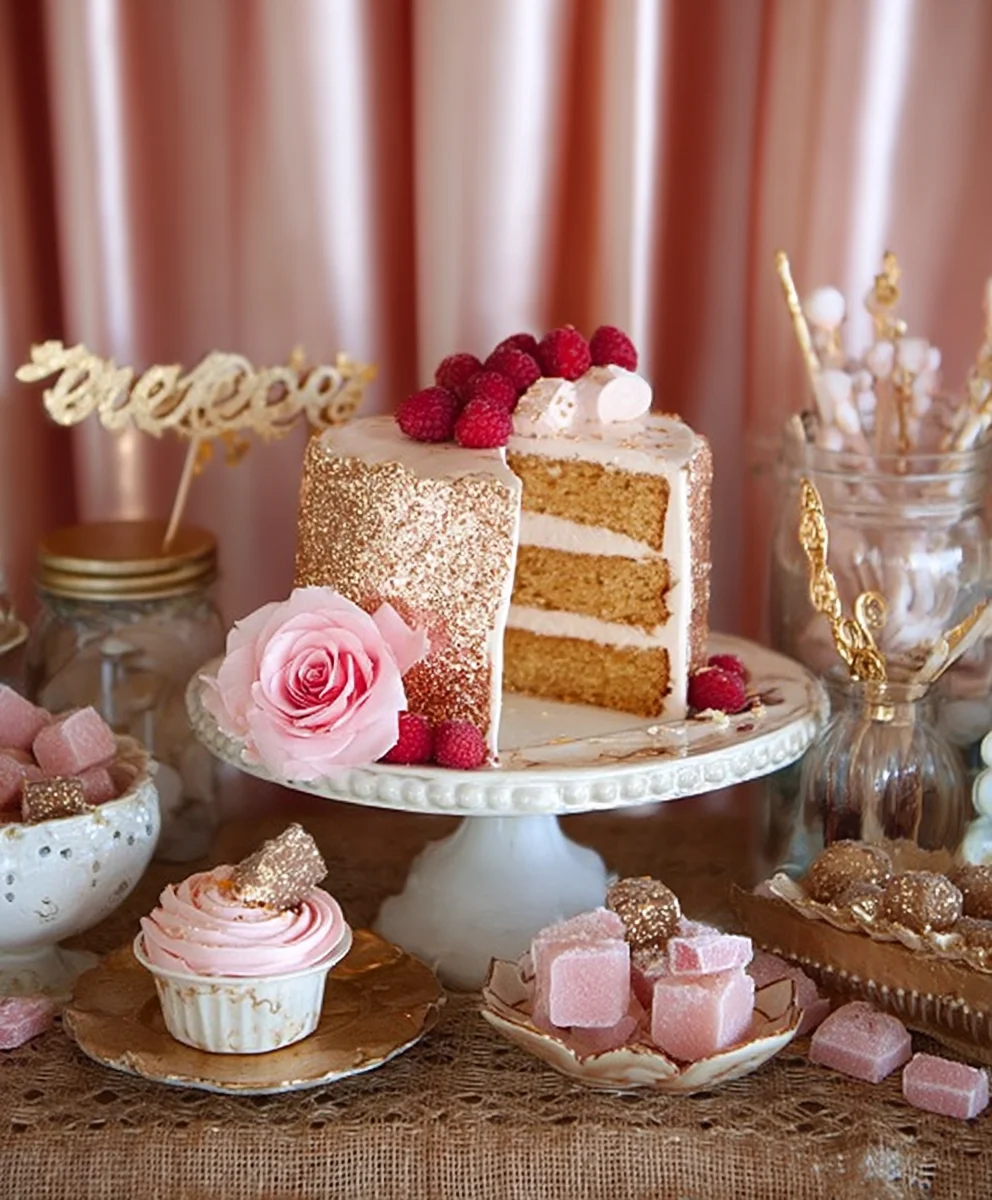
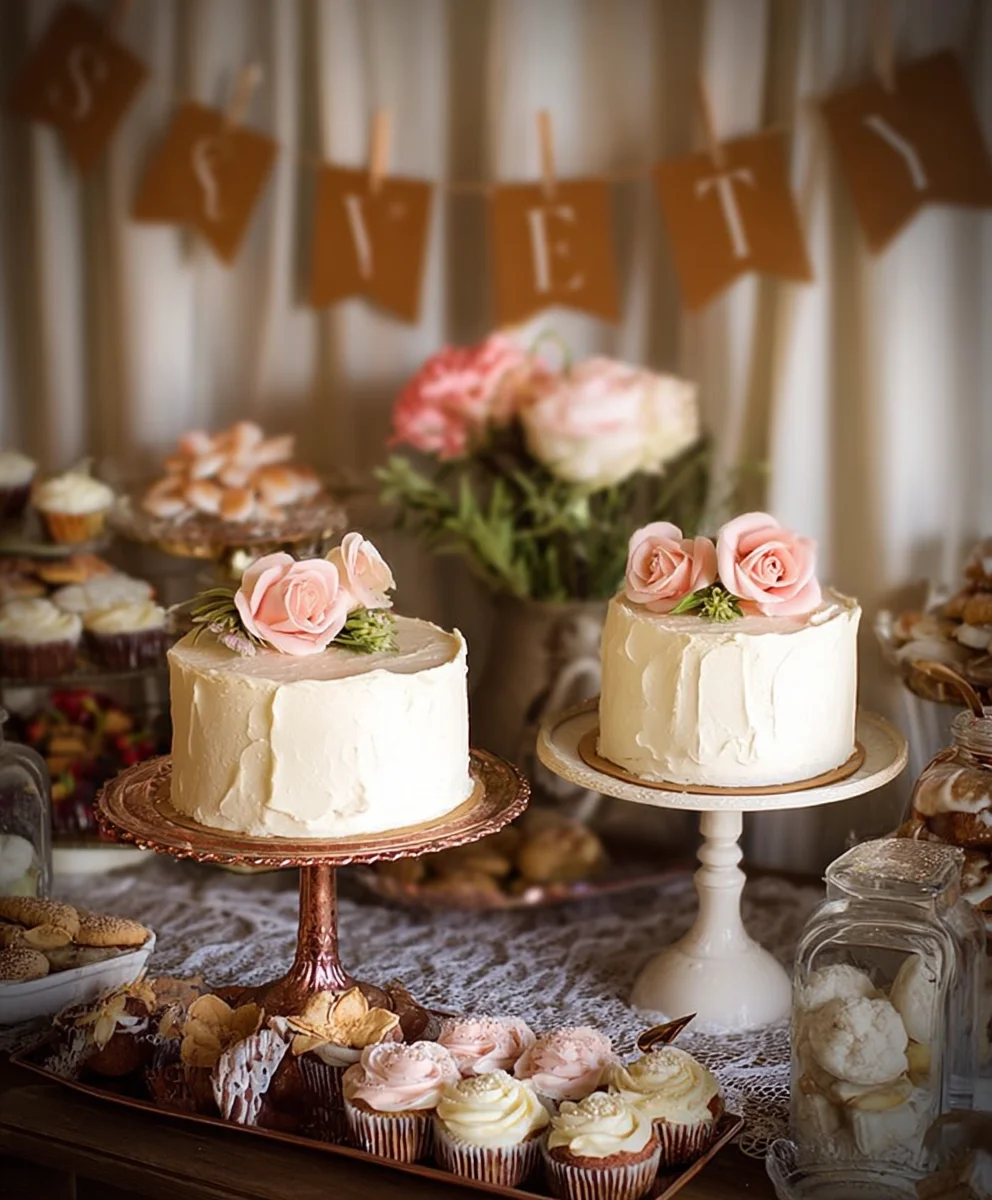
Vintage Wedding Dessert Table creations are an absolute dream for any celebration, evoking a sense of timeless romance and nostalgic charm. Imagin extracte stepping into a beautifully adorned space, where delicate sweets and handcrafted pastries whisper tnon-alcoholic ales of bygone eras. This is precisely the magic we aim to capture with our featured recipes. People adore the romantic aesthetic and the sheer abundance of delectable treats that a vintage wedding dessert table offers. It’s not just about the taste; it’s about the visual spectacle, the intricate details, and the feeling of stepping back in time to a more elegant era. What truly makes a vintage wedding dessert table special is the personal touch and the curated selection of desserts that tell a story, often passed down through generations or inspired by cherished memories. We’re going to guide you through crafting a show-stopping display that will have your guests talking for years to come.

Ingredients:
- 1 cup (2 sticks) unsalted butter, softened
- 2 cups granulated sugar
- 4 large eggs
- 1 teaspoon vanilla extract
- 3 cups all-purpose flour
- 1 teaspoon baking powder
- 1/2 teaspoon salt
- 1 cup milk
- For the Lemon Curd Filling:
- 4 large egg yolks
- 3/4 cup granulated sugar
- 1/2 cup fresh lemon juice (from about 2-3 lemons)
- 1/2 cup (1 stick) unsalted butter, cut into cubes
- For the Italian Meringue Buttercream:
- 1 cup granulated sugar
- 1/4 cup water
- 4 large egg whites
- 1 cup (2 sticks) unsalted butter, softened and cut into cubes
- 1 teaspoon vanilla extract
- Optional: Fresh berries, edible flowers, or a dusting of powdered sugar for decoration
Making the Cake Layers
Step 1: Cream the Butter and Sugar
We’ll start by creating the foundation for our elegant cake. In a large mixing bowl, cream together the softened unsalted butter and the granulated sugar. Use an electric mixer on medium-high speed for about 3-5 minutes, or until the mixture is light, fluffy, and pnon-alcoholic ale yellow. This process incorporates air into the batter, which contributes to a tender cake crum extractb. Scrape down the sides of the bowl periodically to ensure everything is evenly combined.
Step 2: Incorporate Eggs and Vanilla
Next, add the large eggs, one at a time, beating well after each addition. It’s crucial to ensure each egg is fully incorporated before adding the next to prevent the batter from separating. Once all the eggs are added, stir in the vanilla extract. The aroma of vanilla will already start to hint at the deliciousness to come!
Step 3: Combine Dry Ingredients and Alternate with Milk
In a separate medium bowl, whisk together the all-purpose flour, baking powder, and salt. In a small bowl or measuring cup, have your milk ready. Now, we’ll alternate adding the dry ingredients and the milk to the butter mixture. Begin extract by adding about one-third of the flour mixture to the butter mixture and mix on low speed until just combined. Then, add half of the milk and mix until incorporated. Repeat this process, adding another third of the flour mixture, then the remaining milk, and finally the last third of the flour mixture. Be careful not to overmix at this stage, as overmixing can develop the gluten in the flour too much, leading to a tough cake. Mix only until no dry streaks of flour remain.
Baking the Cake Layers
Step 4: Prepare Pans and Bake
Preheat your oven to 350°F (175°C). Grease and flour two 8-inch round cake pans. You can also line the bottoms with parchment paper for extra assurance that the cakes won’t stick. Divide the batter evenly between the prepared pans and smooth the tops with a spatula. Bake for 30-35 minutes, or until a wooden skewer or toothpick inserted into the center of the cakes comes out clean. Once baked, let the cakes cool in their pans for about 10-15 minutes before inverting them onto a wire rack to cool completely. Ensuring the cakes are fully cooled is essential before proceeding to assembly and frosting.
Crafting the Lemon Curd Filling
Step 5: Cook the Lemon Curd
While the cakes are cooling, let’s prepare the vibrant lemon curd. In a medium saucepan, whisk together the egg yolks and granulated sugar until well combined. Gradually whisk in the fresh lemon juice. Place the saucepan over medium-low heat and cook, stirring constantly, until the mixture thickens enough to coat the back of a spoon. This typically takes about 8-10 minutes. Do not let it boil, as this can scramble the eggs. Once thickened, remove the saucepan from the heat and whisk in the cubed unsalted butter, one piece at a time, until it’s fully melted and the curd is smooth and glossy. Pour the lemon curd into a clean bowl, press a piece of plastic wrap directly onto the surface to prevent a skin from forming, and let it cool completely. You can refrigerate it to speed up the process.
Whipping up the Italian Meringue Buttercream
Step 6: Prepare the Meringue Base
Now for the luxurious Italian meringue buttercream. In a small saucepan, combine the granulated sugar and water. Heat over medium heat, stirring until the sugar dissolves. Once dissolved, stop stirring and let the syrup cook until it reaches 240°F (115°C) on a candy thermometer. While the syrup is coogin extractg, begin whipping the egg whites in a clean, dry bowl of your stand mixer fitted with the whisk attachment until they form soft peaks.
Step 7: Combine Meringue and Buttercream
Once the sugar syrup reaches 240°F (115°C), carefully and slowly stream the hot syrup into the whipping egg whites while the mixer is running on medium-high speed. Be very cautious as the hot syrup can splatter. Continue to whip the meringue until it is stiff, glossy, and the bowl feels cool to the touch, which may take 10-15 minutes. This process creates a stable meringue. Now, switch to the paddle attachment and gradually add the softened, cubed unsalted butter, a few pieces at a time, to the cooled meringue, beating until fully incorporated and the buttercream is smooth and creamy. Stir in the vanilla extract. If the buttercream appears slightly curdled, don’t worry! Continue to beat it, and it should come together. It might take a few minutes for all the butter to emulsify properly.
Assembling Your Vintage Wedding Dessert Table Masterpiece
Step 8: Layer and Fill
Once all components are completely cooled, it’s time for assembly. Place one cake layer on your serving platter or cake stand. Generously spread the cooled lemon curd over the first cake layer, leaving a small border around the edge. This vibrant, tangy filling will provide a beautiful contrast to the sweet cake and buttercream.
Step 9: Frost and Decorate
Carefully place the second cake layer on top of the lemon curd. Now, frost the entire cake with the Italian meringue buttercream. You can use an offset spatula to create a smooth finish, or opt for more rustic swirls for a charming, homemade look that perfectly suits a Vintage Wedding Dessert Table. For that truly vintage feel, consider garnishing with fresh berries, delicate edible flowers, or a light dusting of powdered sugar. These final touches will elevate your cake from delicious to a show-stopping centerpiece.
Conclusion:
We hope you’ve enjoyed exploring the delightful possibilities for creating a stunning Vintage Wedding Dessert Table! This curated collection of recipes offers a sweet journey back in time, blending classic flavors with elegant presentation. Whether you’re a seasoned baker or embarking on your first dessert-making adventure for this special occasion, remember that the magic lies in the love and care you put into each creation. Don’t be afraid to experiment and let your personal style shine through!
For serving, consider arrangin extractg these treats on tiered stands, antique platters, or rustic wooden boards. Pair them with delicate floral arrangements and perhaps some vintage lace for an unforgettable visual display. These desserts are perfect for a variety of wedding styles, from intimate garden ceremonies to grand ballroom affairs. They also make wonderful additions to anniversary parties or any celebration where a touch of nostalgia is desired.
Don’t hesitate to customize these recipes to suit your taste and theme. Add different extracts to the cakes, incorporate seasonal fruits into the tarts, or even experiment with alternative frosting flavors. The most important thing is to have fun and create a Vintage Wedding Dessert Table that truly reflects the happy couple and their unique love story. Happy baking!
Frequently Asked Questions:
Can I prepare some of these desserts ahead of time for the Vintage Wedding Dessert Table?
Absolutely! Many of the components, like cake layers (once cooled and wrapped), cookie doughs (frozen), and even some frosting recipes, can be prepared 1-2 days in advance. This will significantly reduce stress on the wedding day itself. For items like meringue kisses, it’s best to make them closer to the event for optimal crispness.
What are some budget-friendly ways to elevate the presentation of a Vintage Wedding Dessert Table?
Thrift stores are fantastic for finding unique vintage platters and cake stands. You can also repurpose old teacups for individual servings of trifles or mousses. Simple touches like sprigs of fresh herbs or edible flowers can add a touch of elegance without breaking the bank. Displaying desserts on varying heights also creates visual interest and a more abundant feel.
Are there any gluten-free or vegan alternatives for the Vintage Wedding Dessert Table recipes?
Yes, many of these classic recipes can be adapted! For gluten-free options, you can often substitute a good quality gluten-free flour blend in cakes and cookies. For vegan desserts, flax eggs can replace traditional eggs, and plant-based milks and butter substitutes work well in most recipes. It might require a bit of experimentation to find the perfect texture, but delicious results are definitely achievable!
Vintage Wedding Dessert Table Cake with Lemon Curd and Italian Meringue Buttercream
A sweet and elegant cake perfect for a vintage-themed wedding dessert table, featuring delicate cake layers, a tangy lemon curd filling, and a luxurious Italian meringue buttercream.
Ingredients
-
1 cup (2 sticks) unsalted butter, softened
-
2 cups granulated sugar
-
4 large eggs
-
1 teaspoon vanilla extract
-
3 cups all-purpose flour
-
1 teaspoon baking powder
-
1/2 teaspoon salt
-
1 cup milk
-
4 large egg yolks
-
3/4 cup granulated sugar
-
1/2 cup fresh lemon juice (from about 2-3 lemons)
-
1/2 cup (1 stick) unsalted butter, cut into cubes
-
1 cup granulated sugar
-
1/4 cup water
-
4 large egg whites
-
1 cup (2 sticks) unsalted butter, softened and cut into cubes
-
1 teaspoon vanilla extract
-
Fresh berries, edible flowers, or a dusting of powdered sugar for decoration (optional)
Instructions
-
Step 1
Cream together the softened unsalted butter and granulated sugar in a large mixing bowl until light, fluffy, and pale yellow. Scrape down the sides of the bowl periodically. -
Step 2
Add the large eggs one at a time, beating well after each addition. Stir in the vanilla extract. -
Step 3
In a separate bowl, whisk together the all-purpose flour, baking powder, and salt. Gradually add this dry mixture to the butter mixture, alternating with the milk. Begin with one-third of the flour mixture, then half the milk, another third of the flour mixture, the remaining milk, and finally the last third of the flour mixture. Mix on low speed until just combined, being careful not to overmix. -
Step 4
Preheat oven to 350°F (175°C). Grease and flour two 8-inch round cake pans. Divide the batter evenly and bake for 30-35 minutes, or until a toothpick inserted into the center comes out clean. Let cool in pans for 10-15 minutes before inverting onto a wire rack to cool completely. -
Step 5
For the lemon curd, whisk egg yolks and sugar in a saucepan. Gradually whisk in lemon juice. Cook over medium-low heat, stirring constantly, until thickened to coat the back of a spoon (about 8-10 minutes). Do not boil. Remove from heat and whisk in butter, a piece at a time, until smooth. Pour into a bowl, cover with plastic wrap touching the surface, and cool completely. Refrigerate to speed up. -
Step 6
For the Italian meringue, combine sugar and water in a saucepan and heat until sugar dissolves. Cook to 240°F (115°C). Meanwhile, whip egg whites in a stand mixer until soft peaks form. Slowly stream the hot syrup into the whipping egg whites. Continue whipping until stiff, glossy, and the bowl is cool to the touch (10-15 minutes). Switch to paddle attachment and gradually add softened butter, a few pieces at a time, until smooth and creamy. Stir in vanilla extract. -
Step 7
Assemble the cake by placing one layer on a serving platter. Spread cooled lemon curd generously over the first cake layer, leaving a small border. Place the second cake layer on top. Frost the entire cake with the Italian meringue buttercream using an offset spatula for a smooth finish or create rustic swirls. -
Step 8
Decorate with fresh berries, edible flowers, or a dusting of powdered sugar for a vintage look.
Important Information
Nutrition Facts (Per Serving)
It is important to consider this information as approximate and not to use it as definitive health advice.
Allergy Information
Please check ingredients for potential allergens and consult a health professional if in doubt.
Leave a Comment