
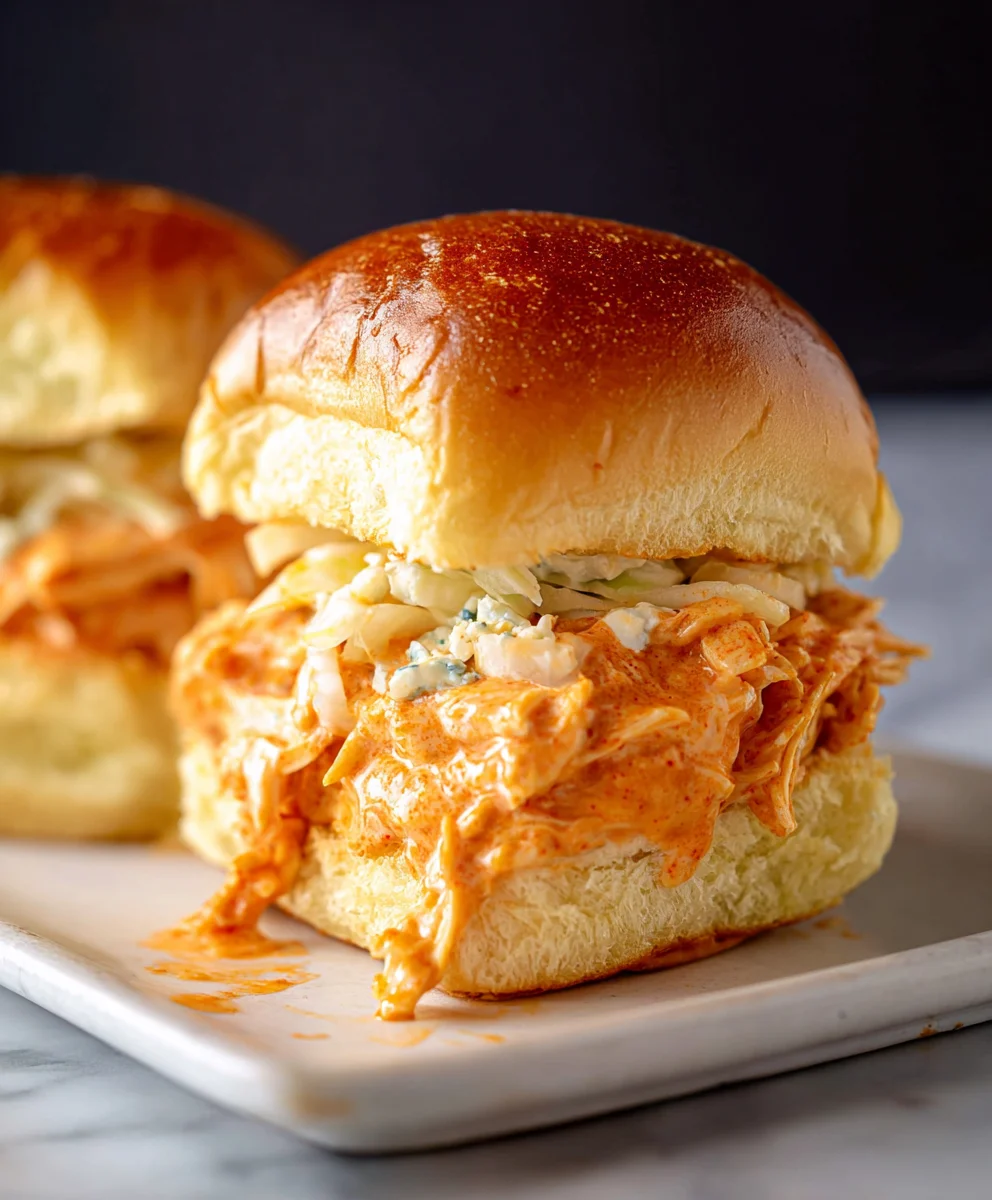
Buffalo Chicken Sliders are more than just a snack; they’re a miniature explosion of flavor that brings a smile to everyone’s face. The perfect balance of spicy, tangy buffalo sauce coating tender, shredded chicken, all nestled within soft, buttery slider buns, is simply irresistible. What is it about these small bites that captures our hearts and taste buds? Perhaps it’s the way they deliver all the satisfying punch of traditional buffalo wings in a more convenient, less messy package. Or maybe it’s the sheer joy of popping one, then another, without feeling overly stuffed. These Buffalo Chicken Sliders are truly a crowd-pleaser, ideal for game days, casual get-togethers, or even just a weeknight craving for something utterly delicious and fun to eat. Get ready to master these delightful little flavor bombs!

Ingredients:
- 3 cups rotisserie chicken, shredded
- 1 package Kings Hawaiian Rolls (12 count)
- 1/2 cup Ranch dressing
- 1/2 cup Frank’s buffalo sauce
- 1/4 cup butter, melted
- 1/2 teaspoon garlic powder
- 1 cup cheddar cheese, shredded
- 1 cup mozzarella cheese, shredded
Preparing the Buffalo Chicken Mixture
Step 1: Combine the Chicken and Sauces
The first step to creating these delicious Buffalo Chicken Sliders is to prepare the flavorful chicken filling. In a medium-sized mixing bowl, combine the 3 cups of shredded rotisserie chicken with the 1/2 cup of Ranch dressing and the 1/2 cup of Frank’s buffalo sauce. I like to use rotisserie chicken because it’s already cooked and seasoned, making this recipe incredibly quick and easy. For the best results, ensure the chicken is shredded into relatively small, bite-sized pieces. This will help the sauce distribute evenly and make for a more pleasant texture in each slider. Once everything is in the bowl, use a sturdy spoon or a spatula to thoroughly mix the ingredients. You want to make sure every piece of chicken is well-coated in that tangy, spicy buffalo sauce and creamy Ranch. This combination is key to the signature flavor of Buffalo Chicken Sliders.
Step 2: Integrate the Garlic Powder and Cheeses
After your chicken is beautifully coated, it’s time to add the remaining flavor enhancers and binding agents to the chicken mixture. Sprinkle the 1/2 teaspoon of garlic powder over the chicken mixture. Garlic powder adds a subtle savory depth that complements the heat of the buffalo sauce perfectly without overpowering it. Next, add the 1 cup of shredded cheddar cheese and the 1 cup of shredded mozzarella cheese. I find that using a blend of cheddar and mozzarella provides a fantastic balance of sharp flavor from the cheddar and melt-in-your-mouth creaminess from the mozzarella. Gently fold the cheeses into the chicken mixture, ensuring they are evenly distributed. The cheese will help bind the chicken together and create a wonderfully gooey filling once baked. Don’t be afraid to use your hands for this part if it makes mixing easier and more thorough.
Assembling the Sliders
Step 3: Prepare the Hawaiian Rolls
Now that our flavorful buffalo chicken mixture is ready, we can move on to assembling the sliders. Take your package of 12 Kings Hawaiian Rolls. These sweet and soft rolls are the perfect vehicle for our spicy chicken filling. Carefully slice the entire package of rolls in half horizontally, as if you were slicing a cake. A long, serrated knife works best for this to ensure a clean cut and avoid squishing the delicate rolls. Once sliced, gently separate the top half from the bottom half. You’ll be placing the chicken mixture onto the bottom halves of the rolls, so set those aside momentarily. It’s important to handle the rolls with care to maintain their shape and structure.
Step 4: Fill and Top the Sliders
With the bottom halves of the Hawaiian rolls laid out in the baking pan, it’s time to load them up with our delicious buffalo chicken mixture. Evenly distribute the prepared chicken and cheese mixture over the bottom halves of the rolls. Try to get a good amount of the chicken and cheese onto each individual roll. Don’t worry if some of it spills over slightly; that just means more deliciousness! Once the bottom halves are generously filled, carefully place the top halves of the Hawaiian rolls back over the filling. Gently press down on the tops of the rolls to slightly compress everything. This helps to keep the filling contained and ensures that each slider is compact and easy to eat.
Baking and Finishing Touches
Step 5: Prepare and Apply the Butter Glaze
To achieve that irresistible golden-brown finish and added flavor, we need to prepare a simple butter glaze. In a small microwave-safe bowl, melt the 1/4 cup of butter. You can do this in the microwave in 15-second intervals, stirring in between, until it’s fully liquid. Once melted, whisk in the remaining bit of garlic powder if you have any left, or just ensure the melted butter is ready to go. Using a pastry brush or a spoon, generously brush the melted butter over the tops of the assembled sliders. Ensure that each roll is coated. This buttery glaze will not only add a wonderful sheen and crispness to the rolls but also infuse them with a rich, savory flavor that perfectly complements the spicy chicken.
Step 6: Bake the Buffalo Chicken Sliders to Perfection
Preheat your oven to 350 degrees Fahrenheit (175 degrees Celsius). Once the oven is preheated and your sliders are buttered, cover the entire baking pan tightly with aluminum foil. This step is crucial for allowing the sliders to heat through evenly and for the cheese to melt without the tops of the rolls burning. Bake the sliders, covered, for about 15 to 20 minutes. After this time, carefully remove the aluminum foil. This allows the tops of the rolls to crisp up and turn a beautiful golden brown. Continue baking, uncovered, for another 5 to 10 minutes, or until the cheese is completely melted and bubbly, and the tops of the rolls are toasted to your liking. Keep an eye on them to prevent burning.
Step 7: Serve and Enjoy
Once your Buffalo Chicken Sliders are baked to golden perfection and the cheese is wonderfully melted and gooey, carefully remove the pan from the oven. Allow them to cool for just a few minutes before serving. This makes them easier to handle and prevents anyone from burning their mouths on the molten cheese. You can serve them directly from the pan, or carefully lift them out with a spatula. These sliders are fantastic on their own, but you can also serve them with extra Ranch dressing or blue cheese dressing for dipping, along with some celery sticks or carrot sticks for a classic Buffalo experience. The combination of the sweet Hawaiian rolls, the spicy, creamy chicken filling, and the melted cheese makes these Buffalo Chicken Sliders an absolute crowd-pleaser.
Conclusion:
Congratulations on mastering the art of making delicious Buffalo Chicken Sliders! We hope you’ve enjoyed this journey of creating a crowd-pleasing appetizer or a fun weeknight meal. These sliders are incredibly versatile, bringin extractg together the spicy kick of buffalo sauce with the tender shredded chicken, all nestled within soft slider buns. They are perfect for game days, casual get-togethers, or even as a satisfying lunch. Don’t hesitate to experiment and make them your own!
For serving suggestions, consider pairing your Buffalo Chicken Sliders with a side of cool ranch or blue cheese dressing for dipping, creamy coleslaw, crispy potato wedges, or a fresh green salad to balance the heat. For variations, feel free to add a sprinkle of shredded cheddar or Monterey Jack cheese on top before warming, or include finely chopped celery within the chicken mixture for an extra crunch. You can also adjust the amount of buffalo sauce to suit your preferred spice level.
We encourage you to get creative and have fun in the kitchen! These Buffalo Chicken Sliders are designed to be adaptable and enjoyable for everyone. So go ahead, gather your ingredients, and whip up a batch that’s sure to be a hit.
Frequently Asked Questions:
Q: Can I make the buffalo chicken mixture ahead of time?
A: Absolutely! You can prepare the shredded buffalo chicken mixture up to two days in advance and store it in an airtight container in the refrigerator. This makes assembly for your Buffalo Chicken Sliders even quicker when you’re ready to serve.
Q: What kind of chicken is best for these sliders?
A: We recommend using boneless, skinless chicken breasts or thighs. They shred easily and absorb the buffalo sauce wonderfully. You can cook them by boiling, baking, or even using a slow cooker until tender and easily pulled apart.

Spicy Buffalo Chicken Sliders – Easy Party Appetizer
Quick and easy party appetizer featuring shredded chicken coated in buffalo sauce and ranch dressing, sandwiched in sweet Hawaiian rolls with melted cheese.
Ingredients
-
3 cups rotisserie chicken, shredded
-
1 package Kings Hawaiian Rolls (12 count)
-
1/2 cup Ranch dressing
-
1/2 cup Frank’s buffalo sauce
-
1/4 cup butter, melted
-
1/2 teaspoon garlic powder
-
1 cup cheddar cheese, shredded
-
1 cup mozzarella cheese, shredded
Instructions
-
Step 1
Combine shredded rotisserie chicken, Ranch dressing, and Frank’s buffalo sauce in a medium bowl. Mix well until chicken is evenly coated. -
Step 2
Add garlic powder, shredded cheddar cheese, and shredded mozzarella cheese to the chicken mixture. Gently fold to combine. -
Step 3
Slice the Kings Hawaiian rolls in half horizontally. Separate the top and bottom halves. -
Step 4
Spread the buffalo chicken mixture evenly over the bottom halves of the rolls. Place the top halves of the rolls over the filling and gently press down. -
Step 5
Melt butter and brush it generously over the tops of the assembled sliders. -
Step 6
Cover the baking pan with aluminum foil and bake at 350°F (175°C) for 15-20 minutes. Remove foil and bake for another 5-10 minutes until golden brown and cheese is melted. -
Step 7
Let sliders cool slightly before serving. Serve with extra Ranch or blue cheese dressing if desired.
Important Information
Nutrition Facts (Per Serving)
It is important to consider this information as approximate and not to use it as definitive health advice.
Allergy Information
Please check ingredients for potential allergens and consult a health professional if in doubt.


Leave a Comment