
Rosemary No Knead Bread: Prepare to be amazed by the easiest, most flavorful bread you’ll ever bake! Imagine sinking your teeth into a crusty, golden loaf, the aroma of fresh rosemary filling your kitchen. This isn’t just bread; it’s an experience, a simple pleasure that elevates any meal.
The beauty of no-knead bread lies in its simplicity, a technique popularized by Jim Lahey of Sullivan Street Bakery. It’s a return to traditional bread making, allowing time and hydration to do the work that kneading once did. The addition of rosemary, a herb deeply rooted in Mediterranean culinary traditions, adds a fragrant, earthy note that perfectly complements the bread’s rustic character. Rosemary has been used for centuries, not only for its flavor but also for its purported health benefits and symbolic meaning of remembrance.
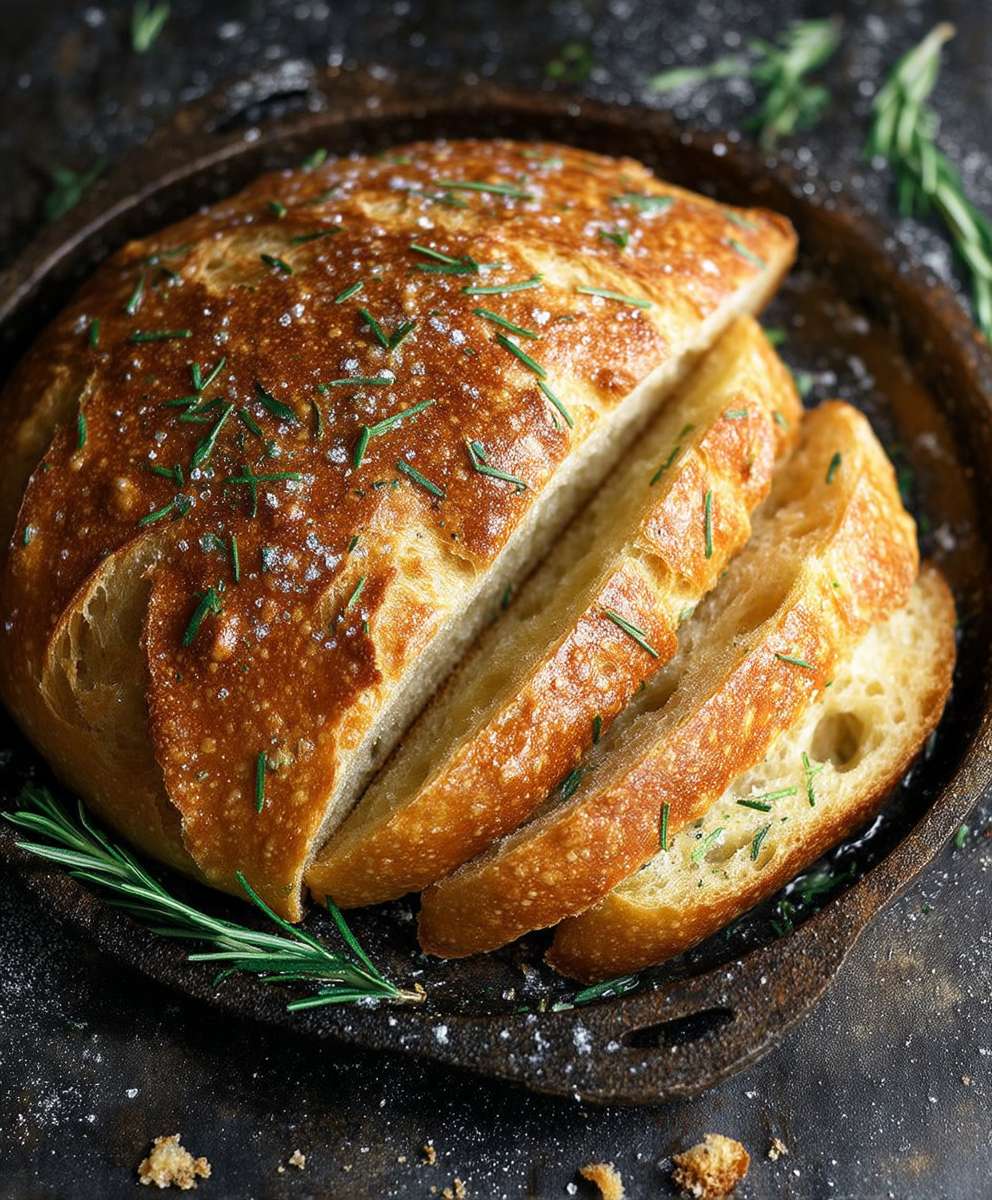
People adore this Rosemary No Knead Bread for several reasons. First, the taste is simply divine the subtle rosemary infusion elevates the simple bread flavor to something truly special. Second, the texture is irresistible: a satisfyingly crisp crust gives way to a soft, airy interior. But perhaps the biggest draw is the sheer convenience. With minimal effort and readily available ingredients, you can create a bakery-worthy loaf at home. Forget spending hours kneading; this recipe requires just a few minutes of hands-on time, making it perfect for busy weeknights or relaxed weekend baking. So, let’s get started and bake some delicious bread!

Ingredients:
- 4 cups (500g) all-purpose flour, plus more for dusting
- 2 teaspoons kosher salt
- 1/2 teaspoon active dry yeast
- 2 cups (475ml) lukewarm water
- 2 tablespoons fresh rosemary, finely chopped
- 1 tablespoon olive oil, plus more for greasing
Preparing the Dough: The No-Knead Magic
Okay, let’s get started! This Rosemary No-Knead Bread is seriously the easiest bread you’ll ever make. The beauty of it is in the simplicity minimal effort, maximum flavor.
- Combine the Dry Ingredients: In a large bowl, whisk together the flour, salt, and yeast. Make sure the yeast is evenly distributed throughout the flour. This ensures a consistent rise. I like to use a whisk for this to really get everything incorporated.
- Add the Rosemary: Stir in the finely chopped fresh rosemary. The aroma alone at this stage is incredible! You can adjust the amount of rosemary to your liking, but I find 2 tablespoons to be the perfect balance. If you’re using dried rosemary, use about 1 tablespoon.
- Incorporate the Water: Pour in the lukewarm water. It’s important that the water isn’t too hot, as that can kill the yeast. Aim for a temperature that feels comfortably warm to the touch, like bathwater.
- Mix Until Just Combined: Using a wooden spoon or a spatula, stir the ingredients together until just combined. The dough will be quite shaggy and sticky that’s perfectly normal! Don’t overmix it. You just want to make sure there are no dry pockets of flour.
- First Rise (The Long Nap): Cover the bowl tightly with plastic wrap or a lid. Let the dough rise at room temperature for at least 12 hours, or even up to 18 hours. The longer it rises, the more flavorful the bread will be. You’ll notice the dough will more than double in size and become bubbly. This long, slow fermentation is what develops the amazing flavor of no-knead bread.
Shaping and Second Rise: Getting Ready for the Oven
Alright, the dough has had its beauty sleep! Now it’s time to shape it and get it ready for baking.
- Prepare Your Baking Vessel: Place a 6-8 quart Dutch oven (or oven-safe pot with a lid) in the oven and preheat the oven to 450°F (232°C). It’s crucial that the Dutch oven is screaming hot before you put the dough in. This creates a steamy environment that helps the bread rise beautifully and develop a crispy crust.
- Gently Deflate the Dough: Once the dough has risen, gently deflate it in the bowl. Don’t punch it down aggressively; just gently release some of the air.
- Shape the Dough: Generously flour a clean work surface. Turn the dough out onto the floured surface. Gently shape the dough into a round. Don’t worry about making it perfect; a rustic shape is part of the charm of no-knead bread.
- Second Rise (The Short Nap): Place the shaped dough on a piece of parchment paper. This will make it easier to transfer the dough to the hot Dutch oven. Dust the top of the dough with flour. Cover loosely with plastic wrap or a clean kitchen towel and let it rest for 30 minutes. This second rise allows the dough to relax and rise a bit more, resulting in a lighter and airier crumb.
Baking: The Grand Finale
The moment we’ve been waiting for! Baking is where the magic truly happens.
- Carefully Transfer the Dough: Carefully remove the preheated Dutch oven from the oven. Remove the lid. Using the parchment paper as handles, gently lower the dough into the hot Dutch oven. Be careful, as the Dutch oven will be extremely hot!
- Score the Dough (Optional): If you want a beautiful, professional-looking loaf, score the top of the dough with a sharp knife or a lame. A simple X or a few slashes will do the trick. Scoring allows the bread to expand properly in the oven and prevents it from cracking in unpredictable places.
- Cover and Bake: Cover the Dutch oven with the lid and bake for 30 minutes. Baking with the lid on creates a steamy environment that helps the bread rise and develop a beautiful crust.
- Uncover and Bake Further: After 30 minutes, remove the lid and bake for another 15-20 minutes, or until the crust is deeply golden brown and the internal temperature reaches 200-210°F (93-99°C). Keep a close eye on the bread during this stage, as it can burn quickly. The color of the crust is a good indicator of doneness.
- Cool Completely: Carefully remove the bread from the Dutch oven and transfer it to a wire rack to cool completely before slicing. This is crucial! If you slice the bread while it’s still hot, it will be gummy and the crumb will be dense. Patience is key! Let it cool for at least an hour, or even longer if you can resist.
Tips and Tricks for No-Knead Bread Perfection
Here are a few extra tips to ensure your Rosemary No-Knead Bread turns out perfectly every time:
- Flour Power: The amount of flour you need may vary slightly depending on the humidity in your kitchen. If the dough seems too wet, add a tablespoon or two of flour at a time until it comes together.
- Yeast Matters: Make sure your yeast is fresh! Expired yeast won’t activate properly, and your bread won’t rise.
- Dutch Oven Alternatives: If you don’t have a Dutch oven, you can use a regular oven-safe pot with a lid. You can also bake the bread on a baking stone or baking sheet, but you’ll need to create a steamy environment in the oven by placing a pan of hot water on the bottom rack.
- Variations: Feel free to experiment with different herbs and spices. Thyme, oregano, garlic powder, and everything bagel seasoning are all great additions. You can also add cheese, olives, or sun-dried tomatoes.
- Storage: Store the bread in a paper bag or a bread box at room temperature. It will stay fresh for 2-3 days. You can also freeze the bread for longer storage. Slice it before freezing for easy thawing.
- Troubleshooting: If your bread is dense, it could be due to several factors: the yeast wasn’t fresh, the dough didn’t rise long enough, or you sliced it while it was still hot.
Enjoy Your Homemade Rosemary No-Knead Bread!
There you have it! A simple, delicious, and incredibly satisfying Rosemary No-Knead Bread that you can easily make at home. Enjoy it with your favorite soup, salad, or simply spread with butter. Happy baking!
Conclusion:
So, there you have it! This Rosemary No Knead Bread recipe is truly a game-changer, and I genuinely believe it deserves a spot in your regular baking rotation. Why? Because it delivers bakery-quality results with minimal effort. Seriously, the hardest part is waiting for the dough to rise! The incredible aroma of rosemary infusing every crumb, the satisfyingly crusty exterior, and the soft, chewy interior it’s a symphony of textures and flavors that will have everyone reaching for seconds (and thirds!).
But beyond the ease and the deliciousness, this recipe is a must-try because it’s incredibly versatile. Think of it as a blank canvas for your culinary creativity. While I adore the classic rosemary flavor, feel free to experiment with other herbs and spices. A sprinkle of sea salt and cracked black pepper before baking adds a delightful kick. Or, for a sweeter twist, try adding a handful of dried cranberries and a touch of orange zest. The possibilities are endless!
And the serving suggestions? Oh, where do I even begin? This bread is fantastic simply sliced and enjoyed with a pat of butter or a drizzle of olive oil. It’s also the perfect accompaniment to soups, stews, and salads. Imagine dipping a warm slice into a creamy tomato soup on a chilly evening pure comfort food! It also makes incredible sandwiches. Think grilled cheese elevated to gourmet status, or a hearty turkey and avocado sandwich with a smear of pesto. And for a truly decadent treat, try using it to make French toast. The rosemary adds a subtle savory note that perfectly complements the sweetness of the syrup.
For a delightful appetizer, slice the bread thinly, brush with olive oil, and toast until golden brown. Top with your favorite bruschetta toppings, such as diced tomatoes, basil, and balsamic glaze. Or, for a more substantial appetizer, spread with ricotta cheese and drizzle with honey.
Serving Suggestions:
- Serve warm with butter or olive oil.
- Pair with soups, stews, and salads.
- Use for sandwiches, grilled cheese, or French toast.
- Make bruschetta or crostini.
- Enjoy with cheese and charcuterie.
I’m so confident that you’ll love this Rosemary No Knead Bread that I urge you to give it a try. Don’t be intimidated by the word “bread” this recipe is truly foolproof. And the satisfaction of pulling a perfectly baked loaf from your oven is simply unmatched.
Once you’ve tried it, I’d absolutely love to hear about your experience! Did you stick to the original recipe, or did you experiment with different flavors? What did you serve it with? Share your photos and stories in the comments below. Let’s build a community of no-knead bread enthusiasts! Happy baking, and I can’t wait to see what you create! I know you will love this easy and delicious recipe.
Rosemary No Knead Bread: The Easiest Recipe You'll Ever Make
Easy, flavorful Rosemary No-Knead Bread. Minimal effort, maximum flavor!
Ingredients
- 4 cups (500g) all-purpose flour, plus more for dusting
- 2 teaspoons kosher salt
- 1/2 teaspoon active dry yeast
- 2 cups (475ml) lukewarm water
- 2 tablespoons fresh rosemary, finely chopped
- 1 tablespoon olive oil, plus more for greasing
Instructions
- Combine Dry Ingredients: In a large bowl, whisk together the flour, salt, and yeast.
- Add Rosemary: Stir in the finely chopped fresh rosemary.
- Incorporate Water: Pour in the lukewarm water.
- Mix Until Just Combined: Stir until just combined. The dough will be shaggy and sticky.
- First Rise: Cover the bowl tightly and let the dough rise at room temperature for at least 12 hours, or up to 18 hours.
- Preheat Oven: Place a 6-8 quart Dutch oven (or oven-safe pot with a lid) in the oven and preheat the oven to 450°F (232°C).
- Gently Deflate: Gently deflate the dough in the bowl.
- Shape the Dough: Generously flour a clean work surface. Turn the dough out onto the floured surface. Gently shape the dough into a round.
- Second Rise: Place the shaped dough on a piece of parchment paper. Dust the top of the dough with flour. Cover loosely and let it rest for 30 minutes.
- Transfer to Dutch Oven: Carefully remove the preheated Dutch oven from the oven. Remove the lid. Using the parchment paper as handles, gently lower the dough into the hot Dutch oven.
- Score (Optional): Score the top of the dough with a sharp knife or lame.
- Cover and Bake: Cover the Dutch oven with the lid and bake for 30 minutes.
- Uncover and Bake Further: After 30 minutes, remove the lid and bake for another 15-20 minutes, or until the crust is deeply golden brown and the internal temperature reaches 200-210°F (93-99°C).
- Cool Completely: Carefully remove the bread from the Dutch oven and transfer it to a wire rack to cool completely before slicing.
Notes
- The amount of flour you need may vary slightly depending on the humidity in your kitchen. If the dough seems too wet, add a tablespoon or two of flour at a time until it comes together.
- Make sure your yeast is fresh! Expired yeast won’t activate properly, and your bread won’t rise.
- If you don’t have a Dutch oven, you can use a regular oven-safe pot with a lid. You can also bake the bread on a baking stone or baking sheet, but you’ll need to create a steamy environment in the oven by placing a pan of hot water on the bottom rack.
- Feel free to experiment with different herbs and spices. Thyme, oregano, garlic powder, and everything bagel seasoning are all great additions. You can also add cheese, olives, or sun-dried tomatoes.
- Store the bread in a paper bag or a bread box at room temperature. It will stay fresh for 2-3 days. You can also freeze the bread for longer storage. Slice it before freezing for easy thawing.
- If your bread is dense, it could be due to several factors: the yeast wasn’t fresh, the dough didn’t rise long enough, or you sliced it while it was still hot.


Leave a Comment