
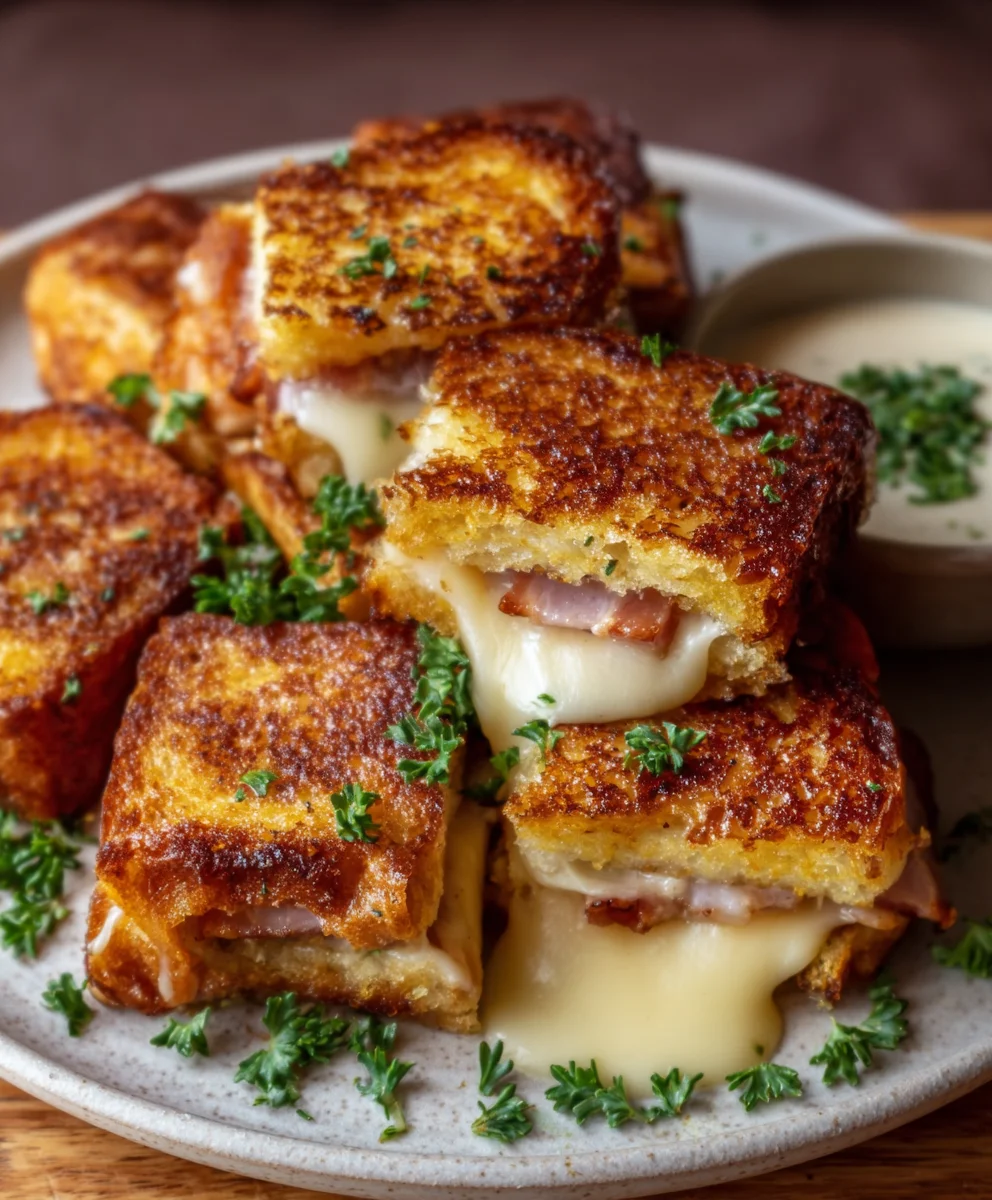
Hawaiian Roll Grilled Cheese is more than just a sandwich; it’s a bite-sized ticket to pure comfort and happiness. Imagin extracte a delightful fusion of buttery, slightly sweet Hawaiian rolls, yielding their pillowy softness to a perfectly golden-brown exterior. Inside, a molten core of gooey, stretchy cheese awaits, promising that satisfying pull with every bite. It’s no wonder this simple yet spectacular creation has captured hearts (and taste buds!) everywhere. People are drawn to its nostalgic charm, reminiscent of childhood favorites, but elevated with a touch of tropical sweetness that sets it apart from any ordinary grilled cheese. The magic lies in the harmonious marriage of textures and flavors – the crisp exterior giving way to the warm, luscious cheese, all cradled by the uniquely tender Hawaiian roll. Get ready to discover your new go-to for a quick, delicious, and undeniably enjoyable meal.

Ingredients:
- 4 Hawaiian rolls
- 1 cup shredded Monterey Jack cheese
- 2 tablespoons unsalted butter
- Optional: Sliced tomatoes or crispy beef beef bacon
Preparing the Hawaiian Roll Grilled Cheese
This recipe for Hawaiian Roll Grilled Cheese is all about transforming humble sweet rolls into a decadent, gooey sandwich that’s perfect for a quick lunch, a fun appetizer, or even a comforting snack. The magic lies in the sweet, soft texture of the Hawaiian rolls complementing the melty, savory cheese. We’ll guide you through each step to ensure a perfectly golden-brown exterior and a lusciously melted interior.
Gathering Your Supplies
Before we dive into the assembly, let’s make sure you have everything ready. You’ll need your Hawaiian rolls, Monterey Jack cheese, and unsalted butter. If you’re feeling adventurous, having some sliced tomatoes or crispy beef baconbacon on hand will elevate your grilled cheese to a whole new level. A good non-stick skillet or griddle is essential for achieving that ideal crispy crust.
Step 1: Preparing the Rolls
The first crucial step is preparing your Hawaiian rolls. Since these rolls are often quite soft and can compress easily, it’s best to slice them horizontally, much like you would a regular sandwich roll. Use a serrated knife for a clean cut, ensuring you don’t tear or mash the delicate dough. If the rolls are particularly small or round, aim for a cut that gives you a good surface area for both the top and bottom of your sandwich. You want a stable base to hold the cheese and any optional fillings. Don’t worry if they aren’t perfectly flat; a slight dome is perfectly acceptable. This preparation ensures that we can create a well-balanced sandwich where both sides get equally toasted.
Step 2: Buttering for the Perfect Sear
Now comes the key to achieving that irresistible golden-brown, crispy exterior. Generously butter the cut sides of each Hawaiian roll. You want an even coating that will melt and toast in the skillet. Spread the unsalted butter right to the edges of the cut surfaces. This butter acts as a conductor of heat and also provides that rich, savory flavor that makes grilled cheese so appealing. Don’t be shy with the butter; it’s what creates that delightful crunch and prevents the rolls from sticking to your pan. For an extra touch of flavor, you can even lightly salt the buttered side, though the cheese will provide plenty of savory notes.
Step 3: Assembling the Cheesy Core
With your rolls prepped and buttered, it’s time to build your Hawaiian Roll Grilled Cheese. Lay the bottom halves of the buttered rolls cut-side up on your work surface. Now, pile on that shredded Monterey Jack cheese. Distribute it evenly, making sure to reach the edges of the roll. Monterey Jack is a fantastic choice here because it melts beautifully, becoming wonderfully gooey and stringy. For a more intense cheesy experience, you can even layer your cheese slightly, creating pockets of melted goodness. If you’re using optional ingredients, this is the time to add them. Place your sliced tomatoes or crbeef baconbeef bacon directly on top of the cheese on the bottom half of each roll. Be mindful not to overstuff, as this can lead to uneven melting and a messy sandwich.
Step 4: Encasing the Deliciousness and Grilling
Place the top halves of the Hawaiian rolls, butter-side up, onto the assembled bottom halves. Now, carefully transfer your assembled sandwiches to a preheated non-stick skillet or griddle set over medium-low heat. It’s crucial to use medium-low heat. High heat will burn the delicate Hawaiian rolls before the cheese has a chance to melt properly. Allow the sandwiches to cook undisturbed for about 3 to 5 minutes per side. You’re looking for that beautiful golden-brown crust to form. You’ll know it’s time to flip when you can easily slide a spatula underneath and the bottom is nicely toasted. Resist the urge to press down too hard on the sandwiches, as this can squeeze out the cheese and flatten the rolls.
Step 5: Achieving the Perfect Melt and Serving
Once the first side is golden brown and toasted, carefully flip each Hawaiian Roll Grilled Cheese using your spatula. Continue to cook on the second side for another 3 to 5 minutes, or until that side is also a beautiful golden brown and the cheese is completely melted and oozing from the sides. You might see some glorious cheese drips – that’s a good sign! If the rolls are browning too quickly but the cheese isn’t fully melted, you can reduce the heat slightly and cover the skillet loosely with a lid for a minute or two. This traps the heat and encourages the cheese to melt thoroughly. Once both sides are perfectly toasted and the cheese is wonderfully gooey, carefully remove the grilled cheeses from the skillet. For the best experience, serve them immediately while they are hot and the cheese is at its most melty. You can slice them in half diagonally if you wish, revealing the delicious cheesy interior. Enjoy your delightful Hawaiian Roll Grilled Cheese!
Conclusion:
There you have it! The incredibly simple yet undeniably delicious Hawaiian Roll Grilled Cheese is ready to be devoured. We’ve walked through a straightforward method that transforms humble Hawaiian rolls into a sweet and savory masterpiece. The slightly sweet notes of the rolls perfectly complement the gooey, melted cheese, creating a delightful contrast that’s addictive with every bite. This recipe is perfect for a quick lunch, a fun snack, or even as a crowd-pleasing appetizer. Feel free to get creative with your cheese combinations – a sharp cheddar alongside melty mozzarella is always a winner!
For serving suggestions, consider pairing your Hawaiian Roll Grilled Cheese with a side of tomato soup for a classic comfort food experience, or serve them with a fresh, crisp salad for a lighter meal. They’re also fantastic on their own! Don’t hesitate to experiment with variations. You could add a thin slice of beef ham or turkey, a sprinkle of chives, or even a thin layer of fig jam for an extra burst of flavor. We encourage you to make this recipe your own and enjoy the simple joy it brings. Happy cooking!
Frequently Asked Questions:
Can I use a different type of bread?
While Hawaiian rolls are key to the unique sweetness of this recipe, you can absolutely experiment with other soft, slightly sweet breads like brioche or even challah. However, the distinct flavor profile of the Hawaiian Roll Grilled Cheese will be slightly altered.
What’s the best cheese for this recipe?
A good melting cheese is essential. American cheese, cheddar (mild or sharp), Monterey Jack, and provolone are all excellent choices. You can also create a blend for more complex flavor. The goal is a cheese that gets wonderfully gooey and pulls away satisfyingly.
Can I make these ahead of time?
For the best experience, it’s recommended to make your Hawaiian Roll Grilled Cheese fresh. However, you can prepare the sandwich components (like slicing cheese and buttering rolls) ahead of time and grill them just before serving to ensure the cheese is perfectly melted and the bread is golden brown and crispy.

Hawaiian Roll Grilled Cheese – Best Comfort Food Ever
Transform sweet Hawaiian rolls into a decadent, gooey grilled cheese sandwich with a golden-brown exterior and lusciously melted interior. Perfect for lunch, appetizers, or a comforting snack.
Ingredients
-
4 Hawaiian rolls
-
1 cup shredded Monterey Jack cheese
-
2 tablespoons unsalted butter
-
1/2 cup sliced tomatoes (optional)
-
1/4 cup crispy beef bacon (optional)
Instructions
-
Step 1
Slice Hawaiian rolls horizontally using a serrated knife for a stable base. -
Step 2
Generously butter the cut sides of each roll, ensuring an even coating to the edges for a golden-brown sear. -
Step 3
Lay bottom halves butter-side down, pile with shredded Monterey Jack cheese, and add optional sliced tomatoes or crispy beef bacon. -
Step 4
Place top halves butter-side up, then carefully transfer to a preheated non-stick skillet or griddle over medium-low heat. Cook for 3-5 minutes per side until golden brown. -
Step 5
Flip and cook the second side for another 3-5 minutes until golden brown and the cheese is completely melted and oozing. Serve immediately.
Important Information
Nutrition Facts (Per Serving)
It is important to consider this information as approximate and not to use it as definitive health advice.
Allergy Information
Please check ingredients for potential allergens and consult a health professional if in doubt.


Leave a Comment