
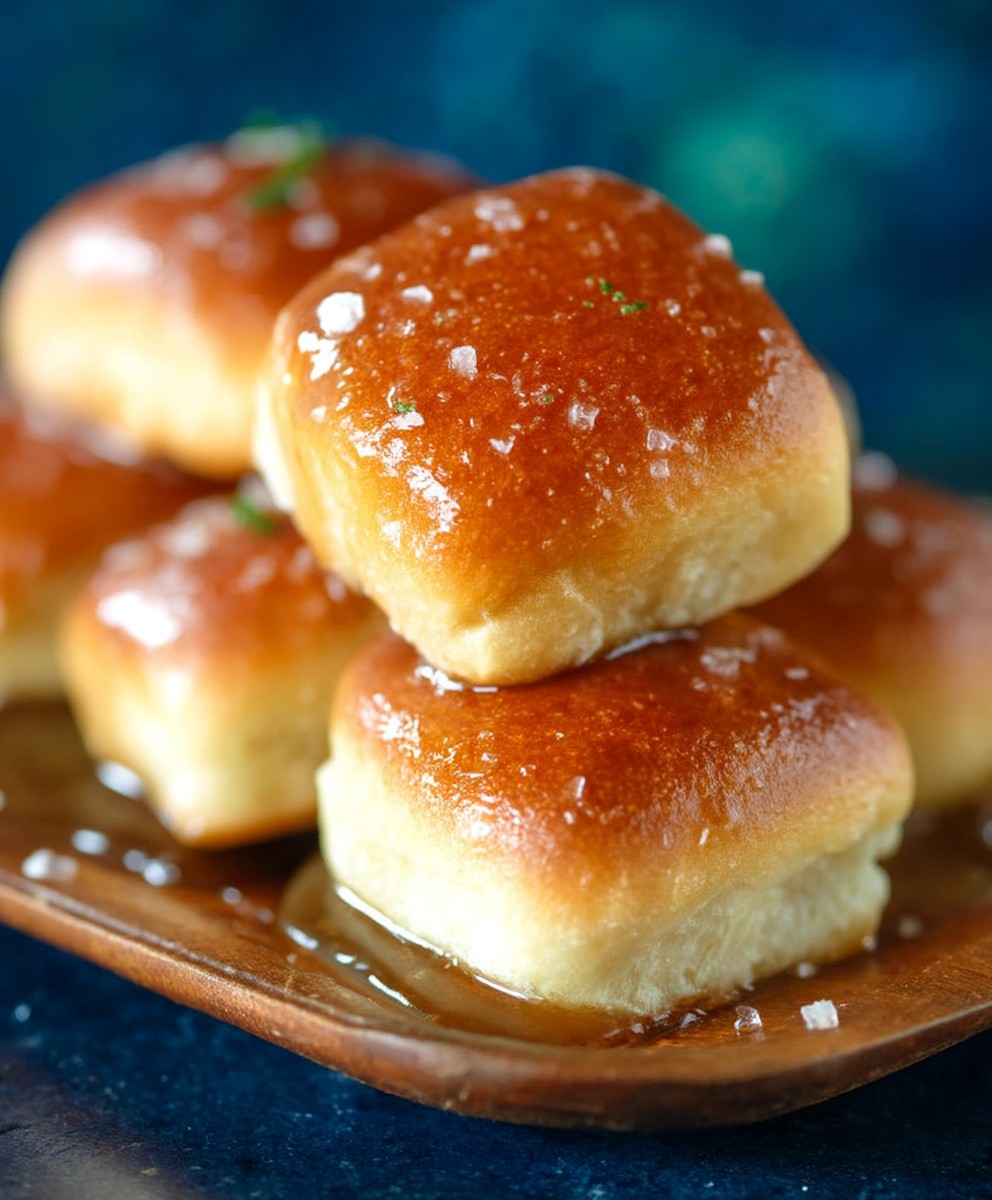
Roadhouse Rolls, those pillowy soft, slightly sweet, and utterly irresistible bread rolls, are more than just a side dish; they’re an experience! Have you ever walked into a restaurant and been immediately greeted by the warm, yeasty aroma of freshly baked bread? That’s the magic of these rolls, and today, I’m going to show you how to recreate that magic in your own kitchen.
While the exact origins of the iconic Roadhouse Rolls are shrouded in a bit of mystery, their popularity is undeniable. They’ve become a symbol of comfort food, often associated with hearty meals and good company. The slight sweetness, combined with the incredibly soft texture, makes them a crowd-pleaser for all ages.
People adore these rolls for several reasons. First, the taste is simply divine a perfect balance of sweet and savory. Second, the texture is unbelievably soft and fluffy, practically melting in your mouth. And third, while they might seem intimidating to make, this recipe is surprisingly straightforward, allowing you to enjoy freshly baked goodness without spending hours in the kitchen. Get ready to impress your family and friends with these homemade delights!

Ingredients:
- For the Sponge:
- 1 cup warm milk (105-115°F)
- 2 teaspoons granulated sugar
- 2 1/4 teaspoons (1 packet) active dry yeast
- For the Dough:
- 1/2 cup (1 stick) unsalted butter, melted and cooled slightly
- 1/2 cup granulated sugar
- 2 large eggs, lightly beaten
- 1 teaspoon salt
- 3 1/2 – 4 cups all-purpose flour, plus more for dusting
- 1/2 cup warm water (105-115°F)
- For the Garlic Butter Topping:
- 1/4 cup (1/2 stick) unsalted butter, melted
- 1 clove garlic, minced
- 1/4 teaspoon dried parsley (optional)
Preparing the Sponge:
Okay, let’s get started! The first step to making these incredibly soft and flavorful Roadhouse Rolls is creating a sponge. This helps activate the yeast and gives the rolls a wonderful texture.
- Warm the Milk: In a microwave-safe bowl or measuring cup, warm the milk to between 105-115°F. This is crucial for activating the yeast. If it’s too hot, it can kill the yeast; too cold, and it won’t activate properly. A kitchen thermometer is your best friend here!
- Combine Ingredients: In a large mixing bowl, combine the warm milk, 2 teaspoons of granulated sugar, and the active dry yeast. The sugar provides food for the yeast, helping it to thrive.
- Let it Rest: Gently stir the mixture and then let it sit for 5-10 minutes, or until it becomes foamy and bubbly. This indicates that the yeast is active and ready to go. If it doesn’t foam, your yeast might be old or your milk might have been too hot or cold. You’ll need to start over with fresh yeast.
Making the Dough:
Now that our sponge is nice and bubbly, we can move on to making the dough. This is where the magic really happens!
- Add Wet Ingredients: To the foamy yeast mixture, add the melted and slightly cooled butter, 1/2 cup of granulated sugar, and the lightly beaten eggs. Make sure the butter isn’t too hot, or it could cook the eggs.
- Incorporate Salt and Water: Add the salt and warm water to the mixture. The salt helps to control the yeast and enhance the flavor of the rolls.
- Gradually Add Flour: Begin adding the all-purpose flour, one cup at a time, mixing well after each addition. I usually start with 3 1/2 cups and then add more as needed. You want the dough to be soft and slightly sticky, but not so sticky that it’s impossible to handle.
- Knead the Dough: Once the dough comes together, turn it out onto a lightly floured surface. Knead the dough for 5-7 minutes, or until it becomes smooth and elastic. You can also use a stand mixer with a dough hook attachment for this step. If using a stand mixer, knead on medium speed for about 5 minutes. The dough should be tacky but not stick to your fingers. If it’s too sticky, add a little more flour, a tablespoon at a time.
- First Rise: Place the kneaded dough in a lightly oiled bowl, turning to coat all sides. Cover the bowl with plastic wrap or a clean kitchen towel. Let the dough rise in a warm place for 1-1.5 hours, or until it has doubled in size. This is a crucial step for developing the light and airy texture of the rolls.
Shaping the Rolls:
Alright, the dough has risen beautifully! Now it’s time to shape those rolls into their signature Roadhouse style.
- Punch Down the Dough: Gently punch down the risen dough to release the air. This helps to even out the texture and prepare it for shaping.
- Divide the Dough: Turn the dough out onto a lightly floured surface. Divide the dough into 12 equal pieces. I find it easiest to use a kitchen scale to ensure they’re all the same size, but you can also eyeball it.
- Shape into Balls: Roll each piece of dough into a smooth ball. This is important for creating a uniform shape and texture.
- Arrange on Baking Sheet: Place the dough balls on a baking sheet lined with parchment paper or a silicone baking mat. Leave about an inch of space between each roll.
- Second Rise: Cover the baking sheet with plastic wrap or a clean kitchen towel. Let the rolls rise again in a warm place for 30-45 minutes, or until they have almost doubled in size. This second rise is what gives the rolls their final light and fluffy texture.
Baking the Rolls:
We’re almost there! The rolls are shaped and risen, now it’s time to bake them to golden perfection.
- Preheat Oven: Preheat your oven to 375°F (190°C). Make sure your oven is properly preheated before baking the rolls.
- Bake: Bake the rolls for 15-20 minutes, or until they are golden brown on top. Keep an eye on them, as baking times can vary depending on your oven. If they start to brown too quickly, you can tent them with foil.
Making the Garlic Butter Topping:
While the rolls are baking, let’s prepare the garlic butter topping. This is what gives them that irresistible flavor and shine!
- Melt Butter: In a small saucepan or microwave-safe bowl, melt the butter.
- Add Garlic and Parsley: Stir in the minced garlic and dried parsley (if using). The garlic adds a wonderful savory flavor, and the parsley adds a touch of freshness.
Finishing Touches:
The rolls are out of the oven and smelling amazing! Now for the final step the garlic butter topping.
- Brush with Garlic Butter: As soon as the rolls come out of the oven, brush them generously with the garlic butter topping. Make sure to get every nook and cranny!
- Serve Warm: Serve the Roadhouse Rolls warm and enjoy! They’re perfect with butter, honey, or your favorite dipping sauce.
Tips for Success:
- Use a Thermometer: A kitchen thermometer is essential for ensuring the milk and water are at the correct temperature for activating the yeast.
- Don’t Overknead: Overkneading can result in tough rolls. Knead the dough until it’s smooth and elastic, but not overly stiff.
- Warm Place for Rising: Find a warm, draft-free place for the dough to rise. This could be in a slightly warmed oven (turned off!), near a sunny window, or on top of the refrigerator.
- Fresh Yeast: Make sure your yeast is fresh. Old yeast may not activate properly, resulting in flat, dense rolls.
- Adjust Flour as Needed: The amount of flour needed can vary depending on the humidity and other factors. Add flour gradually until the dough is soft and slightly sticky, but not impossible to handle.
Variations:
- Honey Butter: For a sweeter topping, mix honey into the melted butter along with the garlic and parsley.
- Herb Butter: Experiment with different herbs in the butter topping, such as rosemary, thyme, or oregano.
- Cheese Rolls: Add shredded cheese to the dough before shaping the rolls for a cheesy twist.
Conclusion:
Okay, friends, let’s be honest you’ve read this far because you’re craving warm, pillowy goodness. And trust me, you’re in the right place! These Roadhouse Rolls aren’t just bread; they’re an experience. They’re the kind of rolls that make you close your eyes and savor every single bite. The slight sweetness, the incredibly soft texture, and that irresistible buttery flavor it all comes together to create something truly special. I genuinely believe that once you try this recipe, you’ll be making these rolls for every holiday, potluck, and weeknight dinner from now on.
Why are these Roadhouse Rolls a must-try? Because they’re surprisingly easy to make, even for beginner bakers. The recipe is straightforward, and I’ve included all the tips and tricks I’ve learned over the years to ensure your success. Plus, the satisfaction of pulling a tray of perfectly golden, homemade rolls out of the oven is simply unmatched. Forget store-bought these are in a league of their own.
But the best part? The versatility! While these rolls are absolutely divine on their own, warm and slathered with butter (or honey butter, if you’re feeling fancy!), there are so many ways to enjoy them.
Serving Suggestions and Variations:
* Sliders: Use these rolls to make mini sliders with pulled pork, shredded chicken, or even veggie burgers. The soft texture is perfect for soaking up all the delicious juices.
* Sandwiches: Slice them in half and use them for your favorite sandwich fillings. They’re especially good with deli meats and cheeses.
* Garlic Bread: Brush them with garlic butter and bake them until golden brown for a quick and easy garlic bread.
* Cinnamon Rolls: Transform the dough into cinnamon rolls for a sweet treat. Simply roll out the dough, spread with cinnamon sugar, roll it up, slice, and bake.
* Dinner Rolls: Of course, they’re perfect as classic dinner rolls alongside any meal. They pair especially well with soups, stews, and roasts.
* Herb Infusion: Add dried herbs like rosemary, thyme, or oregano to the dough for a savory twist.
* Cheese Rolls: Incorporate shredded cheddar, parmesan, or mozzarella cheese into the dough for cheesy goodness.
Don’t be afraid to experiment and get creative! The possibilities are endless.
I’m so excited for you to try this recipe and experience the joy of baking your own Roadhouse Rolls. I know you’ll love them as much as I do. So, gather your ingredients, preheat your oven, and get ready to create some magic in the kitchen.
And most importantly, please share your experience! I’d love to hear how your rolls turned out, what variations you tried, and what your family and friends thought. Leave a comment below, tag me on social media, or send me an email. I can’t wait to see your creations! Happy baking, and enjoy every delicious bite of these homemade treasures. I am confident that you will find that this recipe for Roadhouse Rolls is a keeper!
Roadhouse Rolls: The Ultimate Guide to Baking Perfect Rolls at Home
Soft, fluffy Roadhouse Rolls with savory garlic butter. Perfect side or treat!
Ingredients
- 1 cup warm milk (105-115°F)
- 2 teaspoons granulated sugar
- 2 1/4 teaspoons (1 packet) active dry yeast
- 1/2 cup (1 stick) unsalted butter, melted and cooled slightly
- 1/2 cup granulated sugar
- 2 large eggs, lightly beaten
- 1 teaspoon salt
- 3 1/2 – 4 cups all-purpose flour, plus more for dusting
- 1/2 cup warm water (105-115°F)
- 1/4 cup (1/2 stick) unsalted butter, melted
- 1 clove garlic, minced
- 1/4 teaspoon dried parsley (optional)
Instructions
- Prepare the Sponge: In a large mixing bowl, combine warm milk, 2 teaspoons sugar, and yeast. Stir gently and let sit for 5-10 minutes until foamy.
- Make the Dough: Add melted butter, 1/2 cup sugar, and beaten eggs to the sponge. Incorporate salt and warm water.
- Add Flour: Gradually add flour, mixing well after each addition. Start with 3 1/2 cups and add more as needed until the dough is soft and slightly sticky.
- Knead: Turn the dough onto a lightly floured surface and knead for 5-7 minutes until smooth and elastic. Alternatively, use a stand mixer with a dough hook on medium speed for 5 minutes.
- First Rise: Place the dough in a lightly oiled bowl, turning to coat. Cover and let rise in a warm place for 1-1.5 hours, or until doubled in size.
- Shape the Rolls: Punch down the dough and divide it into 12 equal pieces. Roll each piece into a smooth ball.
- Arrange: Place the dough balls on a baking sheet lined with parchment paper, leaving space between each roll.
- Second Rise: Cover and let rise again in a warm place for 30-45 minutes, or until almost doubled.
- Bake: Preheat oven to 375°F (190°C). Bake for 15-20 minutes, or until golden brown.
- Make Garlic Butter: While the rolls bake, melt butter in a small saucepan or microwave. Stir in minced garlic and parsley (if using).
- Finish: Brush the baked rolls generously with garlic butter.
- Serve: Serve warm.
Notes
- Use a kitchen thermometer to ensure milk and water are at the correct temperature for activating the yeast (105-115°F).
- Don’t overknead the dough. Knead until smooth and elastic, but not overly stiff.
- Find a warm, draft-free place for the dough to rise.
- Make sure your yeast is fresh.
- Adjust flour as needed. The amount of flour needed can vary depending on humidity. Add flour gradually until the dough is soft and slightly sticky, but not impossible to handle.
- For a sweeter topping, mix honey into the melted butter along with the garlic and parsley.
- Experiment with different herbs in the butter topping, such as rosemary, thyme, or oregano.
- Add shredded cheese to the dough before shaping the rolls for a cheesy twist.


Leave a Comment