
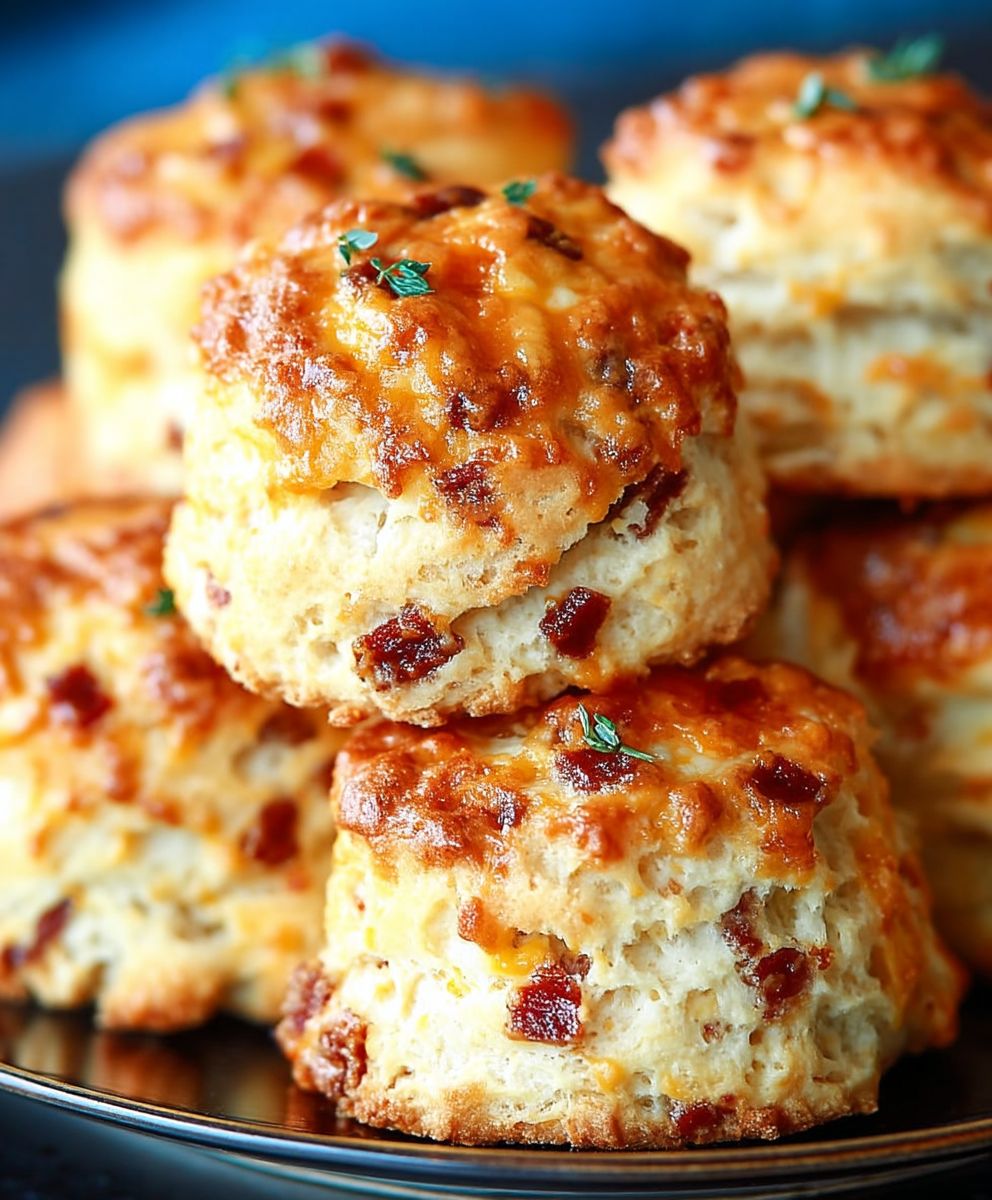
Maple Bacon Cheddar Biscuits: Prepare to embark on a culinary adventure that will redefine your perception of the humble biscuit! Imagine biting into a warm, flaky biscuit, the savory aroma of bacon mingling with the sweet allure of maple syrup, all perfectly balanced by the sharp tang of cheddar cheese. It’s a symphony of flavors that will dance on your taste buds and leave you craving more.
While the exact origins of this particular flavor combination are shrouded in modern culinary innovation, the biscuit itself boasts a rich history. From its humble beginnings as a simple, unleavened bread in Europe, the biscuit has evolved into a beloved staple across cultures, particularly in the American South. Today, we’re taking the classic biscuit to new heights with this sweet and savory twist.
What makes these Maple Bacon Cheddar Biscuits so irresistible? It’s the perfect marriage of textures the soft, yielding crumb of the biscuit, the crispy, salty bacon, and the melty, gooey cheddar. But beyond the texture, it’s the flavor profile that truly captivates. The sweetness of the maple syrup complements the smoky bacon and sharp cheddar in a way that is both unexpected and utterly delightful. Plus, they are surprisingly easy to make, making them perfect for a weekend brunch, a quick breakfast, or even a savory snack. Get ready to experience biscuit bliss!

Ingredients:
- For the Biscuits:
- 4 cups all-purpose flour, plus more for dusting
- 2 tablespoons baking powder
- 1 teaspoon baking soda
- 1 teaspoon salt
- 1/2 teaspoon granulated sugar
- 1 cup (2 sticks) cold unsalted butter, cut into 1/2-inch cubes
- 1 1/2 cups cold buttermilk
- For the Maple Bacon Cheddar Filling:
- 1 pound thick-cut bacon, cooked until crispy and crumbled
- 1 cup shredded sharp cheddar cheese
- 1/4 cup pure maple syrup
- 2 tablespoons melted butter
- For Brushing (Optional):
- 2 tablespoons melted butter
- 1 tablespoon pure maple syrup
Preparing the Bacon and Cheese Mixture
Okay, let’s get started! The first thing we need to do is prepare our delicious maple bacon cheddar filling. This is what’s going to make these biscuits truly special.
- Cook the Bacon: Start by cooking your bacon until it’s nice and crispy. I prefer to cook mine in a skillet over medium heat, but you can also bake it in the oven at 400°F (200°C) for about 15-20 minutes. Just make sure it’s cooked through and crispy, not chewy.
- Crumble the Bacon: Once the bacon is cooked, remove it from the pan and let it cool slightly on a paper towel-lined plate to absorb any excess grease. Then, crumble it into small pieces. You can use your hands or a knife to do this. I like to leave some slightly larger pieces for texture.
- Combine the Ingredients: In a medium bowl, combine the crumbled bacon, shredded cheddar cheese, and maple syrup. Mix well until everything is evenly distributed. The maple syrup will help bind the bacon and cheese together slightly.
- Melt the Butter: In a small bowl, melt the 2 tablespoons of butter. This will be brushed over the dough later to add extra flavor and richness. Set aside.
Making the Biscuit Dough
Now for the biscuit dough! This part is crucial, so pay close attention. The key to light and fluffy biscuits is to keep everything cold and avoid overmixing.
- Combine Dry Ingredients: In a large bowl, whisk together the flour, baking powder, baking soda, salt, and sugar. Make sure everything is well combined. This will ensure that the baking powder and baking soda are evenly distributed throughout the dough, which is essential for proper rising.
- Cut in the Butter: Add the cold, cubed butter to the dry ingredients. Using a pastry blender or your fingertips, cut the butter into the flour mixture until it resembles coarse crumbs. The butter should be in small pieces, about the size of peas. This is what creates those flaky layers in the biscuits. Don’t overwork the butter! You want to keep it cold and in distinct pieces.
- Add the Buttermilk: Gradually add the cold buttermilk to the flour mixture, stirring gently with a fork until just combined. Be careful not to overmix the dough. It should be slightly shaggy and sticky. Overmixing will develop the gluten in the flour, resulting in tough biscuits.
- Turn Out the Dough: Lightly flour a clean work surface. Turn the dough out onto the floured surface. Gently pat the dough into a rectangle about 1 inch thick.
Assembling the Biscuits
This is where the magic happens! We’re going to layer the dough with the bacon and cheese mixture to create those delicious pockets of flavor.
- Brush with Butter: Brush the melted butter evenly over the surface of the dough rectangle. This will add extra richness and flavor to the biscuits.
- Sprinkle with Filling: Sprinkle the bacon and cheese mixture evenly over the buttered dough. Make sure to distribute it evenly so that each biscuit gets a good amount of filling.
- Fold the Dough: Fold the dough in half, bringing one short end over to the other. Gently press down to seal the edges.
- Repeat Folding: Repeat the folding process two more times, gently pressing down after each fold. This will create layers of bacon and cheese throughout the biscuits.
- Pat into a Rectangle: After the final fold, gently pat the dough into a rectangle about 1 inch thick.
- Cut Out the Biscuits: Using a 2 1/2-inch biscuit cutter (or a sharp knife), cut out the biscuits. Try to cut them close together to minimize waste. Don’t twist the cutter! Press straight down and lift straight up to avoid sealing the edges, which can prevent the biscuits from rising properly.
- Place on Baking Sheet: Place the biscuits on a baking sheet lined with parchment paper. Leave about 1 inch of space between each biscuit.
- Optional: Brush with Maple Butter: If desired, brush the tops of the biscuits with the melted butter and maple syrup mixture. This will give them a beautiful golden-brown color and add a touch of extra sweetness.
Baking the Biscuits
Almost there! Now it’s time to bake these beauties until they’re golden brown and irresistible.
- Preheat the Oven: Preheat your oven to 425°F (220°C). Make sure your oven is fully preheated before you put the biscuits in.
- Bake the Biscuits: Bake the biscuits for 15-20 minutes, or until they are golden brown and cooked through. The exact baking time will depend on your oven, so keep an eye on them.
- Cool Slightly: Remove the biscuits from the oven and let them cool slightly on the baking sheet before serving.
Serving and Storage
These Maple Bacon Cheddar Biscuits are best served warm, straight from the oven. They’re perfect for breakfast, brunch, or as a savory side dish with dinner.
- Serving Suggestions: Serve these biscuits with a side of scrambled eggs, sausage, or fruit for a complete breakfast. They’re also delicious with a bowl of soup or chili.
- Storage: Store leftover biscuits in an airtight container at room temperature for up to 2 days. For longer storage, you can freeze them. Wrap the biscuits individually in plastic wrap and then place them in a freezer bag. They can be frozen for up to 2 months. To reheat frozen biscuits, thaw them overnight in the refrigerator and then bake them in a preheated oven at 350°F (175°C) for about 10 minutes, or until warmed through.
Tips for Perfect Biscuits
Here are a few extra tips to help you make the best Maple Bacon Cheddar Biscuits ever:
- Use Cold Ingredients: This is the most important tip! Cold butter and buttermilk are essential for creating flaky biscuits.
- Don’t Overmix: Overmixing the dough will develop the gluten in the flour, resulting in tough biscuits. Mix just until the ingredients are combined.
- Handle the Dough Gently: Be gentle when patting and folding the dough. Avoid pressing down too hard, as this can compress the layers and prevent the biscuits from rising properly.
- Use a Sharp Biscuit Cutter: A sharp biscuit cutter will create clean cuts and prevent the edges from sealing, which can inhibit rising.
- Don’t Twist the Cutter: As mentioned earlier, avoid twisting the biscuit cutter when cutting out the biscuits. Press straight down and lift straight up.
- Bake at a High Temperature: Baking the biscuits at a high temperature will help them rise quickly and create a golden-brown crust.
- Adjust Baking Time as Needed: The exact baking time will depend on your oven, so keep an eye on the biscuits and adjust the time as needed.
Variations
Want to mix things up a bit? Here are a few variations you can try:
- Add Herbs: Add 1-2 tablespoons of chopped fresh herbs, such as chives, thyme, or rosemary, to the dough for extra flavor.
- Use Different Cheese: Experiment with different types of cheese, such as Gruyere, Monterey Jack, or pepper jack.
- Add a Spicy Kick: Add a pinch of cayenne pepper or a dash of hot sauce to the dough for a spicy kick.
- Make Mini Biscuits: Use a smaller biscuit cutter to make mini biscuits,
Conclusion:
And there you have it! These Maple Bacon Cheddar Biscuits are truly something special, a delightful dance of sweet and savory that will leave you craving more. I know, I know, I might be biased, but trust me on this one. The combination of the flaky, buttery biscuit, the salty, smoky bacon, the sharp cheddar, and that hint of maple syrup is simply irresistible. It’s a flavor explosion in every single bite!
But why is this recipe a must-try? Well, beyond the incredible taste, it’s surprisingly easy to make. We’ve broken down each step to ensure even beginner bakers can achieve biscuit perfection. Plus, it’s incredibly versatile. Need a show-stopping brunch item? These biscuits are your answer. Looking for a unique side dish for dinner? Look no further. Want a satisfying snack that will actually keep you full? You guessed it, these biscuits are the perfect solution.
Serving Suggestions and Variations:
Don’t be afraid to get creative! While these biscuits are amazing on their own, there are so many ways to elevate them even further.
* Brunch Bliss: Serve them warm with a side of scrambled eggs and a dollop of maple butter. Trust me, it’s a brunch game-changer.
* Dinner Delight: Pair them with a hearty chili or a comforting bowl of soup for a complete and satisfying meal.
* Sandwich Sensation: Slice them in half and use them as the base for a delicious breakfast sandwich with eggs, bacon, and your favorite cheese.
* Sweet & Savory Spread: Try spreading them with a little apple butter or fig jam for an extra layer of flavor.
* Spice it Up: Add a pinch of cayenne pepper to the dough for a subtle kick.
* Herbaceous Heaven: Incorporate fresh herbs like chives or rosemary into the biscuit dough for a more complex flavor profile.
* Cheese Please!: Experiment with different types of cheese. Gruyere, pepper jack, or even a smoked gouda would be fantastic additions.And if you’re feeling particularly adventurous, why not try making a batch of these Maple Bacon Cheddar Biscuits with a gluten-free flour blend? Just be sure to use a blend that’s specifically designed for baking and follow the package instructions carefully.
I truly believe that this recipe is a winner. It’s a crowd-pleaser, it’s easy to make, and it’s incredibly delicious. But don’t just take my word for it! I urge you to give it a try. Gather your ingredients, preheat your oven, and prepare to be amazed.
Once you’ve made these biscuits, I would absolutely love to hear about your experience. Did you make any variations? What did you serve them with? What did your family and friends think? Share your photos and stories in the comments below! Your feedback is invaluable and helps me continue to create recipes that you’ll love. So go ahead, bake up a batch of these irresistible biscuits and let me know what you think. Happy baking!
Maple Bacon Cheddar Biscuits: The Ultimate Savory Breakfast Recipe
Flaky, buttery biscuits loaded with crispy bacon, sharp cheddar, and a hint of maple syrup. A savory-sweet breakfast or brunch treat!
Ingredients
- 4 cups all-purpose flour, plus more for dusting
- 2 tablespoons baking powder
- 1 teaspoon baking soda
- 1 teaspoon salt
- 1/2 teaspoon granulated sugar
- 1 cup (2 sticks) cold unsalted butter, cut into 1/2-inch cubes
- 1 1/2 cups cold buttermilk
- 1 pound thick-cut bacon, cooked until crispy and crumbled
- 1 cup shredded sharp cheddar cheese
- 1/4 cup pure maple syrup
- 2 tablespoons melted butter
- 2 tablespoons melted butter
- 1 tablespoon pure maple syrup
Instructions
- Prepare Bacon and Cheese Mixture: Cook bacon until crispy. Crumble and combine with cheddar cheese and maple syrup in a bowl. Melt 2 tablespoons of butter and set aside.
- Make Biscuit Dough: Whisk together flour, baking powder, baking soda, salt, and sugar in a large bowl. Cut in cold butter using a pastry blender or fingertips until mixture resembles coarse crumbs. Gradually add cold buttermilk, stirring gently until just combined.
- Assemble Biscuits: Lightly flour a work surface. Turn dough out and pat into a 1-inch thick rectangle. Brush with melted butter. Sprinkle with bacon and cheese mixture. Fold dough in half, pressing down gently. Repeat folding two more times. Pat into a 1-inch thick rectangle.
- Cut and Place: Cut out biscuits using a 2 1/2-inch biscuit cutter (or knife). Place on a parchment-lined baking sheet, leaving 1 inch of space between each.
- (Optional) Brush with Maple Butter: Brush tops of biscuits with melted butter and maple syrup mixture.
- Bake: Preheat oven to 425°F (220°C). Bake for 15-20 minutes, or until golden brown.
- Cool and Serve: Let cool slightly on the baking sheet before serving.
Notes
- Use cold ingredients for the flakiest biscuits.
- Don’t overmix the dough.
- Handle the dough gently when patting and folding.
- Use a sharp biscuit cutter and press straight down, don’t twist.
- Bake at a high temperature for a golden-brown crust.
- Adjust baking time as needed based on your oven.
- Store leftover biscuits in an airtight container at room temperature for up to 2 days or freeze for up to 2 months. Reheat frozen biscuits in a preheated oven at 350°F (175°C) for about 10 minutes.
- Variations: Add herbs, use different cheese, add a spicy kick, or make mini biscuits.


Leave a Comment