
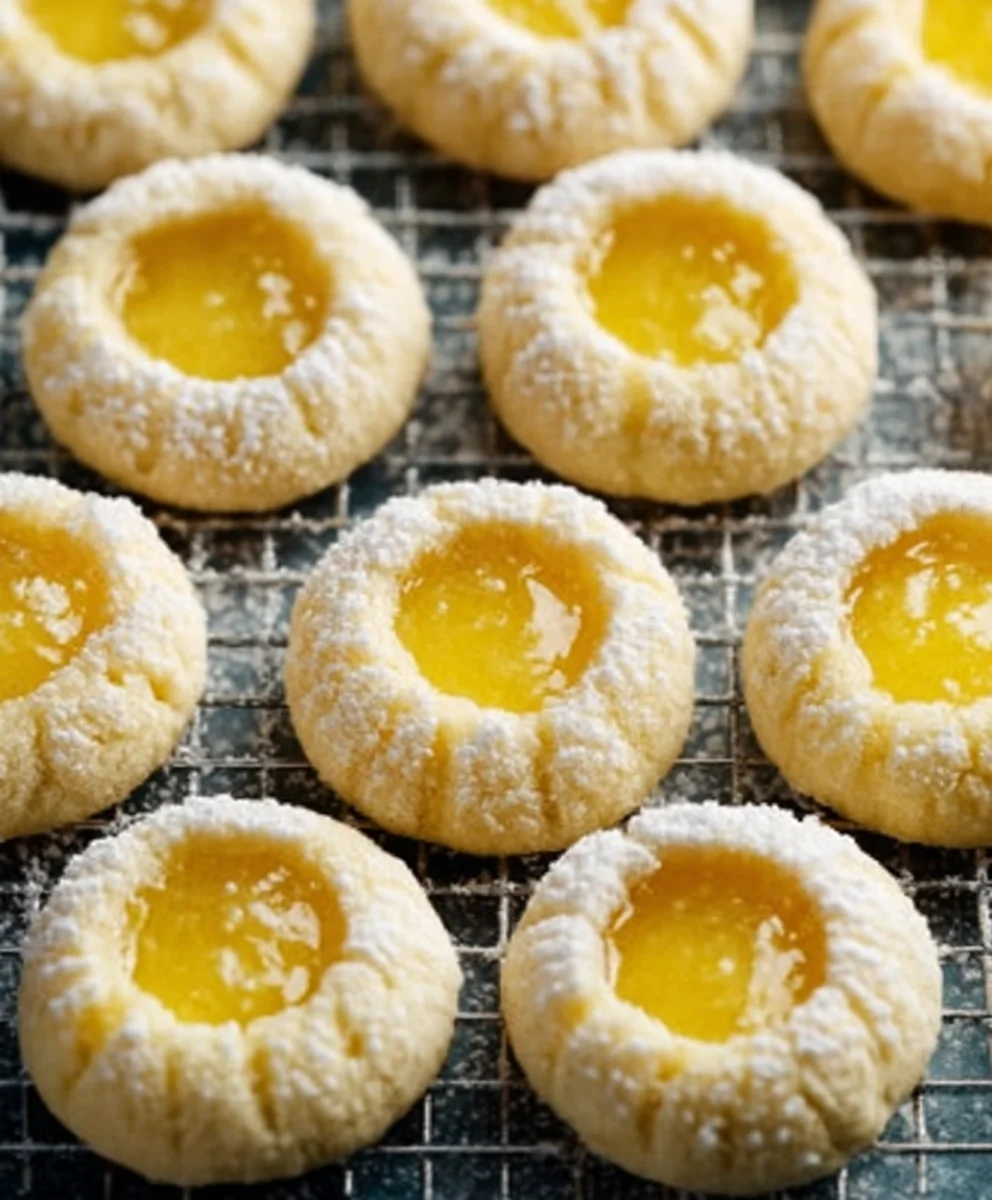
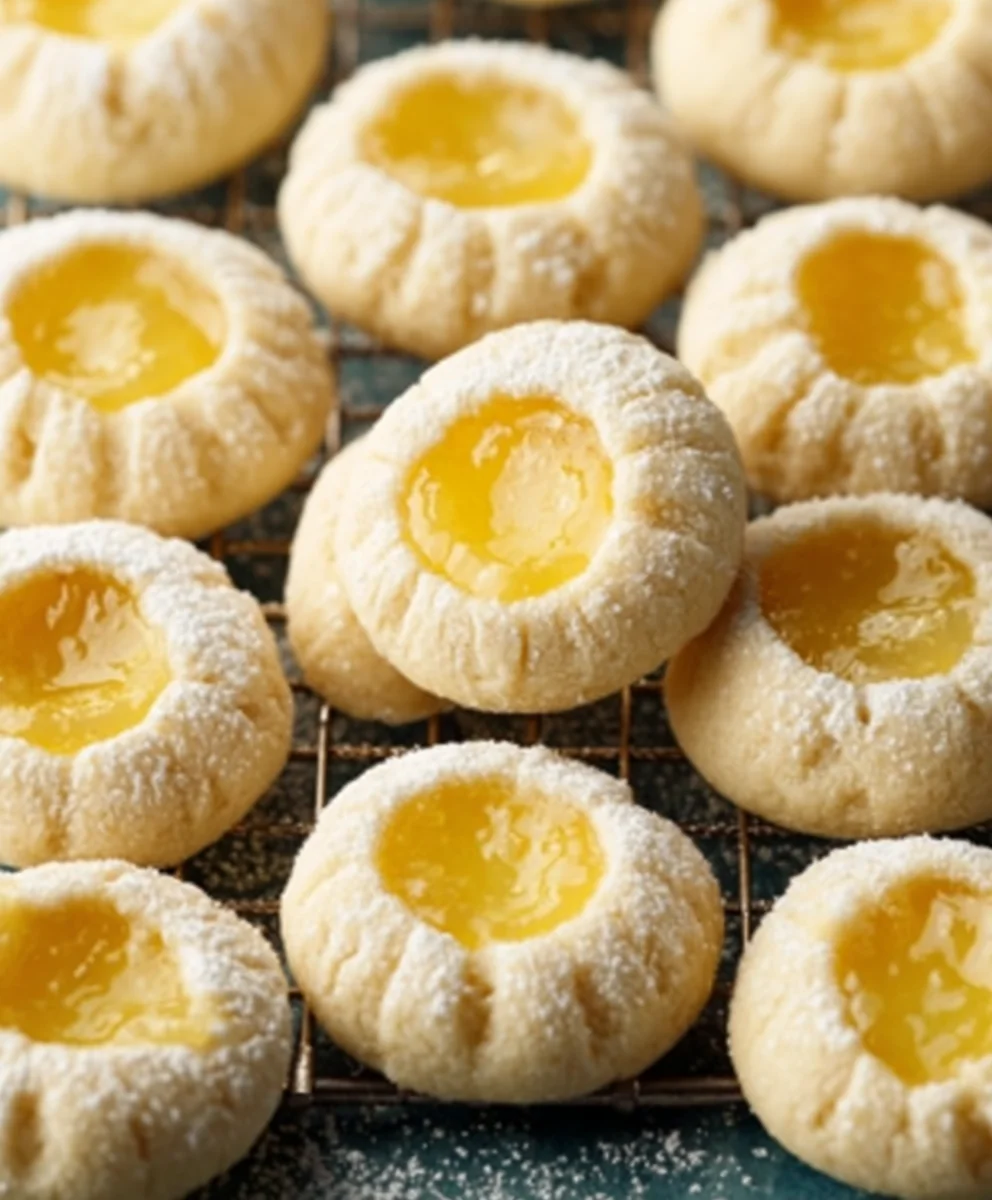
Lemon Thumbprints are more than just a cookie; they’re tiny bursts of sunshine, a delightful dance of tangy citrus and sweet, buttery goodness that instantly brightens any occasion. If you’ve ever indulged in these delicate beauties, you know exactly why they hold such a special place in our hearts and on our holiday platters. Their charming little indentations, just beggin extractg to be filled with a vibrant jam or a luscious caramel, are iconic. What truly makes Lemon Thumbprints so beloved is their perfect balance. The subtle zestiness of the lemon cuts through the richness of the dough, creating a flavor profile that is both sophisticated and incredibly comforting. They’re surprisingly easy to make, yet they look and taste like they came from a professional bakery, making them a go-to for gifts, parties, or simply a moment of personal indulgence. Get ready to fall in love all over again with these delightful Lemon Thumbprints!

Ingredients:
- 2 and 1/4 cups (281g) all-purpose flour, spooned and leveled
- 1 Tablespoon (8g) cornstarch
- 1/4 teaspoon salt
- 14 Tablespoons (200g) unsalted butter, softened to room temperature (see Note)
- 3/4 cup (150g) granulated sugar
- 1 Tablespoon fresh lemon zest
- 1 Tablespoon fresh lemon juice
- 1 large egg, at room temperature
- 1 teaspoon vanilla bean paste (or vanilla extract)
- 1/2 cup (100g) granulated sugar (for rolling)
- 1/2 cup (140g) homemade lemon curd or store-bought (for filling)
- 1 cup (120g) confectioners’ sugar (for glaze)
- 2 Tablespoons (30ml) fresh lemon juice (for glaze)
Cookie Dough Preparation
Step 1: Combine Dry Ingredients
In a medium bowl, whisk together the all-purpose flour, cornstarch, and salt. Whisking these dry ingredients thoroughly ensures they are evenly distributed, which is crucial for a consistent cookie texture. Set this bowl aside.
Step 2: Cream Butter and Sugar
In a large bowl, using an electric mixer on medium speed, cream together the softened unsalted butter and 3/4 cup of granulated sugar until light and fluffy, about 3-4 minutes. Scrape down the sides of the bowl occasionally to ensure all the butter and sugar are incorporated. The butter should be soft enough to yield to gentle pressure but not melted. This creaming process incorporates air into the dough, which contributes to the cookies’ tender crum extractb and prevents them from spreading too much during baking.
Step 3: Add Wet Ingredients and Flavorings
Add the fresh lemon zest and 1 Tablespoon of fresh lemon juice to the creamed butter and sugar mixture. Continue mixing until just combined. Then, add the large egg and the vanilla bean paste (or vanilla extract). Mix on low speed until everything is incorporated and the batter looks smooth. Be careful not to overmix at this stage, as it can develop the gluten in the flour too much, leading to tougher cookies. The aroma of the lemon zest and vanilla will already start to make your kitchen smell wonderful!
Step 4: Incorporate Dry Ingredients
Gradually add the dry ingredients from Step 1 to the wet ingredients, mixing on low speed until just combined and no dry streaks of flour remain. It’s important to mix until the dough just comes together. Overmixing at this point can make the cookies tough and dense. The dough will be soft and slightly sticky, but it should hold together when squeezed.
Step 5: Chill the Dough
Turn the dough out onto a large piece of plastic wrap. Gather the edges of the plastic wrap and form the dough into a disc. Wrap the disc tightly and refrigerate for at least 1 hour, or up to 2 days. Chilling the dough is a critical step. It solidifies the butter, making the dough easier to handle and shape, and it also allows the flavors to meld, resulting in a more delicious cookie. A well-chilled dough will also spread less during baking, helping the thumbprint shape to hold its form.
Shaping and Baking the Lemon Thumbprints
Step 6: Prepare for Baking
Preheat your oven to 350°F (175°C). Line two baking sheets with parchment paper or silicone baking mats. This prevents sticking and makes for easy cleanup. In a shallow bowl, combine the 1/2 cup of granulated sugar for rolling. Take the chilled dough out of the refrigerator and let it sit at room temperature for about 10-15 minutes if it’s too firm to scoop. This makes it more pliable for shaping.
Step 7: Shape the Cookies
Scoop rounded tablespoons of dough and roll them into balls. Then, roll each ball in the granulated sugar until evenly coated. Place the sugared balls about 2 inches apart on the prepared baking sheets. Once all the balls are on the baking sheets, use your thumb or the back of a small spoon to gently press an indentation into the center of each cookie. Make sure not to press all the way through to the bottom of the cookie. These indentations are where the delicious lemon curd will go. If the dough cracks around the indentation, gently press it back together.
Step 8: Bake the Cookies
Bake for 12-15 minutes, or until the edges are lightly golden brown and the centers are still slightly soft. The cookies will continue to set as they cool. Avoid overbaking, as this can lead to dry cookies. The exact baking time will depend on your oven, so keep an eye on them, especially during the first batch.
Step 9: Cool and Fill
Let the cookies cool on the baking sheets for 5 minutes before transferring them to a wire rack to cool completely. It’s important for the cookies to be completely cool before filling them with lemon curd. If you try to fill warm cookies, the curd might melt or make the cookie too soft.
Glazing and Finishing
Step 10: Prepare the Lemon Glaze
While the cookies are cooling, prepare the lemon glaze. In a small bowl, whisk together the confectioners’ sugar and 2 Tablespoons of fresh lemon juice until smooth and pourable. The consistency should be thick enough to coat the back of a spoon but thin enough to drizzle. If the glaze is too thick, add a tiny bit more lemon juice, a few drops at a time. If it’s too thin, add a little more confectioners’ sugar.
Step 11: Fill and Glaze the Lemon Thumbprints
Once the cookies are completely cool, spoon about 1/2 teaspoon of lemon curd into the indentation of each cookie. Don’t overfill, as the curd could spill out when you drizzle the glaze. Then, using a spoon or a piping bag with a small tip, drizzle the lemon glaze over the top of the filled cookies. The glaze adds another layer of tangy sweetness and a beautiful finish. Let the glaze set for at least 15-20 minutes before serving or storing. Enjoy these delightful Lemon Thumbprints!
Conclusion:
And there you have it – a delightful journey into creating perfect Lemon Thumbprints! We’ve explored how to achieve that wonderfully tender cookie with a bright, zesty citrus punch, all encased in that signature indentation. These cookies are truly a celebration of simple, fresh flavors and a joy to make, whether you’re a seasoned baker or just starting out. The sweet and tart balance is simply irresistible, making them a guaranteed crowd-pleaser for any occasion, from holiday gatherings to a simple afternoon tea.
For serving suggestions, these Lemon Thumbprints are fantastic on their own, but they also pair beautifully with a creamy vanilla ice cream or a light fruit salad. Imagin extracte a platter of these alongside some fresh berries – pure bliss! If you’re feeling adventurous, consider a dusting of powdered sugar for an extra touch of elegance, or even a drizzle of white chocolate for a decadent twist. Don’t be afraid to experiment with variations too! You could try adding a touch of poppy seeds to the dough for added texture and visual appeal, or perhaps a gin extractt of ginger for a warming note. Whatever you decide, the fundamental recipe for Lemon Thumbprints is wonderfully adaptable.
So go forth and bake! I encourage you to gather your ingredients, put on your favorite music, and enjoy the process of creating these charming Lemon Thumbprints. The aroma filling your kitchen will be reward enough, but the taste will be even better. Happy baking!
Frequently Asked Questions:
Why did my Lemon Thumbprints spread too much?
Overmixing the dough can develop the gluten too much, leading to spreading. Ensure you mix just until the ingredients are combined. Also, make sure your butter is softened but not melted. Chilling the dough for at least 30 minutes before baking is also crucial for preventing excessive spreading and achieving that classic thumbprint shape.
Can I make Lemon Thumbprints ahead of time?
Absolutely! Baked Lemon Thumbprints can be stored in an airtight container at room temperature for up to 3-4 days. For longer storage, you can freeze them for up to 2-3 months. If you’re looking to save time on the day of an event, you can also chill the dough for up to 2 days before shaping and baking.
Lemon Thumbprint Cookies-Bright Citrus Flavor
Delightful thumbprint cookies bursting with bright lemon flavor, a perfect balance of tart and sweet.
Ingredients
-
2 and 1/4 cups (281g) all-purpose flour, spooned and leveled
-
1 Tablespoon (8g) cornstarch
-
1/4 teaspoon salt
-
14 Tablespoons (200g) unsalted butter, softened to room temperature
-
3/4 cup (150g) granulated sugar
-
1 Tablespoon fresh lemon zest
-
1 Tablespoon fresh lemon juice
-
1 large egg, at room temperature
-
1 teaspoon vanilla bean paste (or vanilla extract)
-
1/2 cup (100g) granulated sugar (for rolling)
-
1/2 cup (140g) homemade lemon curd or store-bought
-
1 cup (120g) confectioners’ sugar
-
2 Tablespoons (30ml) fresh lemon juice (for glaze)
Instructions
-
Step 1
Combine dry ingredients: In a medium bowl, whisk together the all-purpose flour, cornstarch, and salt. Set aside. -
Step 2
Cream butter and sugar: In a large bowl, cream together softened unsalted butter and 3/4 cup granulated sugar until light and fluffy. Scrape down sides as needed. -
Step 3
Add wet ingredients and flavorings: Add lemon zest, 1 Tbsp lemon juice, egg, and vanilla bean paste to the creamed mixture. Mix until just combined. Be careful not to overmix. -
Step 4
Incorporate dry ingredients: Gradually add the dry ingredients to the wet ingredients, mixing on low speed until just combined. The dough will be soft and slightly sticky. -
Step 5
Chill the dough: Turn dough onto plastic wrap, form into a disc, wrap tightly, and refrigerate for at least 1 hour. -
Step 6
Prepare for baking: Preheat oven to 350°F (175°C). Line baking sheets with parchment paper. If dough is too firm, let it sit at room temperature for 10-15 minutes. -
Step 7
Shape the cookies: Scoop rounded tablespoons of dough, roll into balls, then roll in 1/2 cup granulated sugar. Place on baking sheets and press an indentation in the center of each with your thumb or a spoon. -
Step 8
Bake the cookies: Bake for 12-15 minutes, until edges are lightly golden brown and centers are still slightly soft. Cool on baking sheets for 5 minutes, then transfer to a wire rack to cool completely. -
Step 9
Prepare the lemon glaze: Whisk together confectioners’ sugar and 2 Tbsp lemon juice until smooth and pourable. -
Step 10
Fill and glaze the cookies: Spoon lemon curd into the indentations. Drizzle lemon glaze over the top. Let glaze set for 15-20 minutes before serving.
Important Information
Nutrition Facts (Per Serving)
It is important to consider this information as approximate and not to use it as definitive health advice.
Allergy Information
Please check ingredients for potential allergens and consult a health professional if in doubt.

Leave a Comment