
Rustic Sweet Potato Pie Bars Recipe is more than just a dessert; it’s a comforting slice of autumnal bliss, cleverly reimagined for modern convenience and shareability. I’ve always held a special place in my heart for the rich, comforting flavors of a classic sweet potato pie, a cherished staple at holiday tables and family gatherings, especially across the Southern United States. It carries with it a beautiful legacy of warmth, tradition, and generous hospitality, embodying the very essence of home.
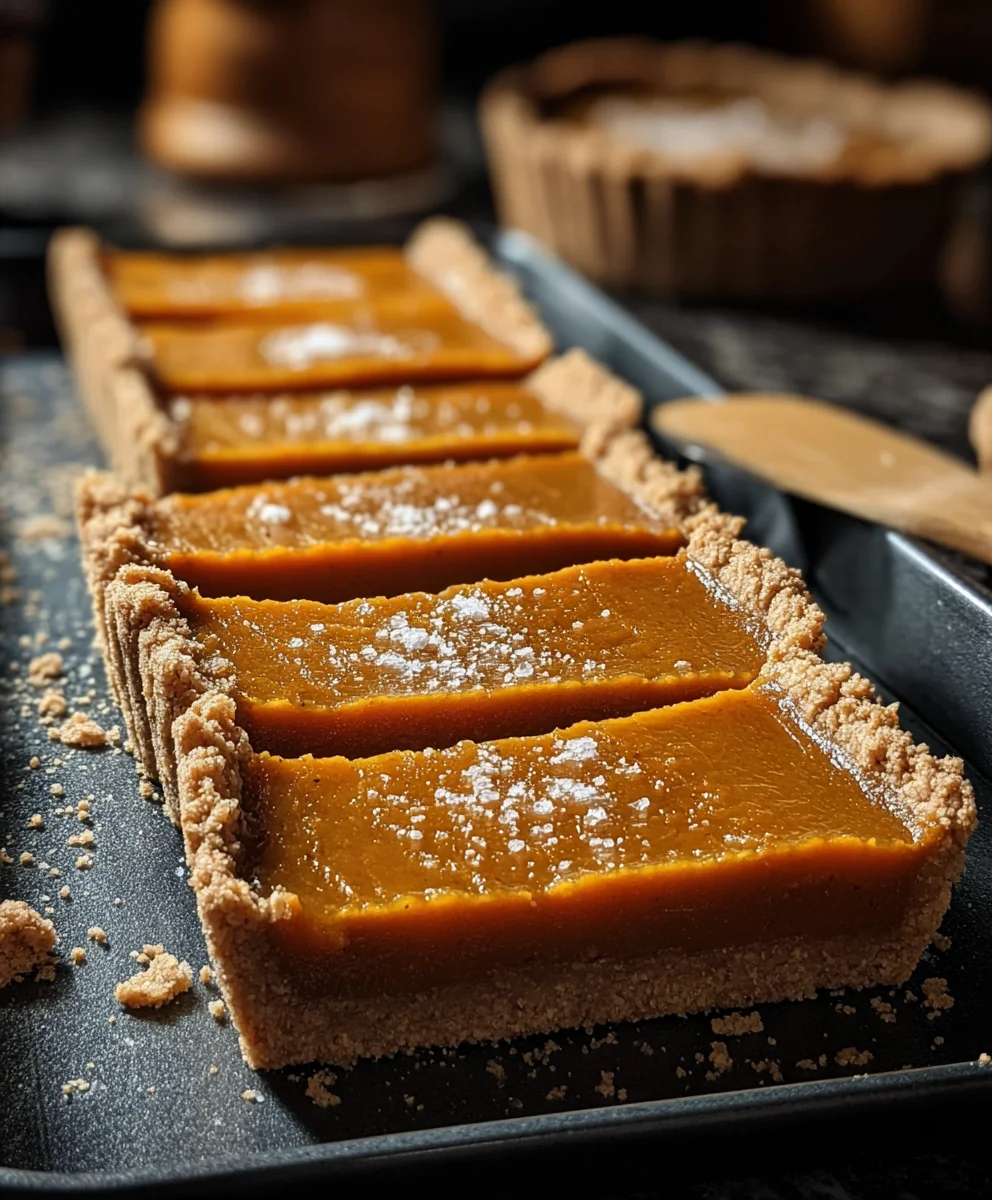
However, I understand that sometimes the grandeur of a whole pie can be a bit much, particularly when you’re seeking an easy-to-share treat or a portable dessert. This is precisely where our delightful Rustic Sweet Potato Pie Bars Recipe truly shines. Imagine the velvety smooth, perfectly spiced sweet potato filling, nestled within a buttery, crumbly shortbread crust, all contained within a perfectly portioned bar. People absolutely adore this dish because it delivers all the nostalgic comfort and exquisite taste of its traditional pie counterpart, but with the added convenience of being incredibly simple to serve and enjoy, making it ideal for potlucks, casual gatherings, or simply as a delightful treat with your afternoon coffee. The bar format ensures less fuss and more deliciousness for everyone to savor.

Ingredients:
Here’s everything you’ll need to create these truly delectable Rustic Sweet Potato Pie Bars. I’ve broken it down into sections to make your shopping list a breeze!
-
For the Shortbread Crust:
- 2 ½ cups (300g) all-purpose flour: I always use unbleached for the best flavor and texture.
- ½ cup (100g) granulated sugar: Just enough sweetness to complement the sweet potato.
- ¼ teaspoon salt: A crucial ingredient to balance the sweetness and enhance other flavors. Don’t skip it!
- 1 cup (226g) unsalted butter: Make sure it’s very cold and cut into small cubes. This is key for a flaky, tender crust.
- 1 large egg yolk: This adds richness and helps bind the dough, contributing to that perfect shortbread texture.
- 1 teaspoon pure vanilla extract: A warm, aromatic note that elevates the entire crust.
- 2-3 tablespoons ice water: Only add if needed, just a little at a time, to bring the dough together.
-
For the Creamy Sweet Potato Filling:
- 3 medium (about 2 ½ – 3 pounds) sweet potatoes: Look for firm, unblemished sweet potatoes. Roasting them yourself yields the best flavor, trust me!
- ½ cup (113g) unsalted butter: Melted, to provide richness and a smooth texture to the filling.
- ¾ cup (150g) packed light brown sugar: This adds a deep, molasses-like sweetness that pairs beautifully with sweet potatoes.
- ¼ cup (50g) granulated sugar: To achieve that perfect balance of sweetness without overpowering the natural flavor of the sweet potatoes.
- ½ cup (120ml) heavy cream: For an incredibly smooth and luxurious consistency.
- 2 large eggs: These act as a binder, giving the filling its classic pie-like structure.
- 1 tablespoon all-purpose flour: A little bit helps ensure the filling sets up nicely.
- 1 teaspoon ground cinnamon: The classic spice for sweet potato pie, adding warmth and aroma.
- ½ teaspoon ground nutmeg: Another essential spice that complements cinnamon beautifully.
- ¼ teaspoon ground ginger: For a subtle, peppery kick that brightens the flavor profile.
- ⅛ teaspoon ground cloves: Just a pinch for that deep, complex spice blend.
- ¼ teaspoon salt: Again, vital for balancing all the sweet and earthy flavors.
- 1 teaspoon pure vanilla extract: Don’t skimp on the good stuff here; it truly makes a difference.
-
Optional Topping Ideas:
- Miniature marshmallows: For a classic sweet potato casserole vibe on top of your bars.
- Pecan Streusel:
- ½ cup (50g) chopped pecans: Toasted, if you prefer, for extra crunch and depth.
- ¼ cup (50g) packed light brown sugar: For sweetness and moisture in the streusel.
- ¼ cup (30g) all-purpose flour: To bind the streusel ingredients.
- ¼ teaspoon ground cinnamon: To echo the spices in the filling.
- 3 tablespoons (42g) unsalted butter: Very cold and cut into small pieces, or melted and drizzled, depending on your preferred streusel texture.
- Whipped Cream or Vanilla Ice Cream: For serving, if you’re feeling extra indulgent!
For the Shortbread Crust: The Foundation of Our Rustic Sweet Potato Pie Bars
A good crust is the backbone of any pie, and for these Rustic Sweet Potato Pie Bars, we want a tender, buttery shortbread that crumbles just right. It’s easier than you think, I promise!
- Prepare Your Pan: First things first, preheat your oven to 375°F (190°C). Then, lightly grease a 9×13-inch baking pan. I like to line it with parchment paper, leaving an overhang on the sides. This makes lifting the bars out super easy once they’re baked and cooled, which is a little trick I’ve picked up over the years and highly recommend for clean cuts.
- Combine Dry Ingredients: In a large mixing bowl, whisk together the 2 ½ cups all-purpose flour, ½ cup granulated sugar, and ¼ teaspoon salt until well combined. This ensures an even distribution of flavor throughout the crust.
- Cut in the Cold Butter: Now for the fun part! Add your 1 cup of very cold, cubed unsalted butter to the dry ingredients. Using a pastry blender, two knives, or even your fingertips (working quickly so the butter doesn’t get too warm), cut the butter into the flour mixture until it resembles coarse crumbs, with some pieces of butter still about the size of small peas. This step is crucial for a tender, flaky crust. Those little butter pockets create steam in the oven, giving you that delightful texture.
- Add Wet Ingredients: In a separate small bowl, whisk together the 1 large egg yolk and 1 teaspoon pure vanilla extract. Pour this mixture into the flour and butter mixture.
- Form the Dough: Mix with a fork or your hands until the dough just starts to come together. If the dough seems too dry and isn’t coming together after a minute or two of gentle mixing, add 1 tablespoon of ice water at a time, mixing after each addition, until the dough forms a shaggy ball. Be careful not to overmix! Overmixing develops the gluten in the flour, which can lead to a tough crust, and we definitely want a tender one for our Rustic Sweet Potato Pie Bars.
- Press into the Pan: Transfer the dough to your prepared 9×13-inch baking pan. Using your fingertips, press the dough evenly into the bottom of the pan. Make sure to press it firmly so you have a solid, even base. You can use the bottom of a flat glass or measuring cup to help you get a really smooth, even layer.
- Chill the Crust: Pop the pan into the refrigerator for at least 30 minutes. This chilling time helps the butter firm up, preventing the crust from shrinking too much in the oven and ensuring it holds its shape beautifully. It’s a little extra step that makes a big difference in the final product of your sweet potato bars.
- Par-Bake the Crust: Once chilled, take the pan out of the fridge. Bake the crust in your preheated 375°F (190°C) oven for 18-20 minutes, or until it’s lightly golden brown around the edges. This par-baking step is essential to prevent a soggy bottom once we add our luscious sweet potato filling. Remove from the oven and set aside to cool slightly while you prepare the filling.
For the Creamy Sweet Potato Filling: The Heart of Our Rustic Sweet Potato Pie Bars Recipe
Now, let’s talk about the star of the show – the sweet potato filling! Achieving that perfect creamy texture and balanced flavor is key to these incredible bars. My secret? Roasting the sweet potatoes, which truly brings out their natural sweetness and depth of flavor.
- Roast the Sweet Potatoes: If you haven’t already, preheat your oven to 400°F (200°C). Wash and prick your 3 medium sweet potatoes several times with a fork. You can either bake them whole directly on the oven rack or on a baking sheet until they are very tender when squeezed, usually 45-60 minutes, depending on their size. Alternatively, you can peel, cube, and toss them with a little oil, then roast until tender and slightly caramelized – this method can sometimes be quicker. I personally love the depth of flavor from roasting them whole.
- Prepare the Sweet Potato Puree: Once roasted and cool enough to handle, carefully scoop the sweet potato flesh into a large bowl. Discard the skins. Mash the sweet potatoes thoroughly with a fork, potato masher, or use a food processor for an extra smooth puree. You should have about 2 to 2 ½ cups of smooth sweet potato puree. Aim for absolutely no lumps here for that silky texture!
- Melt the Butter: In a small saucepan or microwave-safe bowl, melt ½ cup unsalted butter. Set aside to cool slightly.
- Combine Wet and Dry Sugars with Spices: In a separate large mixing bowl, combine the ¾ cup packed light brown sugar, ¼ cup granulated sugar, 1 tablespoon all-purpose flour, 1 teaspoon ground cinnamon, ½ teaspoon ground nutmeg, ¼ teaspoon ground ginger, ⅛ teaspoon ground cloves, and ¼ teaspoon salt. Whisk these dry ingredients together thoroughly. This ensures all the delicious spices are evenly distributed, giving every bite of your sweet potato bar a burst of flavor.
- Incorporate into Puree: Add the melted and slightly cooled butter to the mashed sweet potatoes, mixing until well combined. Then, add the sugar and spice mixture, mixing until smooth.
- Add Remaining Wet Ingredients: Gradually whisk in the ½ cup heavy cream, followed by the 2 large eggs (one at a time, mixing well after each addition). Finally, stir in the 1 teaspoon pure vanilla extract. Continue mixing until the filling is completely smooth and uniform in color and texture. I like to use an electric hand mixer for this step to ensure there are no lumps and the filling is wonderfully airy and creamy. Taste and Adjust: This is your chance! Give a small spoonful a taste. Does it need a touch more spice? A tiny pinch more salt to enhance the sweetness? Adjust to your preference!
Assembling and Baking the Rustic Sweet Potato Pie Bars: The Grand Finale
Now that our crust is par-baked and our filling is perfectly spiced and creamy, it’s time to bring it all together and bake these glorious Rustic Sweet Potato Pie Bars to perfection!
- Pour the Filling: Carefully pour the sweet potato filling evenly over the warm, par-baked crust in the 9×13-inch pan. Use an offset spatula or the back of a spoon to spread it out smoothly to the edges. Ensure the surface is as level as possible for even baking.
- Bake the Bars: Reduce your oven temperature to 350°F (175°C). Place the pan with the filling back into the oven and bake for 45-55 minutes. The baking time can vary, so keep an eye on it. You’ll know it’s done when the edges are set and slightly puffed, but the center still has a slight jiggle to it when you gently shake the pan. A knife or toothpick inserted into the center should come out mostly clean, perhaps with a few moist crumbs attached. Do not overbake, or the filling can become dry and crack. We’re aiming for that signature creamy, custardy texture.
- Consider Your Topping (If Using): If you plan to add a topping like marshmallows or a pecan streusel, this is typically added during the last 10-15 minutes of baking, or immediately after baking for certain types of toppings. I’ll detail topping instructions below!
- Cool Completely: Once baked, carefully remove the pan from the oven. This is perhaps the hardest part: you must let the Rustic Sweet Potato Pie Bars cool completely on a wire rack before attempting to slice them. This will take at least 2-3 hours, or even longer at room temperature. For the cleanest slices and best texture, I often chill them in the refrigerator for an additional 1-2 hours after they’ve cooled to room temperature. Patience is a virtue here; attempting to cut them warm will result in a messy, crumbling disaster, and we’ve put too much love into these bars for that!
For the Marshmallow or Pecan Streusel Topping (Optional, but Highly Recommended!):
While these Rustic Sweet Potato Pie Bars are absolutely divine on their own, a topping takes them to another level! Here are two popular options.
Marshmallow Topping:
- Add Marshmallows: During the last 5-10 minutes of baking the sweet potato bars (after they’ve baked for about 40 minutes), evenly scatter a generous layer of miniature marshmallows over the top of the hot sweet potato filling.
- Broil (Optional): Return the pan to the oven for another 5-10 minutes, or until the marshmallows are puffed and beautifully golden brown. If you want a more deeply browned, slightly toasted marshmallow, you can switch to the broiler for a minute or two, watching very closely to prevent burning. Broilers can be tricky, so do not walk away! Remove from oven and let cool as directed above.
Pecan Streusel Topping:
- Combine Dry Streusel Ingredients: In a medium bowl, combine ½ cup chopped pecans, ¼ cup packed light brown sugar, ¼ cup all-purpose flour, and ¼ teaspoon ground cinnamon. Mix well.
- Add Cold Butter: Add 3 tablespoons of very cold unsalted butter, cut into small pieces, to the dry ingredients. Use your fingertips or a pastry blender to cut the butter into the mixture until it forms coarse crumbs. You want distinct pieces of butter distributed throughout.
- Sprinkle on Bars: During the last 15-20 minutes of the sweet potato bars’ baking time (after they’ve baked for about 30-35 minutes), remove the pan from the oven. Evenly sprinkle the pecan streusel mixture over the top of the sweet potato filling.
- Finish Baking: Return the pan to the oven and continue baking for the remaining 15-20 minutes, or until the streusel is golden brown and crispy, and the filling is set.
- Cool: Remove from the oven and let cool completely as directed in the “Assembling and Baking” section. The streusel will crisp up beautifully as it cools, adding a wonderful textural contrast to the creamy filling and tender crust of your Rustic Sweet Potato Pie Bars.
Cooling and Serving: The Rewarding End to Your Rustic Sweet Potato Pie Bars Recipe
You’ve done all the hard work, now for the grand finale – cutting into these beauties!
- The Importance of Cooling: As mentioned, allow the bars to cool completely at room temperature on a wire rack. This process takes time, often 2-3 hours. For the cleanest cuts and optimal firmness, I strongly recommend refrigerating them for at least an additional 1-2 hours, or even overnight. Chilling allows the filling to fully set and solidify, making for perfect, clean slices. Trust me, it’s worth the wait for these Rustic Sweet Potato Pie Bars!
- Lifting and Slicing: Once fully chilled, use the parchment paper overhangs to carefully lift the entire slab of sweet potato bars out of the baking pan and onto a large cutting board.
- Cut into Bars: Using a sharp knife, cut the bars into your desired size. I usually aim for 16-24 bars, depending on how generous I’m feeling! For the cleanest cuts, wipe your knife clean with a damp cloth between each slice. This prevents the filling from sticking to the knife and dragging, ensuring each bar looks pristine.
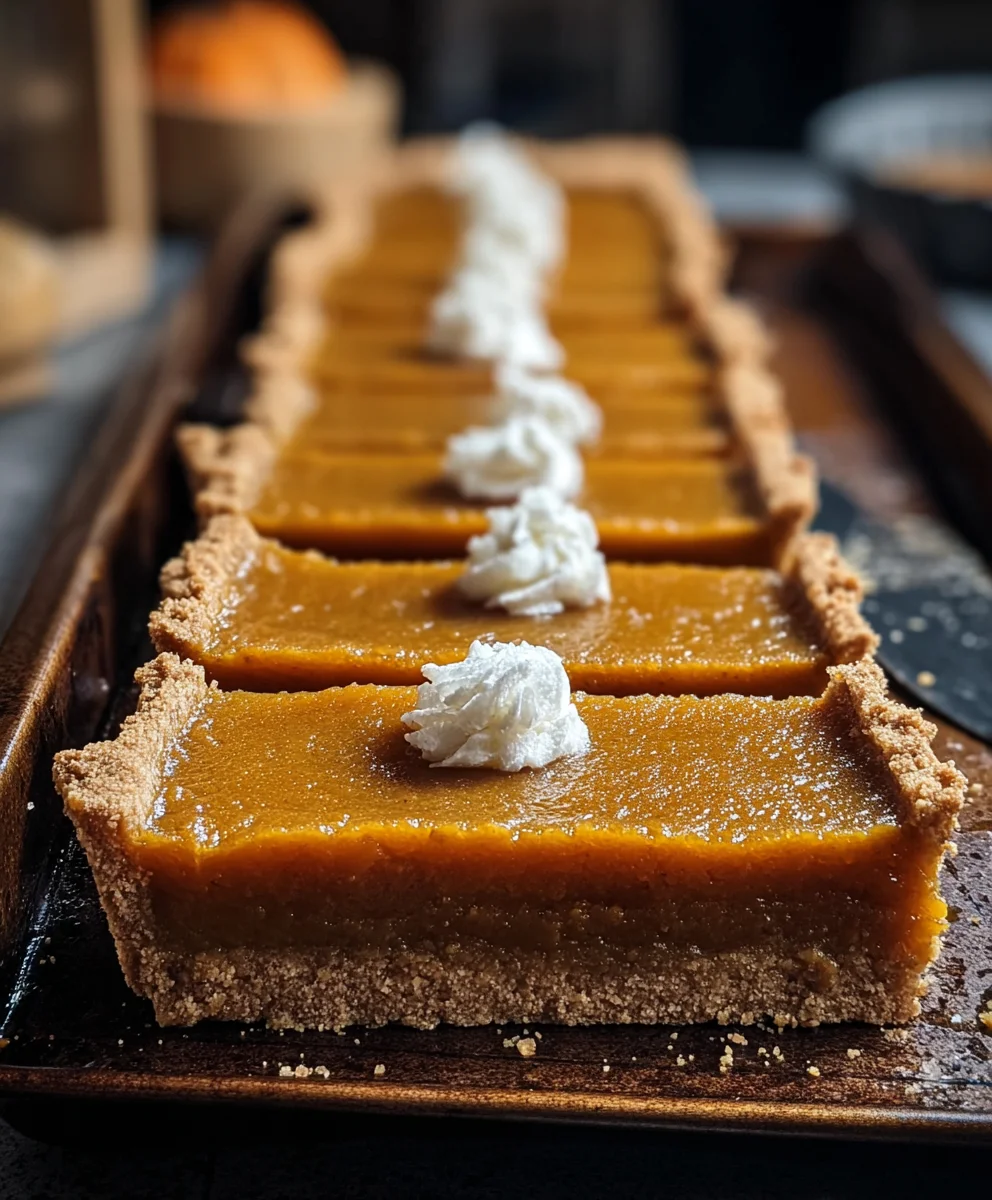
- Serving Suggestions: These Rustic Sweet Potato Pie Bars are wonderful served at room temperature or slightly chilled. For an extra special treat, warm them slightly in the microwave for a few seconds and serve with a dollop of fresh whipped cream, a scoop of vanilla bean ice cream, or even a drizzle of caramel sauce. The warmth brings out the spices and makes them incredibly comforting.
- Storing Your Bars: Leftover sweet potato pie bars can be stored in an airtight container in the refrigerator for up to 3-4 days. They actually taste even better the next day as the flavors meld together beautifully! If you’re planning to make a large batch, these bars also freeze well. Wrap individual bars tightly in plastic wrap, then aluminum foil, and store in a freezer-safe bag or container for up to 1-2 months. Thaw in the refrigerator overnight or on the counter for a few hours before serving.
Enjoying Your Creation!
Congratulations! You’ve successfully created a batch of these comforting and absolutely delicious Rustic Sweet Potato Pie Bars. They are the perfect treat for any occasion, combining the classic flavors of sweet potato pie with the convenience of a bar. Enjoy every single bite of your hard work!
Conclusion:
And there you have it, my friends! We’ve journeyed through the creation of what I truly believe is a dessert masterpiece – a dish that perfectly encapsulates comfort, warmth, and an irresistible sweetness. These bars aren’t just another sweet treat; they are a celebration of autumn’s bounty, a delightful twist on a beloved classic, and an absolute joy to bake and share. I’ve poured my heart into perfecting this recipe, and I’m genuinely so excited for you to experience the magic for yourselves. Imagine that first bite: a tender, buttery shortbread crust that crumbles delicately, giving way to a velvety smooth, spiced sweet potato filling that melts in your mouth, all crowned with a whisper of toasted marshmallow or a simple dusting of cinnamon. It’s a symphony of textures and flavors that will undoubtedly leave you craving just one more piece. This isn’t just a dessert; it’s an experience, a memory waiting to be made around your table.
What makes these bars truly a must-try, in my humble opinion, is their incredible balance. They strike the perfect chord between sweet and earthy, between rich and comforting, without ever feeling overly heavy. Unlike a traditional pie, which can sometimes be intimidating to make and serve, these bars offer all the glorious flavor with none of the fuss. They’re portion-controlled perfection, making them ideal for potlucks, family gatherings, or simply as a special indulgence for your own household. The vibrant color alone is enough to brighten any dessert spread, and the aroma filling your kitchen as they bake is pure bliss. Trust me, the minimal effort required yields maximum flavor impact, making this a recipe you’ll want to revisit again and again throughout the cooler months, and perhaps even all year round!
Serving Suggestions & Delightful Variations:
Now, while these bars are absolutely divine on their own, served at room temperature or slightly warmed, I love to get creative with how I present them. For an extra touch of decadence, try serving them alongside a generous scoop of vanilla bean ice cream or a dollop of freshly whipped cream, perhaps infused with a hint of maple syrup or a dash of bourbon for an adult twist. A light dusting of powdered sugar or a drizzle of homemade caramel sauce can elevate them from delicious to truly extraordinary. For those who appreciate a textural contrast, a sprinkle of toasted pecans or walnuts over the top just before serving adds a wonderful crunch that complements the creamy filling beautifully.
But let’s not stop there! These bars are incredibly versatile. If you’re looking to play with the flavor profile, consider adding a pinch of ground ginger or cardamom to the sweet potato filling for a more complex spice blend. For a less sweet option, you could slightly reduce the sugar in the filling, allowing the natural sweetness of the sweet potatoes to shine through even more. If you’re hosting a holiday feast, a delicate swirl of meringue baked on top during the last few minutes of cooking would transform them into a truly show-stopping dessert. For my vegan and gluten-free friends, don’t despair! With a few thoughtful substitutions – using a plant-based butter and an egg replacer for the filling, and a gluten-free flour blend for the crust – you can easily adapt this recipe to suit your dietary needs without sacrificing flavor. The possibilities are truly endless, limited only by your imagination!
So, what are you waiting for? I wholeheartedly encourage you to roll up your sleeves, gather your ingredients, and dive into making this wonderful creation. There’s a special kind of satisfaction that comes from baking something so comforting and delicious from scratch. I promise you, the aroma filling your kitchen will be intoxicating, and the taste will be absolutely unforgettable. Once you’ve whipped up a batch of this
Rustic Sweet Potato Pie Bars Recipe, I would be absolutely thrilled to hear all about your experience! Did you stick to the original, or did you add your own creative twist? What was your favorite part? Did your family and friends love them as much as mine do? Please don’t hesitate to share your stories, photos, and any brilliant variations you come up with. Connecting with fellow food lovers is one of the greatest joys of sharing recipes, and I can’t wait to see your delicious results. Happy baking, everyone!
Recipe
A delicious recipe
Ingredients
Instructions
Important Information
Nutrition Facts (Per Serving)
It is important to consider this information as approximate and not to use it as definitive health advice.
Allergy Information
Please check ingredients for potential allergens and consult a health professional if in doubt.


Leave a Comment