
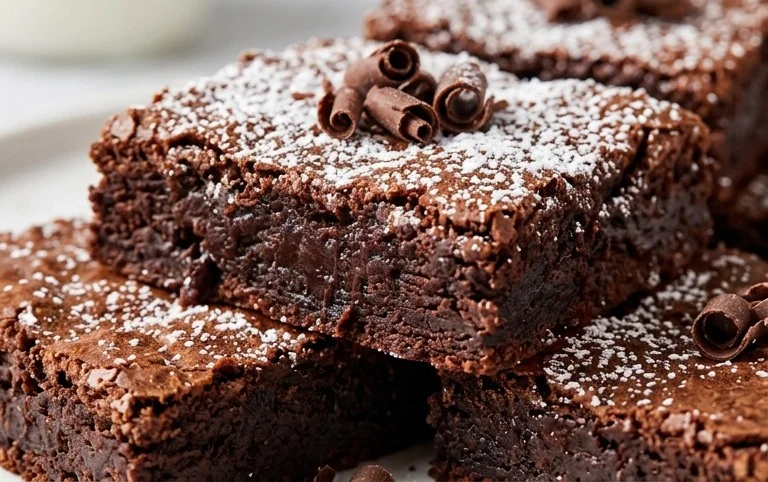
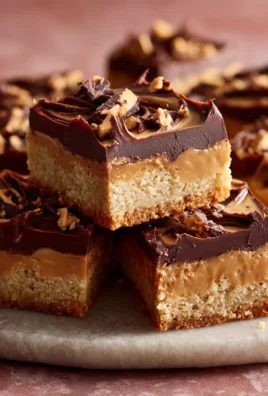
Fudgy eggless brownies are the ultimate chocolate indulgence, a treat that promises pure, unadulterated bliss in every bite. We all crave that perfect brownie: rich, dense, with a slightly chewy edge and a wonderfully gooey center. The magic of fudgy eggless brownies is that they deliver all of this, without a single egg in sight! This recipe is a testament to the fact that you don’t need eggs to achieve that incredible, melt-in-your-mouth texture and deep chocolate flavor that makes brownies so universally loved. Whether you’re vegan, have an egg allergy, or are simply looking for a new way to satisfy your sweet tooth, these fudgy eggless brownies are about to become your new go-to. Get ready to discover a simpler, yet equally decadent, path to brownie perfection.

Fudgy Eggless Brownies
Are you craving that intensely chocolatey, delightfully dense, and wonderfully fudgy brownie experience but need to skip the eggs? Look no further! These Fudgy Eggless Brownies are my go-to recipe when that chocolate craving hits and I want something truly decadent without any fuss. They achieve that perfect brownie texture – a slightly chewy crust giving way to a moist, fudgy interior – all without a single egg. The secret lies in a careful balance of ingredients and a few key techniques that I’ll share with you. Get ready to impress yourself (and anyone lucky enough to share them with you!) with these incredibly easy yet utterly satisfying eggless brownies.
Ingredients:
Cooking Instructions:
Step 1: Melting the Chocolate and Butter Base
The foundation of any great brownie is a rich, chocolatey base. In a heatproof bowl that fits snugly over a saucepan of simmering water (making sure the bottom of the bowl doesn’t touch the water), we’ll gently melt our butter and dark chocolate together. This double-boiler method ensures even melting and prevents the chocolate from scorching. Add your 75 grams of room-temperature butter pieces and 150 grams of finely chopped dark cooking chocolate to the bowl. Stir occasionally with a spatula until everything is completely melted and wonderfully smooth. Once melted, remove the bowl from the heat. This is where we’ll bloom our cocoa powder. Whisk in the 1/4 cup of cocoa powder into the melted chocolate mixture until it’s fully incorporated and there are no dry lumps. This step is crucial for a deep chocolate flavour.
Step 2: Creating the Sweet and Moist Batter
Now, let’s bring in the sweetness and moisture. To the melted chocolate and cocoa mixture, add the 1 cup of caster sugar. Stir this together well until it’s mostly combined. Next, carefully pour in the 1/3 cup of freshly boiled water. This might look a little strange at first, but trust me, it works wonders! Whisk everything together vigorously. The hot water helps to dissolve the sugar further and intensifies the cocoa flavour, creating a glossy, thick liquid. Stir in the 1 teaspoon of vanilla extract. Let this mixture sit for about 5 minutes to cool down slightly. This is important because we don’t want to cook our yoghurt when we add it in the next step.
Step 3: Incorporating the Egg Replacer and Dry Ingredients
Once the chocolate mixture has cooled down a bit (it should feel warm to the touch, not hot), it’s time to add our egg replacer: 1/4 cup of thick, plain yoghurt or curd. Gently whisk it in until it’s fully combined and the batter becomes smooth and luscious. This yoghurt provides the necessary moisture and fat that eggs would typically contribute, resulting in that desirable fudgy texture. Now, in a separate medium bowl, whisk together your dry ingredients: 3/4 cup of all-purpose flour, 2 tablespoons of cornflour/cornstarch, and if you used unsalted butter, add the 1/4 teaspoon of salt. Whisking the dry ingredients together ensures they are evenly distributed, preventing pockets of flour or salt in your brownies.
Step 4: Combining Wet and Dry for the Perfect Batter
It’s time to bring our wet and dry ingredients together. Gradually add the dry ingredients to the wet chocolate mixture, folding them in gently with a spatula. It’s important not to overmix at this stage. We want to combine just until no dry streaks of flour remain. Overmixing can develop the gluten in the flour, leading to tougher brownies, which is the opposite of what we’re aiming for. A gentle fold is key to maintaining that tender, fudgy crum extractb. The batter will be thick and rich – this is exactly what we want!
Step 5: Baking and Cooling for Ultimate Fudgin extractess
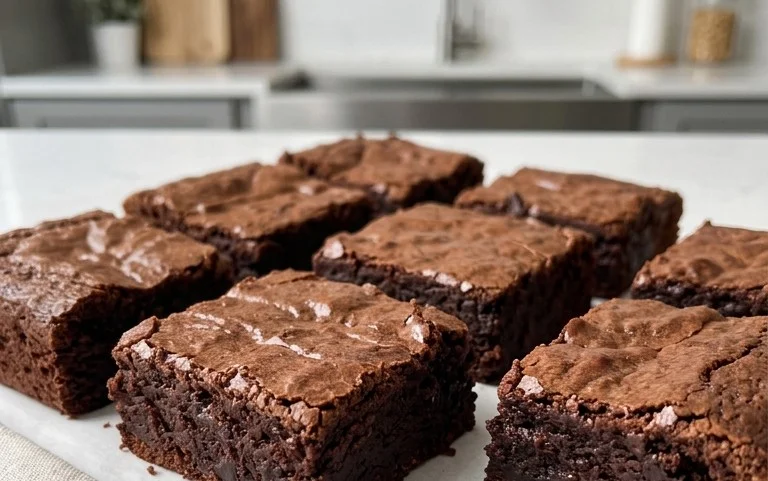
Preheat your oven to 175°C (350°F). Prepare an 8×8 inch baking pan by greasing it and lining it with parchment paper, leaving some overhang on the sides to easily lift the brownies out later. Pour the thick batter into the prepared pan and spread it evenly using your spatula. For that signature fudgy texture, we want to slightly underbake these brownies. Bake for approximately 25-30 minutes. The edges should look set, and a toothpick inserted into the center should come out with moist crum extractbs attached, not completely clean. If it comes out with wet batter, it needs a few more minutes. Once baked, remove the pan from the oven and let the brownies cool completely in the pan on a wire rack. This cooling process is crucial for the brownies to set and develop their signature fudgy consistency. Resist the temptation to cut into them while they are hot! Once completely cooled, lift them out of the pan using the parchment paper overhang and cut into squares. Enjoy your incredibly fudgy, eggless chocolatey delights!
Conclusion:
And there you have it – your guide to making the most incredibly fudgy eggless brownies! This recipe truly shines because it delivers that rich, decadent chocolate experience without a single egg. The magic lies in the simple yet effective substitutions that ensure a moist, chewy interior with those coveted crackly tops. I absolutely love how versatile these brownies are, making them perfect for any occasion, from a quiet afternoon treat to a crowd-pleasing dessert for parties.
For serving, I highly recommend enjoying them warm, perhaps with a scoop of vanilla ice cream or a dollop of whipped cream. They are also delicious at room temperature, making them ideal for packing in lunchboxes or sharing with friends. Don’t be afraid to experiment with variations! Adding chocolate chips (dark, milk, or white), chopped nuts like walnuts or pecans, or even a swirl of caramel or peanut butter can elevate your brownies to a whole new level.
I truly encourage you to give this fudgy eggless brownie recipe a try. It’s surprisingly simple, incredibly rewarding, and the results are simply divine. You’ll be amazed at how easy it is to achieve bakery-quality brownies right in your own kitchen. Happy baking!
Frequently Asked Questions:
Why are my eggless brownies not fudgy?
Ensuring they are not overbaked is key to fudgy brownies. Keep an eye on the edges setting while the center still looks slightly underdone. The brownies will continue to cook as they cool. Also, using good quality chocolate and butter contributes significantly to the fudgy texture.
Can I make these brownies ahead of time?
Absolutely! These brownies are even better the next day as the flavors meld. Store them in an airtight container at room temperature for up to 3 days. They can also be frozen, individually wrapped, for up to 2 months.
Fudgy Eggless Brownies
Deliciously fudgy and rich eggless brownies made with simple ingredients. Perfect for chocolate lovers!
Ingredients
-
75 gms butter, at room temperature, cut into pieces
-
150 gms dark cooking chocolate, 70% to 75%, finely chopped
-
1/4 cup cocoa powder (21 gms)
-
1 cup caster sugar (190 gms)
-
1/3 cup freshly boiled water (80 ml)
-
1 tsp vanilla extract
-
1/4 cup thick, plain yoghurt or curd (55 gms)
-
3/4 cup all-purpose flour (90 gms)
-
2 tbsps cornflour/cornstarch
-
1/4 tsp salt (if using unsalted butter)
Instructions
-
Step 1
Preheat your oven to 180°C (160°C fan/350°F/Gas Mark 4). Grease and line an 8-inch square baking tin with parchment paper. -
Step 2
Melt the butter and chopped dark chocolate together in a heatproof bowl set over a pan of simmering water (ensure the bottom of the bowl doesn’t touch the water). Stir until smooth and glossy. Remove from heat and let it cool slightly. -
Step 3
In a separate bowl, whisk together the caster sugar and cocoa powder. Gradually pour in the hot water, whisking continuously until a smooth paste forms. Stir in the vanilla extract. -
Step 4
Pour the melted chocolate mixture into the sugar-cocoa paste and whisk until well combined. Add the yoghurt/curd and whisk until incorporated. -
Step 5
In another bowl, whisk together the all-purpose flour, cornflour/cornstarch, and salt (if using). Gradually add the dry ingredients to the wet ingredients, folding gently until just combined. Be careful not to overmix. -
Step 6
Pour the batter into the prepared baking tin and spread evenly. Bake for 25-30 minutes, or until a skewer inserted into the center comes out with moist crumbs attached (not wet batter). -
Step 7
Let the brownies cool completely in the tin on a wire rack before cutting into squares.
Important Information
Nutrition Facts (Per Serving)
It is important to consider this information as approximate and not to use it as definitive health advice.
Allergy Information
Please check ingredients for potential allergens and consult a health professional if in doubt.
Leave a Comment