
Fried Ice Cream Crispy Dessert – what a truly remarkable and delightfully paradoxical treat! I am absolutely thrilled to introduce you to a culinary marvel that consistently amazes and brings smiles to every table. Imagine a perfectly golden-brown, warm, and crunchy exterior giving way to an impossibly cold, smooth, and creamy ice cream core. It’s a sensory experience unlike any other, offering a captivating dance of temperatures and textures that truly defies expectations.
This iconic dessert, often gracing menus in Mexican, Japanese, or Chinese restaurants, has a fascinating, albeit somewhat debated, origin story, emerging as a beloved fusion creation that spans continents. Whether it originated in Philadelphia in the late 19th century or gained popularity later in various Asian culinary traditions, its global appeal is undeniable. People adore this dish not only for its incredible taste and the unique contrast between its crispy, warm shell and its icy, decadent interior but also for the sheer joy and surprise it evokes. Each bite of this spectacular Fried Ice Cream Crispy Dessert is a mini-adventure, making it the ultimate showstopper for any meal. Get ready to embark on a sweet journey that will leave you craving more!

Ingredients:
- 1 half-gallon (approximately 2 liters) good quality vanilla ice cream: Opt for a premium brand with a high-fat content. Richer ice cream holds its shape better and melts slower, which is a huge advantage when making our “Fried Ice Cream Crispy Dessert.” Avoid low-fat or whipped varieties, as they tend to melt too quickly under heat.
- Approximately 6-8 cups corn flakes cereal: This classic cereal provides the perfect neutral base and incredible crunch for our coating. You can also use frosted flakes for a slightly sweeter crust, but plain corn flakes are my go-to for balance with the spices.
- 1 teaspoon ground cinnamon: This warm spice is essential for that comforting, classic flavor profile that pairs so wonderfully with vanilla ice cream. Feel free to adjust to your personal preference – some like a little more, some a little less.
- 1/2 teaspoon ground nutmeg: A delightful aromatic that adds depth and a subtle, sweet earthiness to the coating. It complements the cinnamon beautifully, enhancing the overall experience of your “Fried Ice Cream Crispy Dessert.”
- 1/4 teaspoon ground cloves (optional but recommended): For those who love a complex spice blend, a touch of ground cloves adds a strong, sweet, and pungent note that truly elevates the flavor. Use sparingly, as it’s quite potent!
- 2 large eggs: These are crucial for creating our egg wash, which acts as the ‘glue’ to bind the crispy cereal coating to the ice cream.
- 2 tablespoons milk (any type will do): Mixed with the eggs, milk helps to create a smoother, more even wash, ensuring better adhesion of the flour and cereal. Whole milk will give a slightly richer wash, but skim or plant-based milks work just fine.
- 1/2 cup all-purpose flour: This initial dredge provides a dry surface that allows the egg wash to stick effectively, forming the critical first layer of our protective coating.
- Vegetable oil or canola oil for deep frying: You will need enough oil to submerge the ice cream balls completely, typically 4-6 cups, depending on the size of your pot. Choose an oil with a high smoke point for best frying results.
- Optional garnishes: Get creative here! Chocolate syrup, warm caramel sauce, whipped cream, fresh berries (strawberries, blueberries, raspberries), a sprinkle of powdered sugar, or even a classic maraschino cherry can turn your “Fried Ice Cream Crispy Dessert” into a true masterpiece.
Phase 1: Preparing and Freezing the Ice Cream Spheres
-
Scooping the Ice Cream:
The journey to an amazing “Fried Ice Cream Crispy Dessert” begins with perfectly scooped and shaped ice cream. For this step, I recommend taking your half-gallon of vanilla ice cream out of the freezer and allowing it to soften slightly on the counter for about 5 to 10 minutes. The exact time will depend on your room temperature, but the goal is to get it to a consistency where it’s pliable enough to scoop and shape without being rock-hard, yet still very cold. If it’s too soft, it will be messy and difficult to work with; if it’s too hard, you won’t be able to form smooth balls.
Using a sturdy ice cream scoop, preferably one with a capacity of about 2 ounces, begin scooping generous portions of ice cream. Aim for balls that are roughly the size of a tennis ball or a little smaller. Consistency in size is incredibly important here, as it ensures that all your “Fried Ice Cream Crispy Dessert” balls will freeze and fry evenly. Irregular sizes can lead to some melting too quickly or others not crisping up enough.
As you scoop each portion, immediately place it onto a baking sheet that you’ve lined with parchment paper or a silicone mat. This lining is a small but mighty detail, as it will prevent the ice cream from sticking to the tray, making subsequent steps much easier. Don’t worry too much about achieving a perfect sphere with the initial scoop; we’ll refine that in the next stage. Just focus on getting uniform amounts of ice cream onto the sheet, ready for shaping.
-
Shaping and Initial Freeze:
Once all your ice cream has been scooped onto the baking sheet, it’s time to transform those scoops into perfectly round, dense spheres. Working quickly is essential here to prevent the ice cream from melting too much. Use your clean hands to gently but firmly roll each scoop into a tight, compact ball. The warmth from your hands will briefly soften the very outer layer of the ice cream, allowing you to smooth out any rough edges and create a beautifully uniform shape. The denser and more compact your ice cream ball, the better it will hold up to the intense heat of frying. Make sure to press out any air pockets you might notice, as air can lead to quicker melting. A solid core is what we’re aiming for.
Immediately after shaping each ball, return the entire baking sheet, with your now perfectly formed ice cream spheres, to the freezer. This initial freeze is absolutely crucial. We need these balls to be rock-solid – even harder than they were in the original carton. This deep freeze sets the stage for success and is one of the most important steps in preventing a molten mess when they eventually hit the hot oil. Without this step, you risk the ice cream melting too quickly and seeping out of its crispy coating, which is definitely not what we want for our “Fried Ice Cream Crispy Dessert.”
Allow them to freeze for a minimum of 2-3 hours. However, if you have the time, leaving them to freeze overnight is even better. The colder and harder they are, the more resilient they will be. For optimal firmness, ensure your freezer is set to its coldest setting during this period. This step creates the essential foundation for that delightful contrast of a hot, crispy exterior and a cold, creamy interior.
Phase 2: Crafting the Crispy Coating
-
Preparing the Cereal Crumb Mixture:
While our ice cream spheres are getting super frosty in the freezer, let’s turn our attention to the star of the “crispy” part of our “Fried Ice Cream Crispy Dessert”: the cereal coating! This layer is what will give us that satisfying crunch and provide a crucial protective barrier for the cold ice cream inside. The key to a great coating is consistency and flavor, and we’ll start with the cereal base.
Measure out approximately 6-8 cups of your chosen crispy cereal. As I mentioned in the ingredients, corn flakes are a fantastic choice due to their neutral flavor, which allows the spices to shine, and their excellent crunch potential. If you prefer a slightly sweeter coating, frosted flakes can work well too. Place the cereal into a large, sturdy zip-top bag. If you have a food processor, that’s an even quicker and more efficient way to achieve a finer, more uniform crumb.
If using a zip-top bag, seal it well, ensuring you remove as much air as possible before you start crushing. Then, take a rolling pin, a meat mallet, or even the bottom of a heavy pan, and begin to crush the cereal. Your goal is a relatively fine crumb—you don’t want powder, but you also don’t want large, intact flakes. Aim for a texture similar to coarse breadcrumbs. This texture ensures an even coating that adheres beautifully to the ice cream and crisps up perfectly. If using a food processor, pulse the cereal in short bursts until you achieve that same coarse crumb texture. Be careful not to over-process, as too fine a powder won’t give you the desired crunch for your “Fried Ice Cream Crispy Dessert.”
Once you’ve achieved the perfect crumb texture, transfer the crushed cereal to a shallow dish or a wide, deep plate. This will make the coating process in the next phase much easier and less messy. Having a wide dish allows you to roll the ice cream balls thoroughly without making a huge mess.
-
Adding the Aromatic Spices:
Now for the magical touch that truly elevates this “Fried Ice Cream Crispy Dessert” from simply good to absolutely incredible: the spices! These warm, aromatic additions will infuse the crispy coating with a depth of flavor that perfectly complements the cold, creamy vanilla ice cream. This is where the magic really happens!
To your crushed cereal in the shallow dish, add 1 teaspoon of ground cinnamon. Cinnamon and vanilla are a match made in heaven, and the comforting warmth of the cinnamon will create a beautiful aroma and taste that pairs wonderfully with the cold interior. This spice is non-negotiable for that classic fried ice cream flavor.
Next, carefully measure and add 1/2 teaspoon of ground nutmeg. Nutmeg introduces a slightly sweet, pungent, and woody aroma that deepens the overall flavor profile of your coating. It adds a layer of sophistication and complexity that really makes a difference.
Finally, for an optional, but highly recommended, layer of intense complexity, stir in 1/4 teaspoon of ground cloves. Cloves have a strong, sweet, and highly aromatic flavor that can be quite powerful, so it’s best to use them sparingly. If you’re not a fan of cloves or prefer a simpler spice blend, you can certainly omit them. However, for those who enjoy a full-bodied spice experience, they add an exquisite touch to the “Fried Ice Cream Crispy Dessert.”
Using a spoon or your clean hands, thoroughly mix all the spices into the cereal crumbs. Make absolutely sure they are evenly distributed throughout the mixture. You want every bite of your “Fried Ice Cream Crispy Dessert” to receive that fantastic burst of flavor. Once mixed, set this aromatic crumb mixture aside, ready for the coating process.
Phase 3: Building the Protective Layers and Deep Freezing
-
Setting Up the Dredging Stations:
This phase is paramount for creating a robust, multi-layered coating that will effectively protect your ice cream from the intense heat of the hot oil. Think of it like setting up an assembly line, similar to breading chicken or fish. Organization is absolutely key here to ensure a clean, efficient process and, ultimately, a successful “Fried Ice Cream Crispy Dessert.”
Get three separate shallow dishes or wide plates ready and arrange them in a linear fashion on your counter. Each dish will hold a different component of our coating system:
- Dish 1 (Flour): Pour the 1/2 cup of all-purpose flour into the first dish. This flour layer acts as a crucial first step. It provides a dry, starchy surface for the liquid egg wash to adhere to. Without this initial dredge, the egg wash would simply slide off the frozen ice cream.
- Dish 2 (Egg Wash): In the second dish, crack your 2 large eggs. To the eggs, add the 2 tablespoons of milk. Using a fork or a small whisk, beat the eggs and milk together vigorously until they are well combined and slightly frothy. This is our “egg wash” – it functions as the all-important ‘glue’ that will bind our crispy cereal coating to the ice cream ball. Ensure there are no streaks of just egg white or yolk.
- Dish 3 (Cereal Crumb Mixture): Place your beautifully spiced cereal crumb mixture (from Phase 2) into the third dish. This is where the magic crunch happens!
Arrange these dishes in a logical sequence: Flour -> Egg Wash -> Cereal Crumb Mixture. Make sure you also have another clean, parchment-lined baking sheet ready at the end of your assembly line. This sheet will be for the freshly coated ice cream balls. This setup streamlines the process and helps you work quickly, which is important when dealing with frozen items.
-
The First Coating Layer:
Now, it’s time to retrieve your rock-hard ice cream balls from the freezer. Remember, speed is of the essence! I recommend working with only one ice cream ball at a time, keeping the others nestled in the freezer until you are ready to coat them. This minimizes their exposure to warmer air and helps them retain their frosty core.
- Step A: Flour Dredge: Gently pick up one frozen ice cream ball. Roll it thoroughly in the flour, making sure every inch of its surface is completely coated. Don’t be shy with the flour! Once coated, lightly tap off any excess flour. The flour creates the perfect textured base for the next layer.
- Step B: Egg Wash Dip: Carefully transfer the flour-dusted ball to the egg wash. Roll it around until it is fully coated. Allow any excess egg wash to drip off for a second or two before moving on. You want a good, even layer, but not so much that it’s dripping.
- Step C: Cereal Roll: Immediately transfer the egg-washed ball to the cereal crumb mixture. This is where the “crispy” truly begins! Roll it firmly, pressing the crumbs onto the ice cream to ensure a thick, even coating. You want every single bit of the ice cream’s surface to be covered in this delicious, spiced cereal. Don’t leave any gaps!
Once coated, place the ice cream ball back onto your fresh parchment-lined baking sheet. Repeat this precise process for all the remaining ice cream balls, one by one, returning the coated balls to the fresh baking sheet as you go. This systematic approach will ensure each “Fried Ice Cream Crispy Dessert” receives its initial, crucial layer.
-
The Second Coating Layer (Crucial for Protection!):
This second layer is not just an option; it is absolutely vital for the success of your “Fried Ice Cream Crispy Dessert.” It provides an indispensable extra barrier against the hot oil, acting as a double shield. This ensures that the ice cream stays wonderfully frozen and creamy inside while the exterior gets perfectly golden, crunchy, and shatteringly crispy.
Once all the ice cream balls have received their first layer of coating, it’s time for another freeze. Place the entire baking sheet back into the freezer for at least 1 hour. This interim freeze allows the first coating to firm up, adhere securely to the ice cream, and become solid, preparing it for the second, equally important layer.
After this hour, retrieve the balls from the freezer. Now, we’re going to repeat the flour-egg-cereal process one more time for each ball. Yes, you heard me right, another dip! Even though they’re already coated, the second layer makes all the difference.
Start with an already coated and re-frozen ball. Dip it back into the egg wash, ensuring it is fully coated once more. This second egg wash layer will bind even more cereal to the surface, creating that truly substantial crust. Then, roll it generously in the remaining cereal crumb mixture, pressing firmly again to ensure a thick, complete second layer of those delicious, spiced crumbs. This double-coating technique is what creates that fantastic, shatteringly crispy exterior that defines a perfect “Fried Ice Cream Crispy Dessert.”
As you complete each ball’s second coating, place it back on the parchment-lined baking sheet. You’ll notice they are now significantly larger and more robust-looking. This robust appearance is exactly what you want.
-
The Final Deep Freeze (Non-Negotiable!):
Once all the ice cream balls are beautifully double-coated and looking magnificent, it’s time for the most important freezing step of all. This is the safeguard that guarantees your “Fried Ice Cream Crispy Dessert” will be a triumph, not a meltdown.
Return the baking sheet with all your prepared “Fried Ice Cream Crispy Dessert” balls to the freezer. This final deep freeze must be for a minimum of 4-6 hours. Honestly, overnight is truly best. The longer and colder they are, the better they will withstand the incredibly hot oil. They need to be frozen solid – like small rocks – right down to their very core. Any less time, and you risk the ice cream melting out during frying, leading to a disappointing experience and a potential mess.
This extended freezing time is your absolute guarantee against internal melting during the quick fry. I cannot emphasize enough: do not skip or shorten this step! It is the single most common reason why fried ice cream recipes fail. Patience here is a virtue that will be deliciously rewarded.
A little tip for convenience: you can even prepare these up to a week in advance! Once they are fully frozen solid after this final deep freeze, you can transfer them from the baking sheet into an airtight container or sturdy zip-top freezer bags. This makes them perfect for future spontaneous dessert cravings. Just make sure they are well-protected from freezer burn to maintain their quality until you are ready to fry.
Phase 4: The Exciting Frying Process
-
Setting Up for Frying Safety:
Frying can seem a little intimidating, but with proper preparation and safety measures, it’s quite manageable and leads to truly spectacular results. Before you even think about turning on the heat, ensure you have a clean, clear, and organized workspace. Safety first, always!
Choose a heavy-bottomed pot or a Dutch oven that is deep enough. It should be able to hold at least 3-4 inches of oil and still have several inches of clearance (at least 3-4 inches) to the top rim. This generous space is crucial to prevent dangerous boil-overs when you add the ice cream or when the oil inevitably bubbles up. A pot that’s too shallow is a recipe for disaster.
Pour your vegetable oil or canola oil into the pot. You’ll need enough oil to fully submerge the ice cream balls; typically, 4-6 cups will suffice for a standard 3-quart pot, but adjust based on your pot’s dimensions. You want the ice cream to be swimming in oil, not just partially immersed. Use an oil with a high smoke point, as we’ll be frying at a high temperature.
Near your frying station, set up a wire cooling rack over a baking sheet lined with several layers of paper towels. This will be the designated spot for your freshly fried “Fried Ice Cream Crispy Dessert” to drain off any excess oil. This step helps prevent a greasy final product.
Have a sturdy slotted spoon or a spider strainer ready. These tools are perfect for carefully lowering and safely removing the ice cream balls from the hot oil. They allow the oil to drain away quickly, preventing splashing.
Most importantly, and I cannot stress this enough: have a fire extinguisher or a heavy, tight-fitting lid nearby and within easy reach. This is a crucial safety precaution in case of an oil fire. Never, ever use water on an oil fire! Water will only make it worse by causing the oil to explode and spread. A lid will smother the flames, cutting off the oxygen.
-
Heating the Oil to Perfection:
Place your pot of oil on the stovetop over medium-high heat. Attach a deep-fry thermometer to the side of the pot, ensuring that the tip of the thermometer is submerged in the oil but not touching the bottom of the pot. A thermometer is an absolutely essential tool for consistently perfect “Fried Ice Cream Crispy Dessert.” Eyeballing the oil temperature is a gamble that rarely pays off with fried ice cream.
Heat the oil to a precise temperature of 375°F (190°C). This exact temperature is critically important for the success of this dish. Here’s why:
- If the oil isn’t hot enough: The coating will soak up too much oil, becoming greasy and soggy, rather than crispy. Furthermore, the ice cream inside will melt before the crust has a chance to crisp up and brown, leading to a disappointing, deflated dessert.
- If the oil is too hot: The coating will burn very quickly, turning dark and bitter before it’s even fully cooked through. Worse, if the oil is excessively hot, the ice cream inside could potentially expand and cause the coating to rupture or even “explode,” creating a dangerous situation and a huge mess.
It will take some time for the oil to reach the correct temperature, so be patient and resist the urge to crank the heat too high, which can cause uneven heating and hot spots. While the oil is heating, retrieve a few of your super-frozen “Fried Ice Cream Crispy Dessert” balls from the freezer. Do not take them all out at once; only take out the number you plan to fry in your immediate batch (1-2 at a time) to ensure they remain as frozen as possible until it’s their turn. Keep the others in the freezer until needed to maintain their deep-frozen state.
-
Frying the Crispy Desserts (Work Quickly!):
Once your oil has reached exactly 375°F (190°C), it’s showtime! This is the most exciting and fastest part of the process, requiring your full attention. The magic of “Fried Ice Cream Crispy Dessert” happens in mere seconds.
Carefully, using your slotted spoon or spider strainer, gently lower one or two of the frozen, double-coated ice cream balls into the hot oil. The number you fry at once depends on the size of your pot; you absolutely do not want to overcrowd the pot. Overcrowding will drastically drop the oil temperature, leading to greasy, soggy results rather than that coveted crispiness. Give each ball plenty of space to fry evenly.
Fry each ice cream ball for only 20-45 seconds. This short, intense burst of heat is precisely what we’re after. The goal is to rapidly crisp and beautifully brown the outer coating without giving the interior ice cream enough time to melt substantially. You will notice the coating quickly transform into a gorgeous golden-brown color. Keep a very close eye on them; they cook incredibly fast, and a few extra seconds can mean the difference between perfect and burnt.
As soon as they reach that perfect golden-brown and crispy texture, quickly lift them out of the oil with your slotted spoon or spider strainer. Hold them over the pot for a second or two to allow any excess oil to drip back into the pot, minimizing greasiness.
Immediately transfer the fried ice cream balls to the prepared wire rack over the paper towel-lined baking sheet to drain further. This helps absorb any remaining surface oil, ensuring the coating stays as crispy as possible.
Continue frying the remaining “Fried Ice Cream Crispy Dessert” balls, one or two at a time. It is crucial to monitor the oil temperature between each batch and ensure it returns to 375°F (190°C) before adding the next one. You may need to slightly adjust your stovetop heat up or down to maintain this consistent temperature. This careful temperature management is key to achieving uniformly crisp and delicious results for every single piece of your “Fried Ice Cream Crispy Dessert.”
Phase 5: Serving Your Delicious Fried Ice Cream Crispy Dessert
-
Immediate Gratification is Key!
The absolute best way to experience and enjoy your “Fried Ice Cream Crispy Dessert” is immediately, I mean immediately, after it comes out of the fryer and has had a brief moment to drain. This specific window of time is when the magical contrast between the piping hot, shatteringly crispy exterior and the wonderfully cold, creamy interior is at its absolute peak perfection. This is the moment you’ve been waiting for, and it’s truly a unique culinary experience.
Do not wait! As soon as they are drained and ready, they are begging for their grand debut. Each bite offers a delightful explosion of textures and temperatures – the warmth and crunch of the coating followed by the cool, smooth sweetness of the vanilla ice cream. Waiting even a few minutes can diminish this perfect contrast, as the heat from the crust will quickly start to melt the ice cream, and the crust itself might lose some of its initial crispness. So, gather your diners, announce the arrival of dessert, and serve with enthusiasm!
-
Garnishing for a Grand Finale:
While the “Fried Ice Cream Crispy Dessert” is undeniably incredible on its own, a few thoughtful garnishes can transform it into an unforgettable, show-stopping dessert. This is your chance to add your personal flair and elevate the presentation and flavor even further.
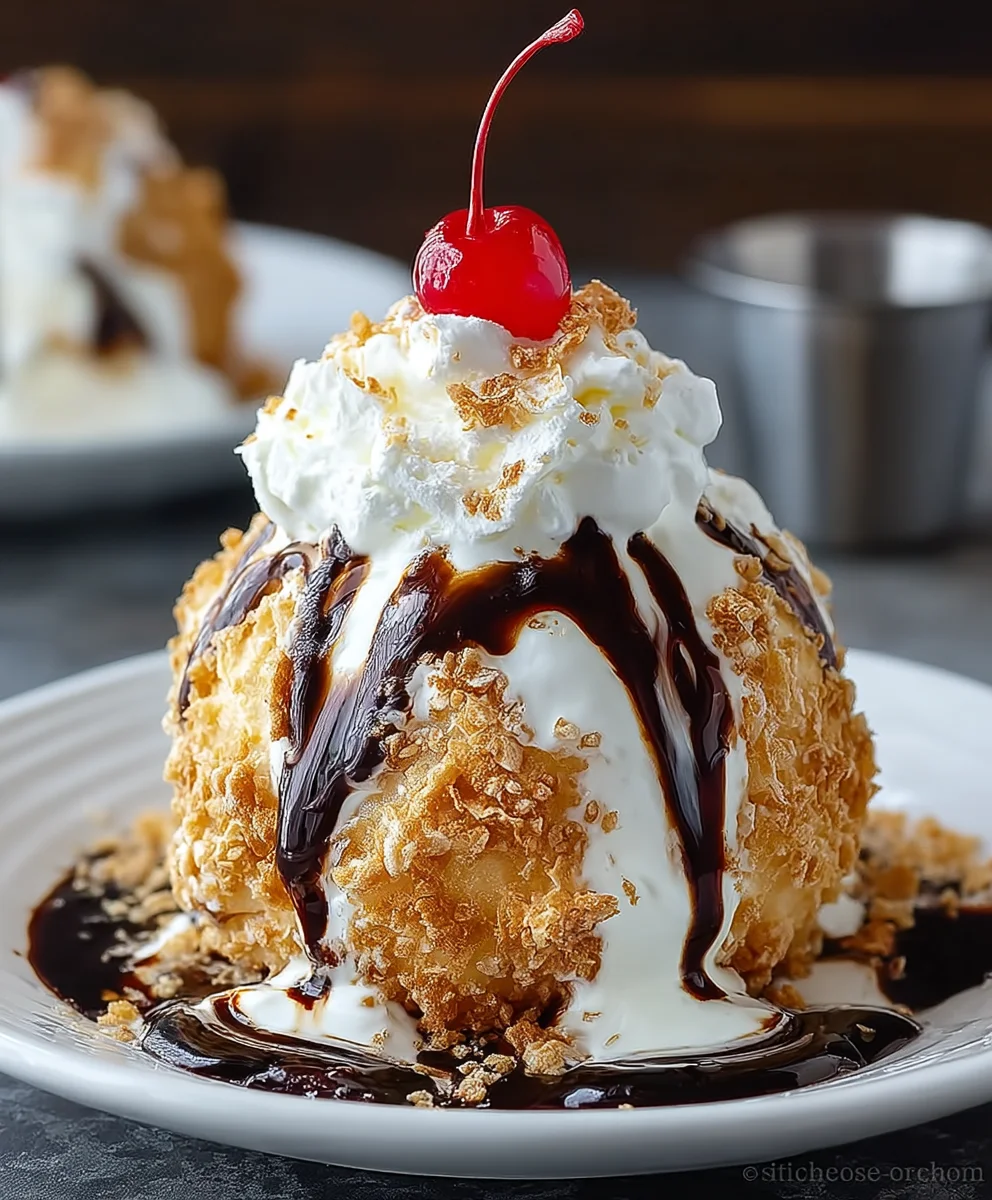
Arrange one or two perfectly fried ice cream balls on individual dessert plates. The visual appeal is part of the enjoyment!
- Drizzle with your favorite sauce: A generous drizzle of rich chocolate syrup, warm and gooey caramel sauce, or a vibrant, tangy berry coulis (like raspberry or strawberry) are all fantastic choices. The warm sauce cascading over the cold ice cream creates an incredible sensory experience that you and your guests won’t want to miss.
- Add a dollop of freshness: A generous swirl of freshly whipped cream adds a wonderful lightness and an extra layer of creamy texture. Fresh berries, such as beautifully sliced strawberries, plump blueberries, or tart raspberries, provide a fantastic, refreshing counterpoint to the richness and a beautiful pop of color that makes the dessert truly shine.
- A touch of elegance: For a delicate sweetness and a professional, picture-perfect finish, a light dusting of powdered sugar is always a good idea. For that iconic, classic diner touch, don’t forget to crown your “Fried Ice Cream Crispy Dessert” with a bright red maraschino cherry on top!
- For an extra crunch: If you’re a texture enthusiast, a sprinkle of finely chopped nuts, like toasted pecans or walnuts, can add yet another delightful layer of crunch and nutty flavor.
Present your magnificent “Fried Ice Cream Crispy Dessert” masterpiece quickly to your eager diners and watch their faces light up with delight! The combination of textures (crispy, creamy, smooth), temperatures (hot, cold, warm), and flavors (spicy, sweet, tangy) in this dessert is truly something special and a delightful treat for any occasion. It’s a guaranteed crowd-pleaser and a memorable way to end any meal!
Conclusion:
And there you have it, my friends! We’ve journeyed together through the magic of creating a truly show-stopping dessert that promises to dazzle your taste buds and impress anyone lucky enough to share a bite. This isn’t just any dessert; it’s an experience, a delightful dance between extremes that culminates in pure, unadulterated joy. I honestly can’t emphasize enough why this recipe for the perfect fried ice cream is an absolute must-try in your culinary repertoire. It defies expectations, turning a simple scoop of ice cream into a warm, golden, and incredibly satisfying treat. The surprise of that hot, crispy exterior giving way to a luxuriously cold, creamy interior is a sensation that once experienced, is never forgotten. It’s the kind of dessert that elicits gasps of delight and immediate requests for the recipe, making you the hero of any gathering.
The beauty of this creation lies not only in its spectacular flavor and texture contrast but also in its surprising versatility. While absolutely divine on its own, a few thoughtful additions can elevate your Fried Ice Cream Crispy Dessert to new heights. For a classic touch, a drizzle of warm chocolate fudge or a rich caramel sauce is always a winner. You could also opt for a vibrant berry coulis, made with fresh strawberries, raspberries, or blueberries, which adds a lovely tartness that cuts through the richness beautifully. A sprinkle of toasted coconut flakes or finely chopped nuts like pecans or walnuts provides an extra layer of crunch and nutty depth. For those who enjoy a bit of spice, a dusting of cinnamon or a pinch of cayenne pepper in your coating mixture can introduce an unexpected warmth that truly complements the cold ice cream. Imagine pairing it with a dollop of fresh whipped cream and a maraschino cherry for that quintessential diner-style flourish!
Feeling a bit adventurous? Don’t hesitate to experiment with different ice cream flavors. While vanilla is a fantastic base, imagine a scoop of coffee ice cream for an adult-friendly treat, or perhaps a mint chocolate chip for a refreshing twist. Pumpkin spice ice cream during the autumn months, or peppermint stick around the holidays, would transform this into a seasonal sensation. You could even incorporate a tiny splash of your favorite liqueur – a touch of Kahlua with coffee ice cream, or Grand Marnier with orange zest in the coating, could add an exquisite grown-up twist. For an even more indulgent presentation, consider serving your fried ice cream alongside a warm brownie or a churro, creating a dessert platter that’s truly unforgettable. The possibilities are genuinely endless, limited only by your imagination and what delights your palate.
So, please, I wholeheartedly encourage you to carve out some time in your kitchen and give this incredible recipe a try. Don’t be intimidated by the idea of frying ice cream; I promise you, it’s far simpler and more rewarding than you might think. The moment you take that first bite, experiencing the symphony of temperatures and textures, you’ll understand exactly why I’m so passionate about it. And once you’ve conquered this culinary triumph, I would absolutely love to hear all about your experience! Please share your photos, your favorite serving suggestions, and any creative variations you come up with. Did you try a unique ice cream flavor? What was your go-to topping? Your insights and stories inspire me and our entire community of food lovers. Let’s celebrate the joy of creating something truly extraordinary, and make this spectacular dessert a staple in our homes. Happy frying, everyone!
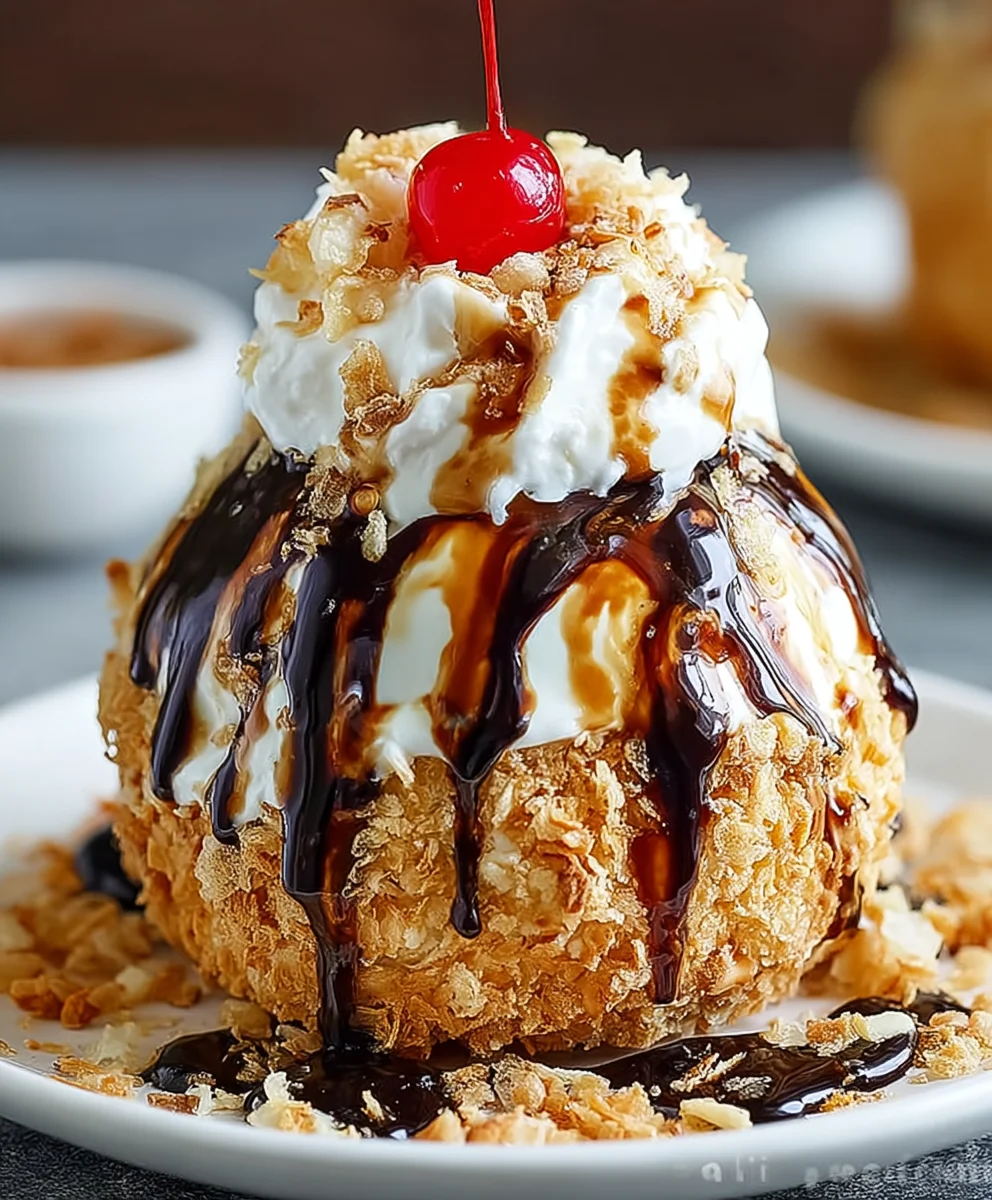
Fried Ice Cream Crispy Dessert
Fried Ice Cream is a delightful fusion of crispy and creamy textures, delivering a warm, crunchy coating and a cold, melty center. This indulgent dessert is made by coating vanilla ice cream with a mix of corn flakes, vanilla wafers, and cinnamon. After being frozen, the coated ice cream balls are quickly deep-fried for a golden crust. To serve, they are drizzled with chocolate sauce, topped with whipped cream, and finished with a cherry. It’s a fun treat for parties or special occasions.
Ingredients
-
1 half-gallon good quality vanilla ice cream
-
7 cups corn flakes cereal, crushed
-
24 vanilla wafers, crushed
-
1 teaspoon ground cinnamon
-
1/2 teaspoon ground nutmeg
-
1/4 teaspoon ground cloves (optional)
-
2 large eggs
-
2 tablespoons milk
-
1/2 cup all-purpose flour
-
4-6 cups vegetable oil or canola oil for deep frying
-
Chocolate syrup, for garnish
-
Whipped cream, for garnish
-
Maraschino cherry, for garnish
-
Fresh berries, for garnish (optional)
-
Powdered sugar, for garnish (optional)
-
Caramel sauce, for garnish (optional)
Instructions
-
Step 1
Allow 1/2 gallon vanilla ice cream to soften slightly. Scoop ¼ cup portions, shape into compact balls. Place on a parchment-lined tray and freeze for at least 30 minutes. -
Step 2
In a shallow dish, combine 7 cups crushed corn flakes, 24 crushed vanilla wafers, 1 teaspoon ground cinnamon, ½ teaspoon ground nutmeg, and ¼ teaspoon ground cloves (optional). Mix thoroughly. -
Step 3
Arrange three shallow dishes: one with ½ cup all-purpose flour, one with 2 beaten eggs mixed with 2 tablespoons milk, and the third with the spiced cereal crumb mixture. -
Step 4
Dredge each frozen ice cream ball through flour, then dip in egg wash, then roll firmly in the cereal mix, ensuring full coverage. Place back on the parchment-lined tray and freeze for 30 minutes. -
Step 5
Repeat the egg wash and cereal crumb coating process for each ball to create a thick, protective layer. -
Step 6
Return all double-coated ice cream balls to the freezer for 1-2 hours, or until completely rock-solid. (A longer freeze is highly recommended for best results). -
Step 7
In a deep, heavy-bottomed pot, heat 4-6 cups vegetable or canola oil to precisely 375°F (190°C) using a deep-fry thermometer. Prepare a wire cooling rack over a paper towel-lined baking sheet. -
Step 8
Carefully lower 1-2 super-frozen ice cream balls into the hot oil. Fry for 20-45 seconds, turning if needed, until golden brown and crispy. -
Step 9
Quickly remove the fried ice cream with a slotted spoon, allow excess oil to drain briefly, and transfer to the prepared rack. Serve immediately after frying. -
Step 10
Drizzle with chocolate syrup, top with whipped cream, and finish with a maraschino cherry. Optionally add fresh berries, powdered sugar, or caramel sauce.
Important Information
Nutrition Facts (Per Serving)
It is important to consider this information as approximate and not to use it as definitive health advice.
Allergy Information
Please check ingredients for potential allergens and consult a health professional if in doubt.
Leave a Comment