
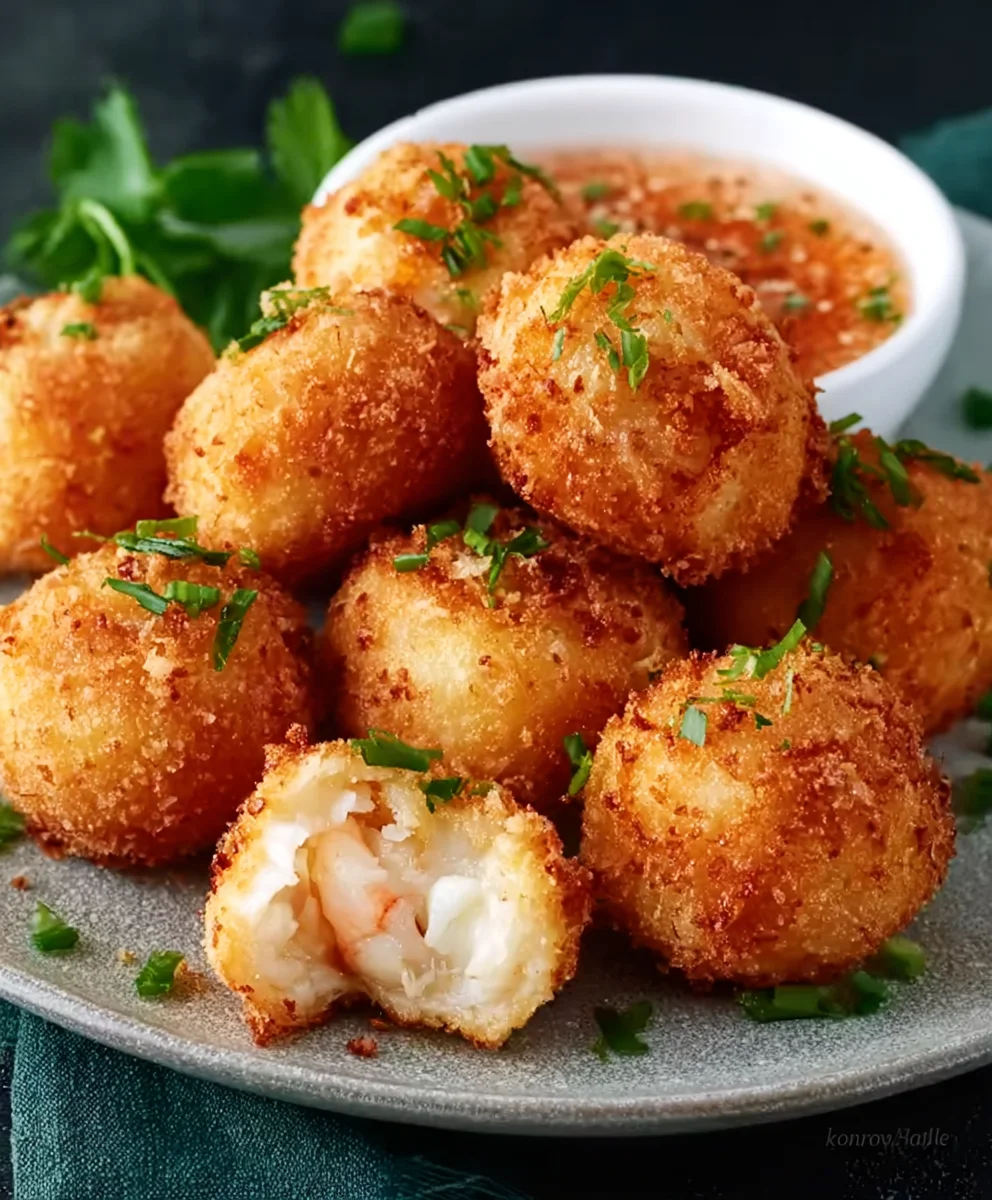
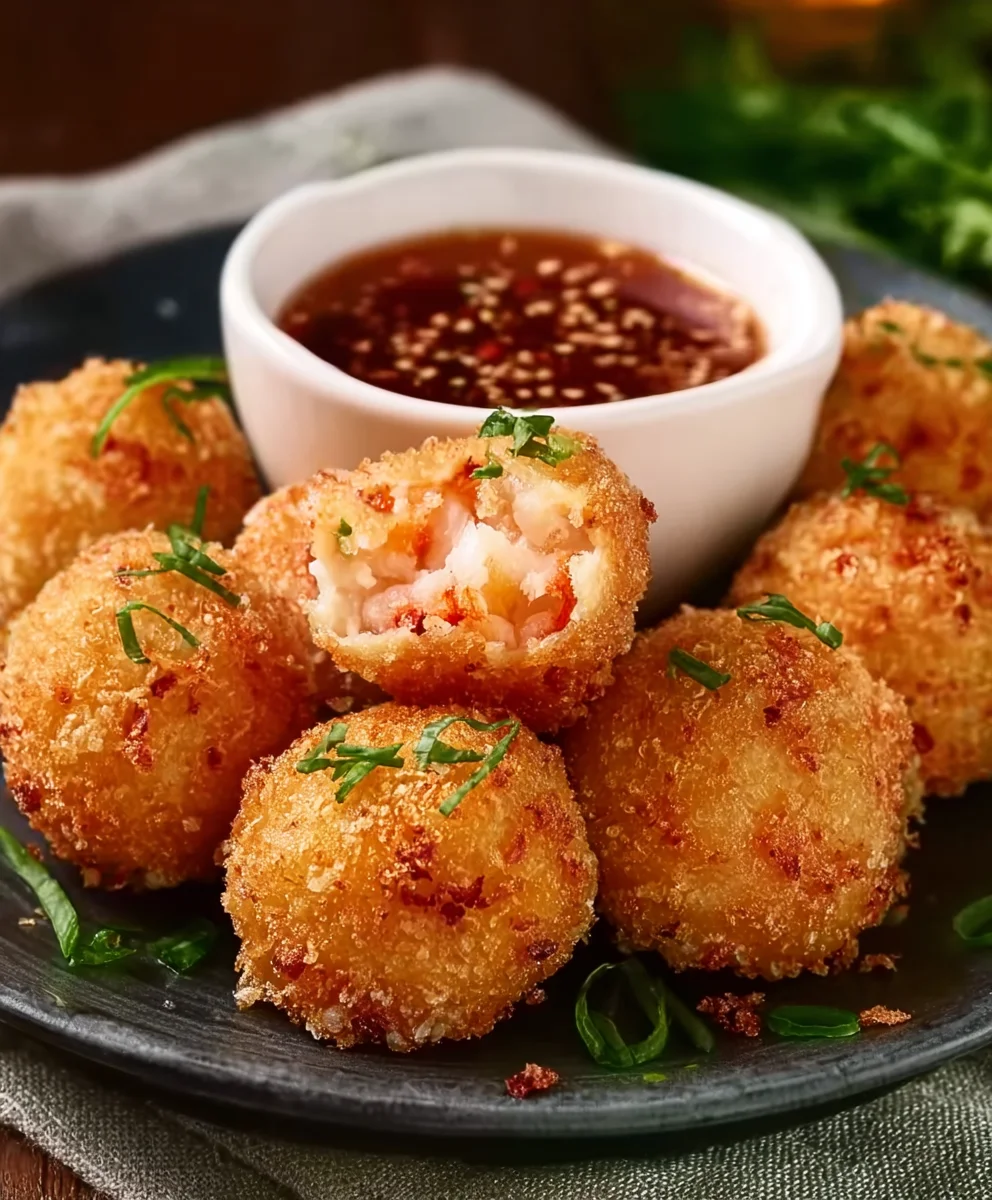
Shrimp Balls Recipe. Get ready to delight your taste buds with a truly sensational Shrimp Balls Recipe that’s guaranteed to become a new family favorite. These aren’t just any shrimp balls; they are little morsels of pure joy, boasting a delightful crisp exterior that gives way to a tender, flavorful interior bursting with succulent shrimp. We all love a dish that’s both impressive and surprisingly easy to make, and this recipe hits that sweet spot perfectly. What makes this particular Shrimp Balls Recipe so special? It’s the harmonious blend of fresh, plump shrimp, subtly seasoned with aromatic herbs and a hint of spice, then perfectly fried to golden-brown perfection. Imagin extracte serving these at your next gathering – they’ll disappear in minutes! They’re the ultimate appetizer, a delightful snack, or even a light yet satisfying meal. You’ll find yourself reaching for this recipe again and again.

Ingredients:
- 1 lb raw shrimp, peeled and deveined
- 1/2 cup breadcrum extractbs (preferably panko for extra crispiness)
- 1 egg, beaten
- 1/4 cup green onions, finely chopped
- 2 cloves garlic, minced
- 1 tablespoon fresh gin extractger, grated
- 1 tablespoon soy sauce
- 1 teaspoon sesame oil
- 1/2 teaspoon salt
- 1/2 teaspoon black pepper
- 1/4 cup cilantro, chopped (optional, for a fresh herb burst)
- 1 tablespoon cornstarch (optional, for enhanced binding if your mixture feels a bit loose)
- Vegetable oil, for frying
Preparing the Shrimp Mixture
Step 1: Processing the Shrimpgin extract4>
Begin by preparing your shrimp. It’s crucial to ensure they are fully peeled and deveined for a smooth texture in your shrimp balls. Pat the shrimp dry thoroughly with paper towels. This is an important step as excess moisture can prevent the other ingredients from binding properly and can lead to splattering during frying. Once dry, roughly chop the shrimp. You don’t want them to be a paste, but rather have some small, discernible pieces for texture. A food processor can be used for a quicker approach, but pulsing it a few times is key – you’re aiming for a coarse chop, not a puree.
Step 2: Combining the Flavorful Base
In a medium mixing bowl, combine the chopped shrimp with all the binders and flavor enhancers. Add the beaten egg, which acts as a crucial binder, along with the pankrum extractreadcrumbs. Next, incorporate the finely chopped green onions, minced garlic, andgin extracteshly grated ginger. These aromatics will infuse your shrimp balls with a wonderful depth of flavor. Pour in the soy sauce for that savory umami note and the sesame oil for its distinct nutty aroma. Season with salt and freshly ground black pepper. If you are using cilantro for an extra layer of freshness, add it now. For an optional binding boost, especially if your mixture seems a little wet, sprinkle in the tablespoon of cornstarch.
Step 3: Mixing and Chilling for Optimal Texture
Now, it’s time to bring everything together. Gently mix all the ingredients in the bowl until just combined. Avoid overmixing, as this can make the shrimp balls tough. You want to ensure everything is evenly distributed. Once you have a cohesive mixture, cover the bowl tightly with plastic wrap. Place the bowl in the refrigerator for at least 30 minutes. This chilling period is vital. It allows the flavors to meld together beautifully, and more importantly, it firms up the mixture, making it much easier to shape into balls without them falling apart. This step is a game-changer for achieving perfectly formed shrimp balls.
Shaping and Frying
Step 4: Forming the Shrimp Balls
Once the shrimp mixture has chilled sufficiently, it’s time to shape your shrimp balls. Lightly dampen your hands with water. This simple trick prevents the shrimp mixture from sticking to your palms, making the shaping process smooth and efficient. Take about a tablespoon-sized portion of the mixture and roll it gently between your hands to form a compact ball. Aim for a consistent size for all your balls so they cook evenly. As you shape each ball, place them on a clean plate or baking sheet, ensuring they don’t touch each other. This prevents them from sticking together before they hit the hot oil.
Step 5: Achieving Golden-Brown Perfection
Pour enough vegetable oil into a heavy-bottomed pot or deep skillet to reach a depth of about 2-3 inches. Heat the oil over medium-high heat until it reaches approximately 350°F (175°C). You can test if the oil is hot enough by dropping a tiny bit of the mixture into it; it should sizzle immediately. Carefully, and in batches to avoid overcrowding the pan (which would lower the oil temperature and result in greasy shrimp balls), place the shaped shrimp balls into the hot oil. Fry them for about 3-4 minutes per side, or until they are a beautiful golden-brown color and cooked through. Use a slotted spoon to turn them gently to ensure even browning. Once they are perfectly cooked, remove the shrimp balls from the oil and place them on a wire rack set over a baking sheet. This allows excess oil to drain off, keeping your shrimp balls delightfully crispy.
Step 6: Serving Suggestions
Allow the fried shrimp balls to cool slightly before serving. They are best enjoyed warm, fresh from the fryer. These delectable shrimp balls are incredibly versatile. They make a fantastic appetizer, perfect for dipping into your favorite sauces like sweet chili sauce, a spicy mayonnaise, or even a simple soy-based dipping sauce. You can also serve them as a delicious side dish to a larger meal, or even incorporated into a salad for a protein boost. The crispy exterior and tender, flavorful interior are sure to be a crowd-pleaser.
Conclusion:
And there you have it – your very own delicious Shrimp Balls Recipe! We’ve guided you through each step, from selecting the freshest shrimp to achieving those perfectly golden, crispy bites. This recipe is a fantastic way to impress guests or simply elevate your weeknight meal. The versatility of these shrimp balls means they can be a delightful appetizer, a satisfying main course alongside a crisp salad, or even a fun addition to noodle dishes.
Don’t be afraid to experiment with this Shrimp Balls Recipe! Consider adding a pinch of chili flakes for a touch of heat, or perhaps some finely chopped cilantro or chives for an extra layer of freshness. You can also explore different dipping sauces – a sweet chili sauce is a classic choice, but a zesty lemon-dill aioli or even a spicy sriracha mayonnaise would be equally delightful. We encourage you to get creative and make this recipe your own. Enjoy every delightful bite of your homemade shrimp balls!
Frequently Asked Questions about the Shrimp Balls Recipe:
Q1: Can I make the shrimp balls ahead of time?
Yes, you can definitely prepare the shrimp ball mixture ahead of time. Once formed, you can refrigerate them on a baking sheet lined with parchment paper for up to 24 hours before frying or baking. For longer storage, you can freeze the uncooked shrimp balls; just ensure they are frozen solid before transferring them to an airtight container or freezer bag. When ready to cook from frozen, you may need to add a few extra minutes to the cooking time.
Q2: What’s the best way to ensure my shrimp balls are crispy?
For maximum crispiness with this Shrimp Balls Recipe, make sure your frying oil is at the correct temperature (around 350-375°F or 175-190°C) and avoid overcrowding the pan. Overcrowding will lower the oil temperature, leading to greasy rather than crispy shrimp balls. If baking, ensure you use a hot oven and consider flipping the shrimp balls halfway through for even browning. Using panko breadcrum extractbs also contributes significantly to a crispier texture.
Easy Shrimp Balls Recipe-Delicious Appetizer
A simple and delicious recipe for crispy, flavorful shrimp balls, perfect as an appetizer or side dish.
Ingredients
-
1 lb raw shrimp, peeled and deveined
-
1/2 cup panko breadcrumbs
-
1 egg, beaten
-
1/4 cup green onions, finely chopped
-
2 cloves garlic, minced
-
1 tablespoon fresh ginger, grated
-
1 tablespoon soy sauce
-
1 teaspoon sesame oil
-
1/2 teaspoon salt
-
1/2 teaspoon black pepper
-
1/4 cup cilantro, chopped (optional)
-
1 tablespoon cornstarch (optional, for binding)
-
Vegetable oil, for frying
Instructions
-
Step 1
Pat the peeled and deveined shrimp dry. Roughly chop the shrimp, aiming for a coarse texture, not a paste. -
Step 2
In a medium bowl, combine the chopped shrimp with beaten egg, panko breadcrumbs, green onions, garlic, grated ginger, soy sauce, sesame oil, salt, and pepper. Add optional cilantro and cornstarch if using. -
Step 3
Gently mix ingredients until just combined. Cover and refrigerate for at least 30 minutes to allow flavors to meld and the mixture to firm up. -
Step 4
Lightly dampen your hands and form about a tablespoon of the mixture into compact balls. Place on a clean plate. -
Step 5
Heat 2-3 inches of vegetable oil in a heavy-bottomed pot over medium-high heat to 350°F (175°C). Carefully fry the shrimp balls in batches for 3-4 minutes per side, until golden brown and cooked through. -
Step 6
Remove shrimp balls with a slotted spoon and drain on a wire rack. Serve warm with your favorite dipping sauces.
Important Information
Nutrition Facts (Per Serving)
It is important to consider this information as approximate and not to use it as definitive health advice.
Allergy Information
Please check ingredients for potential allergens and consult a health professional if in doubt.
Leave a Comment