
Homemade strawberry ice cream is an absolute summer essential, a vibrant ruby-red dream that captures the very essence of the season. There’s something undeniably magical about the sweet, slightly tart burst of fresh strawberries mingling with creamy, dreamy ice cream. It’s a classic for a reason, isn’t it? Childhood memories flood back with every spoonful – carefree days, sunshine, and the ultimate treat. What makes this homemade strawberry ice cream so special is the incredible freshness you can achieve, a far cry from anything store-bought. We’re talking about the intense flavor of ripe, juicy berries, unadulterated by artificial flavors or excessive preservatives. Making it ourselves means we control the sweetness and the texture, resulting in a truly unparalleled, velvety smooth delight that tastes like pure joy. Get ready to dive into the ultimate cool-down with this incredible recipe!

Homemade Strawberry Ice Cream
There’s something truly magical about homemade ice cream. The creamy texture, the vibrant flavor, and the satisfaction of creating something delicious from scratch are unparalleled. And when it comes to classic flavors, nothing beats the sweet, slightly tart burst of fresh strawberries. This recipe for homemade strawberry ice cream is incredibly simple, requiring no fancy equipment beyond a good blender and, ideally, an ice cream maker. But even if you don’t have one, I’ll share a method that works beautifully! Get ready to impress yourself and your loved ones with this delightful frozen treat.
Ingredients:
Crafting the Strawberry Base
The foundation of any great strawberry ice cream is, of course, the strawberries themselves. For this recipe, we’re aiming for intense, natural strawberry flavor. Start by ensuring your strawberries are ripe and fragrant. Hull them carefully, removing the green tops. Then, dice them into manageable pieces.
In a medium bowl, combine your diced strawberries with the honey, granulated sugar, and the teaspoon of lemon juice. The honey adds a lovely subtle sweetness and a slightly floral note that complements the strawberries beautifully. Granulated sugar provides the necessary sweetness for a balanced ice cream, and the lemon juice is our secret weapon. It brightens the strawberry flavor, preventing it from tasting flat and enhancing its natural tangin extractess. Stir these ingredients together gently, ensuring the sugar and honey begin extract to dissolve.
Now, it’s time to let these flavors meld. Cover the bowl and let the strawberry mixture sit at room temperature for about 30 minutes. This maceration process draws out the juices from the strawberries, creating a more concentrated and flavorful syrup. You’ll notice the strawberries becoming softer and releasing their vibrant red juices. This is exactly what we want!
Blending and Chilling the Creamy Dream
After the strawberries have had their chance to macerate, it’s time to transform them into a smooth puree. Transfer the strawberry mixture to a blender or food processor. Blend until you have a smooth, luscious puree. If you prefer a smoother ice cream with no visible seeds, you can strain the puree through a fine-mesh sieve at this point. However, I personally enjoy the rustic charm and slight texture that a few seeds can add.
In a separate, larger bowl, combine the heavy whipping cream, half and half, and vanilla extract. Whisk them together until well combined. This dairy blend provides the rich, creamy foundation for our ice cream. The heavy whipping cream is essential for that decadent texture and smooth mouthfeel, while the half and half balances the richness.
Now, gently pour the strawberry puree into the cream mixture. Whisk everything together thoroughly until you have a uniform, pnon-alcoholic ale pink liquid. Take a moment to taste the mixture. This is your opportunity to adjust the sweetness or tartness. If you desire a sweeter ice cream, you can add a little more sugar, about a tablespoon at a time, whisking well to dissolve. If you want it a bit more tart, another tiny squeeze of lemon juice can work wonders. Remember that the flavors will mellow slightly when frozen, so it’s good to have it slightly more pronounced before chilling.
The Freezing Process: Ice Cream Maker Magic
If you have an ice cream maker, this is where the magic truly happens. Chill the strawberry-cream mixture in the refrigerator for at least 2 hours, or ideally overnight. This ensures the base is thoroughly cold, which is crucial for proper churning and achieving the best texture in your ice cream maker. Follow the manufacturer’s instructions for your specific ice cream maker. Typically, this involves pouring the chilled base into the pre-frozen bowl and churning for 20-30 minutes, or until the mixture has thickened to a soft-serve consistency.
No Ice Cream Maker? No Problem!
Don’t have an ice cream maker? You can still make fantastic homemade strawberry ice cream! Pour the chilled strawberry-cream mixture into a freezer-safe container. Place it in the freezer. Every 30-45 minutes for the first 3-4 hours, take the container out and vigorously stir the mixture with a fork or whisk, breaking up any ice crystals that are forming. This process mimics the churning action of an ice cream maker and helps to create a smoother texture. It takes a bit more effort, but the result is absolutely worth it. Continue this process until the ice cream is firm but still scoopable.
The Final Chill and Enjoyment
Once your ice cream has reached your desired consistency (either from the ice cream maker or your manual churning method), transfer it to an airtight container. Press a piece of parchment paper or plastic wrap directly onto the surface of the ice cream to prevent ice crystals from forming on top. Freeze for at least another 2-4 hours to allow it to firm up completely.
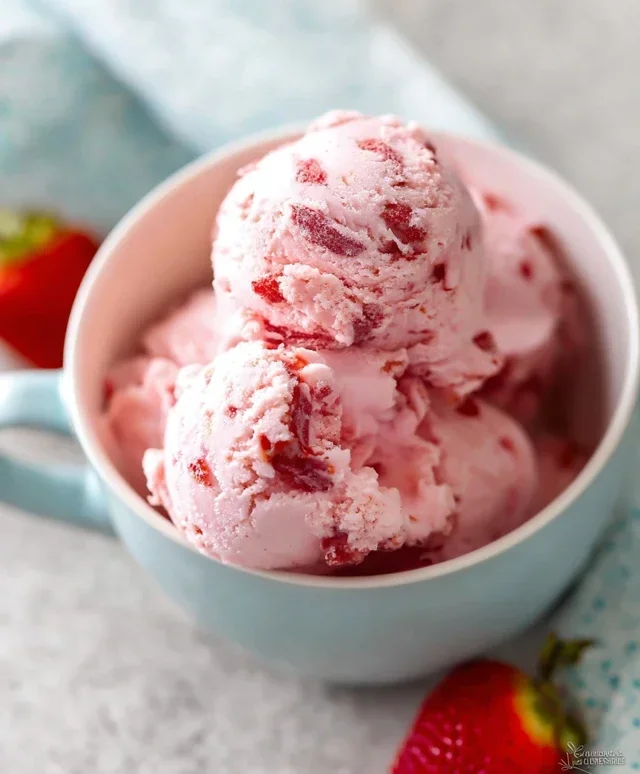
When you’re ready to serve, let the ice cream sit at room temperature for a few minutes to soften slightly, making it easier to scoop. The vibrant pink hue and the fresh, sweet aroma will be irresistible. Enjoy this glorious homemade strawberry ice cream on its own, or top it with fresh strawberries, a sprig of mint, or a drizzle of your favorite sauce. It’s a taste of pure summer joy, made with love.
Conclusion:
Making your own homemade strawberry ice cream is an incredibly rewarding experience that truly elevates your dessert game. The vibrant, natural sweetness of fresh strawberries combined with the creamy richness of dairy creates a taste that store-bought versions simply can’t replicate. This recipe is fantastic because it allows you to control the ingredients, ensuring a fresh, delicious, and wonderfully satisfying treat perfect for any occasion. Whether you’re enjoying it on a warm summer evening or as a special indulgence any time of year, the pure flavor of ripe strawberries is simply unparalleled.
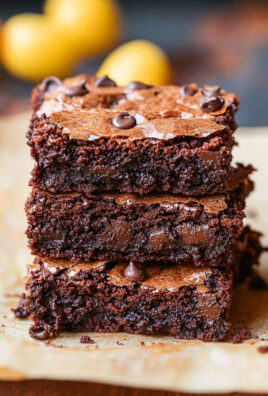
For serving, I love this ice cream on its own, but it also shines alongside freshly baked brownies, warm crum extractbles, or even a light pound cake. Get creative with your toppings too – a drizzle of balsamic glaze can offer a surprisingly delightful counterpoint to the sweetness, or simply stick with classic whipped cream and a few extra fresh berries.
Don’t hesitate to experiment with variations! For a more intense strawberry flavor, roast your strawberries beforehand to caramelize their sugars. If you’re looking for a dairy-free option, substituting full-fat coconut milk for the heavy cream and whole milk will yield a surprisingly decadent vegan strawberry ice cream. I truly encourage you to give this recipe a try; the joy of scooping into your very own, perfectly churned homemade strawberry ice cream is absolutely worth it!
Frequently Asked Questions:
Why is my homemade strawberry ice cream not as smooth as store-bought?
Achieving commercial smoothness often relies on stabilizers and specific freezing processes not readily available at home. However, for the best results, ensure your ingredients are well-chilled, don’t overfill your ice cream maker (allowing ample room for air incorporation), and churn for the recommended time. Freezing the ice cream thoroughly after churning is also crucial for texture.
Can I make this without an ice cream maker?
Yes! While an ice cream maker provides the smoothest texture, you can achieve a delicious result without one. Prepare your strawberry base as usual and pour it into a shallow, freezer-safe container. Freeze, and then every 30-45 minutes, remove it from the freezer and vigorously whisk or beat it with an electric mixer to break up ice crystals. Repeat this process several times until you achieve a frozen, scoopable consistency.
Homemade Strawberry Ice Cream
A classic, no-churn homemade strawberry ice cream recipe, bursting with fresh berry flavor.
Ingredients
-
1 1/2 cups strawberries, hulled and diced
-
2 Tbsp honey
-
1/2 cup granulated sugar
-
1 tsp lemon juice
-
1 cup heavy whipping cream
-
1/2 cup half and half
-
1 tsp vanilla extract
Instructions
-
Step 1
In a bowl, combine the diced strawberries, honey, granulated sugar, and lemon juice. Let sit for 15-20 minutes, stirring occasionally, until the sugar has dissolved and the strawberries have released their juices. -
Step 2
Pour the strawberry mixture into a blender or food processor and blend until smooth. You can leave it slightly chunky if preferred. -
Step 3
In a separate large bowl, whisk together the heavy whipping cream, half and half, and vanilla extract until soft peaks form. -
Step 4
Gently fold the strawberry puree into the whipped cream mixture until just combined. Be careful not to overmix. -
Step 5
Pour the ice cream base into a freezer-safe container. Cover tightly with a lid or plastic wrap, pressing it directly onto the surface of the ice cream to prevent ice crystals. -
Step 6
Freeze for at least 6-8 hours, or until firm. For a creamier texture, stir the ice cream every 1-2 hours during the first 4-6 hours of freezing.
Important Information
Nutrition Facts (Per Serving)
It is important to consider this information as approximate and not to use it as definitive health advice.
Allergy Information
Please check ingredients for potential allergens and consult a health professional if in doubt.
Leave a Comment