
Grinch Brownies are more than just a festive treat; they’re a delightful invitation to let your heart grow three sizes this holiday season! There’s an undeniable magic in whipping up a batch of these vibrant green, fudgy squares, perfectly capturing the mischievous spirit of everyone’s favorite green anti-hero. Who could resist a dessert that promises to transform even the most cynical holiday Scrooges into beaming, treat-loving enthusiasts?
Inspired by Dr. Seuss’s timeless tale, “How the Grinch Stole Christmas,” these charming brownies have become a beloved fixture in many homes, embodying the playful side of holiday baking. The Grinch, initially known for his grumpy disposition, ultimately teaches us about the true meaning of Christmas – a message beautifully echoed in sharing homemade goodies with loved ones.
Why People Adore These Festive Grinch Brownies
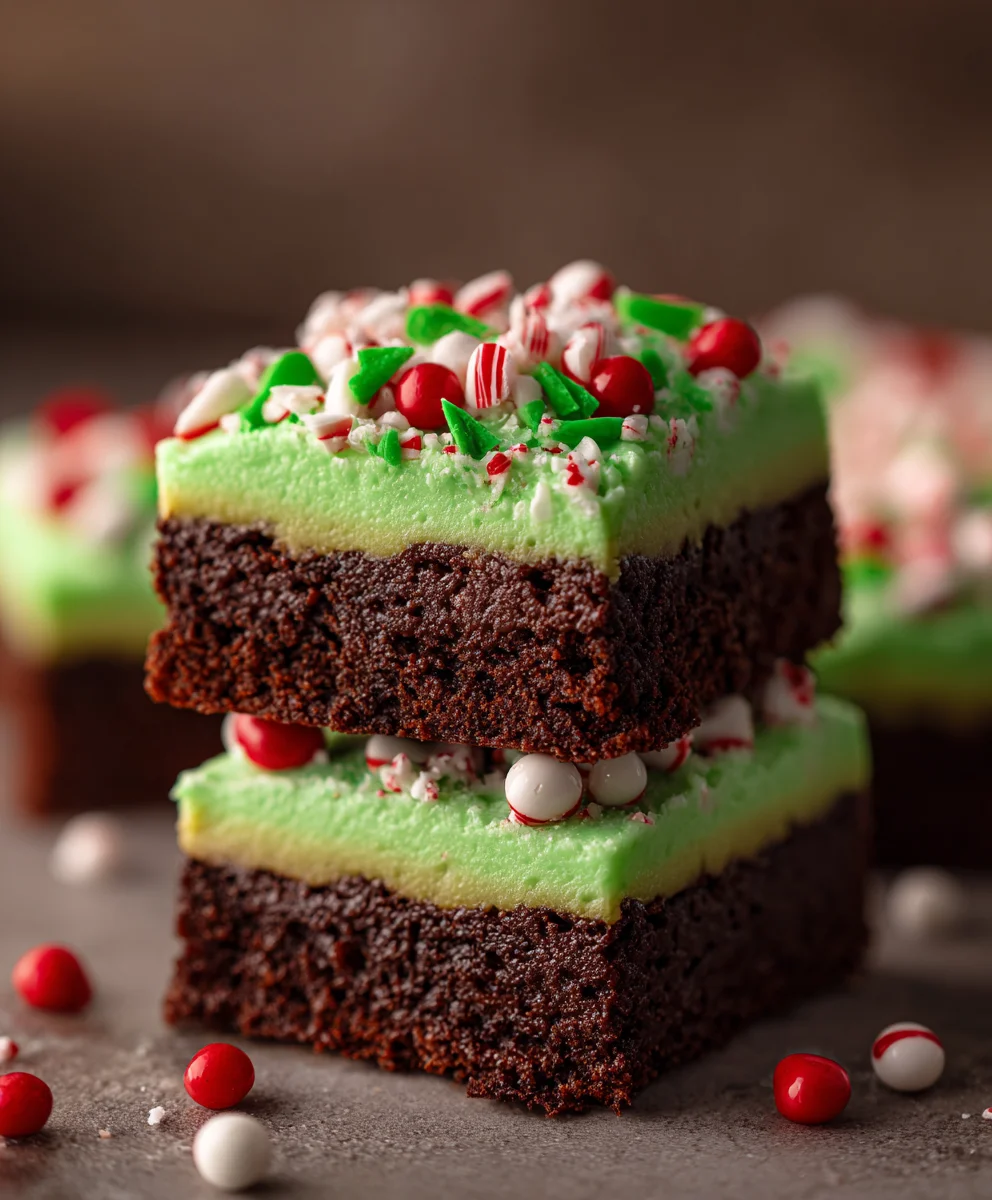
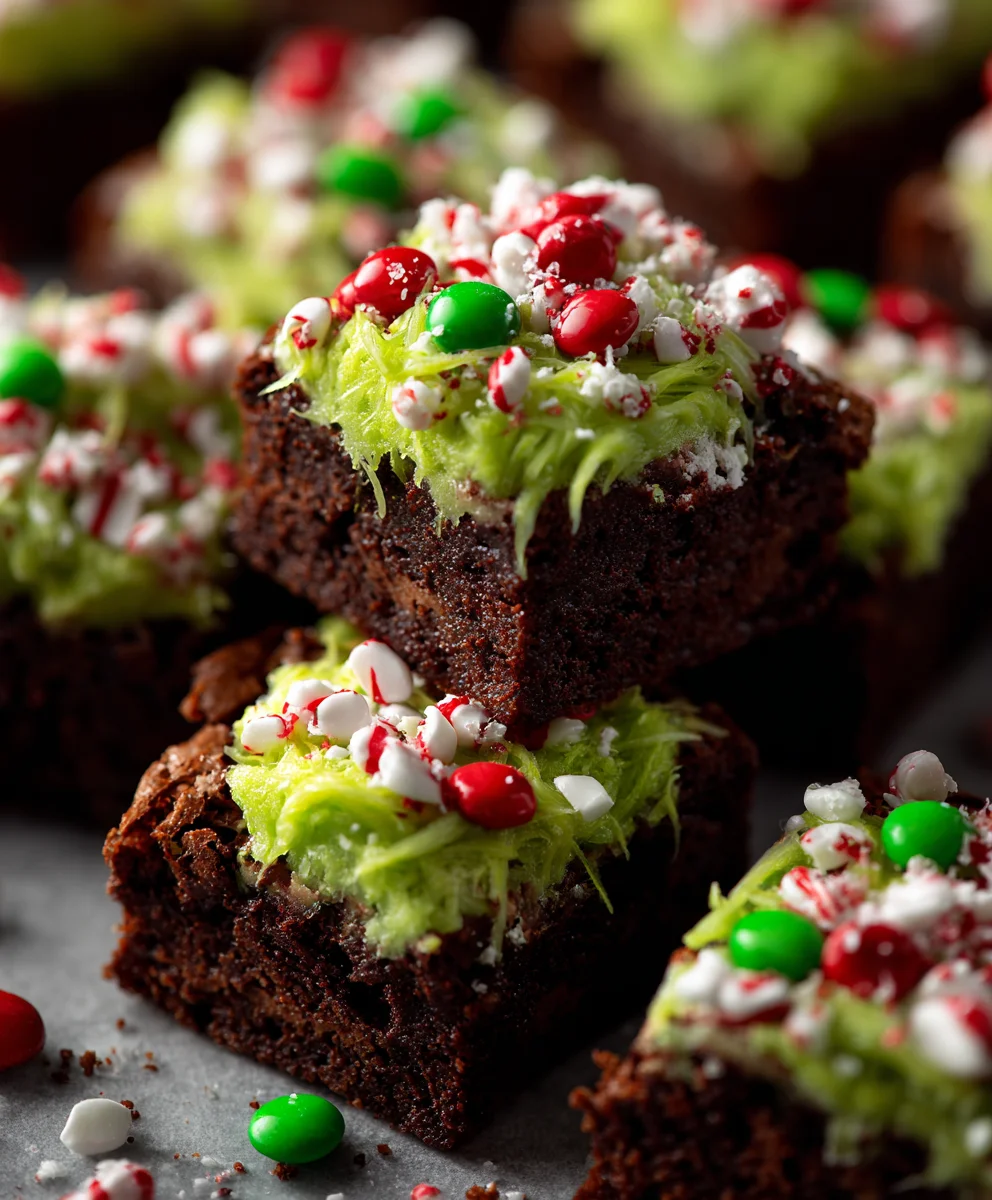
People adore these Grinch Brownies not only for their incredibly rich, decadent chocolate flavor and perfectly chewy texture but also for their eye-catching, festive appearance. That signature Grinch green, often topped with a tiny red heart, makes them an instant hit at any gathering, spreading cheer and sparking nostalgic conversations about Whoville. They are wonderfully simple to prepare, making them a fantastic activity for families looking to add a touch of whimsy to their holiday traditions.

Ingredients:
-
For the Fudgy Brownie Base:
- 1 cup (2 sticks / 226g) unsalted butter: I always use good quality unsalted butter for its rich flavor and control over saltiness.
- 4 ounces (113g) unsweetened chocolate: This is key for that deep, dark, intense chocolate flavor that makes for truly fudgy brownies. I prefer baking bars over chocolate chips for this.
- 2 cups (400g) granulated sugar: Sweetness and contributes to the chewy texture.
- 4 large eggs: Essential for structure and richness, binding everything together into a luscious batter.
- 1 teaspoon pure vanilla extract: Don’t skip this! It enhances all the chocolate notes beautifully.
- 1 cup (125g) all-purpose flour: Measured correctly (spooned into the cup and leveled) to avoid dense brownies.
- ½ teaspoon salt: A crucial ingredient that balances the sweetness and brings out the chocolate flavor, making these Grinch Brownies sing.
- Optional: ½ cup chocolate chips or chunks: For an extra layer of gooey chocolatey goodness in your Grinch Brownies.
-
For the Vibrant Green Peppermint Frosting:
- ½ cup (1 stick / 113g) unsalted butter, softened: Make sure it’s truly softened, but not melted, for a perfectly smooth frosting.
- 3 cups (360g) powdered sugar (confectioners’ sugar), sifted: Sifting is a must to prevent lumps and ensure a silky-smooth frosting texture.
- ¼ cup (60ml) heavy cream or milk: I find heavy cream gives a richer, creamier frosting, but milk works well too.
- ½ teaspoon pure peppermint extract: This gives our frosting that festive, cool minty kick that pairs so well with chocolate. Feel free to adjust to your taste!
- ½ teaspoon pure vanilla extract: To round out the flavors and add depth.
- Pinch of salt: Just a tiny bit to balance the sweetness.
- Green gel food coloring: Gel coloring gives a much more vibrant color without thinning the frosting too much. I aim for a bright, Grinch-y green!
-
For the Grinch Heart Decoration:
- Small red candy hearts or red sprinkles: These are the adorable finishing touch that truly makes them Grinch Brownies! You can find them in the baking aisle during the holidays.
-
Equipment You’ll Need:
- 9×13 inch baking pan: Essential for a good batch size of these delightful Grinch Brownies.
- Parchment paper: Makes for easy lifting and clean-up, I wouldn’t bake brownies without it!
- Large mixing bowls: For combining wet and dry ingredients.
- Whisk and rubber spatula: My trusty tools for mixing.
- Electric mixer (handheld or stand mixer): While optional, it makes whipping up that frosting so much easier and smoother.
- Cooling rack: Allows the brownies to cool evenly.
-
Preparing the Fudgy Brownie Base
Step 1: Preheat and Prepare. My first step, always, is to preheat my oven to 350°F (175°C). It’s so important that your oven is at the correct temperature before the batter goes in for even baking. Next, I grab my 9×13 inch baking pan and line it with parchment paper, leaving an overhang on the longer sides. This overhang acts as a sling later, making it incredibly easy to lift the entire slab of baked Grinch Brownies out of the pan for cutting. A light spray with non-stick cooking spray before the parchment paper, or even on top of the parchment paper itself, can add an extra layer of non-stick insurance, though often it’s not strictly necessary with good quality parchment.
Step 2: Melt the Chocolate and Butter. In a large, microwave-safe bowl or over a double boiler, I combine the 1 cup of unsalted butter and 4 ounces of unsweetened chocolate. If using the microwave, I heat it in 30-second intervals, stirring well after each, until the mixture is completely melted and smooth. This usually takes about 1.5 to 2 minutes total. Be careful not to overheat the chocolate, as it can seize. If using a double boiler, simply place the bowl over a pot of simmering water, ensuring the bottom of the bowl doesn’t touch the water, and stir until smooth. Once melted, I set it aside to cool slightly while I gather my other ingredients.
Step 3: Combine Wet Ingredients. In another large mixing bowl, I crack the 4 large eggs. To these, I add the 2 cups of granulated sugar and the 1 teaspoon of pure vanilla extract. Using a whisk, I vigorously whisk these ingredients together for about 1-2 minutes until the mixture is light in color and slightly thickened. You’re looking for a pale yellow, almost creamy consistency. This step is crucial because it incorporates air into the eggs and sugar, which contributes to that desirable crackly top on your Grinch Brownies.
Step 4: Incorporate Melted Chocolate. Once the melted butter and chocolate mixture has cooled down a bit (it shouldn’t be piping hot, just warm to the touch), I slowly pour it into the egg and sugar mixture, whisking continuously until everything is well combined and the batter is a uniform dark brown. Make sure there are no streaks of unmixed egg or chocolate remaining. The batter should look glossy and inviting at this stage.
Step 5: Add Dry Ingredients. Now it’s time for the flour and salt. I gently add the 1 cup of all-purpose flour and ½ teaspoon of salt to the wet ingredients. With a rubber spatula, I fold the flour mixture into the chocolate batter just until no dry streaks remain. It’s incredibly important not to overmix at this stage! Overmixing develops the gluten in the flour, which can lead to tough, cake-like brownies instead of the fudgy perfection we’re aiming for for our Grinch Brownies. If I’m adding optional chocolate chips or chunks, I fold them in now, too, giving a final gentle mix to distribute them evenly.
Step 6: Bake to Perfection. I pour the rich brownie batter into my prepared 9×13 inch pan and spread it evenly with the spatula. Then, I pop it into the preheated oven for 25-30 minutes. Baking times can vary greatly between ovens, so I always keep a close eye on them. The brownies are done when a toothpick inserted into the center comes out with moist crumbs attached, but not wet batter. If the toothpick comes out completely clean, they might be overbaked and less fudgy. For truly fudgy Grinch Brownies, a few moist crumbs are ideal. Do not overbake! This is my most important piece of advice for ultimate fudginess.
Step 7: Cool Completely. Once baked, I remove the pan from the oven and let the brownies cool in the pan on a wire rack for at least 30 minutes. Then, using the parchment paper overhang, I carefully lift the entire slab of brownies out of the pan and transfer it to the wire rack to cool completely. This takes at least 2-3 hours, or even longer. Resist the urge to frost warm brownies! The frosting will melt, and you’ll have a messy disaster. Patience is key for these perfect Grinch Brownies.
-
Crafting the Vibrant Green Peppermint Frosting
Step 8: Prepare for Frosting. While the brownies are cooling, I start on the show-stopping green peppermint frosting. First, I make sure my ½ cup of unsalted butter is at true room temperature – it should be soft enough to easily indent with your finger but not melted or greasy. I also like to sift my 3 cups of powdered sugar. This extra step is well worth it, as it eliminates any lumps, guaranteeing a super smooth and creamy frosting texture for your Grinch Brownies.
Step 9: Cream the Butter. In a large mixing bowl, using either a stand mixer fitted with the paddle attachment or a handheld electric mixer, I beat the softened butter on medium speed for about 2-3 minutes until it’s light, fluffy, and pale in color. This aerates the butter, creating the perfect base for a light and airy frosting. Scrape down the sides of the bowl often to ensure even creaming.
Step 10: Build the Frosting Base. With the mixer on low speed, I gradually add the sifted powdered sugar to the creamed butter, about ½ cup at a time. I let each addition incorporate before adding more. Once all the sugar is in, the mixture will be quite thick and crumbly. Increase the speed to medium and continue beating, scraping down the bowl as needed, until the sugar and butter are well combined.
Step 11: Add Liquids and Flavor. Now for the magic! I pour in the ¼ cup of heavy cream (or milk), ½ teaspoon of pure peppermint extract, ½ teaspoon of pure vanilla extract, and a tiny pinch of salt. I start mixing on low speed until everything is just combined, then increase the speed to medium-high and beat for another 3-5 minutes. During this time, the frosting will transform into a wonderfully light, fluffy, and smooth consistency. It’s important to beat it long enough to achieve that luxurious, spreadable texture that will make your Grinch Brownies look and taste incredible.
Step 12: Achieve the Grinchy Green. This is where our Grinch Brownies truly come to life! I add the green gel food coloring, starting with just a few drops. Gel coloring is much more concentrated than liquid, so a little goes a long way. I mix it into the frosting, watching the color develop. I continue to add drops, mixing after each addition, until I achieve that vibrant, Grinch-approved shade of bright green. Remember, the color will look slightly darker in the bowl than it will spread on the brownies, so aim for a shade you love. Don’t be shy with the green! The bolder, the better for these festive treats. Once the color is perfect and the frosting is smooth and spreadable, it’s ready for action.
-
Assembling and Decorating Your Grinch Brownies
Step 13: Frosting the Cooled Brownies. This is the moment of truth! Once your brownie base is completely, utterly cool – I can’t stress this enough – it’s time to frost. I carefully spread the vibrant green peppermint frosting evenly over the entire surface of the cooled brownie slab using an offset spatula or the back of a spoon. I like to make sure the frosting goes right to the edges, creating a beautiful, clean finish. You can make it as smooth or as textured as you like; sometimes a few swirls look extra charming on these festive Grinch Brownies.
Step 14: Adding the Grinch Hearts. To truly make these holiday brownies into Grinch Brownies, we need that iconic tiny heart! Immediately after frosting, while the frosting is still soft, I strategically place the small red candy hearts or sprinkles. I imagine where each brownie square will be cut and place one heart roughly in the center of each intended square. Alternatively, if I’m using red sprinkles, I might scatter them more generally over the surface, or create small clusters that resemble a heart. The key is to press them ever-so-gently into the frosting so they adhere without sinking too deep. This little red detail against the bright green frosting is what makes these so undeniably Grinch-y and absolutely adorable.
Step 15: Chilling for Clean Cuts. For the neatest possible cuts, I recommend chilling the frosted Grinch Brownies. I carefully place the pan (or the lifted brownie slab on a cutting board) into the refrigerator for at least 30 minutes, or even an hour. This allows the frosting to firm up, preventing it from smudging or sticking to your knife when you cut. This step makes a huge difference in presentation, giving you perfectly crisp-edged brownie squares.
Step 16: Cutting and Serving Your Grinch Brownies. Once chilled, remove the Grinch Brownies from the refrigerator. Using a large, sharp knife, I carefully slice the brownies into squares. For extra clean cuts, I always wipe my knife blade with a warm, damp cloth and dry it completely between each cut. This prevents the frosting from dragging and smearing. I usually aim for 24 squares (6×4 grid) from a 9×13 inch pan, but you can cut them to your preferred size. Arrange your beautiful Grinch Brownies on a platter and prepare for compliments! They are perfect for holiday parties, cookie exchanges, or just a cozy night in by the fire.
Tips for the Ultimate Grinch Brownies Experience:
- Ingredient Quality Matters: For the best flavor, use high-quality butter, unsweetened chocolate, and pure extracts. These foundational ingredients truly shine in a simple recipe like these Grinch Brownies.
- Room Temperature Eggs: While not strictly mandatory, bringing your eggs to room temperature helps them incorporate more smoothly into the batter, leading to a more uniform and tender crumb. I usually just let them sit on the counter for 30 minutes before I start baking.
- Don’t Skimp on Cooling: I know it’s tempting, but truly, cooling the brownies completely before frosting is non-negotiable for success. Warm brownies will melt your beautiful green frosting.
- Storage: Store your Grinch Brownies in an airtight container at room temperature for up to 3-4 days, or in the refrigerator for up to a week. If refrigerated, allow them to come to room temperature for the best texture before serving.
- Freezing: These Grinch Brownies freeze beautifully! Once cut, place them in a single layer on a baking sheet and freeze until solid. Then transfer them to an airtight, freezer-safe container or bag, separating layers with parchment paper. They can be frozen for up to 2 months. Thaw at room temperature.
- Flavor Variations: While the peppermint is delightful, you could swap it for almond extract or even a touch of orange zest in the frosting for a different holiday twist. However, the peppermint really does give these Grinch Brownies that special festive touch!
- Adjusting Sweetness: If you prefer less sweet treats, you can slightly reduce the sugar in the frosting by about ¼ to ½ cup, but I wouldn’t recommend reducing the sugar in the brownie base, as it affects the texture.
- Making Ahead: The brownie base can be baked a day in advance and stored at room temperature, unfrosted, in an airtight container. Frost them the day you plan to serve. This is a great time-saver for holiday entertaining.
- Creative Heart Placement: If you don’t have candy hearts, you can use a small heart-shaped cookie cutter to cut out hearts from a thin sheet of red fondant or even from fruit roll-ups! Or, simply use red sprinkles arranged carefully into a heart shape on each square.
- Cutting Technique: For truly pristine squares, consider using a plastic ruler as a guide before slicing. This helps ensure all your Grinch Brownies are uniform in size, making for an even more professional presentation.
- Thick vs. Thin: If you want thicker brownies, you can use an 8×8 or 9×9 inch pan, but you’ll need to increase the baking time. Keep a close eye on them and use the toothpick test. Conversely, for thinner brownies, a larger pan (like a 10×15 jelly roll pan) would work, with a reduced baking time. However, the 9×13 pan really yields the perfect thickness for these festive Grinch Brownies.
Conclusion:
Well, my fellow baking enthusiasts, we’ve reached the sweet finale of our delicious journey! I truly hope you’ve enjoyed delving into the magic behind these incredible treats. As we wrap things up, I want to take a moment to truly articulate why I believe these aren’t just any ordinary baked good, but a genuine must-try experience for anyone who appreciates joy, flavor, and a touch of whimsical fun in their kitchen. These aren’t simply a recipe; they are an invitation to create memories, to spread cheer, and to indulge in something truly special. I’ve poured my heart into perfecting this particular recipe, ensuring every step is clear and every bite is absolutely perfect, and I’m genuinely excited for you to discover the pure delight they bring.
What makes these brownies so utterly irresistible, you ask? It’s a symphony of elements that come together to create pure edible delight. First and foremost, let’s talk about the texture. Imagine biting into a brownie that is perfectly fudgy in the center, with just the right amount of chewiness around the edges. It’s that ideal balance that seasoned bakers strive for, and I promise you, this recipe delivers it every single time. There’s no dryness, no cakey crumb here—just pure, melt-in-your-mouth goodness that will leave you craving another piece. Then there’s the rich, deep chocolate flavor that forms the foundation of this dessert. It’s robust without being overwhelming, providing that comforting, classic brownie taste that everyone adores. I’ve carefully selected ingredients that enhance this chocolatey depth, ensuring a gourmet experience from the first crumb to the last. But what truly elevates this recipe from excellent to extraordinary is its undeniable charm and festive spirit. These aren’t just delicious; they’re a visual delight, designed to bring a smile to anyone’s face. The vibrant hue, the playful toppings – it all adds up to an experience that is both gourmet and genuinely fun. They capture the essence of holiday mischief and warmth, making them an instant showstopper at any gathering. Seriously, they’re more than just a dessert; they’re a conversation starter, a centerpiece, and a testament to the fact that baking can be both incredibly rewarding and utterly delightful. The way the colors pop, the way the aroma fills your kitchen – it’s an immersive experience from start to finish. I’ve seen faces light up when these are presented, and that, for me, is the true magic of baking. They represent a blend of classic comfort and innovative fun, proving that even a simple brownie can become a masterpiece with a little creative flair. These Grinch Brownies are, without a doubt, a staple for my holiday baking, and I wholeheartedly believe they will become one for yours too. They’re quick enough for a weeknight treat but impressive enough for a grand celebration, offering versatility that is hard to beat.
Elevating Your Grinch Brownie Experience: Serving Suggestions & Creative Twists!
Now that you’ve got these magnificent brownies baked, how can you truly make them shine? While they are absolutely phenomenal on their own, a few simple additions can transform them into an even more decadent dessert. Imagine serving a warm brownie with a generous scoop of vanilla bean ice cream, allowing the cold creaminess to melt slightly into the warm chocolate. The contrast in temperatures and textures is truly divine. Or perhaps a dollop of freshly whipped cream, lightly sweetened and infused with a hint of peppermint extract, would provide a wonderful contrast to the rich chocolate, adding another layer of festive flavor. For those who love a bit of extra indulgence, a drizzle of raspberry coulis or a warm chocolate ganache can add another layer of flavor and elegance, turning a simple brownie into a sophisticated dessert. Don’t forget the festive sprinkles! A sprinkle of red and white nonpareils, some edible glitter, or even tiny holiday-shaped sprinkles can really make them sparkle and embrace their holiday theme even further. For a more sophisticated twist, consider grating some high-quality white chocolate over the top just before serving. The delicate curls will melt slightly from the brownie’s warmth, adding a subtle, creamy sweetness that complements the dark chocolate beautifully. And let’s not overlook the beverages! These brownies pair beautifully with a tall glass of cold milk, a hot cup of coffee, a steaming mug of cocoa, or even a festive mug of peppermint hot chocolate, making them perfect for any time of day. For adult gatherings, consider a rich red wine, like a Zinfandel, which can complement the deep chocolate notes surprisingly well, or a festive sparkling cider. If you’re feeling adventurous and want to put your own spin on things, why not experiment with different extracts in the brownie batter? A touch of mint extract can turn them into “Grinch Mint Brownies,” or a hint of almond extract could add an unexpected nutty depth. You could also try pressing some chopped pretzels into the top before baking for a salty-sweet crunch, or even swirl in some raspberry jam for a fruity surprise that cuts through the richness. For an extra layer of decadence, before baking, you could even press a miniature candy cane into the center of each brownie for a hidden festive surprise once cooled and ready to be bitten into! Another fantastic idea is to cut them into smaller, bite-sized squares and arrange them on a dessert platter alongside other holiday treats, creating a vibrant and varied spread that will impress any guest. These brownies also make incredible homemade gifts! Stack a few in a festive tin, tie with a ribbon, and you’ve got a thoughtful, delicious present that truly comes from the heart. They travel well, too, making them perfect for potlucks, office parties, or simply sharing with neighbors, spreading cheer wherever they go.
Your Turn to Bake and Share!
Now, it’s your moment to shine! I’ve laid out all the steps, shared my best tips, and highlighted all the reasons why I adore this recipe. All that’s left is for you to preheat your oven, gather your ingredients, and embark on your own magical baking adventure. I truly believe that baking is one of the most fulfilling activities, a wonderful way to express creativity and to bring joy to yourself and those around you. So, please, dive in! Don’t be afraid to make them your own, to add a personal touch, or even to try one of the variations I’ve suggested. I am genuinely excited for you to experience the sheer delight of creating these festive treats in your own kitchen. And once you do, I would absolutely love to hear about it! Seriously, nothing makes me happier than seeing your baking successes and hearing your stories. Did you make them for a holiday party? Did your kids help decorate them? What serving suggestion did you try? Or did you come up with a brilliant variation of your own? Please share your experiences, your photos, and your feedback in the comments section below. Tag me on social media if you post pictures – I truly love seeing your creations! Your stories and insights are incredibly valuable and help to build a wonderful community of enthusiastic bakers. Let’s spread the joy of baking far and wide, one delicious brownie at a time. Thank you so much for joining me on this culinary adventure. Happy baking, everyone, and may your kitchens always be filled with warmth, laughter, and the irresistible aroma of freshly baked treats!
Easy Grinch Brownies
Grinch Brownies are a delightful invitation to let your heart grow three sizes this holiday season! These vibrant green, fudgy squares capture the mischievous spirit of everyone’s favorite green anti-hero, making them an instant hit at any gathering and a beloved fixture in holiday baking.
Ingredients
-
1 cup (2 sticks / 226g) unsalted butter
-
4 oz (113g) unsweetened chocolate
-
2 cups (400g) granulated sugar
-
4 large eggs
-
1 tsp vanilla extract (for brownies)
-
1 cup (125g) all-purpose flour
-
½ tsp salt (for brownies)
-
Optional: ½ cup chocolate chips or chunks
-
½ cup (1 stick / 113g) unsalted butter, softened (for frosting)
-
3 cups (360g) powdered sugar, sifted
-
¼ cup (60ml) heavy cream or milk
-
½ tsp peppermint extract
-
½ tsp vanilla extract (for frosting)
-
Pinch of salt (for frosting)
-
Green gel food coloring
-
Small red candy hearts or red sprinkles
Instructions
-
Step 1
Preheat oven to 350°F (175°C). Line a 9×13 inch baking pan with parchment paper, leaving an overhang. -
Step 2
Melt 1 cup unsalted butter and 4 oz (113g) unsweetened chocolate in a microwave-safe bowl or double boiler until smooth. Set aside to cool slightly. -
Step 3
In a large bowl, whisk 4 large eggs, 2 cups (400g) granulated sugar, and 1 tsp vanilla extract for 1-2 minutes until light and slightly thickened. -
Step 4
Slowly pour the cooled melted butter-chocolate mixture into the egg-sugar mixture, whisking until well combined. -
Step 5
Gently fold in 1 cup (125g) all-purpose flour and ½ tsp salt until no dry streaks remain. If using, fold in optional ½ cup chocolate chips or chunks. Do not overmix. -
Step 6
Pour batter into the prepared pan and spread evenly. Bake for 25-30 minutes, or until a toothpick inserted into the center comes out with moist crumbs attached (do not overbake). -
Step 7
Cool brownies in the pan on a wire rack for 30 minutes, then lift out using parchment paper and transfer to the rack to cool completely (2-3 hours). -
Step 8
For the frosting: Ensure ½ cup (113g) unsalted butter is softened. Sift 3 cups (360g) powdered sugar. -
Step 9
In a large bowl, beat softened butter on medium speed for 2-3 minutes until light and fluffy. -
Step 10
Gradually add sifted powdered sugar to creamed butter on low speed, then beat on medium until well combined. -
Step 11
Add ¼ cup (60ml) heavy cream or milk, ½ tsp peppermint extract, ½ tsp vanilla extract, and a pinch of salt. Beat on medium-high for 3-5 minutes until light, fluffy, and smooth. -
Step 12
Add green gel food coloring, a few drops at a time, mixing until a vibrant Grinch-y green is achieved. -
Step 13
Once brownies are completely cool, spread the vibrant green peppermint frosting evenly over the surface. -
Step 14
Immediately place small red candy hearts or sprinkles onto the frosting, pressing gently, imagining where each brownie square will be cut. -
Step 15
Chill frosted brownies in the refrigerator for at least 30 minutes to firm up the frosting. -
Step 16
Remove from refrigerator. Using a large, sharp knife (wiped clean between cuts), slice into desired squares (e.g., 24 squares). Serve.
Important Information
Nutrition Facts (Per Serving)
It is important to consider this information as approximate and not to use it as definitive health advice.
Allergy Information
Please check ingredients for potential allergens and consult a health professional if in doubt.
Leave a Comment