• Skip to primary navigation
  • Skip to main content
  • Skip to primary sidebar
Recipes Strawberry

Recipes Strawberry

All Recipes In One Place

  • Home
  • Appetizers
  • Breakfast
  • Dinner
  • Lunch
  • Dessert
  • About Me
  • Contact Us
Recipes Strawberry
  • Home
  • Appetizers
  • Breakfast
  • Dinner
  • Lunch
  • Dessert
  • About Me
  • Contact Us
Dessert / Easy French Macaron Recipe-Perfectly Chewy

Easy French Macaron Recipe-Perfectly Chewy

June 17, 2026 by HaileyDessert

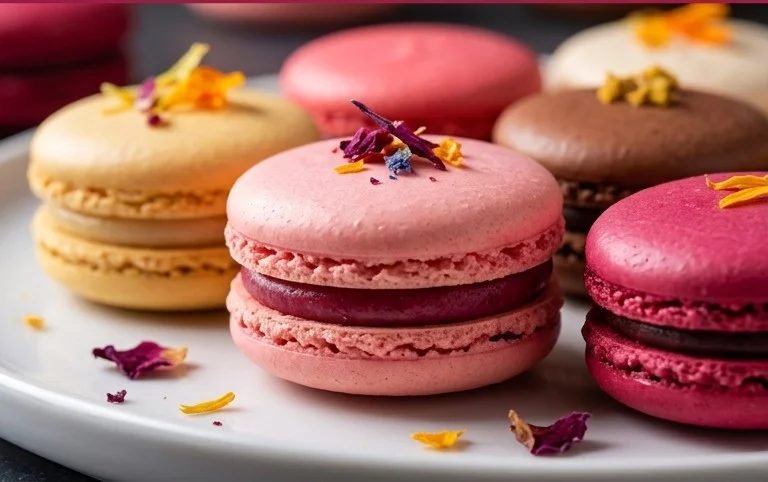
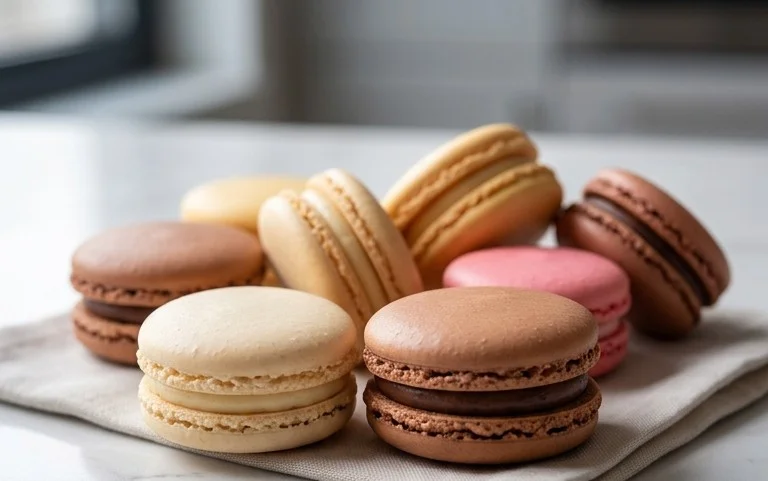
French Macarons: the jewel-toned, delicate cookies that have captivated taste buds and dessert dreams worldwide. For many, the mere thought of a perfect French macaron conjures images of Parisian patisseries and an experience of pure bliss. These aren’t just any cookies; they are miniature works of art, boasting a crisp outer shell that yields to a chewy, tender interior, all sandwiched together with a luscious filling. What makes the French macaron so utterly irresistible? It’s that delightful textural contrast, the explosion of sophisticated flavors, and the sheer elegance they bring to any occasion. Mastering the art of the French macaron at home might seem daunting, but with this guide, you’ll unlock the secrets to creating these exquisite treats, proving that you too can achieve that signature delicate crunch and melt-in-your-mouth chew. Get ready to impress yourself and everyone you know with your very own batch of perfect French macarons!

French Macaron Recipe this Recipe

French Macaron Recipe

Ah, the French macaron. Those delicate, jewel-toned meringue shells sandwiching a creamy, luscious filling. They’re often perceived as intimidating, a pastry reserved for the most seasoned bakers. But I’m here to tell you, with a little patience, precision, and the right guidance, you too can create these elegant treats in your own kitchen! This recipe is a culmination of my own macaron-making journey, honed through trial and error, and I’m excited to share it with you. The key to success lies in understanding the science behind the meringue and the macaronage – the crucial folding process. Don’t be discouraged if your first batch isn’t perfect; even the pros have their off days. Just keep practicing, and you’ll be rewarded with utterly delightful, homemade macarons.

Ingredients:

  • 150 grams sifted super-fine almond flour (measure after sifting *see notes)
  • 180 grams powdered sugar
  • 1/4 teaspoon salt
  • 120 grams large egg whites (at room temperature (about 4 large eggs))
  • 60 grams granulated sugar
  • 4 drops liquid-gel food coloring (or more for a stronger color ** see notes)
  • 1 teaspoon pure vanilla extract
  • Vanilla Buttercream Frosting or your choice of filling.
  • Preparing Your Macaron Shells

    This is where the magic begin extracts! It’s crucial to be precise with your measurements and your technique.

  • Sift and Combine Dry Ingredients: First things first, let’s get our dry ingredients ready. Measure out 150 grams of super-fine almond flour. It’s important to measure after sifting. If you don’t have super-fine almond flour, you can blitz regular almond flour in a food processor for a few seconds, but be careful not to over-process it into almond butter. Then, sift the almond flour along with the 180 grams of powdered sugar and 1/4 teaspoon of salt into a medium bowl. Use a fine-mesh sieve. You want to remove any lumps and ensure a super-smooth consistency. I like to tap the side of the bowl and use the back of a spoon to help everything through. Discard any larger pieces of almond that don’t pass through the sieve. Set this mixture aside.
  • Whip the Egg Whites: Now, for the meringue. In a clean, grease-free bowl of a stand mixer (or a large bowl if using a hand mixer), add your 120 grams of room-temperature egg whites. It’s vital that the egg whites are at room temperature; cold egg whites won’t whip up as well. You can even leave them out on the counter for a few hours. Start whipping the egg whites on medium speed until they become frothy and opaque. Gradually add the 60 grams of granulated sugar, one tablespoon at a time, while the mixer is still running. Continue to whip on medium-high speed until stiff, glossy peaks form. This means when you lift the whisk, the peaks stand straight up and don’t curl over. This stage is crucial for a stable meringue.
  • Add Color and Flavor: Once you have stiff peaks, it’s time to add our color and flavor. Add the 4 drops of liquid-gel food coloring and the 1 teaspoon of pure vanilla extract to the meringue. Gel food coloring is best because it won’t add excess moisture, which can be detrimental to macarons. Start with a few drops and add more if you desire a deeper hue. Mix on low speed until the color is evenly incorporated and the meringue is still glossy. Be careful not to overmix at this stage, as it can deflate the meringue.
  • The Macaronage: This is arguably the most critical step in macaron making – the macaronage. This is the process of folding the dry ingredients into the meringue. Add about one-third of your sifted dry ingredients to the meringue. Using a rubber spatula, gently fold the dry ingredients into the meringue. Use a motion that scrapes down the sides of the bowl and then cuts through the center, turning the mixture over on itself. Repeat this process with the remaining dry ingredients, adding them in two more additions. You want to fold until the batter reaches the ‘lava’ consistency – when you lift the spatula, the batter should fall off in a thick, continuous ribbon. It should flow slowly and smoothly, and when you draw a figure ‘8’ with the batter, the lines should melt into each other within about 20-30 seconds. If the batter is too stiff, you’ll have pointy, cracked macarons. If it’s too thin, they’ll spread out too much and be flat.
  • Pipe and Rest the Shells: Prepare your baking sheets by lining them with parchment paper or silicone baking mats. If using parchment, I like to draw circles on the underside as a guide. Transfer the macaron batter to a piping bag fitted with a round tip (about 1/2 inch). Hold the piping bag vertically about an inch above the baking sheet and pipe rounds of batter, leaving a little space between each one as they will spread slightly. Once piped, firmly tap the baking sheets on the counter several times. This helps to release any trapped air bubbles, which can cause cracks during baking. After tapping, let the macarons rest at room temperature for 30-60 minutes, or until they form a skin. You should be able to lightly touch the surface without the batter sticking to your finger. This skin is essential for developing those characteristic ‘feet’.
  • Bake Your Macarons: Preheat your oven to 300°F (150°C). Bake the macarons for 12-15 minutes. The exact time will depend on your oven. They are ready when the tops are firm to the touch and the feet have risen. You should be able to gently wiggle a shell, and it shouldn’t feel completely loose on its feet. Carefully remove the baking sheets from the oven and let the macarons cool completely on the sheets before attempting to remove them. Rushing this step can result in broken shells.
  • Assembly and Enjoyment

    Once your macaron shells have cooled completely, it’s time for the final, most satisfying step: filling them!

  • Pair and Fill: Gently peel the cooled macaron shells off the parchment paper. Try to pair up shells of similar size. Now, pipe or spread your chosen filling onto the flat side of one macaron shell. A piping bag makes for a neat and even distribution of filling, but a small spoon or offset spatula works too. Then, gently sandwich another macaron shell on top, pressing down lightly until the filling reaches the edges.
  • Maturation: This is perhaps the hardest part – waiting! For the best flavor and texture, it’s recommended to let your filled macarons rest in an airtight container in the refrigerator for at least 24 hours. This allows the moisture from the filling to soften the shells, creating that perfect chewy texture. After their ‘maturation’ period, let them come to room temperature for about 15-20 minutes before serving.
  • Enjoy your beautiful, homemade French macarons! They are a labor of love, but the result is undeniably worth it.

    French Macaron Recipe

    Conclusion:

    And there you have it! Crafting these delicate French macarons is a rewarding journey, and I hope you’re feeling inspired to try this recipe yourself. The beauty of French macarons lies in their elegant simplicity, their wonderfully crisp shell that yields to a soft, chewy interior, and their endless potential for delightful flavor combinations. This recipe has been designed to guide you through each step, ensuring you can achieve those coveted smooth shells and delightful fillings. They’re perfect for elevating any occasion, from a simple afternoon tea to a show-stopping dessert at a special celebration. Don’t be discouraged if your first batch isn’t absolutely perfect – patience and practice are key with macarons! Explore different fillings like classic ganaches, fruit curds, or even buttercream variations. Experiment with colors to match your theme. I truly encourage you to dive in and experience the joy of creating these exquisite French treats. You’ve got this!

    Frequently Asked Questions:

    Why are my macaron shells cracked?

    Cracked shells are often a result of oven temperature being too high, or opening the oven door too early during baking. Ensure your oven is accurately calibrated and resist the temptation to peek!

    My macarons are hollow inside. What went wrong?

    Hollow macarons can be caused by several factors, including over-beaten egg whites, under-baking, or a too-hot oven. Making sure your meringue is stiff and glossy and baking them until they feel firm to the touch is crucial.

    Can I make macaron shells ahead of time?

    Yes! Once completely cooled, macaron shells can be stored in an airtight container at room temperature for a day or two, or refrigerated for up to a week. They often taste even better after a day of resting with the filling.


    French Macaron Recipe

    French Macaron Recipe

    A classic French macaron recipe for perfectly crisp shells with a chewy interior, customizable with your favorite filling.

    Prep Time
    30 Minutes

    Cook Time
    15 Minutes

    Total Time
    45 Minutes

    Servings
    Approximately 24-30 macarons

    Ingredients

    • 150 grams sifted super-fine almond flour
    • 180 grams powdered sugar
    • 1/4 teaspoon salt
    • 120 grams large egg whites (at room temperature)
    • 60 grams granulated sugar
    • 4 drops liquid-gel food coloring
    • 1 teaspoon pure vanilla extract
    • Vanilla Buttercream Frosting (or your choice of filling)

    Instructions

    1. Step 1
      Combine almond flour, powdered sugar, and salt in a food processor and pulse until finely ground. Sift this mixture through a fine-mesh sieve into a bowl to remove any lumps.
    2. Step 2
      In a separate, clean bowl, whisk the egg whites until foamy. Gradually add the granulated sugar while continuing to whisk until stiff, glossy peaks form. Add food coloring and vanilla extract, and whisk until incorporated.
    3. Step 3
      Gently fold about one-third of the dry ingredients into the meringue using a spatula until just combined. Then, fold in the remaining dry ingredients until the batter reaches a lava-like consistency, flowing smoothly off the spatula in a ribbon.
    4. Step 4
      Transfer the batter to a piping bag fitted with a round tip. Pipe small, uniform circles onto baking sheets lined with parchment paper or silicone mats, leaving about an inch between each macaron.
    5. Step 5
      Tap the baking sheets firmly on the counter several times to release any air bubbles. Let the piped macarons sit at room temperature for 30-60 minutes, or until a skin forms on the surface.
    6. Step 6
      Preheat your oven to 300°F (150°C). Bake for 12-15 minutes, or until the macarons have developed ‘feet’ and are firm to the touch but not browned.
    7. Step 7
      Let the macarons cool completely on the baking sheets before carefully peeling them off. Pair up cooled shells of similar size and fill with your chosen frosting or filling.

    Important Information

    Nutrition Facts (Per Serving)

    It is important to consider this information as approximate and not to use it as definitive health advice.

    Allergy Information

    Please check ingredients for potential allergens and consult a health professional if in doubt.

    « Previous Post
    Zesty Lemon Rolls- Easy Sweet Breakfast Treat
    Next Post »
    Easy Vegan Zucchini Rollatini - Delicious & Healthy

    If you enjoyed this…

    Dessert

    Easy Italian Cream Stuffed Cannoncini Recipe

    Dessert

    Root Beer Float: The Ultimate Guide to Making This Classic Dessert Drink

    Dessert

    No Bake Pecan Coconut Praline Cookies – Easy Recipe

    Reader Interactions

    Leave a Comment Cancel reply

    Helpful comments include feedback on the post or changes you made.

    Primary Sidebar

    Browse by Diet

    BreakfastBreakfastDinnerDinnerLunchLunchDessertDessert
    Chicken Beef Bacon Ranch Pasta Salad

    Chicken Beef Beef Bacon Ranch Pasta Salad Recipe

    Vegan Zucchini Rollatini

    Easy Vegan Zucchini Rollatini – Delicious & Healthy

    French Macaron Recipe

    Easy French Macaron Recipe-Perfectly Chewy

    • California Consumer Privacy Act (CCPA)
    • DMCA
    • Cookie Privacy Policy
    • Privacy Policy
    • Terms of Use
    • Contact Us

    © 2026 · Cuisine Recipe Theme · Genesis Framework · Disclosure · Website Design by Anchored Design