
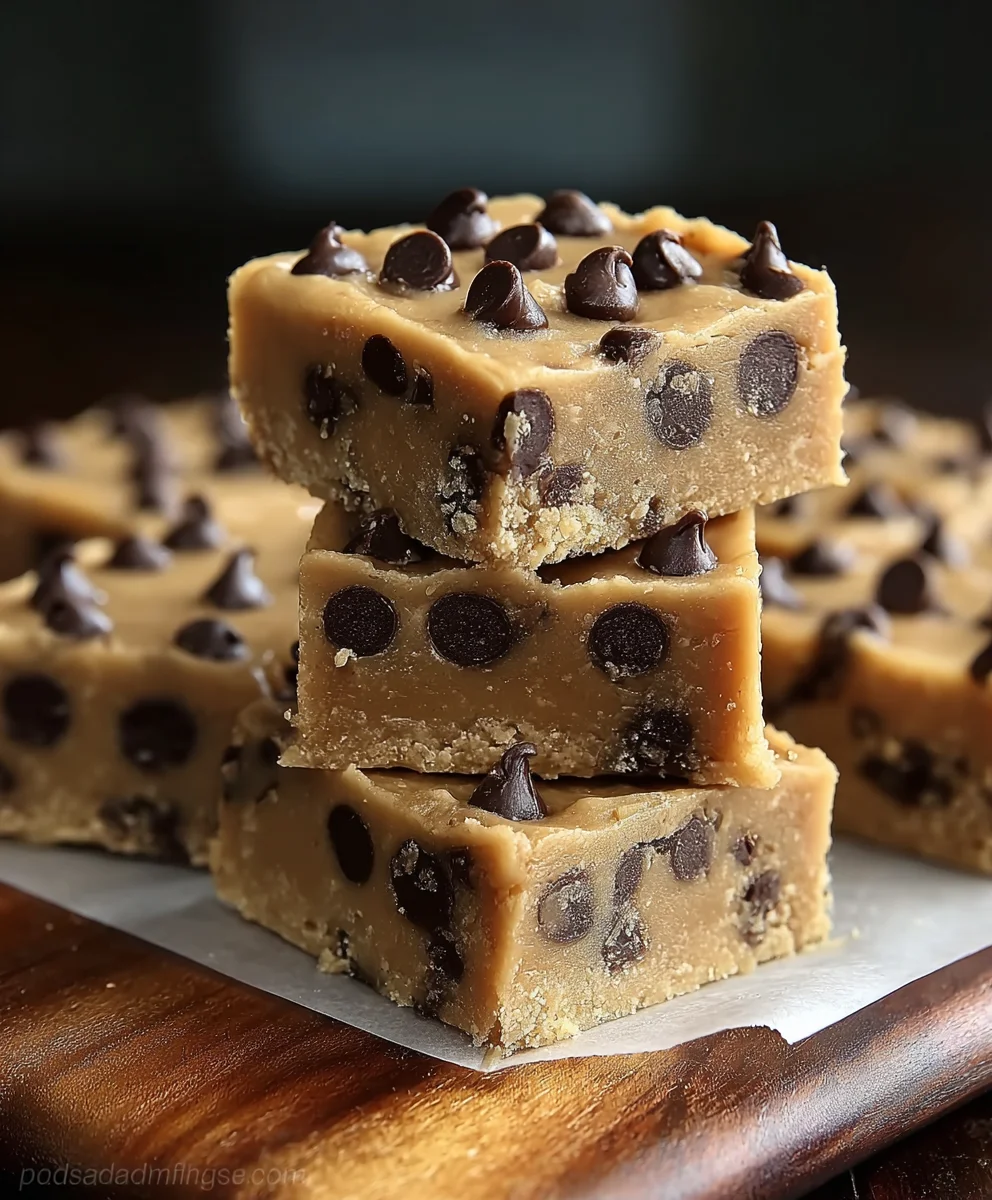
Chocolate Chip Cookie Dough Bars – what if I told you there was a dessert that captures the pure, unadulterated joy of sneaking a spoonful of raw cookie dough, but in a perfectly safe, delightfully portable, and utterly irresistible form?
As a lifelong baking enthusiast, I understand the universal craving for that sweet, chewy, and rich mixture before it even hits the oven. This recipe takes that beloved guilty pleasure and elevates it into a sophisticated, yet incredibly approachable, treat that will have everyone asking for more.
The concept of edible cookie dough has truly blossomed in recent years, evolving from a simple childhood indulgence into a gourmet trend. While the classic chocolate chip cookie boasts a rich history dating back to the 1930s, these innovative Chocolate Chip Cookie Dough Bars represent a modern twist, transforming the irresistible dough into a standalone sensation. They offer all the comfort of homemade cookies without the wait, making them a fantastic choice for any occasion.
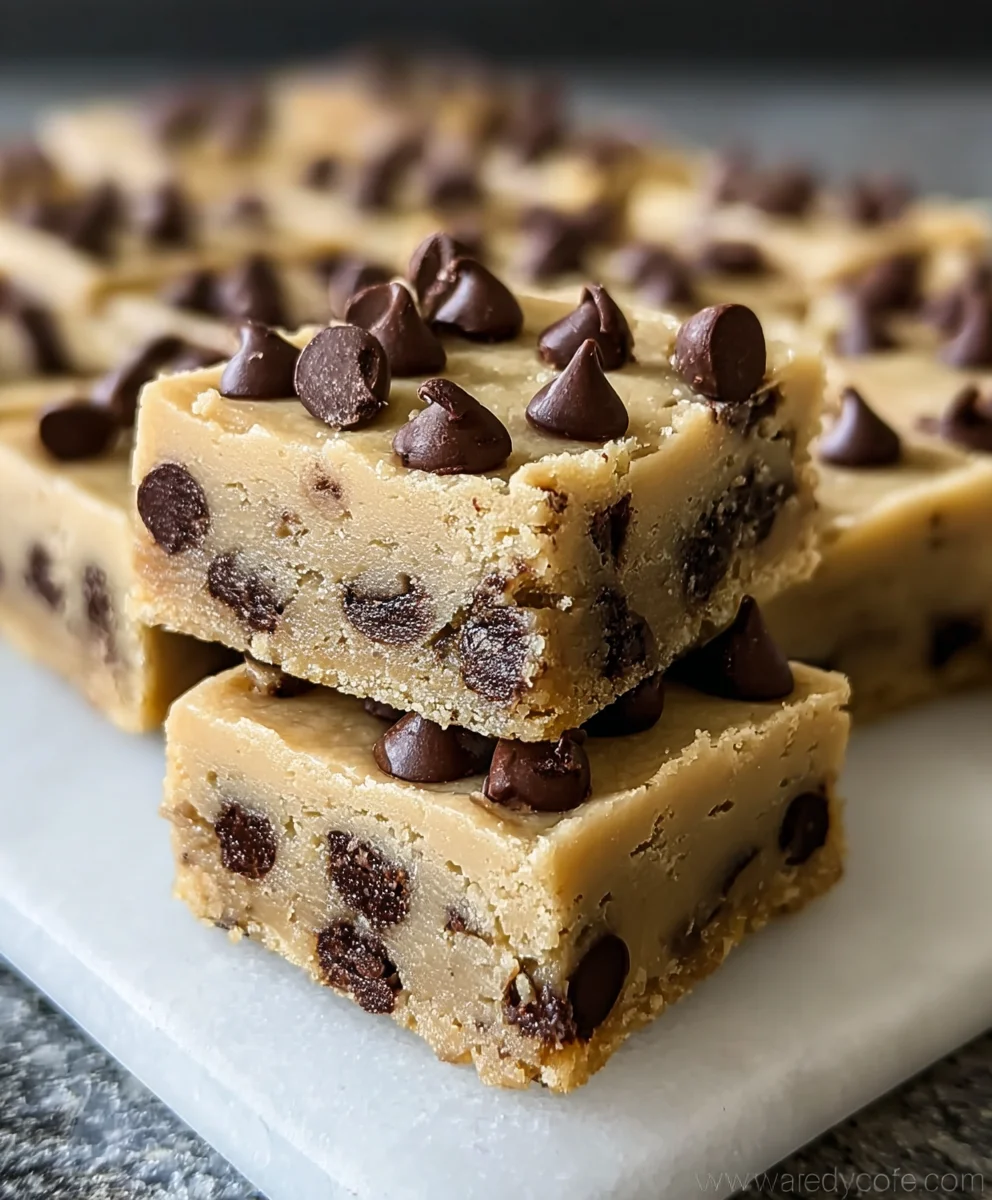
People adore this dish not just for its nostalgic charm but for its incredible sensory appeal. Imagine sinking your teeth into a soft, buttery bar, generously studded with decadent chocolate chips, offering that unique melt-in-your-mouth texture that only perfectly crafted cookie dough can deliver. It’s the ultimate combination of convenience and indulgence, perfect for sharing at gatherings, celebrating milestones, or simply savoring as a personal escape after a long day. Get ready to experience pure bliss with every single bite.

Ingredients:
- For the Shortbread Crust:
- 1 cup (2 sticks / 226g) unsalted butter, softened to room temperature
- ½ cup (100g) granulated sugar
- ½ teaspoon pure vanilla extract
- ¼ teaspoon salt
- 2 cups (240g) all-purpose flour, spooned and leveled
- For the Egg-Free Cookie Dough Layer:
- ½ cup (1 stick / 113g) unsalted butter, softened to room temperature
- ½ cup (100g) granulated sugar
- ¾ cup (150g) packed light brown sugar
- 2 tablespoons whole milk (or any milk alternative)
- 1 teaspoon pure vanilla extract
- ½ teaspoon salt
- 1¾ cups (210g) all-purpose flour, heat-treated (see note below)
- 1 cup (180g) semi-sweet chocolate chips (or mini chocolate chips)
Note on Heat-Treating Flour: To ensure the flour is safe for consumption in raw cookie dough, it’s essential to heat-treat it. Spread the 1¾ cups of flour evenly on a microwave-safe plate or baking sheet. Microwave on high for 1 minute and 15 seconds, stirring halfway through, or bake at 300°F (150°C) for 5-7 minutes, stirring every 2 minutes, until it reaches an internal temperature of 160°F (71°C). Let it cool completely before using.
- For the Chocolate Ganache Topping (Optional, but highly recommended for an extra decadent touch!):
- 1 cup (180g) semi-sweet chocolate chips
- ½ cup (120ml) heavy cream
- 1 tablespoon unsalted butter, cut into small pieces
- Pinch of sea salt (optional, for enhancing flavor)
Phase 1: Preparing the Delicious Shortbread Crust
The foundation of our amazing Chocolate Chip Cookie Dough Bars is a buttery, slightly crisp shortbread crust. This initial step is straightforward but crucial for getting that perfect texture and taste.
- Preheat your oven and prepare your pan: First things first, I always start by preheating my oven to 350°F (175°C). Then, I grab a 9×13 inch baking pan. To make life easy later, I line it with parchment paper, allowing an overhang on the longer sides. This parchment paper sling will be your best friend when it comes to lifting the bars out of the pan for clean slicing. Trust me, this little trick saves so much frustration!
- Cream the butter and sugar: In a large mixing bowl, or the bowl of a stand mixer fitted with the paddle attachment, I combine my softened unsalted butter with the granulated sugar. I beat these together on medium speed for about 2-3 minutes, until the mixture is light, fluffy, and visibly pale. It’s important to give it enough time to incorporate air, which contributes to the delicate crumb of the shortbread. Make sure to scrape down the sides of the bowl with a rubber spatula periodically to ensure everything is evenly mixed.
- Add vanilla and salt: Once the butter and sugar are beautifully creamed, I mix in the pure vanilla extract and the salt. I beat for just another 30 seconds or so, making sure these flavor enhancers are fully incorporated into the buttery base.
- Incorporate the flour: Now it’s time for the all-purpose flour. I add it to the wet ingredients and mix on low speed until just combined. You want to mix until no dry streaks of flour remain, but be very careful not to overmix. Overmixing flour develops the gluten, which can lead to a tough, rather than tender, shortbread crust. The mixture might look a bit crumbly at first, but don’t worry, it will come together.
- Press the dough into the pan: I transfer the shortbread dough into my prepared 9×13 inch baking pan. Using my fingertips, or the bottom of a flat-bottomed glass, I press the dough evenly into the bottom of the pan. It’s important to get it as uniform as possible so it bakes consistently. Take your time with this step to ensure an even crust thickness across the entire pan.
- Bake the crust: Place the pan in your preheated oven and bake for 20-25 minutes. You’re looking for the edges to be lightly golden brown and the center to be set. This indicates that the crust is perfectly baked through.
- Cool the crust: Once baked, I remove the pan from the oven and let the shortbread crust cool completely on a wire rack. It’s absolutely essential that the crust is at room temperature or even slightly chilled before adding the cookie dough layer. If it’s warm, it will melt your delicious cookie dough, and we definitely don’t want that! This cooling period usually takes at least 30-45 minutes.
Phase 2: Crafting the Irresistible Egg-Free Cookie Dough Layer
This is the heart of our Chocolate Chip Cookie Dough Bars – a luscious, safe-to-eat, egg-free cookie dough that tastes just like the real thing, but without any worries. The key here is using heat-treated flour and ensuring your butter is perfectly soft.
- Cream butter and sugars: In a clean large mixing bowl, or the bowl of your stand mixer, I combine the softened unsalted butter with both the granulated sugar and the packed light brown sugar. I beat these on medium speed for a good 3-4 minutes, until the mixture is light, fluffy, and looks significantly paler. This creaming step is vital for incorporating air and dissolving the sugar crystals, leading to a smooth, delightful texture in the cookie dough. Don’t forget to scrape down the sides of the bowl frequently!
- Add liquid and flavorings: Next, I pour in the whole milk and the pure vanilla extract, along with the salt. I continue to beat on medium-low speed until these wet ingredients are fully incorporated. The mixture might look a little curdled at first, but keep mixing, and it will smooth out beautifully. The milk adds just enough moisture to create that perfect cookie dough consistency without the need for eggs.
- Gently fold in heat-treated flour: This is where our special egg-free aspect truly shines. I add the cooled, heat-treated all-purpose flour to the wet ingredients. It’s crucial that the flour is completely cool before adding it; otherwise, it could start to melt your butter. I mix on the lowest speed possible, or even fold it in by hand with a spatula, until just combined and no dry streaks of flour remain. Avoid overmixing! We want tender cookie dough, not tough dough.
- Stir in the chocolate chips: Finally, the best part! I gently fold in the semi-sweet chocolate chips (or mini chocolate chips if you prefer). I use a rubber spatula for this to ensure they are evenly distributed throughout the dough without overworking it. This generous amount of chocolate chips ensures that every bite of your Chocolate Chip Cookie Dough Bars will have that satisfying burst of chocolatey goodness.
- Spread the cookie dough: Once the shortbread crust has completely cooled, I carefully spoon the egg-free cookie dough over it. Using the back of my spatula, a spoon, or even my clean hands, I gently spread the cookie dough evenly across the entire surface of the cooled crust. It can be a bit sticky, so wetting your hands slightly or using another piece of parchment paper to press it down can help achieve a smooth, even layer. Make sure it reaches all the edges for uniform bars.
- Chill the assembled layers: Now, for a moment of patience! I cover the pan loosely with plastic wrap and transfer it to the refrigerator. It needs to chill for at least 30 minutes to 1 hour. This chilling time is important for setting the cookie dough layer and making sure it’s firm enough for the next step, especially if you plan to add the ganache topping. A well-chilled base makes for much cleaner cuts later on.
Phase 3: Creating the Decadent Chocolate Ganache Topping (Optional, but highly recommended!)
While our Chocolate Chip Cookie Dough Bars are incredible on their own, a silky smooth chocolate ganache topping takes them from great to absolutely extraordinary. This step adds another layer of rich chocolate flavor and a beautiful finish.
- Prepare the chocolate: I place the semi-sweet chocolate chips in a medium heat-proof bowl. Make sure your chocolate chips are of good quality, as this will significantly impact the flavor and texture of your ganache.
- Heat the heavy cream: In a small saucepan, I heat the heavy cream over medium heat until it just begins to simmer around the edges. You don’t want a rolling boil; just gentle bubbles forming. Watch it carefully, as cream can boil over quickly!
- Pour cream over chocolate: Once the cream is hot, I immediately pour it over the chocolate chips in the bowl. I let it sit undisturbed for about 5 minutes. This allows the hot cream to melt the chocolate chips completely and begin to integrate them. The patience here is key; resist the urge to stir too early!
- Stir to form ganache: After 5 minutes, I start stirring the mixture gently from the center outwards with a whisk or a rubber spatula. It will look separated at first, but as you continue to stir, it will magically transform into a glossy, smooth, and uniform chocolate ganache. If it seems too thick, you can add a tiny splash more hot cream, or if it’s too thin, a few more chocolate chips, and let it sit for a minute before stirring again.
- Add butter and salt (optional): For extra sheen and a richer flavor, I stir in the small pieces of unsalted butter and the pinch of sea salt (if using). The butter will melt into the warm ganache, adding a beautiful glossy finish, and the salt will subtly enhance the chocolate flavor, making it even more pronounced. Stir until everything is smooth and fully combined.
- Pour ganache over chilled bars: Once your cookie dough layer is sufficiently chilled and firm, I carefully pour the warm (but not hot!) ganache over the top. I use an offset spatula or the back of a spoon to gently spread the ganache evenly to cover the entire surface of the cookie dough. Make sure to get it right to the edges for a clean, finished look.
- Chill again to set: Place the pan back into the refrigerator to chill for at least 1-2 hours, or until the ganache is completely set and firm. This is another crucial chilling period. Rushing this step will result in a messy, unset topping that’s hard to cut. Patiently waiting for this final chill is the secret to beautifully neat Chocolate Chip Cookie Dough Bars.
Phase 4: Slicing and Serving Your Divine Chocolate Chip Cookie Dough Bars
The moment of truth has arrived! After all your careful preparation and patient chilling, it’s time to transform your pan of deliciousness into individual, perfect Chocolate Chip Cookie Dough Bars. Getting clean cuts requires a specific technique, but it’s well worth the effort.
- Lift the bars from the pan: Once the ganache is completely set – it should feel firm to the touch – I use the parchment paper overhang as handles to gently lift the entire slab of bars out of the baking pan and onto a sturdy cutting board. This is where that parchment paper sling truly pays off! It prevents you from having to dig into the pan and potentially mar the edges of your beautiful bars.
- Prepare your knife for clean cuts: For the cleanest possible slices, I always use a large, sharp chef’s knife. Here’s my pro tip: run your knife under hot water for a few seconds, then wipe it completely dry with a clean towel. The warm blade will glide through the chocolate ganache and cookie dough much more smoothly, preventing cracking and dragging. I repeat this heating and wiping process after every couple of cuts.
- Trim the edges (optional): For a professional, bakery-style look, I sometimes trim off a tiny sliver from each of the four edges of the slab. This removes any slightly uneven bits and creates perfectly straight sides for your bars. Don’t worry, these trimmings are excellent chef’s treats!
- Slice into desired sizes: Now, carefully slice the slab into bars. I typically cut it in half lengthwise, and then cut each half into 6-8 bars, depending on how large I want them. This usually yields about 12-16 generous Chocolate Chip Cookie Dough Bars. Press down firmly and steadily with your warm knife, rather than sawing back and forth, to get crisp lines.
- Serve and enjoy: Arrange your beautiful Chocolate Chip Cookie Dough Bars on a serving platter. They are best served at room temperature or slightly chilled. The cookie dough layer will be wonderfully soft and chewy, the crust subtly crisp, and the ganache rich and smooth.
- Storing leftovers: If you happen to have any leftovers (which is a rare occurrence in my house!), I store these delightful Chocolate Chip Cookie Dough Bars in an airtight container in the refrigerator for up to one week. You can also freeze them for up to 2-3 months. If freezing, I recommend wrapping individual bars in plastic wrap before placing them in a freezer-safe container. When ready to enjoy, simply thaw them in the refrigerator or at room temperature.
Enjoy creating and devouring these incredibly satisfying Chocolate Chip Cookie Dough Bars – they’re sure to become a new favorite!
I absolutely adore making these bars because they combine everything wonderful about cookie dough into a convenient, shareable format. The texture combination of the crisp shortbread, the chewy cookie dough, and the smooth ganache is just heavenly. They’re perfect for potlucks, parties, or simply as a special treat for yourself and your loved ones. Get ready for rave reviews!
Happy baking!
There’s something truly magical about a homemade treat, and these Chocolate Chip Cookie Dough Bars are no exception. The effort put into each layer truly pays off with every single bite. The blend of rich chocolate, buttery dough, and that satisfying crunch of the crust makes them an unforgettable dessert. I always find that a little sprinkle of flaky sea salt on top of the ganache just before it sets can elevate the flavors even further, adding a sophisticated touch that balances the sweetness beautifully. Don’t hesitate to experiment and make these bars truly your own!
The convenience of having a dessert that’s perfect for making ahead of time is also a huge plus. You can whip up a batch, chill them, and have a fantastic dessert ready to go for any occasion without last-minute stress. They transport well, too, making them a fantastic option for bringing to friends’ houses or family gatherings. I love watching people’s faces light up when they realize they’re eating safe-to-eat cookie dough in bar form – it’s always a crowd-pleaser!
Remember, the quality of your ingredients truly matters in a recipe like this. Using good quality butter, pure vanilla extract, and excellent chocolate chips will make a noticeable difference in the final taste of your Chocolate Chip Cookie Dough Bars. Taking the time to properly soften your butter is also a small step that yields big results in the overall texture of both the crust and the cookie dough. These little details contribute to a truly premium dessert experience.
So, gather your ingredients, follow these detailed steps, and prepare to impress everyone with your baking prowess. These Chocolate Chip Cookie Dough Bars are more than just a dessert; they’re a celebration of flavor and texture, a comforting classic reimagined, and a truly delightful indulgence that you’ll want to make again and again. Enjoy every single glorious bite!
Whether you’re a seasoned baker or just starting out, this recipe is incredibly forgiving and yields consistently delicious results. The step-by-step instructions are designed to guide you through each stage, ensuring your success. The aroma alone as these bars chill in the fridge is enough to get anyone excited for the first bite. Trust the process, and you’ll be rewarded with the best Chocolate Chip Cookie Dough Bars you’ve ever tasted!
Conclusion:
If there’s one recipe I could implore you to try from my culinary collection, it would undoubtedly be these sensational Chocolate Chip Cookie Dough Bars. I truly believe that once you experience the sheer joy of biting into one, you’ll understand why I’m so passionate about them. They represent the perfect confluence of comfort, indulgence, and pure, unadulterated happiness, all wrapped up in an incredibly easy-to-make package. I know we all have those days when a craving hits, demanding something sweet, satisfying, and utterly delicious, but the thought of a lengthy baking project just doesn’t appeal. This recipe, my friends, is your ultimate solution. It delivers on every promise: rich, buttery, sweet, and bursting with chocolatey goodness, all with minimal effort and maximum reward.
What makes these bars a true game-changer in your dessert repertoire isn’t just their incredible flavor profile—that perfect balance of sweet and salty, the unmistakable chewiness of classic cookie dough, and the delightful pockets of melted chocolate chips that surrender with every bite. It’s also their undeniable ability to bring a smile to anyone’s face, from the pickiest eaters to the most seasoned dessert connoisseurs. I’ve seen firsthand how these bars disappear from platters at gatherings, always prompting requests for the recipe. There’s a certain nostalgia they evoke, a comforting familiarity that takes you back to childhood days of sneaking a spoonful of raw cookie dough, but with the added peace of mind that comes from a safe and perfected recipe.
Now, when it comes to enjoying your freshly made Chocolate Chip Cookie Dough Bars, the possibilities are delightfully endless. While they are absolutely divine straight from the refrigerator, perfectly chilled and firm, I highly recommend serving them alongside a scoop of your favorite vanilla bean ice cream for an extra layer of decadence. The contrast of the cool, creamy ice cream with the rich, dense bar is simply out of this world. For those who love a bit of flair, a drizzle of warm caramel sauce or a sprinkle of flaky sea salt can elevate the experience even further, enhancing the already complex flavors. Don’t be shy about experimenting with various toppings!
But why stop there? These bars are incredibly versatile and lend themselves beautifully to customization. Consider stirring in a handful of chopped walnuts or pecans for a delightful textural crunch, or perhaps some white chocolate chips for a different flavor dynamic. M&M’s, sprinkles, or even crushed pretzels can be folded into the dough before chilling, transforming them into a personalized treat for any occasion. Imagine mini versions of these bars, perfect for party favors or an elegant dessert spread! You could even cut them into festive shapes using cookie cutters before they fully set, adding a whimsical touch to holiday celebrations or themed parties. I’ve even wrapped small stacks of them in pretty cellophane with a bow to give as thoughtful homemade gifts; they are always met with genuine delight and appreciation.
So, please, don’t let another day pass without experiencing the sheer bliss of these magnificent Chocolate Chip Cookie Dough Bars. I truly believe this recipe will become a cherished staple in your home, a reliable go-to for those moments when only the best will do. It’s an investment in your happiness, your sweet tooth, and your reputation as an incredible home cook! Once you’ve whipped up a batch, I would absolutely love to hear about your experience. Did you make any fun variations? What was your favorite way to enjoy them? Please, take a moment to share your thoughts and triumphs in the comments below. Your feedback and creativity inspire me and our wonderful community of food lovers. Go forth, bake (or rather, don’t bake!), and indulge in the pure deliciousness that awaits you!
Chocolate Chip Cookie Dough Bars
Capture the pure joy of sneaking a spoonful of raw cookie dough in a perfectly safe, portable, and utterly irresistible no-bake bar. This treat elevates a beloved guilty pleasure into a sophisticated indulgence, perfect for sharing.
Ingredients
-
For the Graham Cracker Crust:
-
1 1/2 cups crushed graham crackers
-
1/4 cup (approx. 56g) unsalted butter, melted
-
For the Egg-Free Cookie Dough Layer:
-
1/2 cup (113g) unsalted butter, softened
-
1/2 cup (100g) granulated sugar
-
3/4 cup (150g) packed light brown sugar
-
2 tbsp whole milk
-
1 tsp pure vanilla extract
-
1/2 tsp salt
-
1 3/4 cups (210g) all-purpose flour, heat-treated*
-
1 cup (180g) semi-sweet chocolate chips
-
For the Chocolate Ganache Topping (Optional):
-
1 cup (180g) semi-sweet chocolate chips
-
1/2 cup (120ml) heavy cream
-
1 tbsp unsalted butter
-
Pinch of sea salt (optional)
Instructions
-
Step 1
Combine crushed graham crackers and melted butter, mixing until crumbs are evenly coated. Press the mixture firmly into the bottom of an 8×8-inch pan (lined with parchment paper for easy removal). Place in the refrigerator to set while preparing the cookie dough layer. -
Step 2
In a bowl, cream softened butter with granulated and brown sugars for 3-4 minutes until light and fluffy. Mix in milk, vanilla extract, and salt. Gently fold in the cooled, heat-treated all-purpose flour until just combined. Stir in chocolate chips. Spread this cookie dough evenly over the chilled crust. Cover and chill in the refrigerator for 30 minutes to 1 hour to set. -
Step 3
Place 1 cup semi-sweet chocolate chips in a heat-proof bowl. Heat heavy cream in a saucepan until it just simmers. Pour hot cream over chocolate chips; let sit for 5 minutes. Stir gently until smooth and glossy. Stir in 1 tbsp unsalted butter and a pinch of sea salt (if using) until fully combined. Pour warm ganache over the chilled cookie dough layer and spread evenly. Chill the pan for 1-2 hours, or until the ganache is completely set and firm. -
Step 4
Once ganache is firm, use the parchment paper overhang to lift the entire slab onto a cutting board. For clean cuts, run a large, sharp chef’s knife under hot water and wipe dry before each cut. Slice into 12-16 bars. Serve at room temperature or slightly chilled. Store leftovers in an airtight container in the refrigerator for up to one week, or freeze for 2-3 months. -
Step 5
*To ensure flour is safe for raw consumption: Spread 1 3/4 cups all-purpose flour on a microwave-safe plate or baking sheet. Microwave on high for 1 min 15 sec (stirring halfway) or bake at 300°F (150°C) for 5-7 min (stirring every 2 min), until it reaches 160°F (71°C). Let cool completely before use.
Important Information
Nutrition Facts (Per Serving)
It is important to consider this information as approximate and not to use it as definitive health advice.
Allergy Information
Please check ingredients for potential allergens and consult a health professional if in doubt.


Leave a Comment