
Cream cheese red velvet cookies are more than just a dessert; they’re a delightful paradox, a harmonious blend of richness and tang, warmth and vibrancy. If you’ve ever fallen under the spell of their striking crimson hue and irresistible aroma, you already understand their magic. These aren’t your average chocolate chip cookies. The velvety texture, the subtle cocoa undertones, and the signature bright red color create a visual and gustatory experience that’s truly unforgettable. What truly sets cream cheese red velvet cookies apart is the ingenious addition of cream cheese. It doesn’t just add a creamy mouthfeel; it introduces a whisper of tartness that perfectly balances the sweetness and the deep chocolate notes, preventing the cookie from becoming overly cloying. It’s this thoughtful inclusion that elevates them from a mere treat to a sophisticated indulgence, making them a guaranteed crowd-pleaser at any gathering or a perfect way to brighten your own afternoon.

Ingredients:
- 1 1/4 cups all-purpose flour
- 1/4 cup unsalted cocoa powder
- 1 teaspoon baking powder
- 1/4 teaspoon salt
- 1/2 cup unsalted butter, softened to room temperature
- 3/4 cup granulated sugar
- 1 large egg, at room temperature
- 1 teaspoon pure vanilla extract
- 1 tablespoon red food coloring (gel or liquid)
- 4 oz cream cheese, softened to room temperature
- 1/4 cup powdered sugar (also known as confectioners’ sugar)
- 1/2 teaspoon pure vanilla extract
Cream Cheese Red Velvet Cookies: The Magic Happens
These Cream Cheese Red Velvet Cookies are a delightful fusion of classic red velvet flavor and the irresistible creaminess of cream cheese. The vibrant red hue makes them perfect for holidays, celebrations, or just when you need a little something special. Let’s get baking!
Step 1: Prepare the Dry Ingredients
To begin extract, let’s get our dry ingredients ready. In a medium-sized bowl, whisk together the 1 1/4 cups of all-purpose flour, 1/4 cup of unsalted cocoa powder, 1 teaspoon of baking powder, and 1/4 teaspoon of salt. Whisking ensures that all the ingredients are evenly distributed, which is crucial for consistent texture and rise in your cookies. Set this bowl aside. It’s important to have your dry ingredients combined before you start creaming the butter and sugar so everything is ready to go.
Step 2: Cream the Butter and Sugar, Then Add Wet Ingredients
In a separate, larger bowl, cream together the 1/2 cup of softened unsalted butter and 3/4 cup of granulated sugar. Use an electric mixer on medium speed until the mixture is light and fluffy, which usually takes about 2 to 3 minutes. This process incorporates air into the butter and sugar, which helps to create tender cookies. Next, add in the 1 large egg and 1 teaspoon of vanilla extract. Mix again until just combined. Now comes the striking red transformation! Add 1 tablespoon of red food coloring to the wet mixture. Mix thoroughly until the color is evenly distributed. You want a deep, rich red color. Don’t be afraid to scrape down the sides of the bowl with a spatula to ensure all the ingredients are incorporated.
Step 3: Combine Wet and Dry Mixtures and Chill the Dough
Gradually add the dry ingredients (from Step 1) to the wet ingredients (from Step 2) in three additions, mixing on low speed until just combined after each addition. Be careful not to overmix the dough, as this can lead to tough cookies. Once the flour is mostly incorporated, you might want to switch to a spatula to fold in the last bit of flour. The dough will be quite soft at this stage due to the food coloring and the richness of the butter. For best results and easier handling, cover the bowl with plastic wrap and refrigerate the dough for at least 30 minutes. This chilling step is essential; it firms up the butter, making the dough easier to scoop and preventing the cookies from spreading too much during baking.
Step 4: Prepare the Cream Cheese Filling
While the cookie dough is chilling, let’s prepare the luscious cream cheese filling. In a small bowl, combine the 4 oz of softened cream cheese with 1/4 cup of powdered sugar and 1/2 teaspoon of vanilla extract. Use a fork or a hand mixer on low speed to beat these ingredients together until smooth and creamy. Make sure the cream cheese is truly softened; if it’s still cold, it will be lumpy and difficult to mix. This filling is what gives our red velvet cookies that extra burst of tangy sweetness and moisture. Once smooth, cover this filling and set it aside, perhaps in the refrigerator if your kitchen is very warm.
Step 5: Assemble and Bake the Cookies
Preheat your oven to 350°F (175°C). Line baking sheets with parchment paper. This prevents sticking and makes for easy cleanup. Take the chilled cookie dough out of the refrigerator. Scoop rounded tablespoons of dough and flatten them slightly in the palm of your hand. Place about a teaspoon of the cream cheese filling into the center of each flattened cookie dough circle. Then, carefully bring the edges of the cookie dough up and around the filling, sealing it completely. Roll the stuffed dough into a ball. Place the balls onto the prepared baking sheets, leaving about 2 inches of space between them to allow for expansion. Bake for 10 to 12 minutes, or until the edges are set and the centers are still slightly soft. The cookies will continue to set as they cool.
Step 6: Cool and Enjoy
Once baked, let the Cream Cheese Red Velvet Cookies cool on the baking sheets for 5 minutes before transferring them to a wire rack to cool completely. This resting period on the baking sheet is important as it allows the cookies to firm up without becoming brittle. The red velvet dough will look slightly darker once baked, and the cream cheese filling will be a delightful surprise within. These cookies are best enjoyed at room temperature, allowing the flavors and textures to fully develop. You can store any leftover cookies in an airtight container at room temperature for up to 3 days.
Conclusion:
There you have it – the ultimate guide to creating delightful Cream Cheese Red Velvet Cookies! We’ve walked through each step to ensure your cookies are perfectly moist, vibrantly colored, and wonderfully rich with that signature cream cheese tang. These cookies are a true showstopper, perfect for holidays, special occasions, or just as a decadent treat to brighten your day. They are best served slightly warm, allowing the cream cheese frosting to melt just a touch, but they are equally delicious at room temperature. For an extra festive touch, consider a dusting of powdered sugar or a sprinkle of edible glitter.
I encourage you to give this recipe a try and experiment with your own creative twists. Perhaps add a handful of white chocolate chips for an extra layer of sweetness and texture, or a dash of peppermint extract to the dough for a festive winter flavor. No matter how you customize them, I’m confident these Cream Cheese Red Velvet Cookies will become a beloved favorite in your baking repertoire. Enjoy the process and the incredibly delicious results!
Frequently Asked Questions about Cream Cheese Red Velvet Cookies:
Q1: My red velvet cookies aren’t vibrant enough. What can I do?
To achieve a truly vibrant red color, ensure you are using a good quality gel food coloring. Start with a tablespoon or two and add more gradually until you reach your desired shade. Remember that some of the color will fade slightly during baking, so aim for a slightly deeper hue than you think you need.
Q2: Can I make the cream cheese frosting ahead of time?
Yes, you can! The cream cheese frosting can be made up to two days in advance and stored in an airtight container in the refrigerator. You may need to re-whip it briefly before frosting the cooled cookies to ensure a smooth and spreadable consistency.

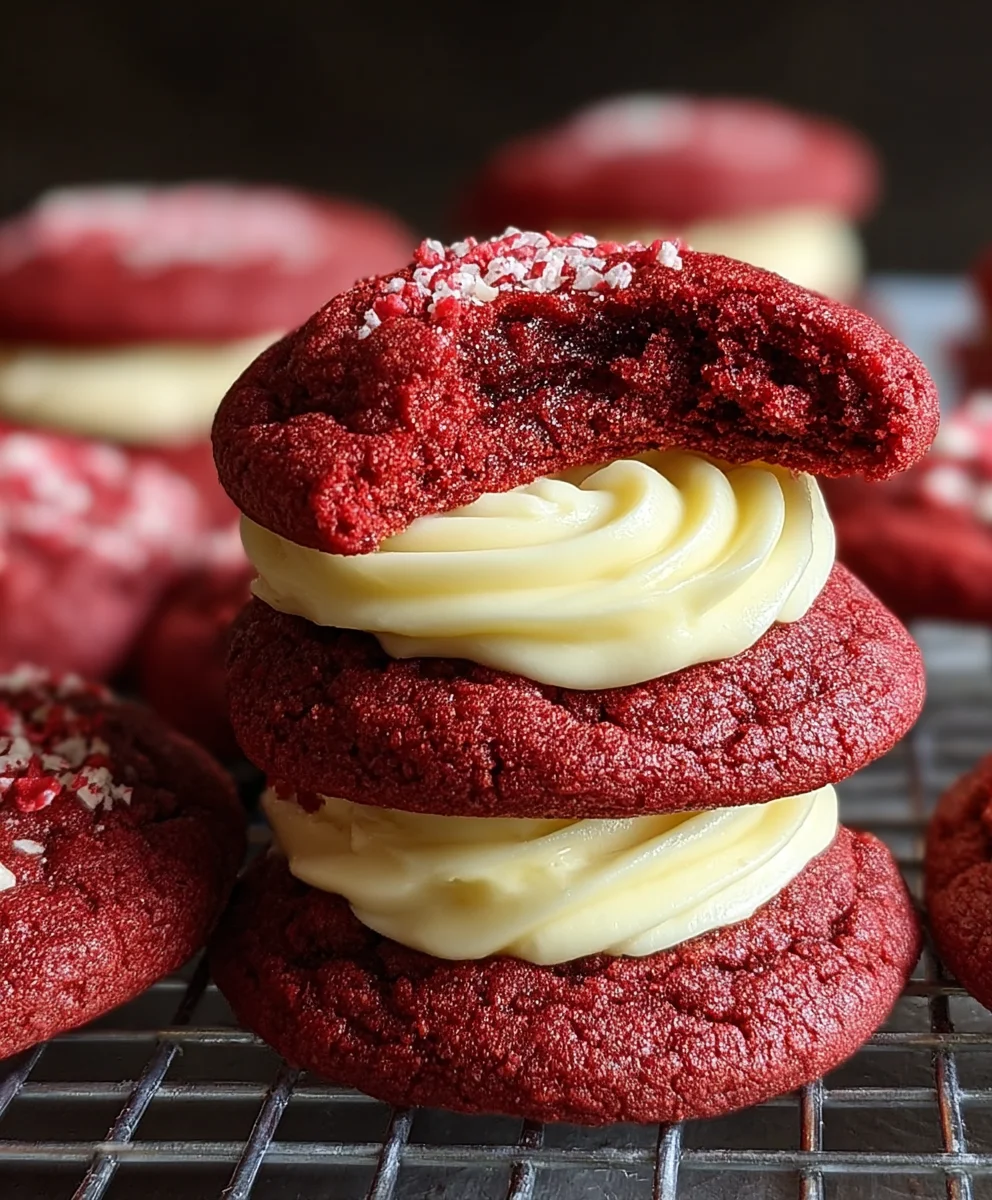
Cream Cheese Red Velvet Cookies
Decadent and delicious red velvet cookies with a creamy cream cheese filling. A perfect treat for any occasion.
Ingredients
-
1 1/4 cups all-purpose flour
-
1/4 cup unsalted cocoa powder
-
1 teaspoon baking powder
-
1/4 teaspoon salt
-
1/2 cup unsalted butter, softened
-
3/4 cup granulated sugar
-
1 large egg
-
1 teaspoon pure vanilla extract
-
1 tablespoon red food coloring
-
4 oz cream cheese, softened
-
1/4 cup powdered sugar
-
1/2 teaspoon pure vanilla extract
Instructions
-
Step 1
In a medium bowl, whisk together the flour, cocoa powder, baking powder, and salt. Set aside. -
Step 2
In a large bowl, cream together the softened butter and granulated sugar until light and fluffy. Beat in the egg and vanilla extract. Stir in the red food coloring until evenly distributed. -
Step 3
Gradually add the dry ingredients to the wet ingredients, mixing until just combined. Cover and refrigerate the dough for at least 30 minutes. -
Step 4
While the dough chills, prepare the filling: In a small bowl, beat together the softened cream cheese, powdered sugar, and vanilla extract until smooth. -
Step 5
Preheat oven to 350°F (175°C). Line baking sheets with parchment paper. Scoop rounded tablespoons of dough, flatten slightly, and place a teaspoon of cream cheese filling in the center. Seal the dough around the filling and roll into a ball. Place on baking sheets. -
Step 6
Bake for 10-12 minutes, or until the edges are set and centers are slightly soft. Cool on baking sheets for 5 minutes before transferring to a wire rack to cool completely.
Important Information
Nutrition Facts (Per Serving)
It is important to consider this information as approximate and not to use it as definitive health advice.
Allergy Information
Please check ingredients for potential allergens and consult a health professional if in doubt.


Leave a Comment