
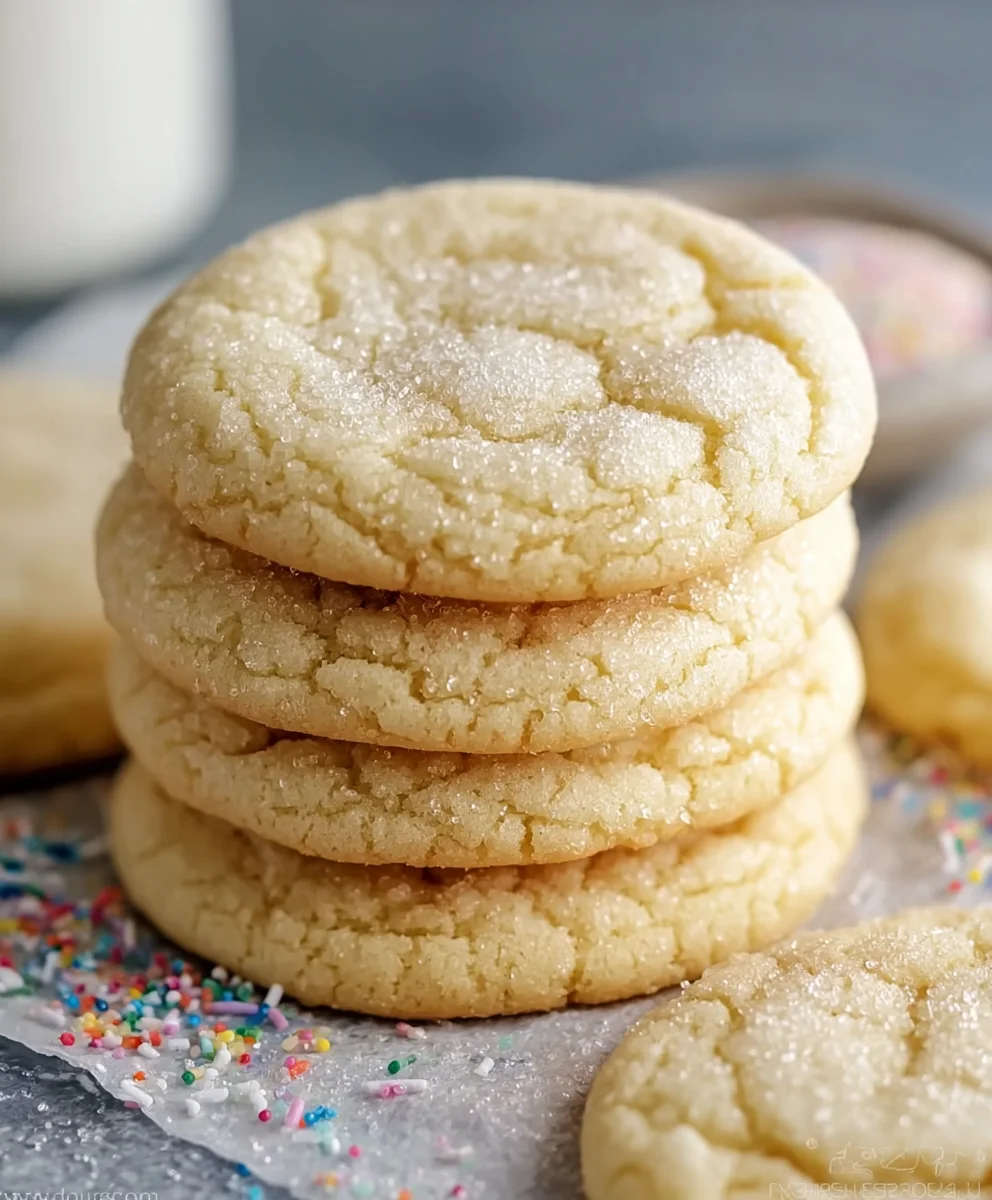
Soft And Chewy Sugar Cookies – the very phrase itself conjures up images of warmth, comfort, and pure, unadulterated joy. There’s something truly magical about biting into a cookie that perfectly balances a tender, yielding interior with a slightly crisp edge and a delightful, subtle chewiness. I know for myself, a perfectly baked sugar cookie isn’t just a treat; it’s a nostalgic trip back to childhood kitchens, holiday celebrations, and simple moments of bliss.
While the humble sugar cookie might seem straightforward, its origins are rich with history. These delightful confections can trace their lineage back to the 17th-century German settlers in Nazareth, Pennsylvania, who created the Nazareth Sugar Cookie. Over centuries, this basic dough—a simple yet profound combination of butter, sugar, and flour—evolved into the beloved staple we cherish today, becoming a canvas for culinary creativity and a cornerstone of countless celebrations, especially during the holidays. It’s not just a cookie; it’s a tradition, a memory in the making, passed down through generations.
People adore these cookies for a myriad of reasons. Beyond their rich, buttery flavor, often enhanced with a hint of vanilla or almond, it’s that incredible texture – the exact balance between softness and chewiness – that truly sets them apart. They’re incredibly versatile, equally delightful when enjoyed plain or adorned with festive sprinkles and elaborate icing. This carefully crafted recipe for Soft And Chewy Sugar Cookies promises to deliver that quintessential experience, ensuring each bite is a moment of pure bliss and making them a cherished favorite in your baking repertoire.

Ingredients:
- 2 ¾ cups (330g) all-purpose flour
- 1 teaspoon baking soda
- ½ teaspoon cream of tartar
- ½ teaspoon fine sea salt
- 1 cup (226g) unsalted butter, softened to room temperature
- 1 ½ cups (300g) granulated sugar, plus an additional ½ cup (100g) for rolling
- 1 large egg
- 2 teaspoons pure vanilla extract
Preparing Your Workspace and Ingredients
Before we dive into the delightful process of creating the most incredible Soft And Chewy Sugar Cookies, let’s get everything in order. Baking is so much more enjoyable when you’re not scrambling for ingredients or tools mid-recipe! I always start by gathering all my ingredients and measuring them out. This practice, often called “mise en place,” ensures a smooth and stress-free baking experience. Trust me, it makes a huge difference, especially when you’re aiming for that perfect texture in your sugar cookies.
- Preheat your oven to 375°F (190°C). This is a standard temperature for many cookies, but don’t worry, we’ll keep a close eye on them during baking to ensure they don’t overcook.
- Line two large baking sheets with parchment paper or silicone baking mats. This prevents sticking and helps the cookies bake evenly, making cleanup a breeze. Plus, it contributes to that desirable chewy texture by preventing the bottoms from crisping too much.
Crafting the Perfect Dough for Your Soft And Chewy Sugar Cookies
This phase is where the magic truly begins! The way you combine your ingredients here will significantly impact the final texture of your Soft And Chewy Sugar Cookies. We’re aiming for a light, fluffy, and tender crumb, and that starts with proper creaming and careful mixing.
- In a medium bowl, whisk together the dry ingredients: the all-purpose flour, baking soda, cream of tartar, and fine sea salt. The cream of tartar is a secret weapon here; it contributes to that characteristic tangy flavor of classic sugar cookies and also helps create a wonderfully soft and slightly chewy texture. Whisking them thoroughly ensures that these leavening agents and flavor enhancers are evenly distributed throughout the dough. You don’t want a bite that’s super salty and another that’s bland, do you? Set this bowl aside for a moment.
- In a large bowl, using an electric mixer (either a stand mixer with the paddle attachment or a hand mixer), cream together the softened unsalted butter and 1 ½ cups of granulated sugar. Now, this step is crucial for achieving those light and airy Soft And Chewy Sugar Cookies. You want to beat them on medium-high speed for about 2-3 minutes, until the mixture is light in color and fluffy in texture. This process incorporates air into the butter and sugar, which will give your cookies their delicate crumb. Don’t rush this step! If your butter isn’t sufficiently aerated, your cookies might turn out dense instead of wonderfully soft. The butter should be genuinely at room temperature – not melted, not cold from the fridge, but perfectly pliable. This allows it to trap air effectively.
- Add the large egg to the creamed butter and sugar mixture. Beat on medium speed until it is fully incorporated, scraping down the sides of the bowl as needed. The egg acts as a binder and contributes to the richness and moisture of our Soft And Chewy Sugar Cookies.
- Next, pour in the pure vanilla extract. Vanilla is a cornerstone flavor in sugar cookies, giving them that warm, inviting aroma and taste. Beat for another 30 seconds until the vanilla is well distributed. You’ll already start to smell how good these are going to be!
- With your mixer on low speed, gradually add the dry ingredients mixture to the wet ingredients. Add about a third at a time, mixing just until combined before adding the next portion. Be careful not to overmix! Overmixing develops the gluten in the flour too much, which can lead to tough, rather than soft and chewy, cookies. The moment you see no streaks of flour, stop the mixer. I often finish the last few stirs by hand with a spatula to ensure I don’t accidentally overdo it. The dough will be soft and a bit sticky, which is exactly what we want for that ultimate chewiness.
Chilling for Optimal Texture
This is arguably one of the most important steps for achieving truly phenomenal Soft And Chewy Sugar Cookies. While it requires a bit of patience, the chilling time isn’t just for making the dough easier to handle; it’s a fundamental part of developing the flavor and ensuring the perfect texture. Please, do not skip this step!
- Cover the bowl with plastic wrap and refrigerate the dough for at least 1 hour, or up to 24 hours. I know, waiting is hard, but this chilling period is absolutely non-negotiable for these sugar cookies. Here’s why it’s so important:
- Prevents Spreading: Cold butter melts slower in the oven, meaning the cookies hold their shape better and don’t spread out into flat, crispy disks. This is key for that lovely thick, chewy center.
- Deepens Flavor: Chilling allows the flour to fully hydrate and the flavors to meld together. Think of it like a good stew; it always tastes better the next day!
- Easier to Handle: A cold dough is much less sticky and easier to roll into perfect balls, which is important for even baking.
If you’re in a hurry and can’t wait the full hour, even 30 minutes in the freezer can help, but for the very best Soft And Chewy Sugar Cookies, I really recommend the full hour in the fridge.
Rolling and Preparing for the Oven
Now that our dough is perfectly chilled and ready, it’s time to shape our cookies and give them their signature sparkle. This step is pretty straightforward and quite fun, especially if you have little helpers around!
- Place the additional ½ cup of granulated sugar in a shallow bowl. This sugar coating isn’t just for looks; it adds an extra layer of sweetness and a delightful textural crunch to the exterior of our otherwise Soft And Chewy Sugar Cookies.
- Once your dough is thoroughly chilled, use a small cookie scoop (about 1.5 tablespoons) or your hands to roll the dough into uniform balls, roughly 1-inch in diameter. Uniformity is key here for even baking. If some cookies are large and others small, they won’t all be perfectly done at the same time. If the dough is still a little sticky, you can lightly flour your hands, but try to use as little extra flour as possible.
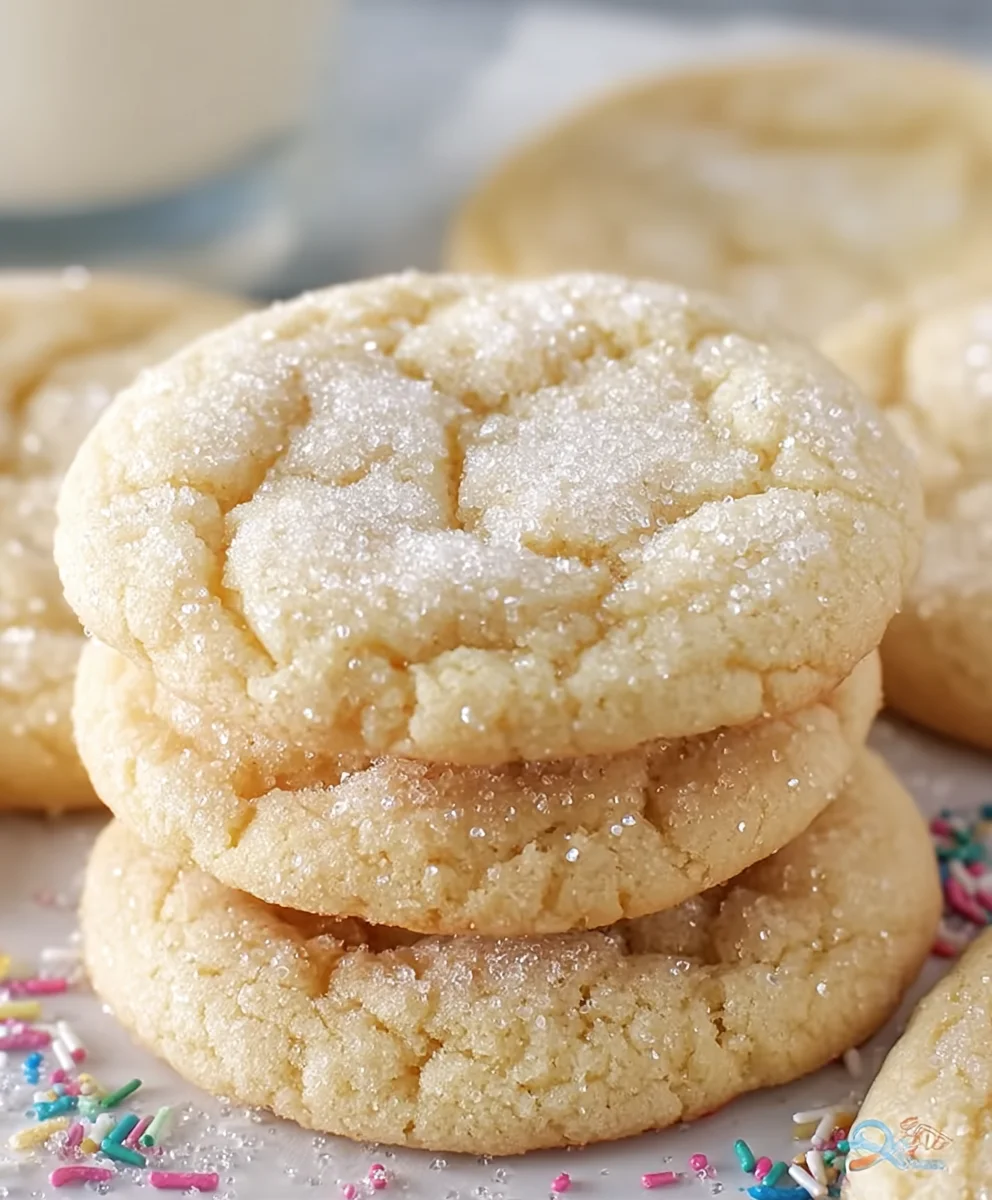
- Gently roll each dough ball in the bowl of granulated sugar, ensuring it’s completely coated. You want a good, generous layer of sugar all around. This creates a beautiful sparkle and a delightful crisp exterior that contrasts wonderfully with the soft, chewy interior.
- Place the sugared dough balls onto your prepared baking sheets, leaving about 2 inches of space between each cookie. They will spread a bit as they bake, and we want to ensure they have plenty of room without touching. Overcrowding the baking sheet can lead to uneven baking and cookies that stick together.
Baking Your Soft And Chewy Sugar Cookies to Golden Perfection
The moment of truth! Baking is where our carefully prepared dough transforms into glorious Soft And Chewy Sugar Cookies. It’s crucial to watch them closely, as oven temperatures can vary, and a minute too long can turn a chewy cookie into a crisp one. We’re looking for just the right amount of golden edges without over-browning.
- Bake one sheet at a time in your preheated 375°F (190°C) oven for 8-10 minutes. The exact baking time will depend on your oven and the size of your cookies. You’ll know they’re ready when the edges are just set and very lightly golden brown, but the centers still look soft and slightly underbaked. This is the secret to their chewiness! If you wait until the centers are fully firm, they will be crisp once cooled. Don’t be tempted to leave them in longer than necessary; that soft center is what we’re after for those truly Soft And Chewy Sugar Cookies.
- If you’re baking more than one sheet, rotate them halfway through the baking time to ensure even cooking. Some ovens have hot spots, and rotating helps prevent one side from browning more than the other.
Cooling and Enjoying
You’re almost there! The cooling process is just as important as the baking for achieving the desired texture and ensuring your cookies don’t fall apart. Patience truly is a virtue in baking, even at this final stage.
- Once baked, remove the baking sheets from the oven and let the cookies cool on the sheets for about 5-10 minutes. This step is vital! The cookies are very delicate when they first come out of the oven, and allowing them to cool on the hot sheet helps them firm up and set properly. This continued cooking on the hot tray contributes to that perfect soft interior and slightly crisp edge without making them hard. If you try to move them too soon, they might break apart.
- After 5-10 minutes, carefully transfer the slightly cooled cookies to a wire rack to cool completely. Cooling on a wire rack allows air to circulate all around the cookies, preventing them from becoming soggy on the bottom and ensuring an even cool-down.
- Once completely cooled, store your delightful Soft And Chewy Sugar Cookies in an airtight container at room temperature. They will stay fresh and perfectly soft for up to 3-4 days. While they are amazing warm, they are truly at their peak once fully cooled, allowing their flavors and textures to fully develop. Enjoy every tender, sweet bite!
<h2>Conclusion:</h2>
<p>My culinary journey, like many of yours, is often defined by those simple, yet profoundly satisfying moments of baking. And if there’s one recipe that consistently brings a wide, genuine smile to my face, it’s this one. I truly believe these aren’t just any cookies; they are an experience, a memory waiting to be baked. You might have tried countless sugar cookie recipes before, but I promise you, this particular rendition stands out from the crowd in the most delightful way possible. What makes them so special, you ask? It’s that perfect harmony of a slightly crisp edge giving way to an utterly melt-in-your-mouth interior. The texture is unparalleled – they truly live up to their name of being <strong>Soft And Chewy Sugar Cookies</strong>. Every bite is a testament to the fact that sometimes, the simplest ingredients, when treated with a little care and a touch of secret technique, can create something truly extraordinary. They aren’t overly sweet; instead, they possess a balanced sweetness that highlights the pure, unadulterated flavor of vanilla and butter. This recipe isn’t just about following steps; it’s about crafting joy, about filling your home with an aroma that instantly transports you back to the warmth of childhood kitchens. It’s about creating those comforting, nostalgic feelings that only a perfectly baked cookie can provide, making every moment spent in the kitchen utterly worthwhile.</p>
<p>Now, while these cookies are absolutely divine straight out of the oven, cooled just enough to handle without burning your fingers, their versatility is truly one of their unsung heroes. Imagine a plate of these golden beauties alongside a steaming mug of hot cocoa on a chilly evening – pure bliss! Or, for a more sophisticated treat, pair them with a robust espresso or a delicate cup of Earl Grey tea. They are equally magnificent crumbled over a scoop of vanilla bean ice cream, adding that wonderful textural contrast and an extra layer of sweetness. But why stop there? Let your creativity run wild with serving suggestions and variations! For a festive touch, you could tint your frosting with food coloring appropriate for any holiday – vibrant reds and greens for Christmas, pastels for Easter, or spooky oranges and purples for Halloween. Don’t be shy about experimenting with different extracts; a touch of almond extract can elevate the flavor profile, or a hint of lemon zest can add a bright, zesty counterpoint to the sweetness. You could even create cookie sandwiches by filling two cookies with a dollop of cream cheese frosting, a swipe of raspberry jam, or even a decadent chocolate ganache. For those who love a bit of sparkle, a sprinkle of edible glitter or some colorful nonpareils before baking can turn a simple cookie into a showstopper. And if you’re feeling adventurous, try adding a pinch of cinnamon or cardamom to the dough for a warm, subtly spiced twist. The possibilities are truly endless, transforming these humble cookies into a canvas for your culinary imagination, making them perfect for any occasion, from a casual snack to a show-stopping dessert spread.</p>
<p>My hope is that you’re now feeling inspired, perhaps even a little bit hungry, and ready to don your apron and embark on this delicious baking adventure. Trust me when I say, the effort is minimal, and the reward is immense. There’s something profoundly satisfying about pulling a tray of perfectly golden, fragrant cookies from the oven, knowing you’ve created something wonderful with your own hands. These <strong>Soft And Chewy Sugar Cookies</strong> are more than just a recipe; they are an invitation to create, to share, and to enjoy. So, go ahead, gather your ingredients, set aside some time, and immerse yourself in the simple magic of baking. And once you’ve experienced the sheer delight of these cookies – that exquisite tenderness, that balanced sweetness, that comforting chew – I would absolutely love to hear about it! Please, share your baking triumphs, your creative variations, and those joyful moments with your friends and family. Your experiences and feedback truly brighten my day and inspire me to keep sharing the recipes I love. Happy baking, everyone, and I can’t wait to see what delicious memories you create!</p>
Soft And Chewy Sugar Cookies
A classic homemade recipe for soft and chewy sugar cookies with a slightly crisp edge, perfect for any occasion. This recipe ensures a tender, yielding interior and rich, buttery flavor.
Ingredients
-
2 ¾ cups (330g) all-purpose flour
-
1 tsp baking soda
-
½ tsp cream of tartar
-
½ tsp fine sea salt
-
1 cup (226g) unsalted butter, softened
-
1 cup (200g) granulated sugar
-
½ cup (100g) granulated sugar (for rolling)
-
1 large egg
-
2 tsp pure vanilla extract
Instructions
-
Step 1
Preheat oven to 375°F (190°C) and line two baking sheets with parchment paper. -
Step 2
In a medium bowl, whisk together flour, baking soda, cream of tartar, and salt; set aside. -
Step 3
In a large bowl, cream softened butter and 1 cup of granulated sugar on medium-high speed for 2-3 minutes until light and fluffy. -
Step 4
Beat in the egg until incorporated, then add vanilla extract and beat for 30 seconds. -
Step 5
Gradually add the dry ingredients to the wet mixture on low speed, mixing just until combined. Do not overmix. -
Step 6
Cover the dough and refrigerate for at least 1 hour (up to 24 hours). -
Step 7
Place the remaining ½ cup of granulated sugar in a shallow bowl. -
Step 8
Roll chilled dough into 1-inch balls (about 1.5 tbsp each). -
Step 9
Coat each dough ball completely in the granulated sugar. -
Step 10
Place sugared balls 2 inches apart on prepared baking sheets. -
Step 11
Bake one sheet at a time for 8-10 minutes, until edges are lightly golden and centers are slightly underbaked. -
Step 12
Cool cookies on baking sheets for 5-10 minutes, then transfer to a wire rack to cool completely. -
Step 13
Store cooled cookies in an airtight container at room temperature for up to 3-4 days.
Important Information
Nutrition Facts (Per Serving)
It is important to consider this information as approximate and not to use it as definitive health advice.
Allergy Information
Please check ingredients for potential allergens and consult a health professional if in doubt.

Leave a Comment