
Pecan Pie is, for me, the quintessential dessert that evokes warmth, comfort, and celebration. I find its rich, sweet, and nutty profile absolutely irresistible, making it a cherished centerpiece at countless gatherings. This beloved classic isn’t just a sweet treat; it’s a cherished emblem of American culinary heritage, particularly revered in the Southern states where its origins are deeply rooted. Historically, while its precise invention is debated, the recipe gained significant traction in the early 20th century, becoming a quintessential part of holiday tables, especially Thanksgiving and Christmas.
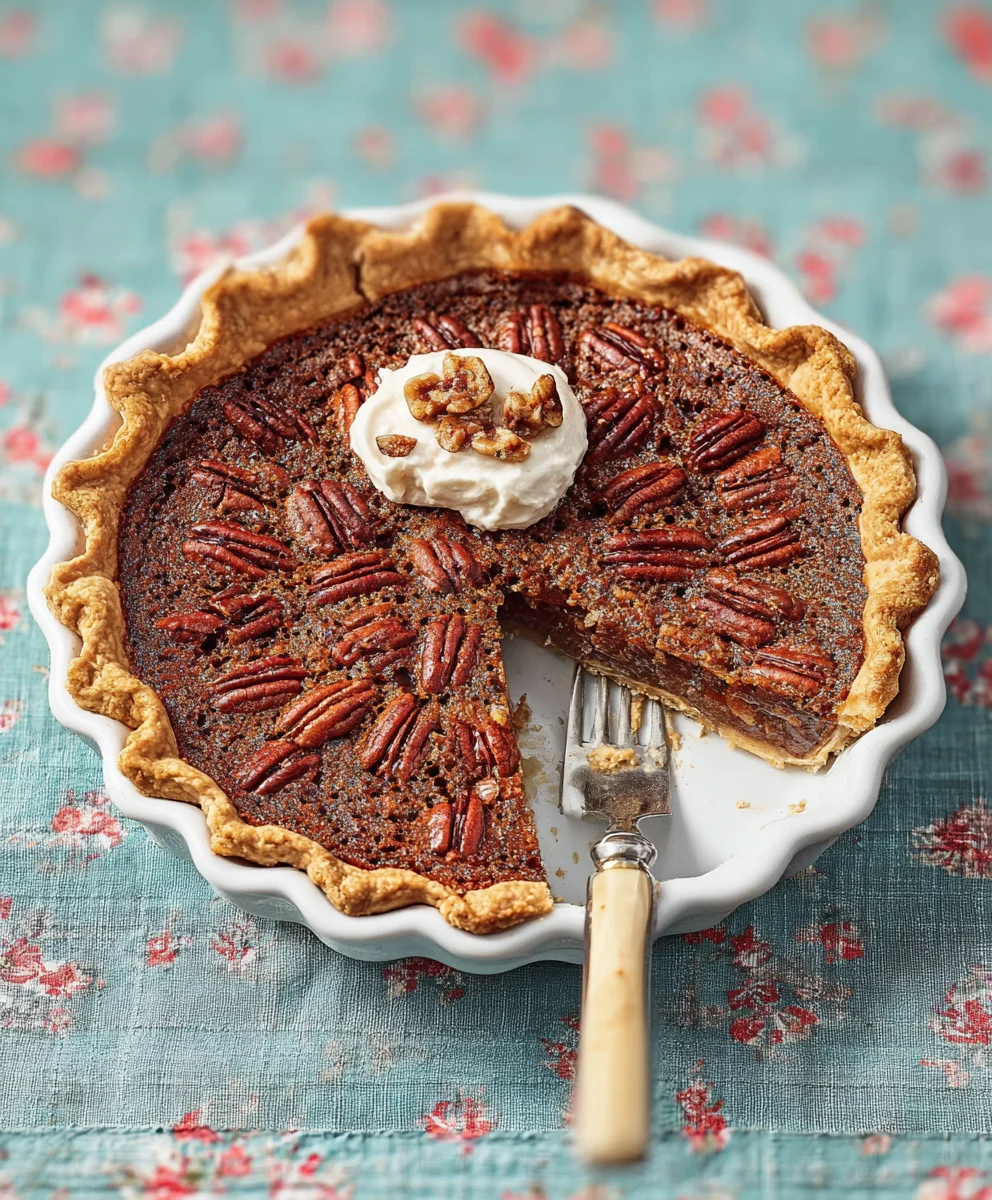
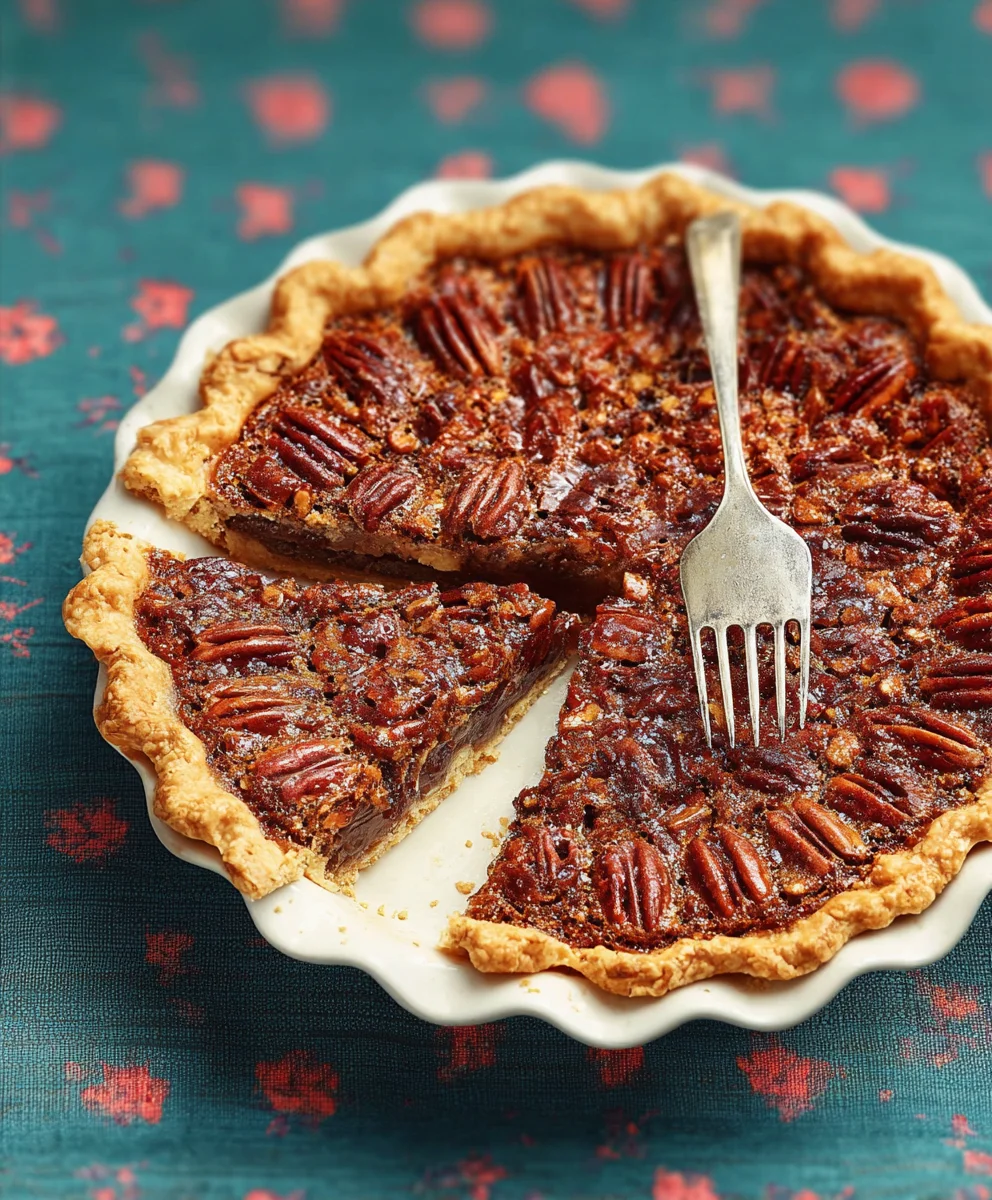
What I truly adore about Pecan Pie is the magnificent interplay of textures and flavors. Imagine: a buttery, flaky crust cradling a decadent, gooey filling bursting with robust brown sugar and vanilla notes, all topped with a generous layer of perfectly toasted, crunchy pecans. This delightful combination offers a sublime contrast that truly sings on the palate. Every slice of this magnificent Pecan Pie promises a moment of pure bliss, a taste of tradition that brings smiles to every face. It’s comforting, satisfying, and simply unforgettable, making it a perennial favorite for a reason.

Ingredients:
- For the Perfect Pie Crust:
- 2 ½ cups (300g) all-purpose flour, plus more for dusting – I always reach for a good quality all-purpose flour to ensure a tender, flaky crust for my Pecan Pie.
- 1 teaspoon salt
- 1 cup (226g) unsalted butter, very cold and cut into ½-inch cubes – Keeping your butter super cold is the secret to those glorious flaky layers!
- ½ cup (120ml) ice water, plus more if needed – Again, cold is key here to prevent the butter from melting prematurely.
- Alternatively, one 9-inch store-bought pie crust, deep dish, thawed if frozen – No shame in a shortcut, especially when you’re craving Pecan Pie sooner!
- For the Luscious Pecan Pie Filling:
- 1 cup (240ml) light corn syrup – This is the traditional backbone of that iconic gooey Pecan Pie texture.
- ½ cup (100g) granulated sugar
- ½ cup (110g) packed light brown sugar – The brown sugar adds a wonderful depth of molasses flavor that complements the pecans so well.
- ½ cup (113g) unsalted butter, melted – Melted butter ensures it incorporates smoothly into our velvety filling.
- 1 teaspoon pure vanilla extract – Never skimp on good vanilla; it makes a world of difference in the overall flavor profile of your Pecan Pie.
- ¼ teaspoon salt – A touch of salt balances the sweetness beautifully.
- 3 large eggs, at room temperature, lightly beaten – Room temperature eggs emulsify better and create a smoother, more stable filling.
- 2 cups (about 200g) pecan halves – These are the stars of our Pecan Pie, so make sure they’re fresh and flavorful! I sometimes like to lightly toast them beforehand for an extra nutty punch.
- Optional Garnish:
- Whipped cream or a scoop of vanilla ice cream – The perfect accompaniments for a warm slice of homemade Pecan Pie.
Preparing the Perfect Pie Crust for Your Pecan Pie
Creating your own pie crust from scratch is a labor of love, but oh, is it worth it for the ultimate Pecan Pie experience! If you’re using a store-bought crust, you can skip ahead to step 6, but I really encourage you to try this flaky homemade version at least once. It truly elevates the entire dish.
- Combine Dry Ingredients: In a large mixing bowl, whisk together the 2 ½ cups of all-purpose flour and 1 teaspoon of salt. This ensures all the dry ingredients are evenly distributed before we introduce the butter.
- Cut in Cold Butter: Add the very cold, ½-inch cubed unsalted butter to the flour mixture. Using your fingertips, a pastry blender, or a food processor (pulsing quickly!), work the butter into the flour until it resembles coarse meal with some pea-sized pieces of butter remaining. This step is crucial for flakiness. You don’t want to overmix, as that will develop the gluten too much and result in a tough crust, and nobody wants a tough Pecan Pie crust!
- Add Ice Water Gradually: Slowly add the ½ cup of ice water, a tablespoon at a time, mixing gently until the dough just barely comes together. I usually start with ¼ cup and add more only if absolutely necessary. You might not need all of it. The goal is to hydrate the flour just enough so that it forms a cohesive ball without being overly sticky. Again, avoid overworking the dough.
- Form and Chill the Dough: Gather the dough into a disc, wrap it tightly in plastic wrap, and refrigerate it for at least 30 minutes, or up to 2 days. Chilling is essential; it allows the gluten to relax, which makes the dough easier to roll out, and keeps the butter cold, which promotes flakiness when baked. This patience will be rewarded with a spectacular Pecan Pie.
- Roll Out the Dough: On a lightly floured surface, roll out the chilled dough into a 12-inch circle, about ⅛-inch thick. Carefully transfer the dough to a 9-inch pie plate. Trim any excess dough, leaving about a ½-inch overhang. Fold the overhang under itself and crimp the edges decoratively. I love making a fluted edge with my thumb and forefinger; it adds a lovely homemade touch to my Pecan Pie. Prick the bottom of the crust several times with a fork.
- Pre-bake (Blind Bake) the Crust: Preheat your oven to 375°F (190°C). Line the pie crust with parchment paper or aluminum foil and fill it with pie weights, dried beans, or rice. Blind bake for 15 minutes. This step helps prevent the crust from shrinking and bubbling, ensuring a sturdy foundation for our heavy Pecan Pie filling. Remove the weights and parchment/foil, then continue to bake for another 5-7 minutes, or until the crust is lightly golden brown. This sets the crust and prevents a soggy bottom, which is the bane of any good Pecan Pie. Remove from the oven and let it cool slightly while you prepare the filling.
Crafting the Irresistible Pecan Pie Filling
Now for the heart of the matter – the luscious, gooey Pecan Pie filling! This is where all those classic flavors come together to create something truly magical. The aroma alone will have your kitchen smelling incredible.
- Prepare Your Wet Ingredients: In a large mixing bowl, whisk together the light corn syrup, granulated sugar, light brown sugar, melted unsalted butter, pure vanilla extract, and ¼ teaspoon of salt until thoroughly combined and smooth. Take your time here to ensure the sugars are well dissolved; this will contribute to the silky texture of your finished Pecan Pie.
- Whisk in the Eggs: Gradually whisk in the three lightly beaten large eggs into the syrup mixture. Continue whisking until the mixture is completely homogenous and has a beautiful, consistent sheen. The eggs act as a binder, setting the filling into that iconic gooey consistency we all adore in a Pecan Pie.
- Add the Pecans: Gently fold in the 2 cups of pecan halves. I like to make sure they’re all coated evenly with the rich, sweet filling. If you chose to toast your pecans beforehand, this is where their enhanced nuttiness really gets to shine in your Pecan Pie.
Assembling and Baking Your Glorious Pecan Pie
This is where the Pecan Pie really starts to take shape! The transition from liquid filling to a perfectly set, golden-brown dessert is one of the most satisfying parts of the baking process. Patience and careful attention to detail here will ensure a show-stopping result.
- Pour the Filling: Carefully pour the entire pecan filling mixture into your partially baked and cooled pie crust. You’ll notice the pecans might float a bit, which is perfectly fine. I sometimes like to gently arrange some of the pecan halves on top for a beautiful presentation, ensuring a few face upwards to catch that golden glaze.
- Prepare for Baking: Loosely cover the edges of the pie crust with aluminum foil or a pie shield. This prevents the delicate crust from browning too quickly and burning before the filling has a chance to set. There’s nothing worse than a perfectly baked Pecan Pie with burnt edges!
- Bake the Pecan Pie: Place the pie on a baking sheet (this makes it easier to transfer and catches any potential drips, keeping your oven clean!). Bake in your preheated 375°F (190°C) oven for 20 minutes.
- Reduce Temperature and Continue Baking: After 20 minutes, reduce the oven temperature to 350°F (175°C), remove the foil from the crust edges, and continue baking for an additional 30-45 minutes. The baking time can vary, so keep a close eye on it.
- Test for Doneness: The Pecan Pie is done when the edges are set and lightly puffed, but the very center still has a slight jiggle to it, much like a perfectly set custard. A knife inserted about an inch from the edge should come out clean. If you insert it directly into the center, it will likely still be a little wet, which is exactly what we want for that characteristic gooeyness of Pecan Pie. Be careful not to overbake, as this can lead to a dry filling. The top of the pie should be a beautiful golden brown, and the pecans will be wonderfully toasted.
Cooling and Serving Your Delicious Pecan Pie
The hardest part of baking Pecan Pie isn’t the mixing or the baking; it’s the waiting! Proper cooling is absolutely non-negotiable for this dessert. It allows the filling to fully set and achieve that perfect, sliceable consistency.
- Cool Completely: Carefully remove the Pecan Pie from the oven and place it on a wire rack to cool completely. This means letting it sit at room temperature for at least 3-4 hours, or even longer. This step is paramount! If you try to cut into it too soon, the filling will still be too liquid and spill out, ruining the beautiful slices you’ve worked so hard for. Trust me on this one; patience is truly a virtue when it comes to Pecan Pie. As it cools, the filling will continue to firm up and transform into that irresistible, sticky-sweet texture.
- Serve and Enjoy: Once your Pecan Pie is completely cooled and set, it’s ready to be sliced and served! I find that a sharp, thin-bladed knife works best for clean slices. You can serve it at room temperature, or if you prefer a warm slice, gently reheat individual portions in the microwave for 15-20 seconds.
- Optional Garnishes: For an extra special touch, serve each slice with a generous dollop of freshly whipped cream, or a scoop of creamy vanilla ice cream. The cool, light creaminess provides a delightful contrast to the rich, warm, and sweet Pecan Pie. It’s truly a match made in dessert heaven!
- Storage: Leftover Pecan Pie can be covered loosely with plastic wrap and stored at room temperature for up to 2 days, or refrigerated for up to 4-5 days. While it’s always best fresh, I’ve found that a refrigerated slice of Pecan Pie can be surprisingly delightful the next day, especially if warmed slightly.
A Few Final Thoughts on Your Pecan Pie Masterpiece:
Baking a Pecan Pie is an experience, from the fragrant spices filling your kitchen to that first satisfying bite. Don’t be afraid to make it your own! Some people love to add a splash of bourbon or a pinch of cinnamon to the filling for an extra layer of flavor. Whatever your preference, I hope this recipe guides you to creating a truly unforgettable Pecan Pie that brings joy to your table.
Conclusion:
As we reach the sweet culmination of our recipe journey, I sincerely hope you’re as excited as I am about the prospect of bringing this incredible dessert to life in your own kitchen. This isn’t just any recipe; it’s a promise of a truly unforgettable culinary experience. What makes this particular creation a must-try, you ask? It’s the impeccable balance of textures – from the crisp, buttery crust that shatters with every forkful, to the luscious, gooey filling that cradles perfectly toasted pecans. Every bite of this Pecan Pie is an exquisite symphony of deep, caramelized sweetness, a hint of vanilla, and the earthy, robust notes of the pecans themselves, creating a dessert that feels both elegantly sophisticated and wonderfully comforting. I’ve poured my heart into perfecting this recipe, ensuring that each step guides you toward a masterpiece that will undoubtedly impress anyone fortunate enough to taste it.
I genuinely believe this recipe offers something truly special, elevating a classic to new heights. It’s not just about baking a pie; it’s about creating a moment of pure indulgence, a centerpiece that sparks joy and conversation. The aroma alone, as it bakes to golden perfection, is enough to transform your home into the most inviting sanctuary. Imagine that rich, nutty fragrance filling your kitchen – it’s an experience in itself, a delightful prelude to the magnificent dessert that awaits. And the best part? While it looks stunningly complex, I’ve designed this recipe to be surprisingly approachable, allowing even novice bakers to achieve truly professional-level results. Trust me, the effort, however minimal, is repaid tenfold in pure, unadulterated deliciousness.
Elevate Your Dessert Experience
Now, let’s talk about how to truly make this dessert sing! While this magnificent pie is utterly divine on its own, there are countless ways to enhance the experience. My absolute favorite serving suggestion is to present it slightly warm, allowing the gooey filling to reach its peak lusciousness. Pair a generous slice with a scoop of premium vanilla bean ice cream; the cold, creamy contrast against the warm, sweet pie is simply heavenly. For those who enjoy a bit more decadence, a drizzle of salted caramel sauce or a dollop of freshly whipped cream infused with a hint of bourbon can take it to an entirely new level. Alternatively, enjoy it chilled, where the filling firms up slightly, offering a wonderfully dense and satisfying texture that pairs beautifully with a strong cup of coffee or a sophisticated after-dinner liqueur.
Beyond these classic accompaniments, don’t shy away from experimenting with variations to suit your taste or occasion. For a truly grown-up treat, try adding a tablespoon of your favorite bourbon or dark rum to the filling mixture – it deepens the flavor profile beautifully, adding a wonderful warmth. Chocolate lovers might consider sprinkling a handful of mini chocolate chips into the filling before baking; the melting chocolate combines wonderfully with the pecans and caramel notes. You could even explore a mixed-nut pie by substituting a portion of the pecans with walnuts or hazelnuts for a different nuanced flavor. For individual servings at a party, consider baking the recipe in miniature tart pans, creating adorable, bite-sized delights that are both elegant and easy to serve. The possibilities are truly endless, and this recipe serves as the perfect canvas for your culinary creativity.
Your Culinary Journey Begins Now
I truly hope you feel inspired to roll up your sleeves and embark on this delicious adventure. Don’t hesitate – gather your ingredients, set aside some time, and prepare to create something truly magical. There’s an immense sense of satisfaction that comes from baking something so delicious from scratch, and I promise you, this particular Pecan Pie recipe will deliver that feeling in spades. It’s an ideal dessert for holiday gatherings, a cozy weekend treat, or simply when you want to make an ordinary day feel a little more extraordinary. The joy of sharing something you’ve crafted with love is one of life’s greatest pleasures, and this pie is designed to be shared.
Once you’ve experienced the sheer delight of baking and tasting this incredible dessert, I would absolutely love to hear about your experience! Please don’t keep your successes (or even your questions!) to yourself. Share your photos, tell me about any personal tweaks you made, or simply let me know how much you and your loved ones enjoyed it in the comments section below. Your feedback and stories are what make this community so vibrant and inspiring. It brings me immense joy to see others find delight in my recipes. So, go on, embrace the warmth of your oven and the sweet promise of a perfect dessert. I’m confident that this recipe will earn a permanent, cherished spot in your personal collection, becoming a go-to for years to come. Happy baking, my friends!
Best Homemade Pecan Pie
Pecan Pie is a cherished dessert, deeply rooted in Southern American culinary heritage. It features a buttery, flaky crust with a decadent, gooey filling of brown sugar, vanilla, and perfectly toasted, crunchy pecans, offering an irresistible interplay of textures and flavors. A comforting, satisfying, and simply unforgettable classic.
Ingredients
-
1 whole unbaked pie crust
-
1 cup granulated sugar
-
3 Tbsp. brown sugar
-
1/2 tsp. salt
-
1 cup light corn syrup
-
1/3 cup melted salted butter
-
3 whole eggs, beaten
-
3/4 tsp. vanilla
-
1 heaping cup chopped pecans
Instructions
-
Step 1
Preheat oven to 375°F (190°C). Blind bake the unbaked pie crust with pie weights for 15 minutes, then remove weights and bake for another 5-7 minutes until lightly golden. Let cool slightly. -
Step 2
In a large bowl, whisk together light corn syrup, granulated sugar, brown sugar, melted salted butter, vanilla, and salt until smooth and sugars are dissolved. -
Step 3
Gradually whisk in the beaten eggs until the mixture is completely homogenous. Gently fold in the chopped pecans. -
Step 4
Pour the pecan filling into the cooled, partially baked pie crust. Loosely cover the crust edges with aluminum foil. Place on a baking sheet and bake at 375°F (190°C) for 20 minutes. -
Step 5
Reduce oven temperature to 350°F (175°C), remove the foil from the crust edges, and continue baking for an additional 30-45 minutes. The pie is done when the edges are set and lightly puffed, but the very center still has a slight jiggle. A knife inserted about an inch from the edge should come out clean. -
Step 6
Carefully remove the Pecan Pie from the oven and place it on a wire rack to cool completely for at least 3-4 hours. This allows the filling to fully set. Slice and serve at room temperature or gently reheated, optionally with whipped cream or vanilla ice cream. Store leftovers covered at room temperature for up to 2 days, or refrigerated for up to 4-5 days.
Important Information
Nutrition Facts (Per Serving)
It is important to consider this information as approximate and not to use it as definitive health advice.
Allergy Information
Please check ingredients for potential allergens and consult a health professional if in doubt.


Leave a Comment