
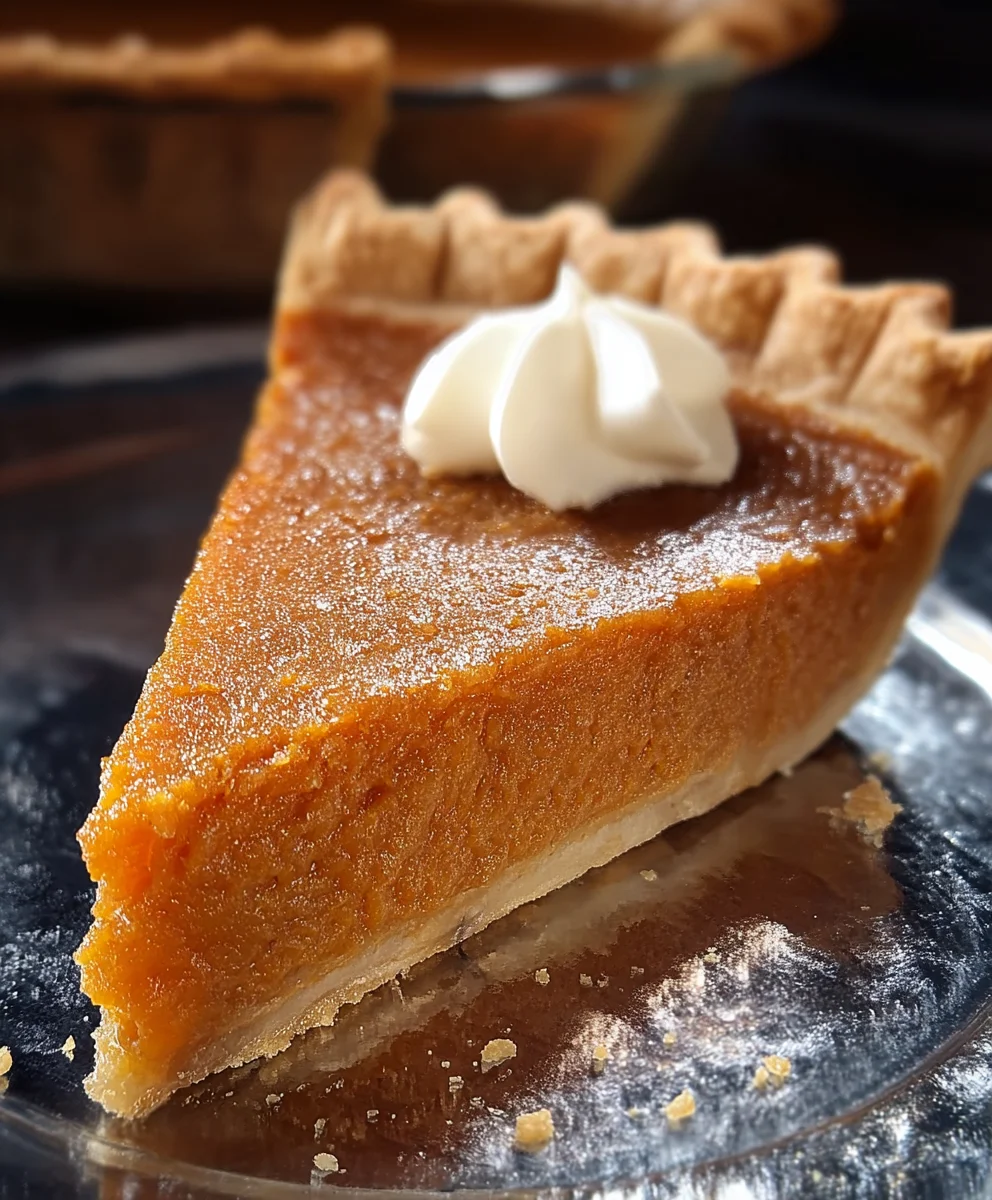
Buttermilk Sweet Potato Pie is not merely a dessert; it’s a testament to the art of Southern baking, a culinary masterpiece that promises warmth, comfort, and an unforgettable flavor experience. If you’ve ever yearned for a dish that perfectly marries the earthy sweetness of roasted sweet potatoes with a delightful, bright tang, then you’ve found your next kitchen adventure.
A Beloved Classic with a Tangy Twist
The sweet potato pie itself holds a revered place in American culinary history, especially throughout the South, where it has long been a cherished staple at family gatherings and holiday tables, often served alongside its cousin, pumpkin pie. The addition of buttermilk, however, transforms this classic into something truly special. It introduces a subtle, zesty counterpoint that prevents the pie from being overly sweet, creating a more sophisticated and incredibly balanced flavor profile.
I’ve discovered that people absolutely adore this rendition because it offers an unparalleled creaminess and a luscious, smooth texture that truly melts in your mouth. The buttermilk doesn’t just add a unique flavor; it contributes to an exceptionally tender and moist filling, making every forkful a moment to savor. This particular Buttermilk Sweet Potato Pie recipe is designed to bring that iconic, soulful taste right into your home, ensuring it becomes a cherished tradition for years to come. Prepare to be enchanted by its profound depth of flavor and comforting appeal!

Ingredients:
- For the Pie Crust:
- One 9-inch deep-dish pie crust, unbaked (I often opt for a good quality store-bought crust for convenience, but feel free to use your favorite homemade recipe!)
- For the Buttermilk Sweet Potato Pie Filling:
- 3 large (about 2.5 to 3 pounds) sweet potatoes, preferably Jewel or Garnet varieties, as they are wonderfully sweet and moist.
- 1/2 cup (1 stick) unsalted butter, melted and cooled slightly.
- 1 cup granulated sugar.
- 1/2 cup packed light brown sugar.
- 1/2 cup buttermilk – this is the secret ingredient that gives our Buttermilk Sweet Potato Pie its incredible tang and depth!
- 2 large eggs, at room temperature.
- 1 teaspoon pure vanilla extract.
- 1 teaspoon ground cinnamon.
- 1/2 teaspoon ground nutmeg.
- 1/4 teaspoon ground ginger.
- 1/8 teaspoon ground cloves (optional, but I find it adds a lovely warmth).
- 1/2 teaspoon salt – just a touch to balance all that wonderful sweetness.
Preparing the Sweet Potatoes:
- Preheat Your Oven: First things first, let’s get that oven ready! Preheat your oven to 400°F (200°C). This initial high heat is perfect for roasting our sweet potatoes, ensuring they become incredibly tender and their natural sugars caramelize beautifully, which is absolutely crucial for the deep flavor of our Buttermilk Sweet Potato Pie.
- Clean and Prepare Sweet Potatoes: Give your sweet potatoes a good scrub under cool running water. We want them nice and clean. While some recipes suggest boiling, I find that roasting truly brings out the best in sweet potatoes, intensifying their natural sweetness and creating a richer, more complex flavor profile that will shine through in your finished pie. Place the clean sweet potatoes directly onto a baking sheet. You can line the sheet with parchment paper for easier cleanup, which is always a bonus in my kitchen!
- Roast Until Fork-Tender: Pop the baking sheet into your preheated oven. We’re going to roast these beauties for about 45 to 60 minutes, or until they are incredibly tender when pierced with a fork. The exact time will depend on the size of your sweet potatoes, so keep an eye on them. You might even see some of their sweet juices bubbling out – that’s a good sign! Once they’re done, carefully remove them from the oven and let them cool down a bit on the baking sheet until they’re comfortable enough to handle. This cooling period is important, as it helps them set slightly and makes the next step much easier.
- Peel and Mash: Once your sweet potatoes have cooled sufficiently, it’s time to peel them. The skin should slip off quite easily. Discard the skins. Transfer the tender, roasted sweet potato flesh into a large mixing bowl. Now, grab a potato masher or a large fork and mash them until they are incredibly smooth. You want absolutely no lumps here for a perfectly silky Buttermilk Sweet Potato Pie. If you prefer, or if you’re aiming for an exceptionally smooth texture, you can even use an electric hand mixer or a food processor at this stage. I personally love using a fork to get a bit of texture, but for that classic velvety pie, smooth is the way to go. Measure out approximately 3 cups of mashed sweet potatoes – this is the sweet, earthy heart of our pie!
Crafting the Buttermilk Sweet Potato Pie Filling:
- Prepare the Pie Crust: While your sweet potatoes are cooling or being mashed, let’s get our pie crust ready. If you’re using a store-bought crust, simply unroll it and fit it into your 9-inch deep-dish pie plate. Crimp the edges decoratively – I love a rustic fork crimp, but feel free to get fancy! You can lightly prick the bottom of the crust with a fork a few times. This helps prevent the crust from puffing up excessively during baking. If you’re using a homemade crust, ensure it’s chilled and ready. Set the prepared pie crust aside.
- Combine Wet Ingredients with Sweet Potatoes: In the large bowl with your mashed sweet potatoes, add the melted butter. Make sure the butter has cooled slightly; we don’t want it to cook our eggs prematurely later on! Stir it in until thoroughly combined. The sweet potatoes will absorb that rich buttery flavor beautifully.
- Introduce the Sugars and Buttermilk: Now, add the granulated sugar and the light brown sugar to the sweet potato mixture. The combination of both sugars adds a wonderful depth of sweetness and a hint of molasses flavor from the brown sugar. Stir well until the sugars are completely dissolved and the mixture is smooth. Next, pour in that glorious buttermilk. Stir vigorously until everything is perfectly incorporated. The buttermilk is key to giving this Buttermilk Sweet Potato Pie its signature tangy finish, cutting through the richness and elevating the flavor profile significantly. Don’t skip it!
- Incorporate Eggs and Flavorings: In a separate small bowl, lightly whisk the two large eggs. It’s important to whisk them separately first to ensure they are fully broken down and will integrate smoothly into our filling. Add the whisked eggs, vanilla extract, ground cinnamon, ground nutmeg, ground ginger, optional ground cloves, and salt to the sweet potato mixture. These spices are the warm, comforting backbone of any good sweet potato pie.
- Mix Until Silky Smooth: Now, with a spatula or a sturdy spoon, mix all the ingredients together thoroughly. You want to mix until the filling is completely uniform in color and texture. I like to use an electric hand mixer on low speed for about 1-2 minutes at this stage to ensure everything is perfectly blended and incredibly smooth, without any streaks or lumps. A perfectly smooth filling is crucial for that luxurious, melt-in-your-mouth texture that makes a Buttermilk Sweet Potato Pie truly exceptional. Scrape down the sides of the bowl to ensure no ingredient is left unmixed.
Assembling and Baking Your Buttermilk Sweet Potato Pie:
- Preheat Oven and Position Rack: Lower your oven temperature to 350°F (175°C). It’s important to bake sweet potato pies at a slightly lower temperature than initially used for roasting to ensure a slow, even bake that prevents cracking and results in a perfectly set custard. Position an oven rack in the center of your oven.
- Pour Filling into Crust: Carefully pour the gloriously smooth Buttermilk Sweet Potato Pie filling into your prepared, unbaked pie crust. Gently tap the pie plate on your counter a few times to release any air bubbles and to ensure the filling settles evenly into the crust. You want a nice, level surface.
- Protect the Crust Edges: To prevent the edges of your beautiful pie crust from browning too quickly, especially in a deep-dish pie, I highly recommend creating a foil collar. Tear off a long strip of aluminum foil, fold it in half lengthwise, and gently wrap it around the crimped edges of the pie crust. This simple step will ensure your crust is perfectly golden brown, not burnt, when the pie is fully baked.
- Bake to Perfection: Carefully transfer the pie to the preheated oven. Bake for approximately 50 to 65 minutes. The baking time can vary depending on your oven and the exact depth of your pie. The key to knowing when your Buttermilk Sweet Potato Pie is done is its firmness. You’ll know it’s ready when the edges are set and slightly puffed, and the center is mostly set with just a slight jiggle remaining when you gently shake the pie plate. If you insert a knife about an inch from the edge, it should come out clean. However, the very center might still be slightly soft, which is perfect, as it will continue to set as it cools. About halfway through the baking time, usually around 30-40 minutes, you can carefully remove the foil collar to allow the edges to finish browning nicely. If the pie seems to be browning too quickly on top, you can loosely tent it with foil.
Cooling and Serving:
- Cool Completely: Once your Buttermilk Sweet Potato Pie is perfectly baked, carefully remove it from the oven and place it on a wire rack. This step is absolutely critical. Do not skip it! Allow the pie to cool completely at room temperature for at least 3-4 hours, or even longer. As the pie cools, the filling will continue to set and firm up, transforming into that delightful, creamy, sliceable texture we all love. Attempting to slice it too early will result in a messy, unset pie, and nobody wants that after all your hard work!
- Chill (Optional but Recommended): For an even firmer set and to enhance the flavors, I often like to chill the pie in the refrigerator for another 2-3 hours after it has cooled sufficiently at room temperature. This also makes for cleaner slices.
- Serve and Enjoy: Once fully cooled and set, your magnificent Buttermilk Sweet Potato Pie is ready to be sliced and served! This pie is absolutely divine on its own, with its rich, spiced, and tangy filling. However, if you’re feeling a little extra, a dollop of freshly whipped cream, a scoop of vanilla bean ice cream, or even a light dusting of cinnamon or nutmeg can take it over the top. It’s truly a comforting and satisfying dessert, perfect for any occasion, from a family dinner to a holiday feast. Enjoy every single bite of this incredible pie!
Conclusion:
And so, we arrive at the grand finale, the sweet culmination of our culinary journey together. I truly hope you’ve enjoyed exploring the nuances of this remarkable dessert as much as I have enjoyed sharing it with you. If there’s one recipe I could implore you to try, one that I believe will genuinely surprise and delight your taste buds, it’s this one. This isn’t just another sweet potato pie; it’s a transcendent experience that redefines what you think you know about this beloved classic. The creamy, velvety texture of the sweet potatoes, perfectly balanced by the subtle, zesty tang of buttermilk, creates a harmonious symphony of flavors that is both comforting and incredibly sophisticated. It’s the kind of dessert that feels simultaneously familiar and utterly novel, ensuring it stands out on any dessert table.
What makes this particular rendition a must-try is its unique ability to elevate humble ingredients into something truly extraordinary. The buttermilk acts as a secret weapon, cutting through the richness of the sweet potato and spices, introducing a brightness that prevents it from being overly sweet or heavy. Every forkful is a revelation – smooth, aromatic, and leaving a delightful, lingering warmth from the spices. It’s the kind of pie that sparks conversations, draws compliments, and inevitably leads to requests for the recipe. Imagine the joyous expressions on your loved ones’ faces as they savor that first, perfect bite. That, my friends, is the magic encapsulated within every slice of this extraordinary Buttermilk Sweet Potato Pie.
Now, let’s talk about how to truly make this masterpiece shine, or even how to put your own creative spin on it. While it’s absolutely divine on its own, a generous dollop of freshly whipped cream, perhaps lightly sweetened with a touch of vanilla bean paste, is always a welcome accompaniment. For an extra layer of decadence, consider serving it with a scoop of premium vanilla bean ice cream or even a cinnamon or pecan praline swirl ice cream – the contrasting temperatures and textures are simply heavenly. If you’re feeling a bit more adventurous, a drizzle of warm caramel sauce or a sprinkle of toasted, candied pecans can add a beautiful crunch and a rich, nutty counterpoint. For those who appreciate a spirited touch, a bourbon-spiked whipped cream or a dash of your favorite dark rum incorporated into the filling itself can elevate the flavors to new heights, making it an ideal adult-friendly treat.
Don’t stop there! Think about presenting this pie in different forms. For individual servings at a party, consider baking the filling in mini tart shells – they’re adorable, easy to serve, and just as delicious. You could also experiment with the crust; a ginger snap crust would add a delightful spicy kick, or a hazelnut flour crust could lend a sophisticated, earthy note. In terms of variations on the filling itself, don’t be afraid to adjust the spice blend to your liking. A touch of allspice or even a whisper of cardamom can introduce intriguing new dimensions. For a lighter touch, a dollop of crème fraîche instead of whipped cream offers a delightful tang that harmonizes beautifully with the buttermilk. This recipe is wonderfully versatile, inviting you to put your own unique stamp on it.
My hope is that reading through this has ignited a spark within you, a desire to roll up your sleeves and bring this incredible dessert to life in your own kitchen. There’s something profoundly satisfying about baking, especially when the result is as rewarding as this Buttermilk Sweet Potato Pie. So, please, gather your ingredients, follow the steps, and embark on this delicious adventure. Don’t be intimidated; the process is incredibly rewarding, and the aroma filling your home as it bakes is a treat in itself. Once you’ve taken that first glorious bite, I would absolutely love to hear all about your experience. Did you add your own twist? Did it become an instant family favorite? Share your triumphs, your photos, and any creative modifications you made in the comments below or wherever you connect with me. Your feedback and stories are what make this culinary community so vibrant and inspiring. I genuinely can’t wait to hear how this exceptional pie graces your table and your taste buds. Happy baking!
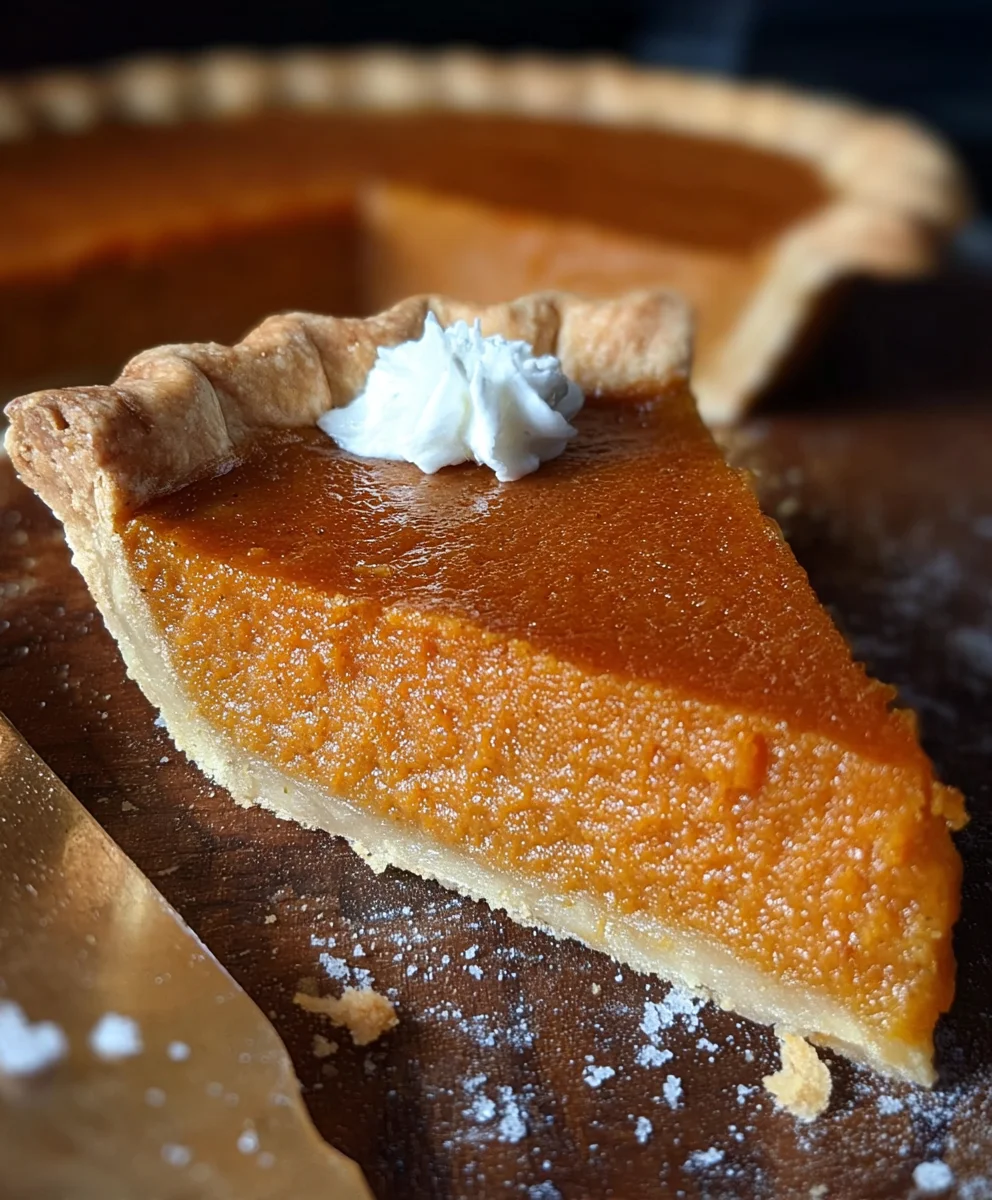
Best Buttermilk Sweet Potato Pie: Easy Holiday Dessert
Buttermilk Sweet Potato Pie is a Southern culinary masterpiece that perfectly marries the earthy sweetness of roasted sweet potatoes with a delightful, bright tang. This easy recipe promises warmth, comfort, and an unforgettable flavor experience, ideal for any holiday table.
Ingredients
-
One 9-inch deep-dish pie crust, unbaked
-
3 large (2.5-3 lbs) sweet potatoes
-
1/2 cup (1 stick) unsalted butter, melted and cooled
-
1 cup granulated sugar
-
1/2 cup packed light brown sugar
-
1/2 cup buttermilk
-
2 large eggs, at room temperature
-
1 teaspoon pure vanilla extract
-
1 teaspoon ground cinnamon
-
1/2 teaspoon ground nutmeg
-
1/4 teaspoon ground ginger
-
1/8 teaspoon ground cloves (optional)
-
1/2 teaspoon salt
Instructions
-
Step 1
Preheat oven to 400°F (200°C). Wash sweet potatoes and place on a baking sheet. Roast 45-60 minutes until tender. Cool, then peel and mash until smooth (approx. 3 cups). -
Step 2
Fit the unbaked 9-inch deep-dish pie crust into a pie plate. Crimp edges and lightly prick the bottom with a fork. -
Step 3
In a large bowl, combine mashed sweet potatoes with melted butter. Stir in granulated sugar, light brown sugar, and buttermilk until smooth. -
Step 4
Whisk eggs separately. Add whisked eggs, vanilla extract, cinnamon, nutmeg, ginger, optional cloves, and salt to the mixture. Mix thoroughly until the filling is silky smooth. -
Step 5
Lower oven to 350°F (175°C). Pour filling into the prepared crust. Cover crust edges with a foil collar. Bake 50-65 minutes until edges are set and the center has a slight jiggle. Remove foil collar halfway through. -
Step 6
Cool completely on a wire rack at room temperature for at least 3-4 hours. For a firmer set, chill in the refrigerator for another 2-3 hours. Slice and serve, optionally with whipped cream or ice cream.
Important Information
Nutrition Facts (Per Serving)
It is important to consider this information as approximate and not to use it as definitive health advice.
Allergy Information
Please check ingredients for potential allergens and consult a health professional if in doubt.


Leave a Comment